


Halloween calls for cakes that stand out at parties and family events. These 13 ideas cover a range of styles and difficulty levels so you can match them to what you have time for. Each one includes complete steps and ingredient lists to make baking straightforward. You will see options that use pantry staples along with simple decorations that still look impressive. Pick the ones that suit your needs and get started.
Helpful Tips Before You Start
These tips will help you pull off Halloween cakes that look polished and taste great.
Use Gel Colors
Gel food coloring creates deep shades like black and orange without thinning the batter. Add it gradually and mix well for even results.
Cool Cakes Fully
Frosting a warm cake causes sliding and uneven layers. Let layers sit at room temperature for at least an hour before decorating.
Make Decorations Early
Prepare fondant shapes, candy eyes, or cookie toppers a day ahead. Store them in an airtight container so assembly goes faster on party day.
Pick Stable Frosting
Swiss meringue buttercream or cream cheese frosting holds up better under Halloween humidity than basic American buttercream. Test a small batch first if the weather is warm.
Graveyard Dirt Chocolate Layer Cake
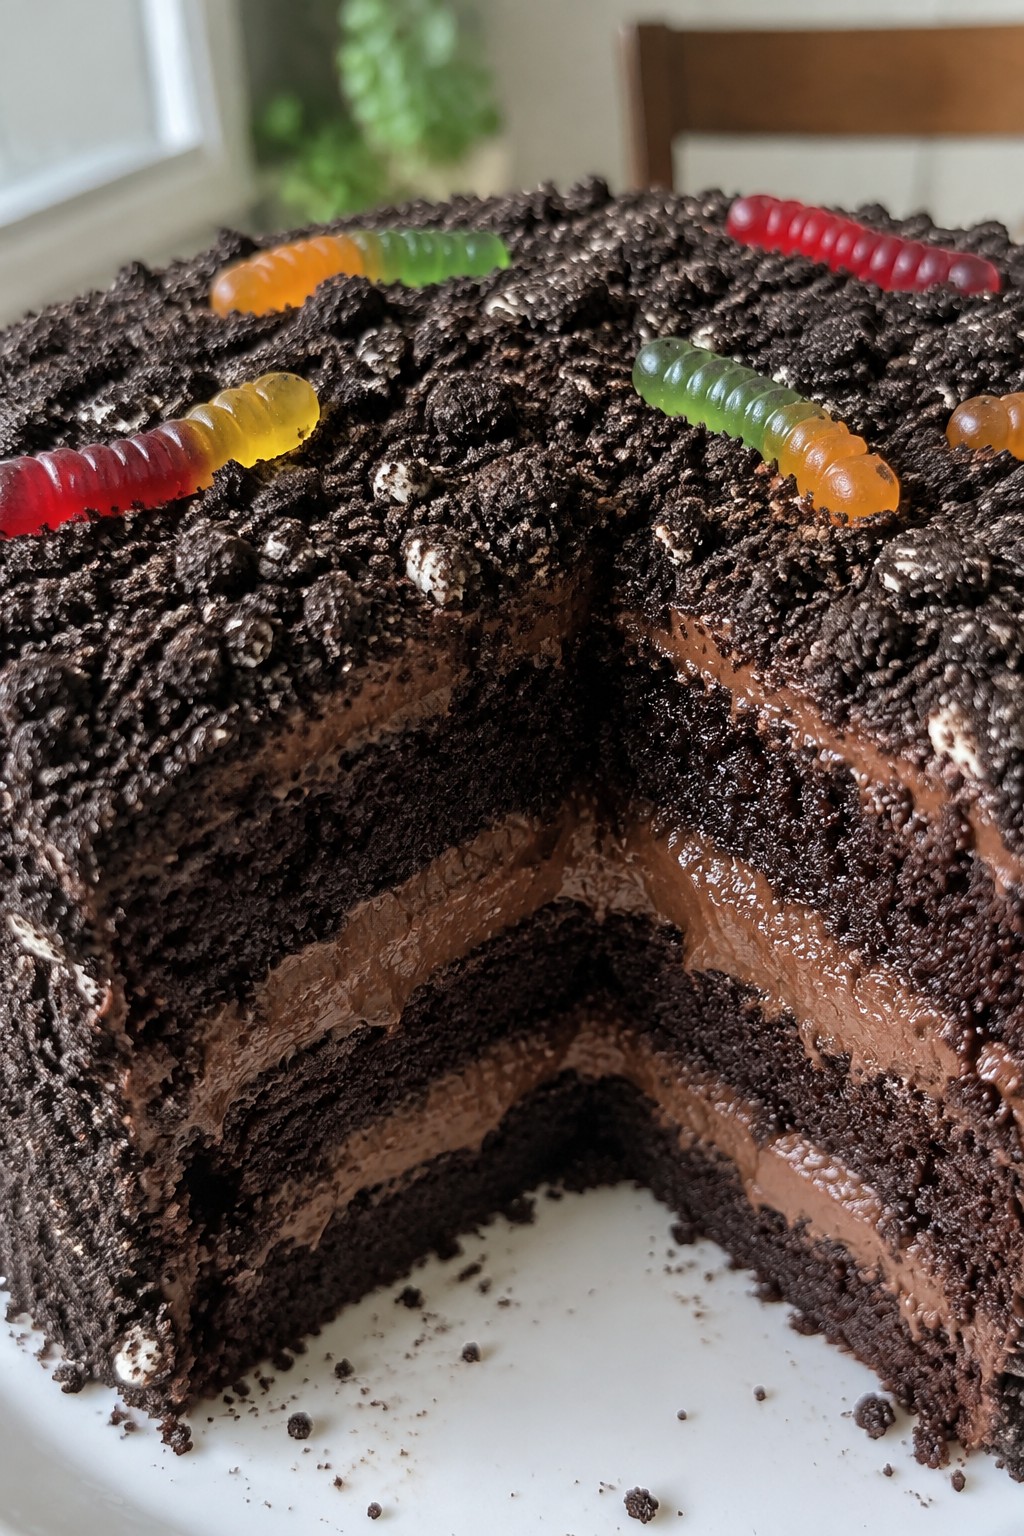
This Graveyard Dirt Chocolate Layer Cake turns a classic chocolate dessert into a Halloween centerpiece. Moist layers of chocolate cake hold creamy pudding between them, while crushed cookies create the look of fresh soil on top. It works well for parties or family nights when you want something playful that still tastes like a solid chocolate cake.
The finished cake offers rich cocoa flavor with smooth cream and a bit of crunch from the cookie topping. Gummy worms add a light, chewy element that fits the theme without overpowering the chocolate.
Equipment
- Mixing bowls
- Cake pans
- Whisk
- Electric mixer
- Wire rack
Ingredients
- 1 1/2 cups all-purpose flour
- 3/4 cup unsweetened cocoa powder
- 1 cup granulated sugar
- 2 large eggs
- 1/2 cup vegetable oil
- 1 cup milk
- 1 1/2 teaspoons baking powder
- 1 teaspoon vanilla extract
- 1 package (3.9 oz) instant chocolate pudding mix
- 2 cups cold milk
- 12 Oreo cookies, crushed
- 1/2 cup heavy whipping cream
- 8 gummy worms
Instructions
- Preheat the oven to 350 degrees. Grease two 6-inch round cake pans and line the bottoms with parchment paper.
- In a large bowl, whisk together the flour, cocoa powder, sugar, and baking powder until evenly mixed.
- Add the eggs, vegetable oil, milk, and vanilla extract to the dry ingredients. Stir until the batter is smooth and no dry streaks remain.
- Divide the batter evenly between the prepared pans. Bake for 25 to 28 minutes, or until a toothpick inserted in the center comes out clean. Let the cakes cool in the pans for 10 minutes, then transfer to a wire rack to cool completely.
- While the cakes cool, whisk the pudding mix with the 2 cups cold milk in a medium bowl until it thickens, about 2 minutes. Set aside.
- Whip the heavy cream in a separate bowl until soft peaks form.
- Place one cooled cake layer on a serving plate. Spread half the pudding over it. Add the second cake layer and spread the remaining pudding on top.
- Sprinkle the crushed Oreos evenly over the pudding to create the dirt layer. Arrange the gummy worms on top before serving.
Notes
Cuisine: American
Equipment: Mixing bowls, Cake pans, Whisk, Electric mixer, Wire rack
Pumpkin Spice Ghost Bundt Cake
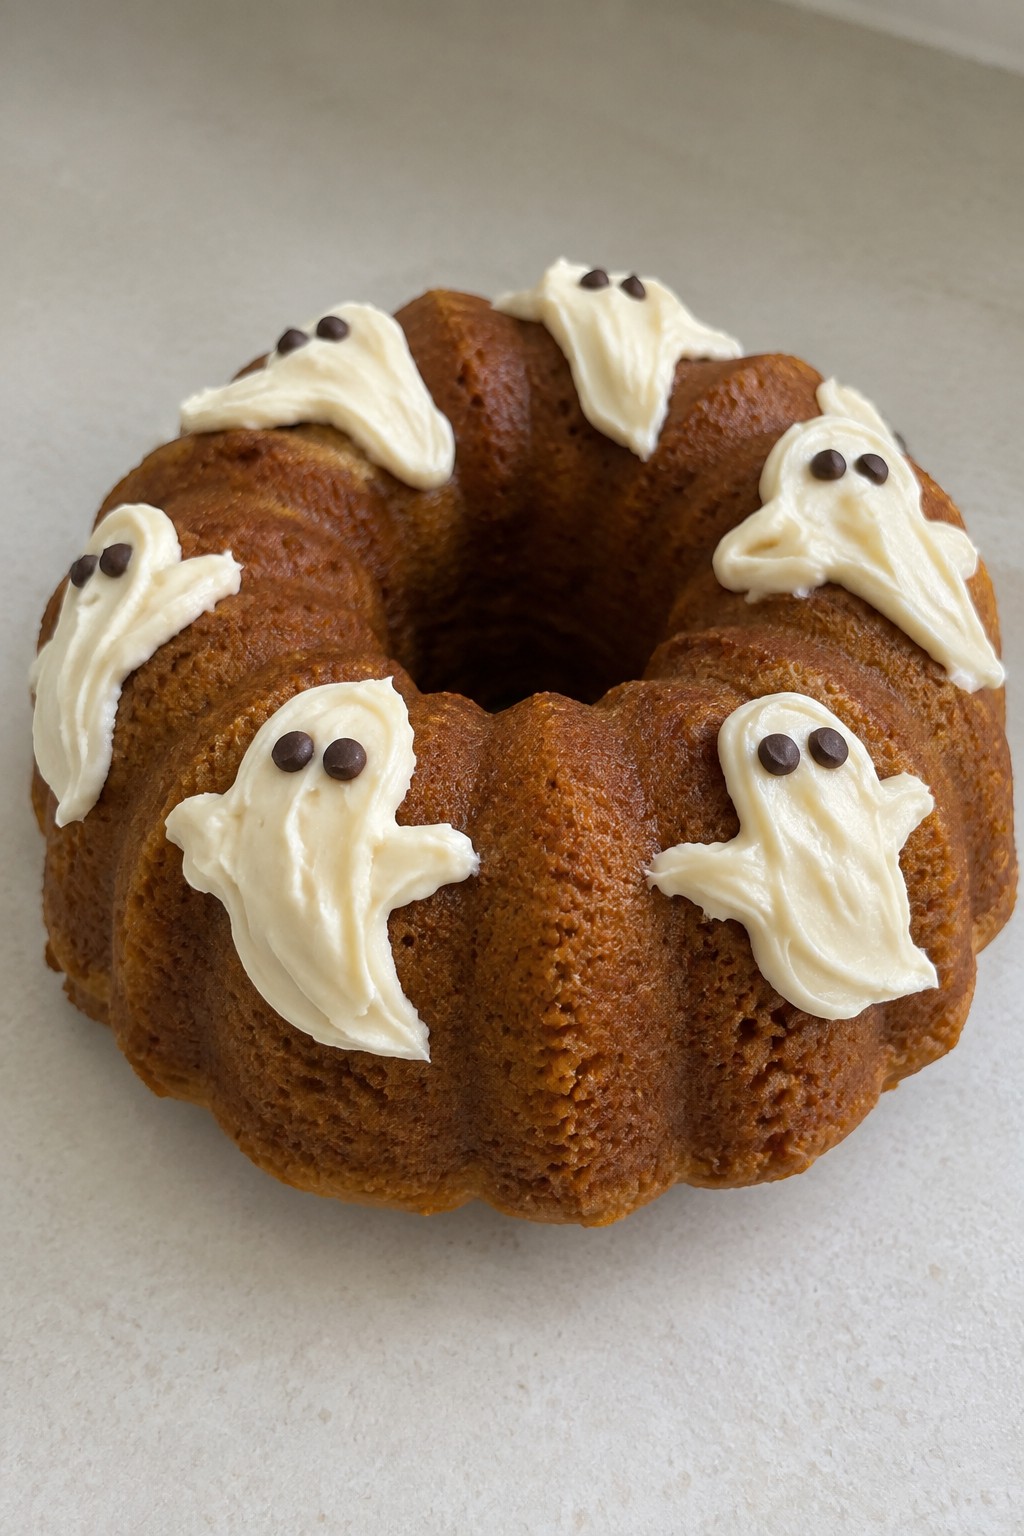
This bundt cake brings warm pumpkin spice flavor to the table with a moist crumb that holds up well under simple frosting. It works nicely for small Halloween gatherings or as a fun weekend bake when you want something seasonal without a lot of fuss. The finished cake tastes like classic pumpkin bread but looks festive with ghost shapes piped on top.
Equipment
- Bundt pan
- Mixing bowls
- Whisk
- Oven
- Wire rack
Ingredients
- ¾ cup all-purpose flour
- ½ cup granulated sugar
- ½ cup pumpkin puree
- 1 large egg
- ¼ cup vegetable oil
- 1 teaspoon pumpkin pie spice
- ½ teaspoon baking powder
- ¼ teaspoon baking soda
- ¼ teaspoon salt
- 1 teaspoon vanilla extract
- ½ cup cream cheese frosting
- 2 tablespoons mini chocolate chips
Instructions
- Preheat the oven to 350°F and grease a small bundt pan. In a medium bowl, whisk together the flour, baking powder, baking soda, salt, and pumpkin pie spice. In a separate bowl, mix the pumpkin puree, sugar, egg, oil, and vanilla extract until smooth. Pour the wet mixture into the dry ingredients and stir just until combined. Spoon the batter into the prepared pan and smooth the top. Bake for 25 to 30 minutes, or until a toothpick inserted in the center comes out clean. Let the cake cool in the pan for 10 minutes, then turn it out onto a wire rack to cool completely. Once cool, pipe or spread the cream cheese frosting on top in small ghost shapes. Press two mini chocolate chips into each ghost for eyes.
Notes
Cuisine: American
Equipment: Bundt pan, Mixing bowls, Whisk, Oven, Wire rack
Black Velvet Spiderweb Cake
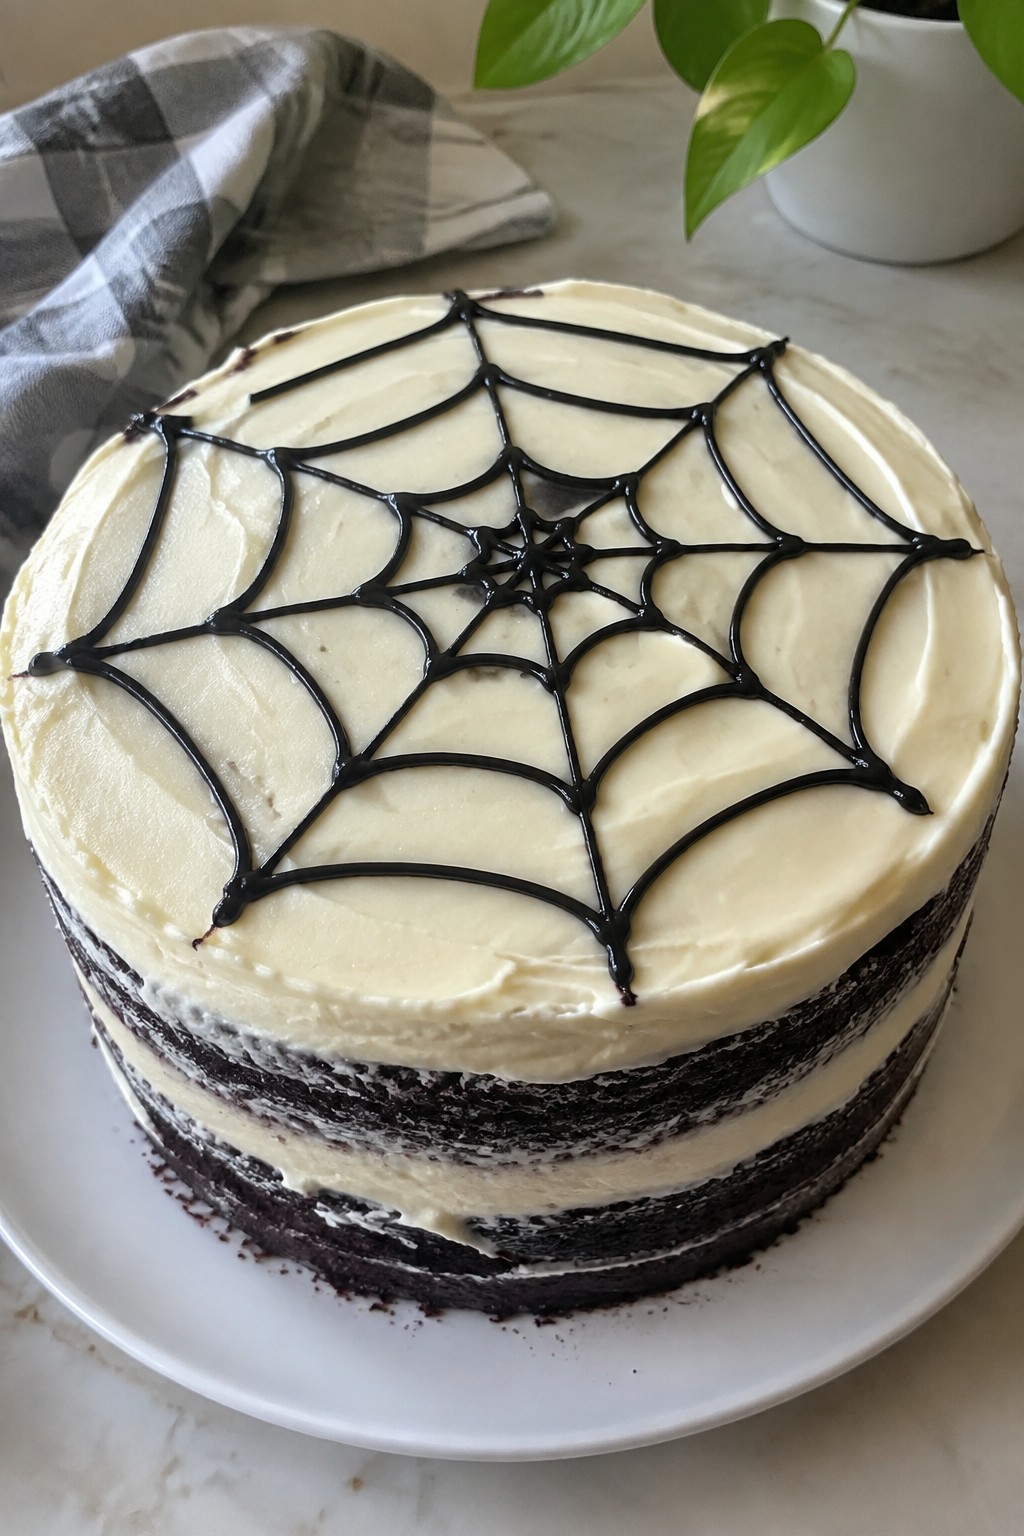
This black velvet spiderweb cake brings a spooky touch to Halloween without needing fancy skills. The dark layers and simple web design on top make it a natural fit for parties or family nights. It stays moist with a mild cocoa taste that pairs nicely with tangy frosting.
The finished cake slices cleanly and holds its shape, so it travels well to gatherings. A cream cheese frosting covers the cake while black lines create the web effect on top.
Equipment
- Mixing bowls
- 8-inch cake pan
- Electric mixer
- Piping bag or gel tube
Ingredients
- 1 cup all-purpose flour
- 3/4 cup granulated sugar
- 1/4 cup unsweetened cocoa powder
- 1/2 teaspoon baking soda
- 1/4 teaspoon salt
- 1/2 cup buttermilk
- 1/4 cup vegetable oil
- 1 large egg
- 2 teaspoons vanilla extract
- 1 tablespoon black food coloring
- 8 ounces cream cheese, softened
- 1/4 cup unsalted butter, softened
- 2 cups powdered sugar
- Black decorating gel
Instructions
- Preheat the oven to 350°F and grease an 8-inch round cake pan. Line the bottom with parchment paper.
- In a large bowl, whisk together the flour, granulated sugar, cocoa powder, baking soda, and salt.
- In a separate bowl, mix the buttermilk, vegetable oil, egg, 1 teaspoon vanilla extract, and black food coloring until smooth.
- Pour the wet mixture into the dry ingredients and stir until just combined. Do not overmix.
- Pour the batter into the prepared pan and bake for 25 to 30 minutes, or until a toothpick comes out clean. Cool the cake completely in the pan.
- While the cake cools, beat the cream cheese and butter together until creamy. Add the powdered sugar and remaining teaspoon of vanilla extract, then beat until fluffy.
- Remove the cooled cake from the pan and spread the cream cheese frosting evenly over the top and sides.
- Use the black decorating gel to pipe a spiderweb design on the frosted surface, starting with concentric circles and dragging lines outward with a toothpick.
Notes
Cuisine: American
Equipment: Mixing bowls, 8-inch cake pan, Electric mixer, Piping bag or gel tube
Candy Corn Ombre Layer Cake
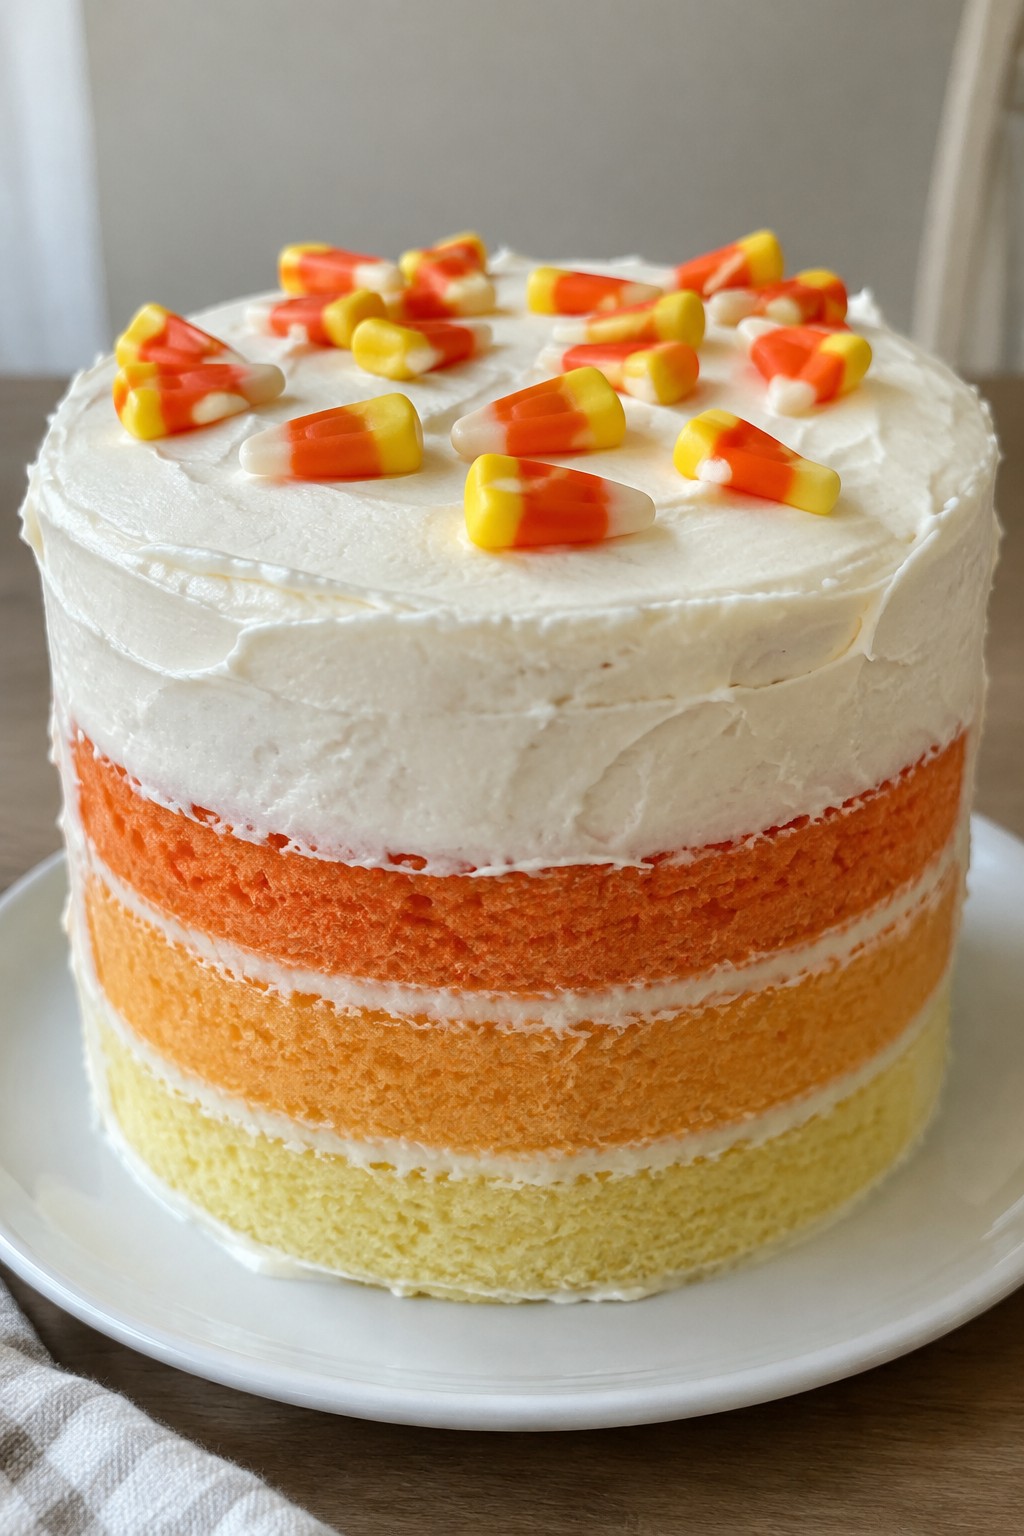
This cake brings the classic candy corn colors into a simple layered dessert that fits right into a Halloween spread. The ombre effect comes from tinting the batter in stages, so each slice shows a clear shift from pale yellow to bright orange. It has a light vanilla flavor with a soft, tender crumb that pairs well with the sweet buttercream.
The recipe works well for small gatherings or as one standout item among other treats. Three thin layers keep the bake time short while still giving a nice height once stacked and frosted.
Equipment
- Mixing Bowl
- Cake Pans
- Electric Mixer
- Oven
Ingredients
- 1 1/2 cups all-purpose flour
- 3/4 cup granulated sugar
- 1/2 cup unsalted butter, softened
- 2 large eggs
- 1/2 cup whole milk
- 2 teaspoons baking powder
- 1 teaspoon vanilla extract
- Yellow food coloring
- Orange food coloring
- 1 cup powdered sugar
- 1/4 cup unsalted butter, softened
- 2 tablespoons heavy cream
- Candy corn pieces for topping
Instructions
- Preheat the oven to 350 degrees and grease three 6-inch round cake pans.
- In a mixing bowl, beat the granulated sugar and 1/2 cup butter until light and fluffy. Add the eggs one at a time, then stir in the vanilla extract and milk.
- In a separate bowl, whisk the flour and baking powder together. Add the dry mixture to the wet ingredients and stir until just combined.
- Divide the batter into three equal portions. Leave one portion plain, tint the second with yellow food coloring, and tint the third with orange food coloring. Pour each portion into a prepared pan.
- Bake the layers for 18 to 20 minutes until a toothpick comes out clean. Cool the cakes in the pans for 10 minutes, then turn them out onto a wire rack to cool completely.
- For the frosting, beat the powdered sugar, 1/4 cup butter, and heavy cream until smooth and spreadable.
- Place the orange layer on a plate, spread a thin layer of frosting on top, add the yellow layer, and repeat. Finish with the plain layer on top. Frost the sides and top of the cake, then press candy corn pieces around the base.
Notes
Cuisine: American
Equipment: Mixing Bowl, Cake Pans, Electric Mixer, Oven
Caramel Apple Crumb Sheet Cake
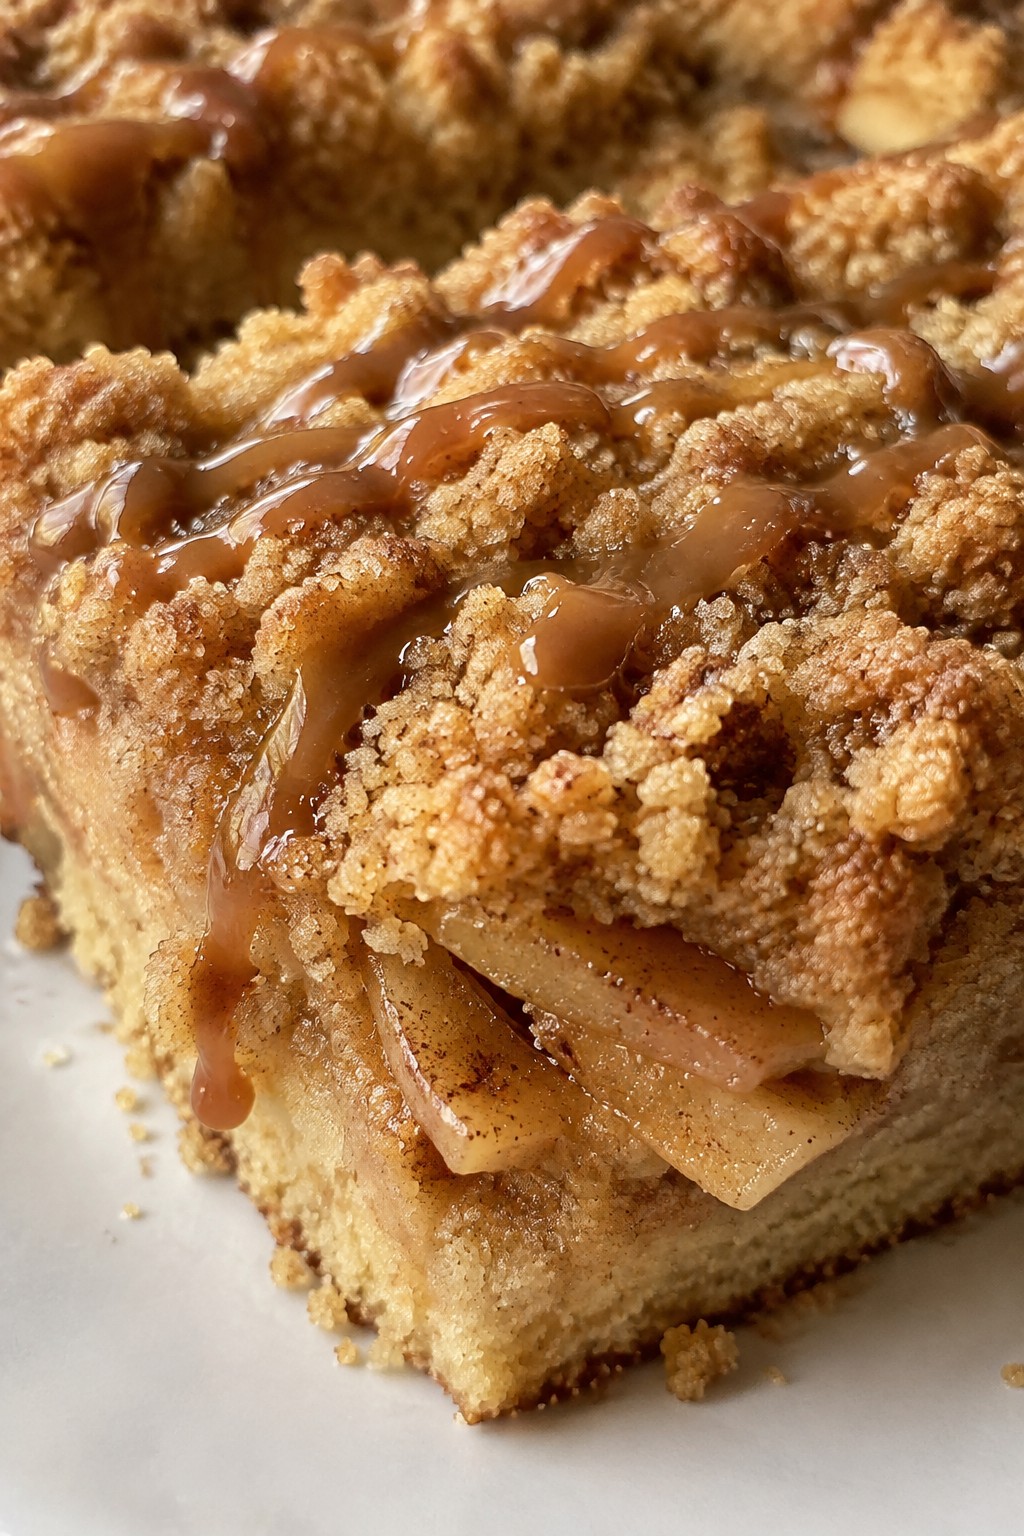
This cake brings together a soft spiced base with tender apple slices and a buttery crumb topping. A drizzle of caramel adds richness that suits Halloween parties or family get-togethers in the fall. The texture stays moist with a slight crunch from the crumbs.
It works well when you need a simple dessert that travels easily to potlucks or school events. The flavors lean warm and comforting without being overly sweet.
Equipment
- Baking sheet
- Mixing bowls
- Oven
Ingredients
- 1 1/2 cups all-purpose flour
- 3/4 cup granulated sugar
- 1/2 cup unsalted butter, softened
- 2 large eggs
- 1 teaspoon baking powder
- 1/2 cup milk
- 2 medium apples, peeled and thinly sliced
- 1/3 cup caramel sauce
- 1/2 cup all-purpose flour (for crumb)
- 1/4 cup brown sugar
- 1/4 cup unsalted butter, cold (for crumb)
- 1 teaspoon ground cinnamon
Instructions
- Preheat the oven to 350 degrees and line a small baking sheet with parchment paper.
- In a mixing bowl, cream the softened butter with the granulated sugar until light. Add the eggs one at a time and mix until combined.
- Stir in the milk. In a separate bowl, whisk together 1 1/2 cups flour and baking powder, then fold the dry mixture into the wet ingredients until just smooth.
- Spread the batter evenly onto the prepared baking sheet. Arrange the apple slices over the top in a single layer.
- To make the crumb, combine the remaining 1/2 cup flour, brown sugar, and cinnamon in a bowl. Cut in the cold butter until the mixture forms coarse crumbs, then sprinkle evenly over the apples.
- Bake for 30 to 35 minutes until the crumb turns golden and a toothpick inserted in the center comes out clean.
- Remove from the oven and let cool slightly before drizzling with the caramel sauce.
Notes
Cuisine: American
Equipment: Baking sheet, Mixing bowls, Oven
Vampire Blood Orange Red Velvet Cake
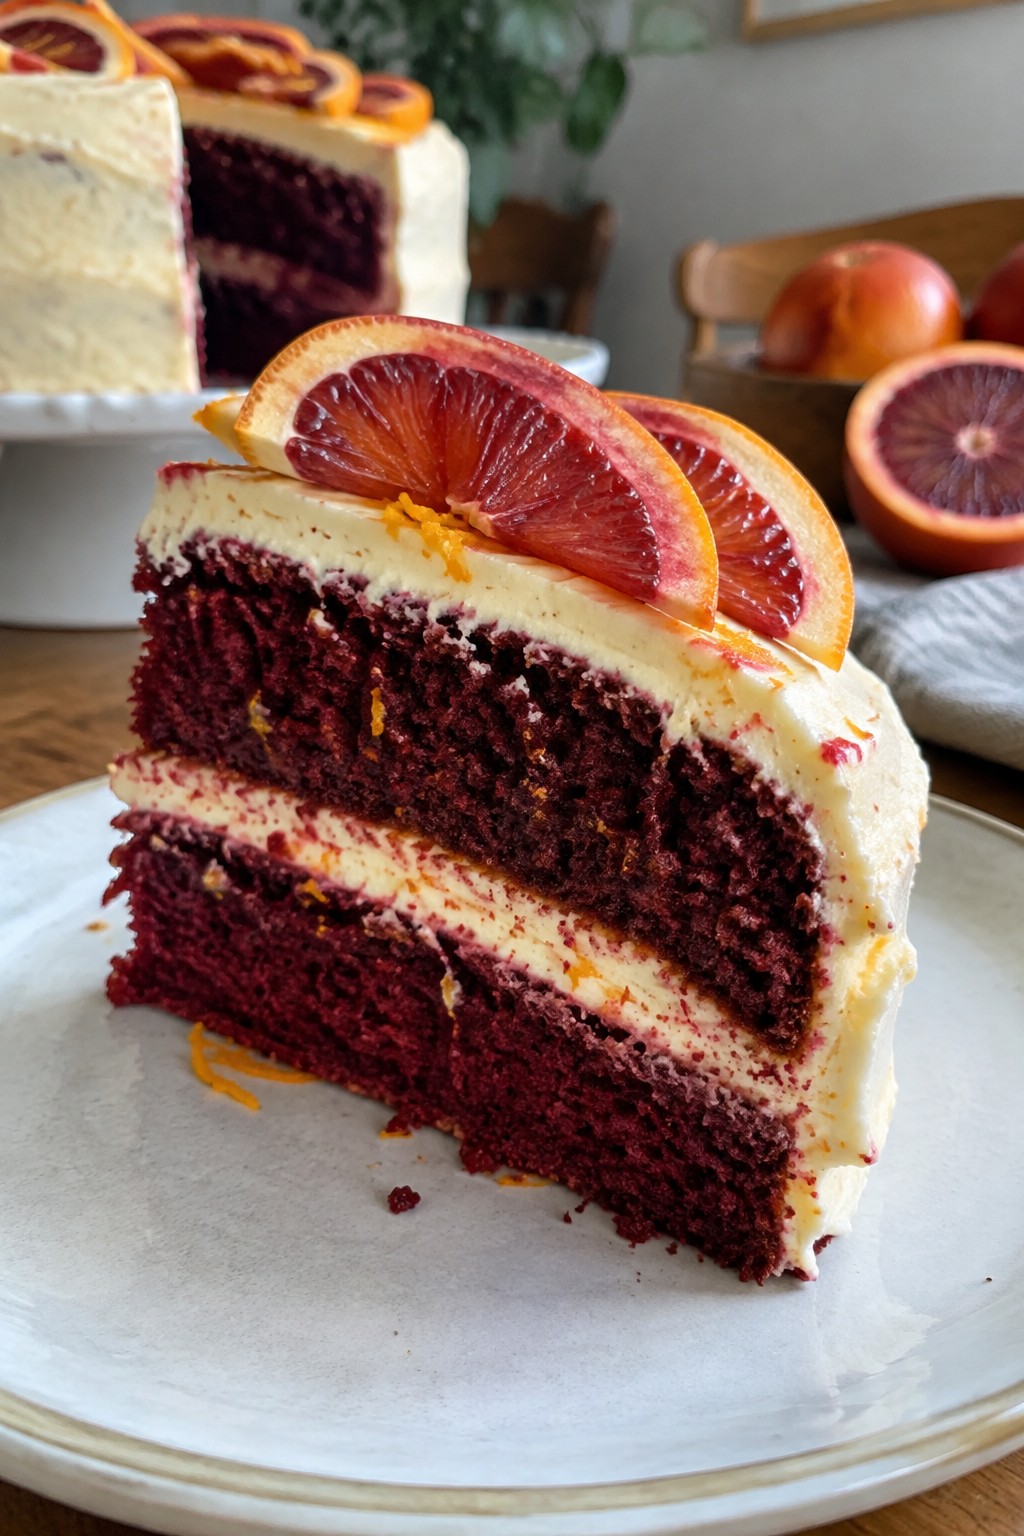
This cake brings red velvet together with blood orange for a bright citrus twist that fits right into a Halloween spread. The moist layers show a deep red color while the frosting carries a tangy orange note that cuts through the cocoa.
It suits small gatherings or a dessert table where you want something a little different from standard chocolate cakes. The texture stays soft with a light crumb, and the blood orange adds a fresh edge that pairs well with the cream cheese frosting.
Equipment
- Mixing Bowls
- Electric Mixer
- 6-inch Cake Pan
- Wire Rack
Ingredients
- 1 cup all-purpose flour
- 1 tablespoon unsweetened cocoa powder
- 3/4 cup granulated sugar
- 1/2 teaspoon baking soda
- 1/4 teaspoon salt
- 1/2 cup buttermilk
- 1/4 cup vegetable oil
- 1 large egg
- 1 teaspoon red food coloring
- 1 teaspoon white vinegar
- Zest of 1 blood orange
- Juice of 1 blood orange, divided
- 4 ounces cream cheese, softened
- 2 tablespoons unsalted butter, softened
- 1 cup powdered sugar
- Blood orange slices for topping
Instructions
- Preheat the oven to 350°F and grease a 6-inch round cake pan. Line the bottom with parchment paper.
- In a medium bowl, whisk together the flour, cocoa powder, sugar, baking soda, and salt.
- In a separate bowl, mix the buttermilk, oil, egg, red food coloring, vinegar, blood orange zest, and half the blood orange juice until smooth.
- Pour the wet mixture into the dry ingredients and stir until just combined. Do not overmix.
- Pour the batter into the prepared pan and bake for 28 to 30 minutes, or until a toothpick inserted in the center comes out clean.
- Let the cake cool in the pan for 10 minutes, then turn it out onto a wire rack to cool completely.
- While the cake cools, beat the cream cheese and butter together until smooth. Add the powdered sugar and remaining blood orange juice, then beat until creamy.
- Slice the cooled cake into two thin layers. Spread half the frosting on the bottom layer, top with the second layer, and cover the top with the rest of the frosting.
- Arrange blood orange slices over the finished cake before serving.
Notes
Cuisine: American
Equipment: Mixing Bowls, Electric Mixer, 6-inch Cake Pan, Wire Rack
Mummy Vanilla Buttercream Cake
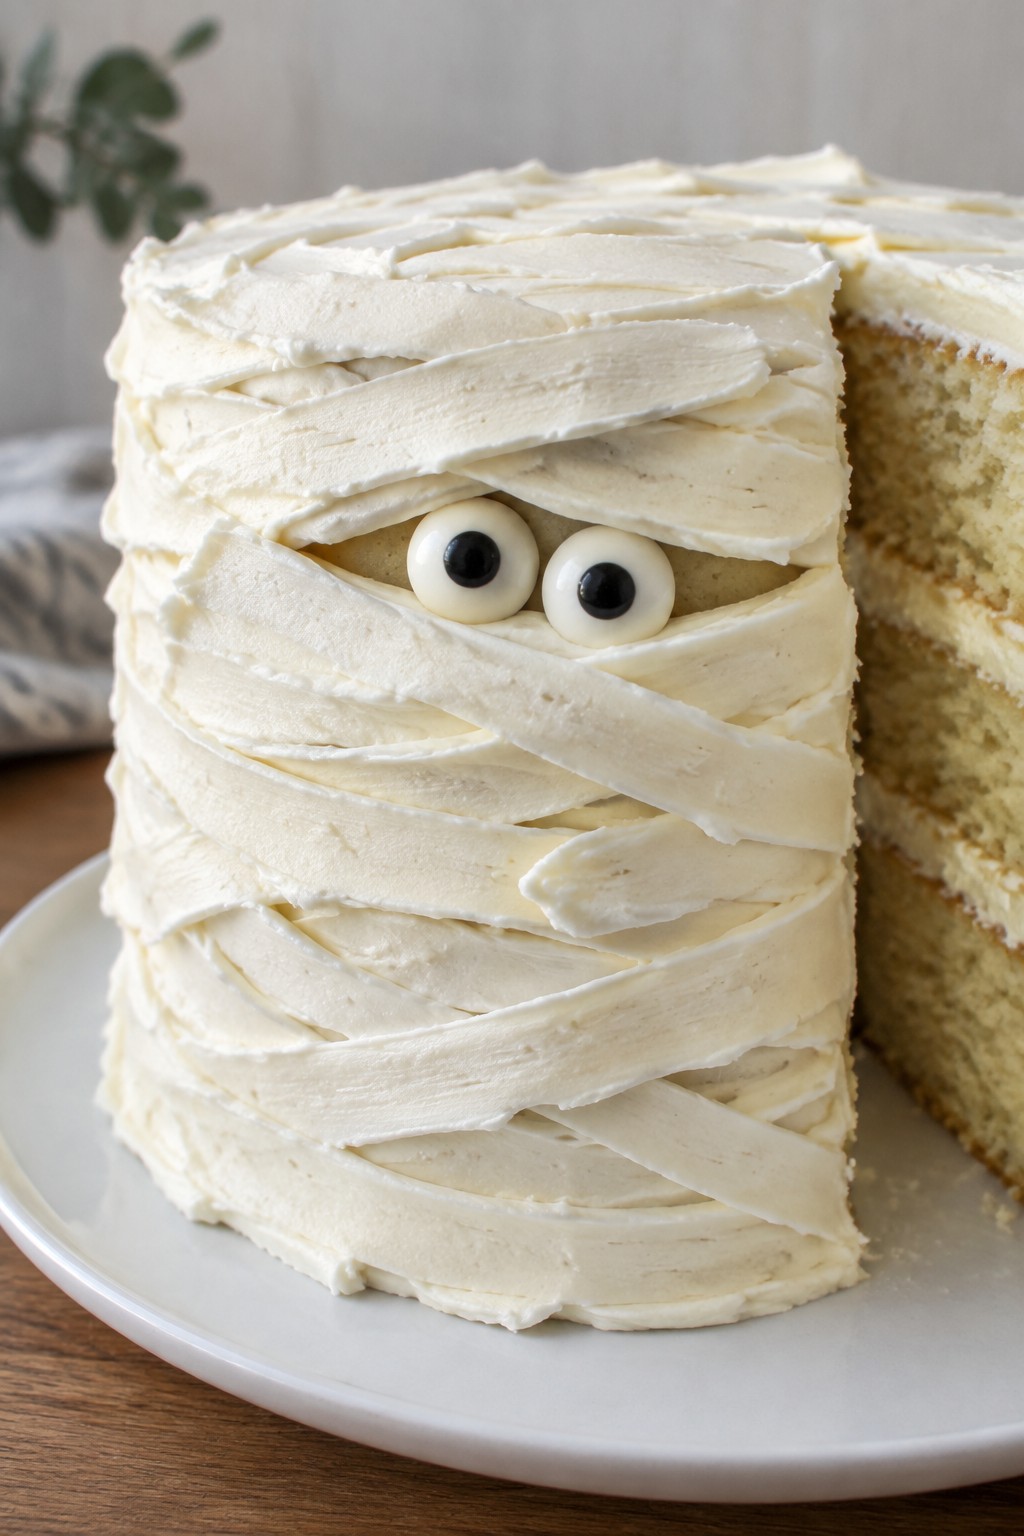
This mummy cake turns a simple vanilla buttercream cake into a Halloween treat. The white frosting gets piped in overlapping strips to create a wrapped look, with candy eyes peeking out for the finishing touch. It suits small parties or family nights when you want something festive without much fuss.
The cake stays light with a soft crumb and mild vanilla taste that balances the sweet buttercream. Kids and adults both reach for a slice once the bandages are on.
Equipment
- Mixing Bowl
- Electric Mixer
- 6-inch Cake Pan
- Piping Bag
Ingredients
- 1 1/4 cups all-purpose flour
- 1 cup granulated sugar
- 1/2 cup unsalted butter, softened
- 2 large eggs
- 1/2 cup milk
- 2 teaspoons vanilla extract
- 1 1/2 teaspoons baking powder
- 1/4 teaspoon salt
- 1 cup unsalted butter, softened
- 3 cups powdered sugar
- 2 tablespoons milk
- 8 candy eyes
Instructions
- Preheat the oven to 350°F and grease a 6-inch round cake pan. In a mixing bowl, cream the 1/2 cup softened butter with the granulated sugar until light. Add the eggs one at a time, then stir in 2 teaspoons vanilla.
- In a separate bowl, whisk the flour, baking powder, and salt. Add half the dry mix to the butter mixture, followed by half the milk. Repeat with the remaining dry mix and milk until just combined.
- Pour the batter into the pan and bake for 25-30 minutes until a toothpick comes out clean. Cool the cake in the pan for 10 minutes, then turn it out onto a wire rack to cool completely.
- For the buttercream, beat the 1 cup softened butter in a clean mixing bowl until smooth. Gradually add the powdered sugar, then the remaining 2 tablespoons milk and 2 teaspoons vanilla. Beat until fluffy.
- Place the cooled cake on a plate and spread a thin layer of buttercream over the top and sides. Fit a piping bag with a flat or ribbon tip and pipe thin horizontal strips across the cake to look like bandages.
- Press the candy eyes onto the cake where the strips allow them to show through.
Notes
Cuisine: American
Equipment: Mixing Bowl, Electric Mixer, 6-inch Cake Pan, Piping Bag
Witch Hat Chocolate Hazelnut Cake
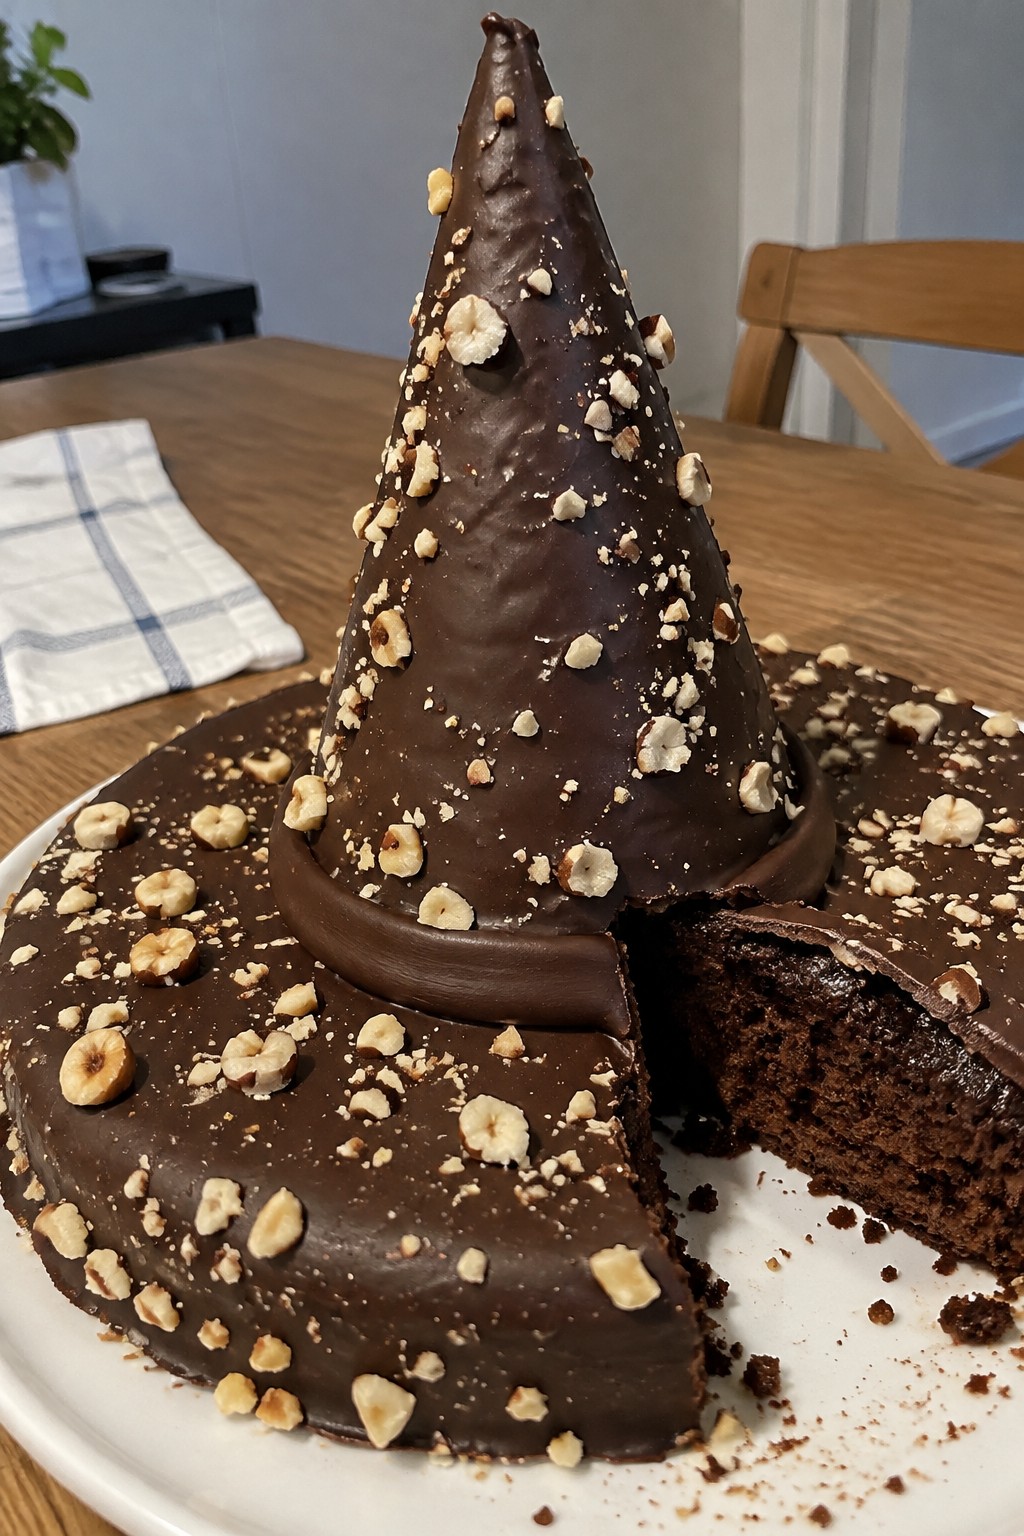
This cake brings a fun Halloween twist with its witch hat shape and rich chocolate hazelnut flavor. The moist crumb pairs with a smooth chocolate coating and crunchy hazelnut accents, making it a hit at small gatherings or family parties.
It works well for cozy October baking sessions when you want something festive without too much fuss. The texture stays tender inside while the outside sets with a light snap from the chocolate shell.
Equipment
- Mixing Bowl
- 6-inch Cake Pan
- Microwave-safe Bowl
- Oven
Ingredients
- 1 cup all-purpose flour
- 3/4 cup granulated sugar
- 1/4 cup unsweetened cocoa powder
- 1 teaspoon baking powder
- 1/2 teaspoon baking soda
- 1/4 teaspoon salt
- 1/2 cup chocolate hazelnut spread
- 1/2 cup milk
- 1/4 cup vegetable oil
- 1 large egg
- 1 teaspoon vanilla extract
- 1 cup semisweet chocolate chips
- 4 sugar cones
- 1/4 cup chopped hazelnuts
Instructions
- Preheat the oven to 350 degrees F and grease a 6-inch round cake pan.
- In a mixing bowl, whisk together the flour, sugar, cocoa powder, baking powder, baking soda, and salt.
- Add the chocolate hazelnut spread, milk, oil, egg, and vanilla extract. Stir until the batter is smooth and no dry streaks remain.
- Pour the batter into the prepared pan and bake for 25 to 30 minutes, until a toothpick inserted in the center comes out clean. Let the cake cool completely in the pan.
- Melt the chocolate chips in a microwave-safe bowl in 30-second bursts, stirring between each until smooth.
- Place the cooled cake on a plate. Spread a thin layer of melted chocolate over the top. Set one sugar cone upright in the center to form the hat point. Spoon more melted chocolate over the cone and the cake edges to create the brim and seal everything together.
- Sprinkle chopped hazelnuts around the base while the chocolate is still soft. Let the cake sit until the chocolate sets.
Notes
Cuisine: American
Equipment: Mixing Bowl, 6-inch Cake Pan, Microwave-safe Bowl, Oven
Jack-o’-Lantern Pumpkin Cheesecake Cake
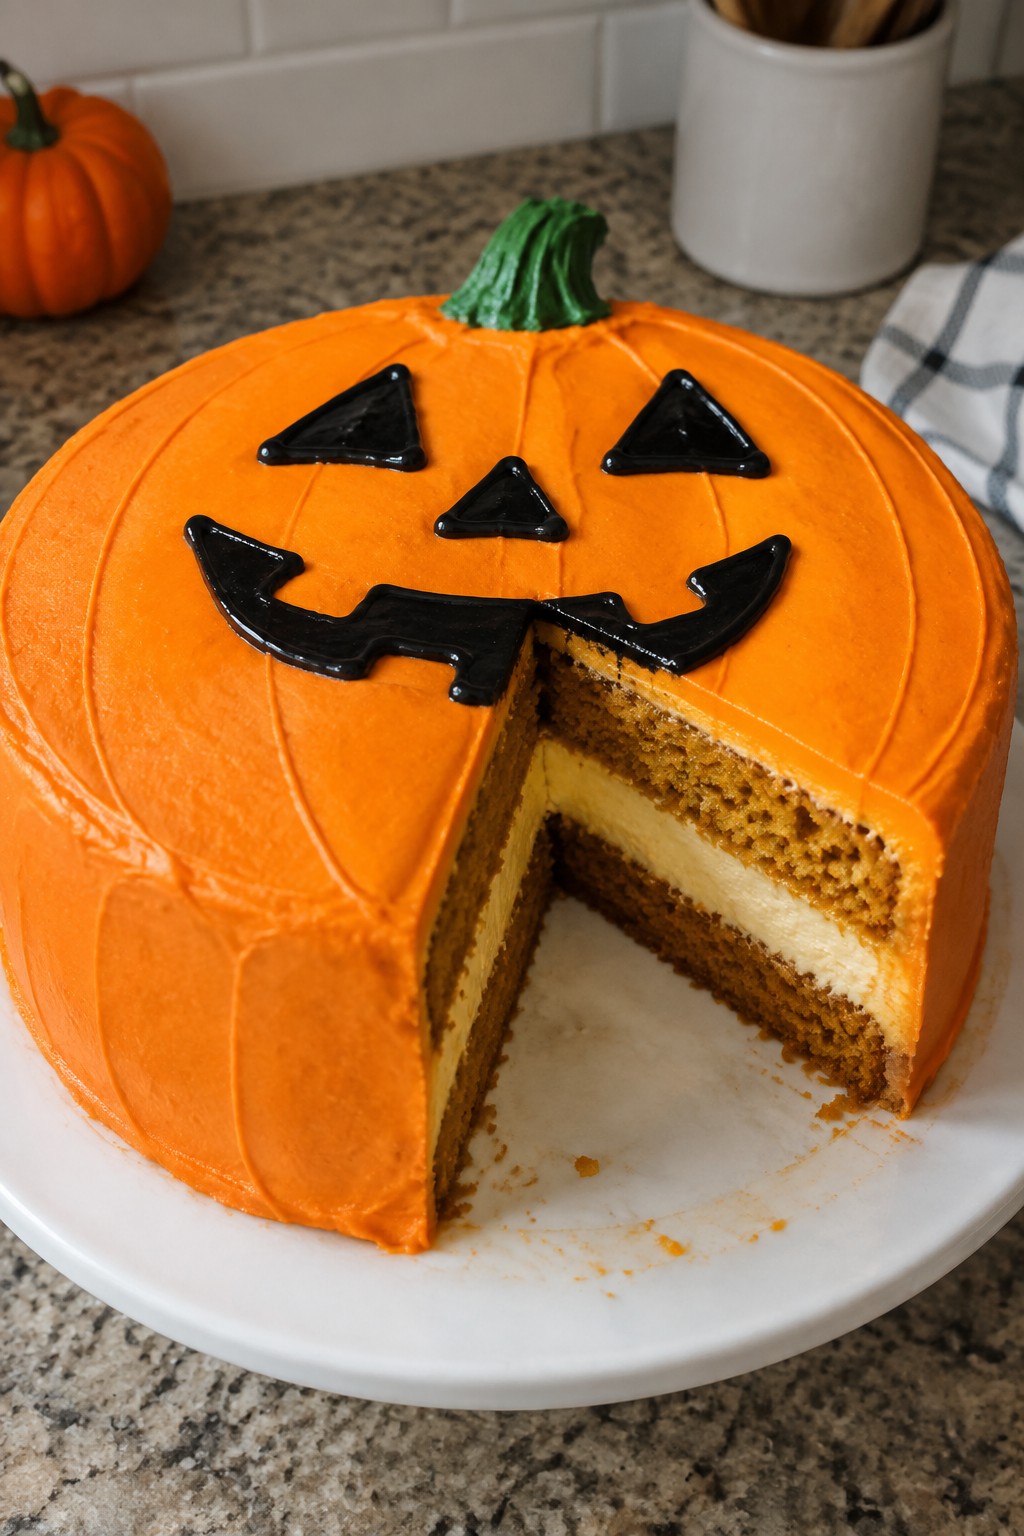
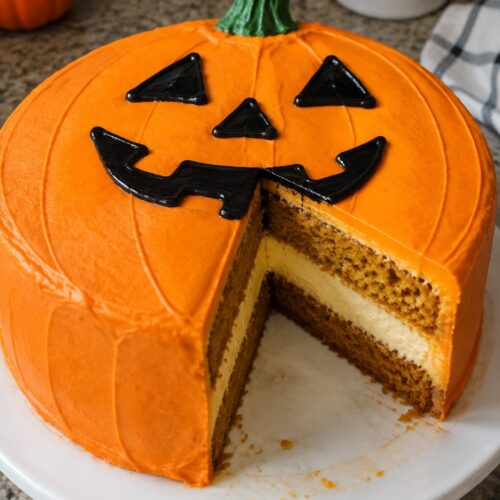
This cake layers moist pumpkin cake with a creamy cheesecake filling for a dessert that feels special without much fuss. It works well for Halloween gatherings because the bright orange frosting makes it easy to add a jack-o’-lantern face that guests notice right away.
The flavor blends warm pumpkin spice with tangy cream cheese, and the texture stays soft from the oil in the cake and the smooth filling in the center.
Equipment
- Mixing bowls
- 6-inch cake pan
- Electric mixer
- Oven
Ingredients
- 1 cup all-purpose flour
- 1/2 cup pumpkin puree
- 1/2 cup granulated sugar
- 1 large egg
- 1/4 cup vegetable oil
- 1 teaspoon pumpkin pie spice
- 1/2 teaspoon baking soda
- 4 ounces cream cheese, softened
- 2 tablespoons granulated sugar
- 1 egg yolk
- 1 teaspoon vanilla extract
- 4 tablespoons unsalted butter, softened
- 1 cup powdered sugar
- Orange food coloring
- Black decorating gel
Instructions
- Preheat the oven to 350 degrees and line a 6-inch round cake pan with parchment.
- In a bowl, stir together the flour, 1/2 cup granulated sugar, pumpkin pie spice, and baking soda. Add the pumpkin puree, egg, and oil, then mix until smooth.
- In a separate bowl, beat the cream cheese with 2 tablespoons granulated sugar, the egg yolk, and vanilla until creamy.
- Pour half the pumpkin batter into the pan. Spoon the cream cheese mixture over it, then top with the remaining pumpkin batter. Smooth the surface.
- Bake for 35 minutes, or until a toothpick inserted in the center comes out clean. Cool the cake completely in the pan.
- Beat the butter with the powdered sugar until fluffy. Add orange food coloring a drop at a time until the frosting reaches a bright shade. Spread the frosting over the cooled cake.
- Use the black decorating gel to draw eyes, a nose, and a mouth on the frosting to create the jack-o’-lantern face.
Notes
Cuisine: American
Equipment: Mixing bowls, 6-inch cake pan, Electric mixer, Oven
Monster Mash Funfetti Layer Cake
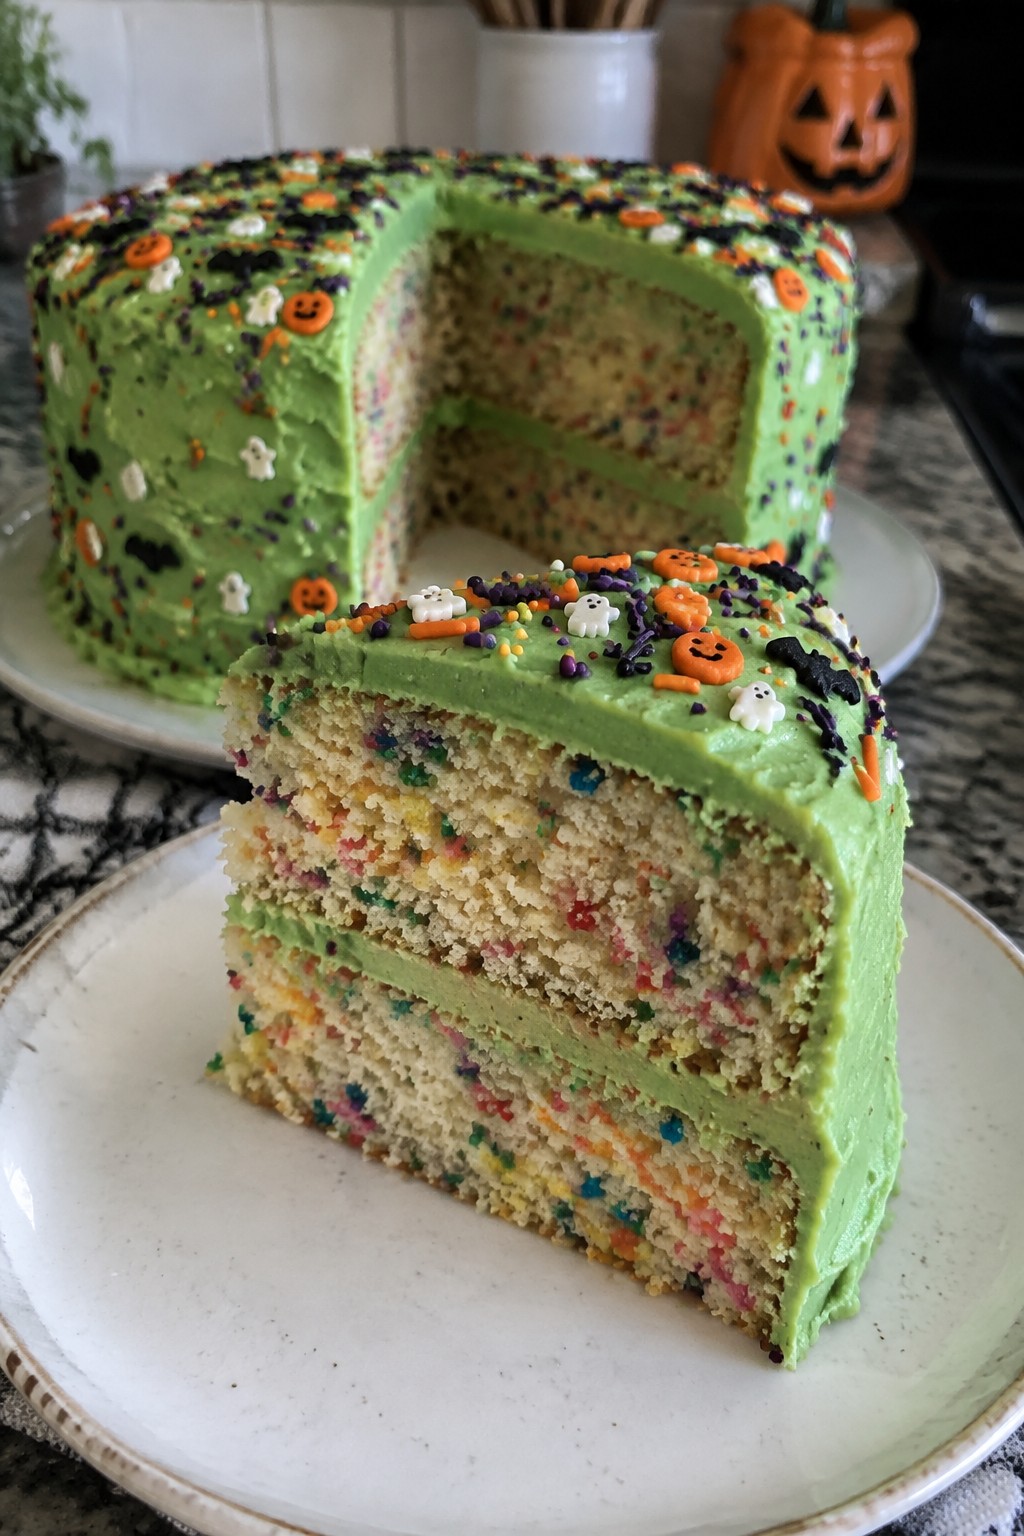
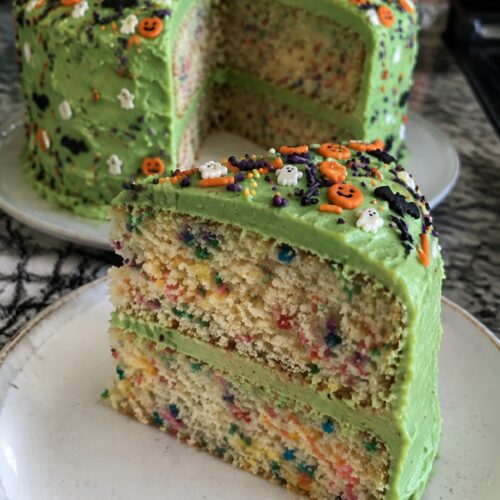
This cake brings bright colors and sprinkles to any Halloween table. The soft vanilla layers hold plenty of rainbow bits throughout the crumb. It suits small gatherings where you want a festive dessert that still feels homemade.
The buttercream gets tinted green for a playful monster look. Extra sprinkles on top add crunch and keep the funfetti theme going. The result is sweet, colorful, and easy to slice for four.
Equipment
- Mixing Bowls
- Hand Mixer
- 6-inch Cake Pans
- Oven
- Spatula
Ingredients
- 1 cup all-purpose flour
- 3/4 cup granulated sugar
- 1/4 cup unsalted butter, softened
- 1 large egg
- 1/2 cup milk
- 1 1/2 teaspoons baking powder
- 1 teaspoon vanilla extract
- 2 tablespoons rainbow sprinkles
- 1/2 cup unsalted butter, softened
- 1 1/2 cups powdered sugar
- 1 tablespoon milk
- 1/2 teaspoon vanilla extract
- Green food coloring
- 2 tablespoons Halloween-themed sprinkles
Instructions
- Preheat the oven to 350 degrees and grease two 6-inch round cake pans.
- In a mixing bowl, cream the 1/4 cup softened butter with the granulated sugar until light. Add the egg and 1 teaspoon vanilla extract and beat until smooth.
- Stir together the flour and baking powder in a separate bowl. Add half the dry mixture to the butter mixture, then pour in half the milk. Repeat with the remaining dry mixture and milk until just combined.
- Fold in the rainbow sprinkles. Divide the batter evenly between the two pans and bake for 22 to 25 minutes until a toothpick comes out clean. Let the layers cool completely.
- For the frosting, beat the 1/2 cup softened butter with the powdered sugar, 1 tablespoon milk, and 1/2 teaspoon vanilla extract until creamy. Add green food coloring a drop at a time until the desired shade is reached.
- Place one cooled cake layer on a plate and spread a thin layer of green frosting on top. Set the second layer over it and frost the top and sides. Finish with Halloween-themed sprinkles scattered over the surface.
Notes
Cuisine: American
Equipment: Mixing Bowls, Hand Mixer, 6-inch Cake Pans, Oven, Spatula
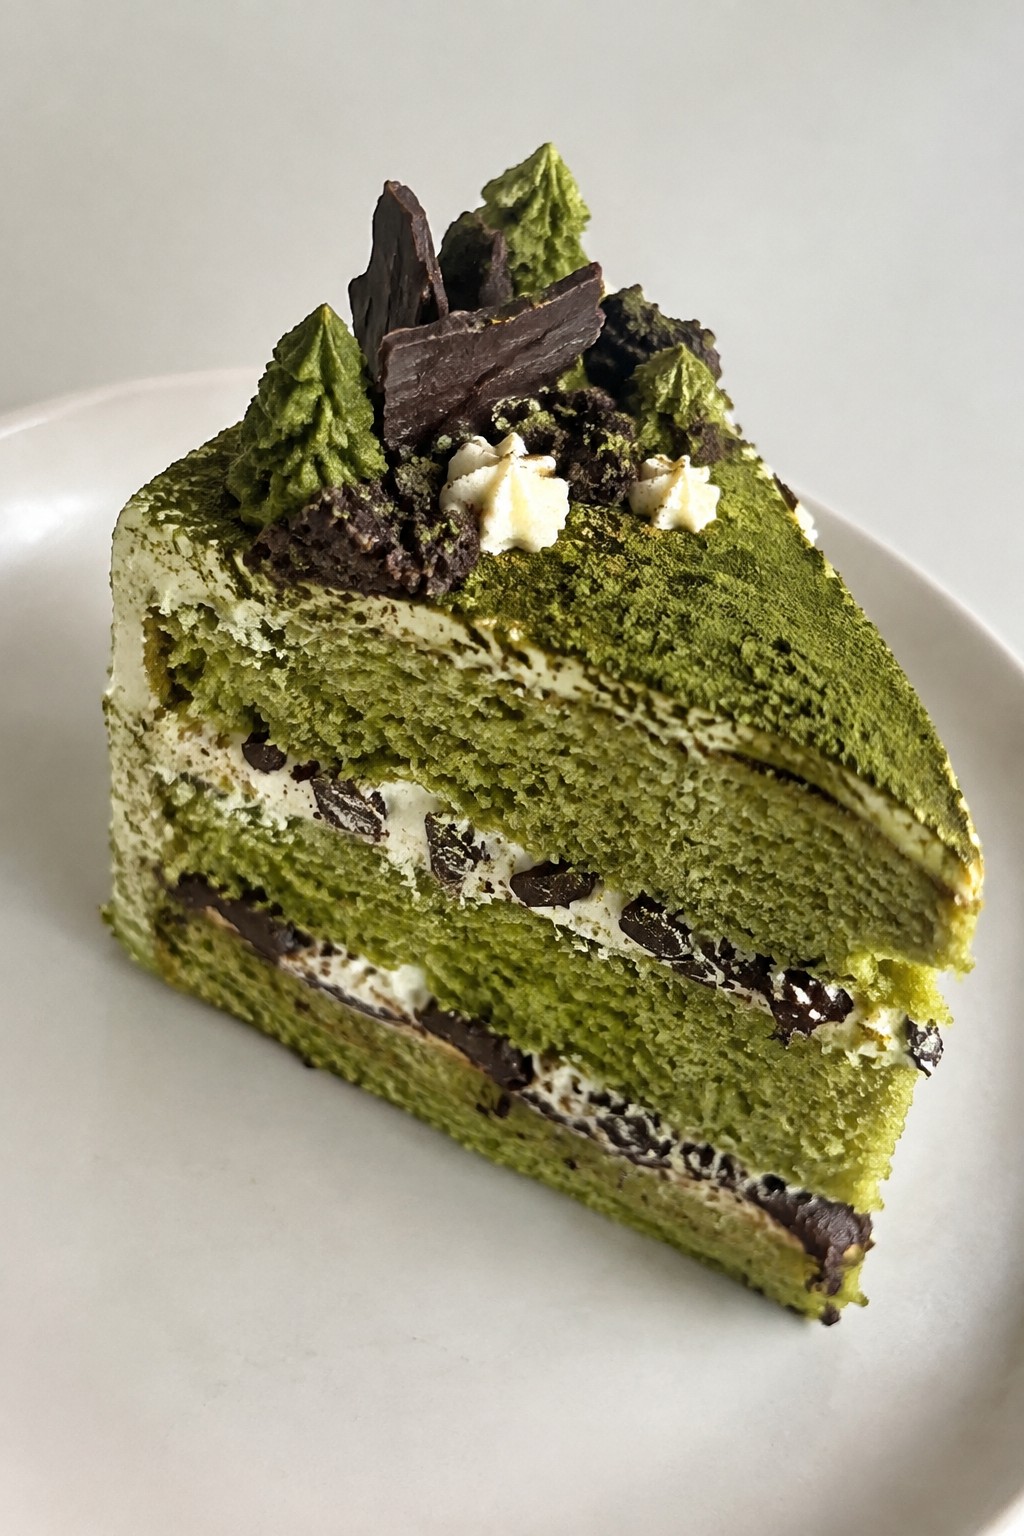
Haunted Forest Matcha Green Tea Cake
This cake brings a bright green hue from matcha that stands out on a Halloween table. The flavor balances earthy tea notes with mild sweetness, and the texture stays light and tender. It works well for small gatherings or as a centerpiece dessert when you want something different from typical chocolate or pumpkin bakes.
Equipment
- Mixing Bowl
- Whisk
- Cake Pan
- Oven
Ingredients
- 1 1/4 cups all-purpose flour
- 3 tablespoons matcha powder
- 3/4 cup granulated sugar
- 2 large eggs
- 1/2 cup unsalted butter, melted
- 1/2 cup whole milk
- 2 teaspoons baking powder
- 1/4 teaspoon salt
- 1 cup heavy cream
- 2 ounces dark chocolate
Instructions
- Preheat the oven to 350°F and line a small loaf pan or 6-inch round cake pan with parchment.
- In a mixing bowl, whisk together the flour, 2 tablespoons of the matcha powder, sugar, baking powder, and salt.
- In a separate bowl, combine the melted butter, milk, and eggs until smooth.
- Pour the wet mixture into the dry ingredients and stir until just combined with no large lumps.
- Transfer the batter to the prepared pan and bake for 25-30 minutes until a toothpick comes out clean.
- Let the cake cool completely in the pan before removing it.
- Whip the heavy cream with the remaining 1 tablespoon of matcha powder until soft peaks form.
- Spread the matcha whipped cream over the cooled cake.
- Melt the dark chocolate and drizzle or pipe thin lines and small shapes on top to create simple tree or branch details.
Notes
Cuisine: American
Equipment: Mixing Bowl, Whisk, Cake Pan, Oven
Skeleton Bone White Chocolate Almond Cake
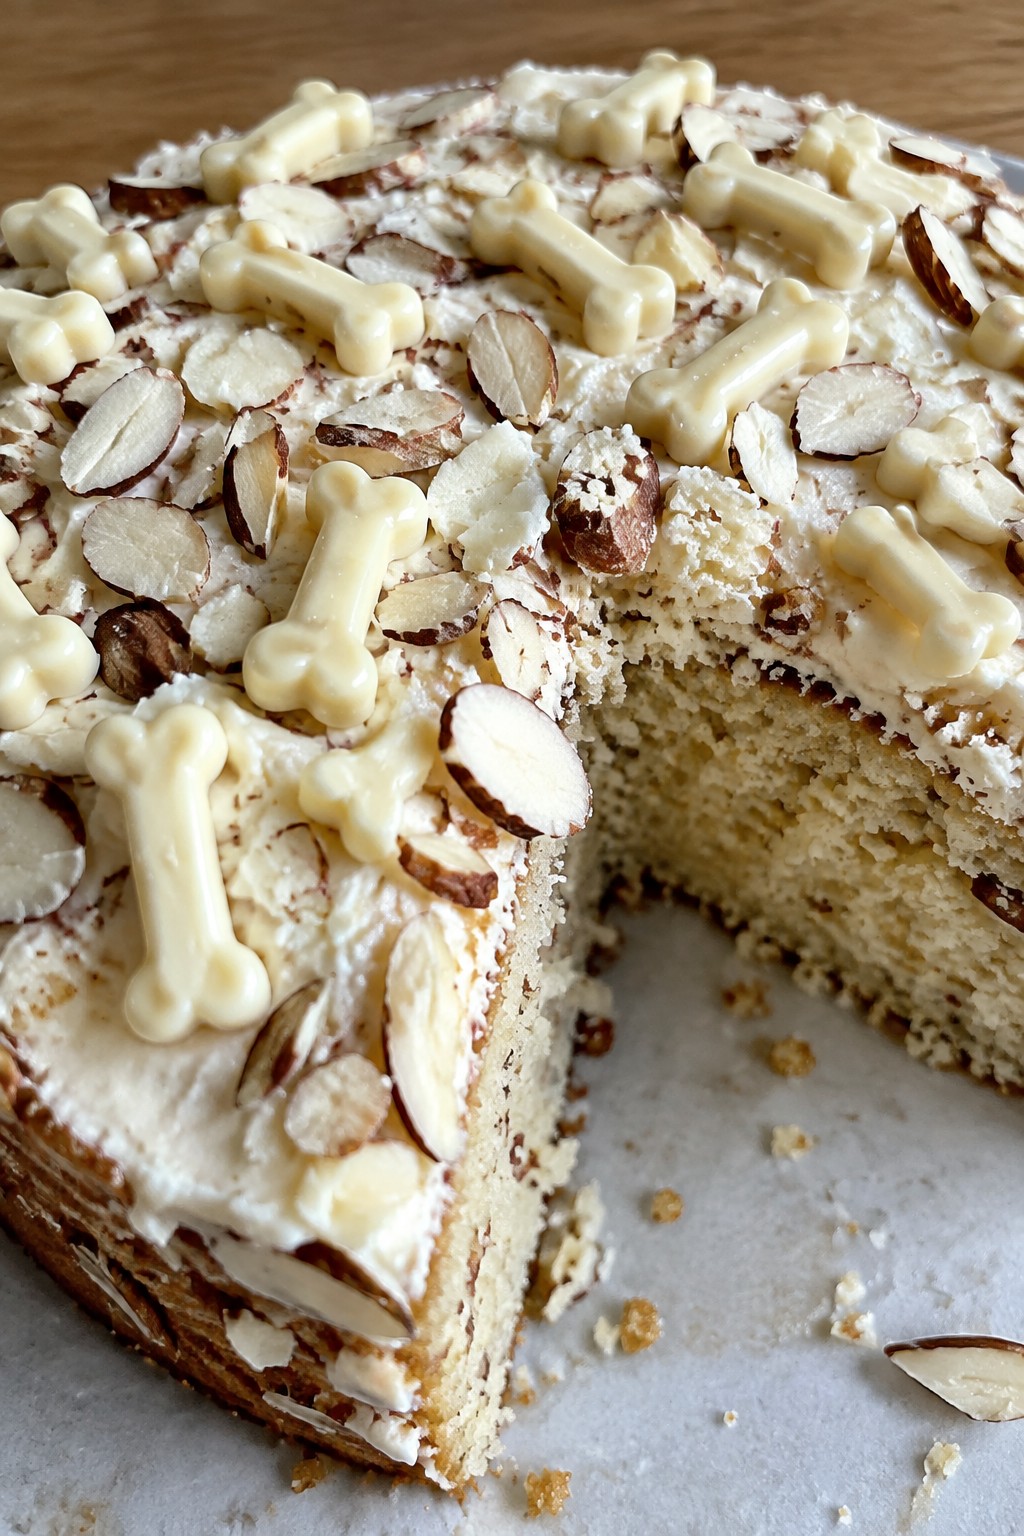
This cake brings together smooth white chocolate and toasted almond flavor in a light, moist crumb that feels special without much fuss. It fits well at a Halloween gathering when you want a dessert that looks striking but stays simple to put together at home.
The finished cake shows off white chocolate shapes that resemble bones, giving it a playful edge while the almond notes keep the taste balanced and not overly sweet.
Equipment
- Mixing Bowls
- Electric Mixer
- Loaf Pan
- Piping Bag
Ingredients
- 1 cup all-purpose flour
- ½ cup granulated sugar
- 1 teaspoon baking powder
- ¼ teaspoon salt
- ¼ cup unsalted butter, softened
- 2 large eggs
- 1 teaspoon almond extract
- ½ cup whole milk
- 6 ounces white chocolate, divided
- ¼ cup sliced almonds
Instructions
- Heat the oven to 350 degrees and line a small loaf pan with parchment paper.
- Stir together the flour, sugar, baking powder, and salt in a medium bowl.
- In another bowl, beat the butter until smooth, then add the eggs one at a time along with the almond extract.
- Pour the milk into the butter mixture and stir until combined.
- Add the dry ingredients to the wet ingredients and mix just until no flour streaks remain.
- Chop 4 ounces of the white chocolate and fold it into the batter.
- Spread the batter into the prepared pan and scatter the sliced almonds over the top.
- Bake for 30 to 35 minutes, until a toothpick inserted in the center comes out clean.
- Let the cake cool completely in the pan.
- Melt the remaining 2 ounces of white chocolate and pipe it into simple bone shapes on parchment paper. Let the shapes set, then place them on the cooled cake before serving.
Notes
Cuisine: American
Equipment: Mixing Bowls, Electric Mixer, Loaf Pan, Piping Bag
Blood-Drip Cherry Chocolate Truffle Cake
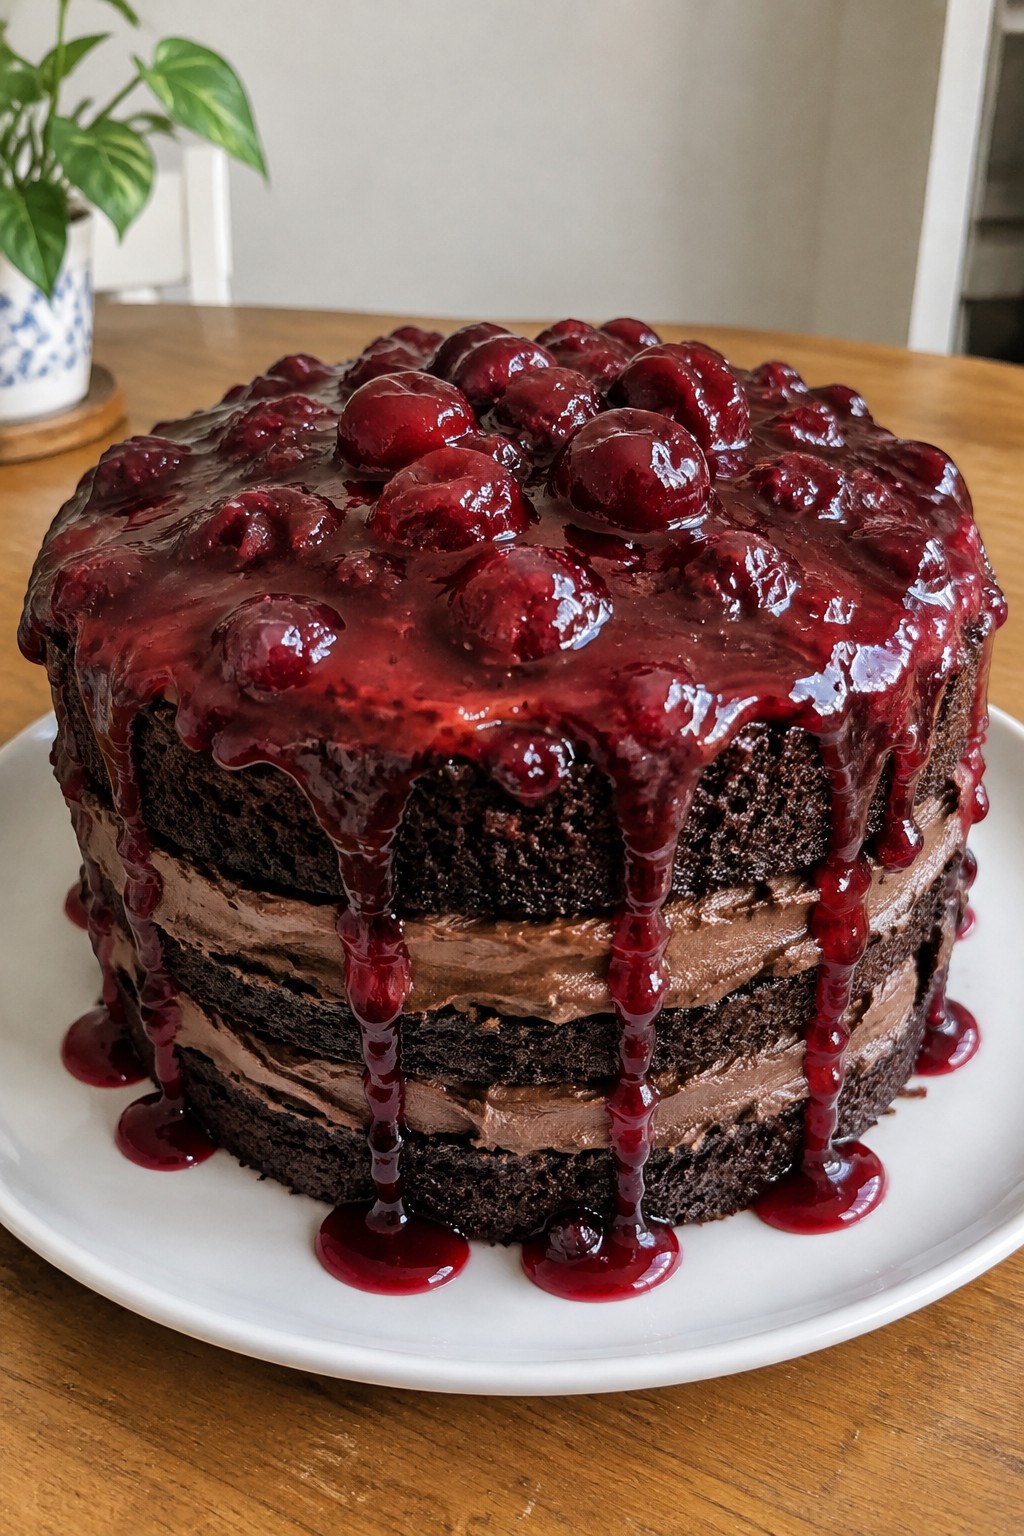
This cake layers moist chocolate sponge with a creamy chocolate truffle filling and finishes with a glossy cherry sauce that drips down the sides. It suits Halloween parties or autumn gatherings where a bold but simple dessert is needed. The flavor balances deep cocoa with tart cherry, while the texture stays soft inside and slightly firm on top.

Equipment
- Mixing Bowls
- 6-inch Cake Pan
- Saucepan
- Wire Rack
Ingredients
- ¾ cup all-purpose flour
- ½ cup unsweetened cocoa powder
- ¾ cup granulated sugar
- 1 teaspoon baking powder
- ½ teaspoon baking soda
- ½ teaspoon salt
- ½ cup buttermilk
- ¼ cup vegetable oil
- 1 large egg
- 1 teaspoon vanilla extract
- 1 cup semisweet chocolate chips
- ½ cup heavy whipping cream
- 1½ cups fresh cherries, pitted
- 2 tablespoons granulated sugar
Instructions
- Preheat the oven to 350°F and grease a 6-inch round cake pan. In a large bowl, whisk together the flour, cocoa powder, ¾ cup sugar, baking powder, baking soda, and salt.
- Add the buttermilk, vegetable oil, egg, and vanilla extract to the dry ingredients. Stir until the batter is smooth and no dry streaks remain.
- Pour the batter into the prepared pan and bake for 28 to 32 minutes, or until a toothpick inserted in the center comes out clean. Cool the cake in the pan for 10 minutes, then turn it out onto a wire rack.
- While the cake cools, place ¾ cup of the chocolate chips in a heatproof bowl. Heat the heavy whipping cream in a small saucepan until it just begins to simmer, then pour it over the chocolate chips. Let it sit for 2 minutes and stir until smooth to create the truffle filling.
- Slice the cooled cake in half horizontally. Spread the truffle filling over the bottom layer, replace the top layer, and chill the cake for 15 minutes.
- In the same saucepan, combine the cherries and remaining 2 tablespoons sugar. Cook over medium heat for 8 to 10 minutes, stirring occasionally, until the cherries soften and release their juices. Mash lightly with a fork and let the sauce cool slightly.
- Spoon the warm cherry sauce over the top of the cake so it drips down the sides. Melt the remaining ¼ cup chocolate chips and drizzle thin lines over the cherry sauce if desired.
Notes
Cuisine: American
Equipment: Mixing Bowls, 6-inch Cake Pan, Saucepan, Wire Rack
