

Hosting guests is always nicer when the food feels comforting without adding too much stress.
These recipes focus on warm dishes that come together with everyday ingredients and still look nice on the table.
I chose options that work well for different group sizes and can often be prepped ahead.
You will find a mix of classics and slightly updated versions that guests usually enjoy.
Each one aims to keep things simple while giving that homemade feel.
Helpful Tips Before You Start
These steps will help your comfort food recipes stay warm and look polished when guests sit down.
Cook One Day Ahead
Many dishes like baked pastas or stews improve after resting overnight. Reheat them gently in a low oven so flavors stay rich and consistent.
Use Heavy Serving Dishes
Choose cast iron or thick ceramic pieces that hold heat well. Set them out on the table so food stays warm without constant trips to the kitchen.
Keep the Menu Focused
Pick one main comfort recipe and pair it with two simple sides. This cuts down on last minute work and keeps everything hot at the same time.
Add Garnishes at the Table
Set out bowls of fresh herbs, grated cheese, or toasted breadcrumbs. Let guests add their own so each plate looks fresh and inviting.
Red Wine Braised Short Ribs with Creamy Polenta
This dish brings tender, fall-apart beef short ribs in a rich red wine sauce together with smooth, cheesy polenta. It feels special enough for company yet stays grounded in simple, hearty flavors that guests always enjoy.
Serve it on a cool evening when you want something that looks impressive on the table without needing constant attention. The slow braise builds deep flavor while the polenta comes together quickly at the end.


Equipment
- Dutch oven
- Large saucepan
- Whisk
Ingredients
- 3 lbs bone-in beef short ribs
- 2 tbsp olive oil
- Salt and black pepper
- 1 large onion, diced
- 2 carrots, diced
- 3 garlic cloves, minced
- 2 tbsp tomato paste
- 2 cups dry red wine
- 3 cups beef broth
- 4 sprigs fresh thyme
- 2 bay leaves
- 1 cup coarse polenta
- 4 cups whole milk
- 3 tbsp butter
- 1/2 cup grated Parmesan cheese
- Chopped fresh parsley
Instructions
- Preheat the oven to 325°F. Pat the short ribs dry, then season generously with salt and pepper on all sides.
- Heat the olive oil in a Dutch oven over medium-high heat. Sear the ribs in batches until browned on all sides, then remove them to a plate.
- Lower the heat to medium and add the onion and carrots to the pot. Cook for 5 minutes until softened. Stir in the garlic and tomato paste and cook for 1 minute more.
- Pour in the red wine and scrape the bottom of the pot to release any browned bits. Let the wine simmer for 3 minutes to reduce slightly.
- Add the beef broth, thyme sprigs, and bay leaves. Return the short ribs to the pot, cover, and transfer to the oven. Braise for 2.5 to 3 hours until the meat is very tender.
- About 30 minutes before the ribs are done, make the polenta. Bring the milk to a simmer in a large saucepan. Slowly whisk in the polenta and a pinch of salt. Cook, stirring often, for 20 minutes until thick and creamy.
- Remove the polenta from heat and stir in the butter and Parmesan. Taste and adjust seasoning if needed.
- Spoon the creamy polenta into bowls, top with short ribs and some of the braising sauce, then finish with chopped parsley.
Notes
Cuisine: American
Equipment: Dutch oven, Large saucepan, Whisk
Four-Cheese Baked Ziti with Crispy Herb Breadcrumbs
This baked ziti brings together four cheeses for a rich filling that stays creamy after baking. The crispy herb breadcrumbs on top add crunch and a savory finish that makes the dish feel special enough for company yet still familiar and comforting.
It works well for a casual dinner with friends or a weekend gathering when you want something warm that can be prepped ahead. The combination of tender pasta, melted cheese, and golden crumbs gives it a balanced texture that guests tend to enjoy.


Equipment
- Large pot
- 9×9 inch baking dish
- Mixing bowl
- Colander
Ingredients
- 12 ounces ziti pasta
- 2 cups marinara sauce
- 1 cup ricotta cheese
- 1 cup shredded mozzarella cheese
- 1/2 cup grated Parmesan cheese
- 1/2 cup shredded fontina cheese
- 1 cup panko breadcrumbs
- 2 tablespoons chopped fresh parsley
- 1 teaspoon dried oregano
- 2 tablespoons olive oil
- 1/2 teaspoon salt
- 1/4 teaspoon black pepper
Instructions
- Preheat the oven to 375°F and lightly grease a 9×9 inch baking dish.
- Bring a large pot of salted water to a boil and cook the ziti until just al dente. Drain and return it to the pot.
- Stir the marinara sauce, ricotta, half the mozzarella, half the Parmesan, and the fontina into the pasta until evenly combined. Add the salt and pepper and mix again.
- Transfer the pasta mixture to the prepared baking dish and spread it into an even layer. Sprinkle the remaining mozzarella and Parmesan over the top.
- In a small bowl, combine the panko breadcrumbs, parsley, oregano, and olive oil. Stir until the crumbs are evenly coated.
- Scatter the breadcrumb mixture over the cheese layer. Bake for 20 to 25 minutes until the top is golden and the edges are bubbling.
- Let the ziti rest for 5 minutes before serving.
Notes
Cuisine: Italian
Equipment: Large pot, 9×9 inch baking dish, Mixing bowl, Colander
Chicken and Wild Mushroom Pot Pie with Flaky Pastry
This pot pie brings comfort to the table with tender chicken and earthy wild mushrooms tucked under a golden, flaky pastry crust. It feels special enough for guests yet stays grounded in familiar flavors that everyone enjoys.
The filling stays creamy without being heavy, while the mushrooms add depth that pairs well with the buttery pastry. Serve it on a cool evening when you want something warm and satisfying that still looks thoughtful on the plate.


Equipment
- Large skillet
- 9-inch pie dish
- Oven
- Pastry brush
Ingredients
- 1 pound boneless skinless chicken thighs, cut into bite-size pieces
- 8 ounces mixed wild mushrooms, sliced
- 1 medium onion, diced
- 2 carrots, diced
- 2 celery stalks, diced
- 3 garlic cloves, minced
- 3 tablespoons butter
- 3 tablespoons all-purpose flour
- 1 1/4 cups chicken broth
- 1/2 cup heavy cream
- 1 teaspoon fresh thyme leaves
- 1/2 teaspoon salt
- 1/4 teaspoon black pepper
- 1 sheet frozen puff pastry, thawed
- 1 egg, beaten
Instructions
- Preheat the oven to 400 degrees F. Melt 1 tablespoon of butter in a large skillet over medium heat. Add the chicken pieces and cook until lightly browned on all sides. Remove the chicken to a plate and set aside.
- Add the remaining 2 tablespoons of butter to the same skillet. Stir in the onion, carrots, and celery. Cook for 5 minutes until the vegetables soften.
- Add the mushrooms and garlic. Cook for another 4 minutes until the mushrooms release their liquid and start to brown.
- Sprinkle the flour over the vegetables and stir for 1 minute to cook out the raw taste. Slowly pour in the chicken broth while stirring to avoid lumps. Add the heavy cream, thyme, salt, and pepper.
- Return the chicken to the skillet. Simmer the filling for 3 to 4 minutes until it thickens slightly. Remove from heat.
- Transfer the filling to a 9-inch pie dish or individual ramekins. Roll out the puff pastry slightly if needed and lay it over the top. Trim excess and crimp the edges. Cut a few small slits in the center for steam.
- Brush the pastry with the beaten egg. Bake for 25 to 30 minutes until the crust is deep golden and the filling bubbles at the edges.
Notes
Cuisine: American
Equipment: Large skillet, 9-inch pie dish, Oven, Pastry brush
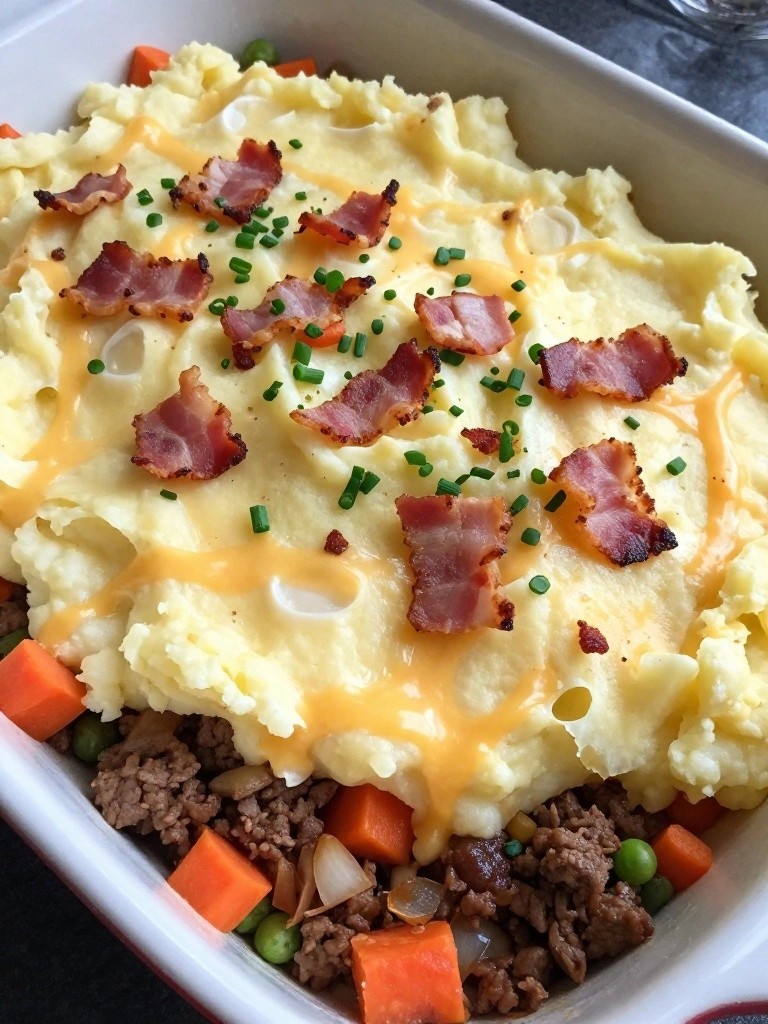
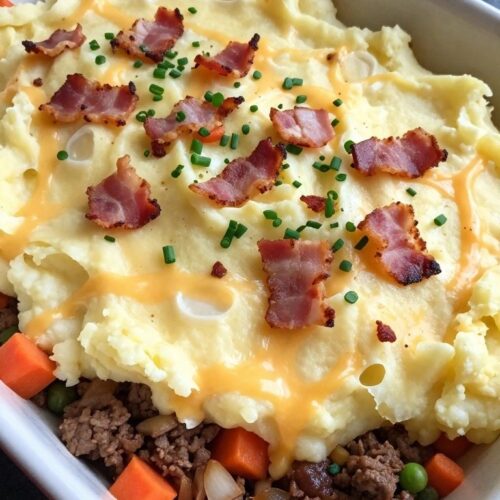
Loaded Shepherd’s Pie with Sharp Cheddar Mashed Potatoes
This hearty shepherd’s pie brings together savory ground beef and vegetables under a thick layer of sharp cheddar mashed potatoes. The bacon and extra cheese on top make it feel a little more special than a basic version, which helps it stand out when you have guests over for dinner.
It works well for cool evenings or casual get-togethers when you want something filling that still looks put together. The creamy potatoes contrast with the rich meat filling, and the melted cheddar adds a nice sharp finish.
Equipment
- Large skillet
- Medium pot
- Potato masher
- Baking dish
Ingredients
- 1 lb ground beef
- 1 medium onion, diced
- 2 medium carrots, diced
- 2 garlic cloves, minced
- 1 cup frozen peas
- 2 tbsp tomato paste
- 1 cup beef broth
- 1 tbsp Worcestershire sauce
- 1/2 tsp salt
- 1/4 tsp black pepper
- 4 large russet potatoes, peeled and cubed
- 4 tbsp butter
- 1/2 cup milk
- 1 1/2 cups shredded sharp cheddar cheese, divided
- 4 slices bacon, cooked and crumbled
- 2 tbsp chopped chives
Instructions
- Preheat the oven to 400°F. Boil the potatoes in a large pot of salted water until fork-tender, about 15 minutes. Drain and return them to the pot.
- Mash the potatoes with butter, milk, and 1 cup of the sharp cheddar until smooth. Set the mash aside while you prepare the filling.
- In a large skillet over medium heat, cook the ground beef until browned. Add the onion and carrots and cook for 5 minutes until they begin to soften.
- Stir in the garlic, tomato paste, beef broth, Worcestershire sauce, salt, and pepper. Simmer for 5 minutes until the liquid thickens slightly. Add the peas and cook for 2 more minutes.
- Spread the beef mixture evenly in a baking dish. Spoon the cheddar mashed potatoes over the top and smooth it out. Sprinkle the remaining 1/2 cup cheddar and the crumbled bacon across the surface.
- Bake for 20 minutes until the top is golden and the edges bubble. Remove from the oven and scatter the chives over the finished pie before serving.
Notes
Cuisine: American
Equipment: Large skillet, Medium pot, Potato masher, Baking dish
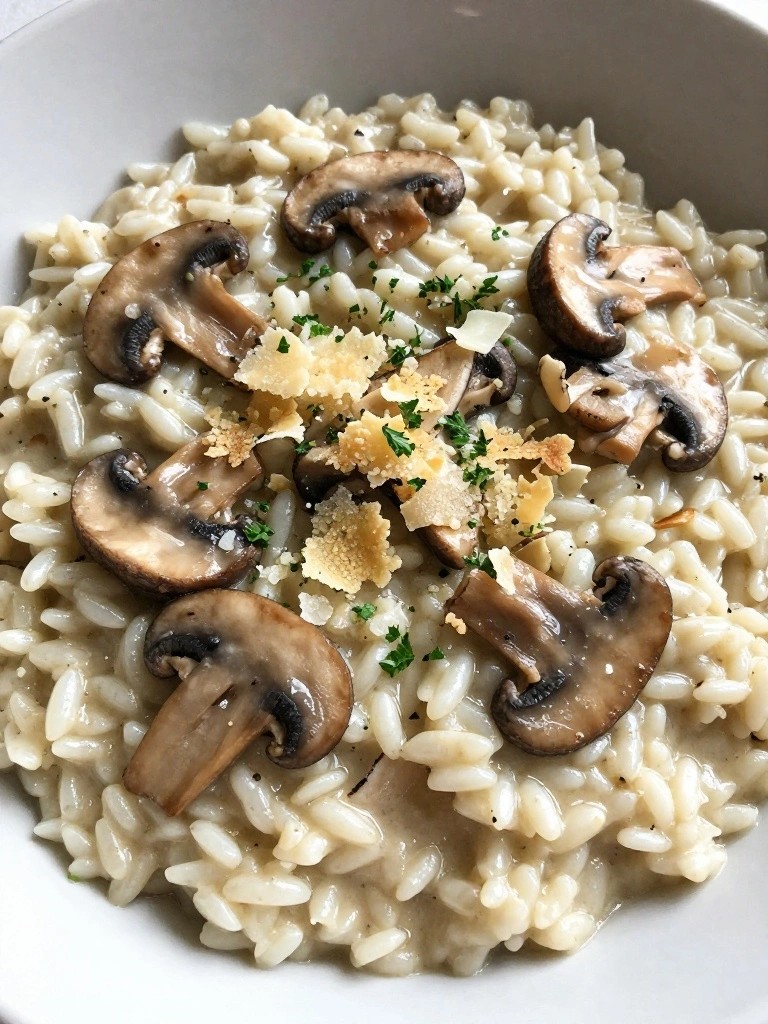
Truffle Mushroom Risotto with Parmesan Crisps
This risotto turns a simple bowl of rice into something guests remember. Earthy mushrooms and a light truffle note give it depth, while the Parmesan crisps on top add a crisp contrast that feels special without extra work.
It suits cool evenings when you want comfort food that still looks thoughtful on the plate. The texture stays creamy from steady stirring, and the flavors stay balanced so the dish feels warm and satisfying rather than heavy.

Equipment
- Large skillet
- Saucepan
- Baking sheet
- Ladle
- Wooden spoon
Ingredients
- 1 1/2 cups Arborio rice
- 1 pound mixed mushrooms (cremini and shiitake), sliced
- 5 cups vegetable broth
- 1 medium onion, finely chopped
- 3 cloves garlic, minced
- 1/2 cup dry white wine
- 4 tablespoons unsalted butter
- 1 cup grated Parmesan cheese, divided
- 2 tablespoons truffle oil
- Salt and black pepper to taste
- 2 tablespoons chopped fresh parsley
- 1/2 cup grated Parmesan cheese for the crisps
Instructions
- Preheat the oven to 400 degrees. Spoon small mounds of the extra 1/2 cup Parmesan onto a lined baking sheet and flatten them slightly. Bake for 5 to 7 minutes until golden and crisp, then set aside to cool.
- Warm the vegetable broth in a saucepan over low heat and keep it hot.
- Melt 2 tablespoons of butter in a large skillet over medium heat. Add the sliced mushrooms and cook until they release their liquid and turn golden. Season with a pinch of salt and set the mushrooms aside.
- In the same skillet, melt the remaining 2 tablespoons of butter. Add the chopped onion and cook until soft. Stir in the minced garlic and cook for one minute more.
- Add the Arborio rice and stir for two minutes until the grains look lightly toasted. Pour in the white wine and stir until it is mostly absorbed.
- Add the hot broth one ladle at a time, stirring often. Wait until each addition is absorbed before adding the next. Continue until the rice is tender and creamy, about 18 to 20 minutes.
- Stir the cooked mushrooms back into the rice. Add 3/4 cup of the grated Parmesan, the truffle oil, and a few grinds of black pepper. Taste and adjust salt if needed.
- Spoon the risotto into bowls. Break the Parmesan crisps into pieces and scatter them over each serving. Finish with the chopped parsley.
Notes
Cuisine: Italian
Equipment: Large skillet, Saucepan, Baking sheet, Ladle, Wooden spoon
Smoky Bacon and Leek Potato Gratin
This Smoky Bacon and Leek Potato Gratin layers thin potato slices with crisp bacon and soft leeks in a lightly spiced cream sauce. The result is a warm, golden-topped dish that feels both familiar and a bit elevated for guests.
It works well as a side for roasted meats or a simple main with a green salad. The smoky bacon balances the mild sweetness of the leeks while the creamy potatoes stay tender underneath a cheesy crust.


Equipment
- Baking Dish
- Large Skillet
- Sharp Knife
Ingredients
- 4 large Yukon gold potatoes, thinly sliced
- 6 slices bacon, chopped
- 2 leeks, white and light green parts thinly sliced
- 1 cup heavy cream
- 1 cup grated Gruyere cheese
- 2 garlic cloves, minced
- 1 tsp smoked paprika
- 2 tbsp butter
- Salt and black pepper
- Fresh thyme sprigs
Instructions
- Preheat the oven to 375°F and use 1 tablespoon of butter to grease a medium baking dish.
- Cook the chopped bacon in a skillet over medium heat until crisp. Remove the bacon with a slotted spoon and leave 1 tablespoon of fat in the pan.
- Add the sliced leeks and minced garlic to the skillet. Cook for 4 minutes until the leeks soften.
- Stir the smoked paprika, salt, and pepper into the heavy cream.
- Layer half the potato slices in the baking dish. Scatter half the bacon and leek mixture over the potatoes. Repeat with the remaining potatoes, bacon, and leeks.
- Pour the seasoned cream evenly over the layers. Dot the top with the remaining tablespoon of butter and sprinkle the grated Gruyere cheese over everything.
- Bake for 45 to 50 minutes until the potatoes are tender and the top is golden brown. Let the gratin rest for 5 minutes, then garnish with fresh thyme sprigs before serving.
Notes
Cuisine: American
Equipment: Baking Dish, Large Skillet, Sharp Knife
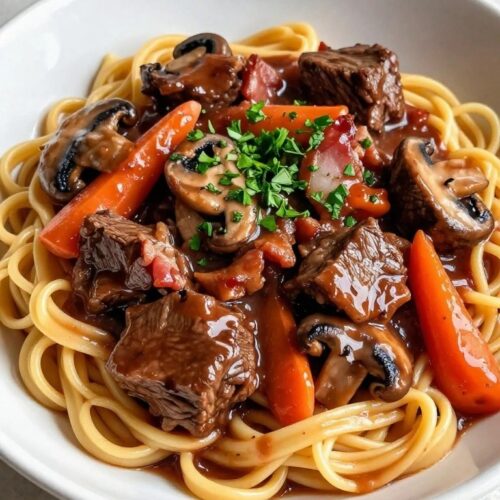
Classic Beef Bourguignon over Buttery Egg Noodles
This beef bourguignon turns simple ingredients into a rich stew that simmers until the meat is fork tender. The red wine sauce picks up deep flavor from bacon and herbs, then gets ladled over wide egg noodles tossed in butter. It works well for a weekend dinner with guests because most of the work happens in one pot while you set the table.
The finished dish has a silky sauce that clings to each noodle and a savory aroma that fills the kitchen. Carrots and mushrooms add a little sweetness and earthiness without overpowering the beef.

Equipment
- Dutch Oven
- Large Pot
- Wooden Spoon
Ingredients
- 2 pounds beef chuck roast, cut into 1-inch cubes
- 4 ounces bacon, chopped
- 1 large onion, diced
- 2 carrots, sliced into 1/2-inch pieces
- 8 ounces cremini mushrooms, quartered
- 2 cloves garlic, minced
- 2 tablespoons all-purpose flour
- 2 cups dry red wine
- 2 cups beef broth
- 2 sprigs fresh thyme
- 1 bay leaf
- 1 teaspoon salt
- 1/2 teaspoon black pepper
- 12 ounces egg noodles
- 4 tablespoons butter
- 2 tablespoons chopped fresh parsley
Instructions
- Cook the chopped bacon in a large Dutch oven over medium heat until it releases its fat and turns crisp. Remove the bacon with a slotted spoon and set it aside, leaving the fat in the pot.
- Season the beef cubes with salt and pepper. Brown them in the bacon fat in batches so they do not crowd the pot. Turn the pieces until they develop a deep brown crust on all sides, then transfer them to a plate.
- Add the diced onion and sliced carrots to the pot. Cook for 5 minutes until the onion softens. Stir in the mushrooms and garlic and cook 2 minutes more.
- Sprinkle the flour over the vegetables and stir for 1 minute to remove the raw taste. Pour in the red wine and scrape the bottom of the pot to loosen any browned bits.
- Return the beef and bacon to the pot. Add the beef broth, thyme sprigs, and bay leaf. Bring the mixture to a gentle simmer, then cover and cook on low for 2 hours until the beef is very tender.
- While the stew finishes, cook the egg noodles in a large pot of salted boiling water according to package directions. Drain them and return them to the pot. Add the butter and stir until the noodles are coated.
- Remove the thyme sprigs and bay leaf from the stew. Taste and adjust salt if needed. Spoon the buttery noodles into bowls and top with the beef and sauce. Sprinkle with chopped parsley before serving.
Notes
Cuisine: French
Equipment: Dutch Oven, Large Pot, Wooden Spoon
Spinach and Artichoke Stuffed Shells in Tomato Cream Sauce
This dish combines tender pasta shells with a creamy spinach and artichoke filling, all baked under a rich tomato cream sauce. It offers the cozy feel of classic comfort food while looking polished enough to serve to guests.
The balance of cheesy filling and bright tomato sauce makes it a reliable choice for dinner parties or family gatherings. Guests enjoy the familiar flavors, and the make-ahead nature keeps the host relaxed.


Equipment
- Large pot
- Large skillet
- 9×13 baking dish
- Mixing bowl
Ingredients
- 16 jumbo pasta shells
- 10 ounces frozen spinach, thawed and squeezed dry
- 1 (14-ounce) can artichoke hearts, drained and chopped
- 1 cup ricotta cheese
- 1 cup shredded mozzarella cheese, divided
- 1/2 cup grated Parmesan cheese
- 2 tablespoons olive oil
- 1 small onion, diced
- 3 cloves garlic, minced
- 1 (28-ounce) can crushed tomatoes
- 1/2 cup heavy cream
- Salt and black pepper to taste
- Fresh basil leaves for garnish
Instructions
- Bring a large pot of salted water to a boil and cook the jumbo shells until just al dente. Drain and set aside to cool slightly.
- In a mixing bowl, combine the spinach, artichoke hearts, ricotta, half the mozzarella, and the Parmesan. Season with salt and pepper, then stir until evenly mixed.
- Heat the olive oil in a large skillet over medium heat. Add the onion and cook until softened, then stir in the garlic and cook for one minute more.
- Pour in the crushed tomatoes and simmer for 10 minutes. Stir in the heavy cream and season with salt and pepper. Remove from heat.
- Spoon the spinach mixture into each cooked shell. Spread a thin layer of sauce in the bottom of a baking dish, then arrange the stuffed shells on top.
- Pour the remaining sauce over the shells and sprinkle with the rest of the mozzarella. Bake at 375°F for 25 minutes until the cheese is melted and bubbly.
- Let the dish rest for five minutes, then scatter fresh basil over the top before serving.
Notes
Cuisine: Italian
Equipment: Large pot, Large skillet, 9×13 baking dish, Mixing bowl
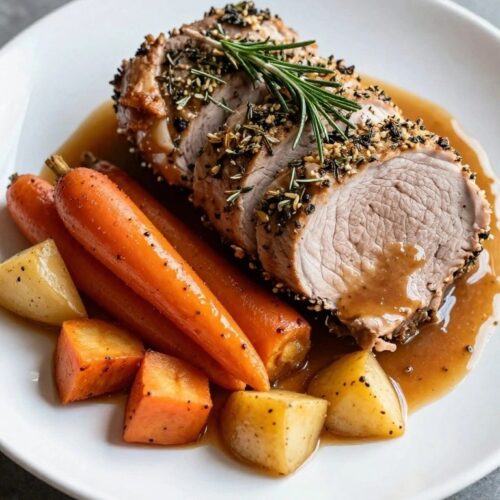
Herb-Crusted Pork Tenderloin with Apple Cider Gravy and Roasted Root Vegetables
This herb-crusted pork tenderloin offers a cozy centerpiece that still feels special enough for company. The juicy meat carries a savory herb crust while roasted root vegetables add natural sweetness and hearty texture. A light apple cider gravy brings a gentle tang that pulls the whole plate together.
It works well for fall or winter gatherings when you want comfort food that looks thoughtful on the table. Guests enjoy the mix of tender pork, caramelized vegetables, and smooth gravy without any fussy steps.

Equipment
- Roasting pan
- Oven
- Saucepan
- Whisk
Ingredients
- 1 pork tenderloin (1 to 1.5 pounds)
- 3 tablespoons olive oil, divided
- 2 cloves garlic, minced
- 1 tablespoon fresh rosemary, chopped
- 1 tablespoon fresh thyme, chopped
- 1 tablespoon fresh parsley, chopped
- 1 teaspoon salt
- 1/2 teaspoon black pepper
- 4 cups mixed root vegetables (carrots, parsnips, and potatoes), cut into 1-inch pieces
- 1 cup apple cider
- 1 cup chicken broth
- 2 tablespoons all-purpose flour
- 2 tablespoons butter
Instructions
- Heat the oven to 400 degrees. Toss the root vegetables with 2 tablespoons olive oil, half the salt, and half the pepper in a large roasting pan.
- Mix the remaining olive oil with the garlic, rosemary, thyme, parsley, and the rest of the salt and pepper to form a paste.
- Pat the pork tenderloin dry and rub the herb paste evenly over the surface.
- Nestle the pork into the center of the vegetables in the roasting pan.
- Roast until the pork reaches an internal temperature of 145 degrees and the vegetables are tender and browned at the edges.
- Remove the pork to a cutting board and let it rest while you make the gravy.
- Place the roasting pan on the stovetop over medium heat or pour the pan juices into a saucepan. Add the butter and flour, stirring to form a roux.
- Slowly whisk in the apple cider and chicken broth, scraping up any browned bits. Simmer until the gravy thickens to a light coating consistency.
- Slice the rested pork and serve it with the roasted vegetables and warm gravy.
Notes
Cuisine: American
Equipment: Roasting pan, Oven, Saucepan, Whisk
Creamy Garlic Butter Shrimp and Gouda Grits
This dish pairs plump shrimp cooked in garlic butter with rich, cheesy grits that turn extra creamy from a touch of cream and plenty of Gouda. It brings warmth to the table without demanding hours in the kitchen, making it a strong choice when you want to serve guests something that feels both familiar and a little special. The soft, cheesy base balances the bright, savory shrimp for a meal that stays satisfying from first bite to last.
It works well for weekend dinners or small gatherings where you need a main that holds up if conversation runs long. The flavors stay balanced and comforting, with the nuttiness of Gouda adding depth to the classic garlic butter profile.


Equipment
- Medium saucepan
- Large skillet
- Whisk
- Wooden spoon
Ingredients
- 1 cup stone-ground grits
- 4 cups chicken broth
- 1 cup shredded Gouda cheese
- 4 tablespoons butter, divided
- 1 pound large shrimp, peeled and deveined
- 4 garlic cloves, minced
- 1/4 cup heavy cream
- 1/2 teaspoon salt, plus more to taste
- 1/4 teaspoon black pepper
- 2 tablespoons chopped fresh parsley
Instructions
- Bring the chicken broth and 1/2 teaspoon salt to a boil in a medium saucepan. Slowly whisk in the grits, then reduce heat to low and cook for 20 to 25 minutes, stirring often until thick and tender.
- While the grits cook, melt 2 tablespoons butter in a large skillet over medium heat. Add the minced garlic and cook for 1 minute until fragrant. Add the shrimp, season with black pepper, and cook 2 to 3 minutes per side until pink and opaque. Remove the shrimp from the skillet and set aside.
- Once the grits are done, stir in the remaining 2 tablespoons butter, heavy cream, and shredded Gouda until the cheese melts and the mixture turns smooth and creamy. Taste and adjust salt if needed.
- Return the shrimp to the skillet with any juices and warm through for 1 minute. Spoon the grits into bowls, top with the garlic butter shrimp, and finish with chopped parsley.
Notes
Cuisine: American
Equipment: Medium saucepan, Large skillet, Whisk, Wooden spoon
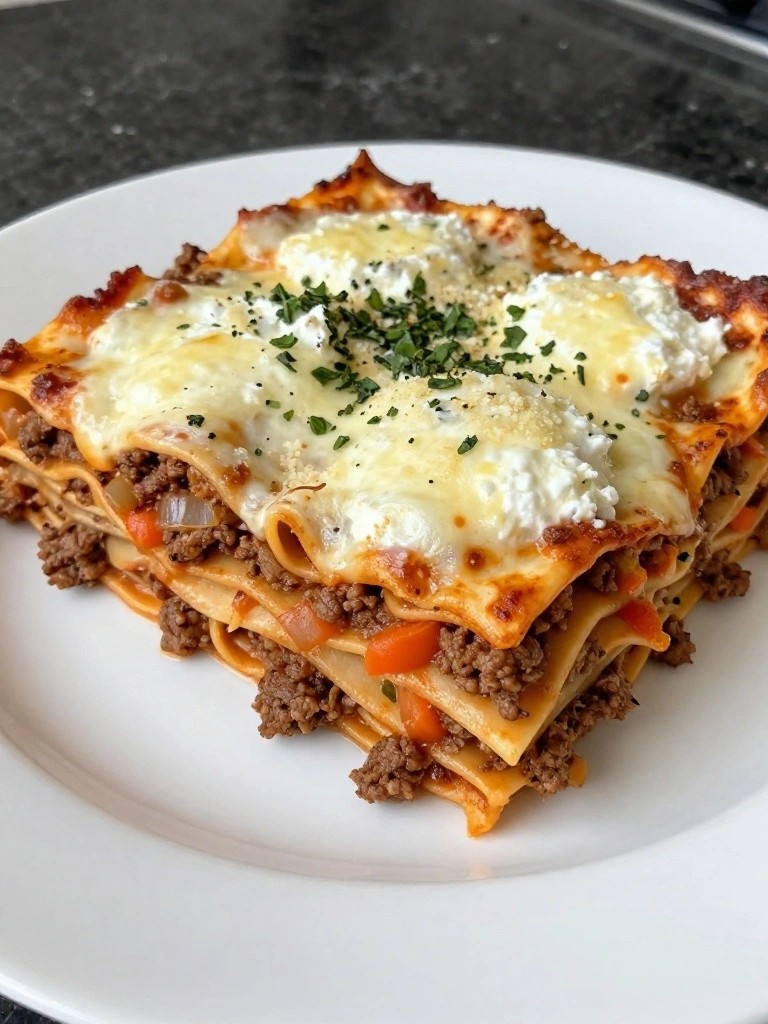
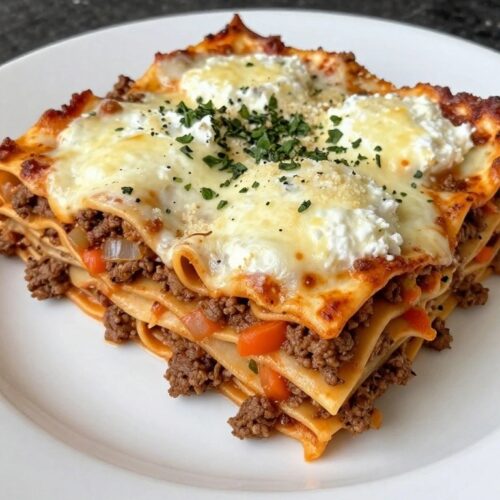
Hearty Lasagna Bolognese with Fresh Basil Ricotta Layers
This lasagna brings together a slow-simmered meat sauce and creamy ricotta dotted with fresh basil. The result is a dish with deep savory flavor and bright herb notes that feels special enough for guests yet comforting on a cold evening.
It works well for dinner parties because most of the work happens in advance. You can assemble it earlier in the day, then simply bake it when everyone arrives. The layers stay distinct, with tender noodles, rich sauce, and pockets of basil-flecked cheese throughout.
Equipment
- Large skillet
- Mixing bowl
- 8×8 baking dish
- Oven
Ingredients
- 8 lasagna noodles
- 1 pound ground beef
- 1 onion, diced
- 1 carrot, diced
- 1 celery stalk, diced
- 3 cloves garlic, minced
- 1 can (15 oz) crushed tomatoes
- 1 teaspoon dried oregano
- Salt and pepper
- 2 tablespoons olive oil
- 1 cup ricotta cheese
- 1/4 cup chopped fresh basil
- 2 cups shredded mozzarella cheese
- 1/2 cup grated Parmesan cheese
Instructions
- Heat the olive oil in a large skillet over medium heat. Add the onion, carrot, and celery and cook until softened, about 5 minutes.
- Add the ground beef and garlic. Cook until the beef is browned, breaking it up with a spoon as it cooks. Season with salt, pepper, and oregano.
- Pour in the crushed tomatoes and simmer the sauce for 15 minutes until it thickens slightly. Remove from heat.
- In a bowl, stir together the ricotta cheese and chopped fresh basil. Set aside.
- Preheat the oven to 375°F. Spread a thin layer of Bolognese sauce in the bottom of an 8×8 baking dish.
- Layer 2 noodles over the sauce, followed by one-third of the remaining sauce, one-third of the ricotta mixture, and one-quarter of the mozzarella and Parmesan. Repeat the layers two more times.
- Finish with a final layer of noodles and the remaining sauce and cheeses. Cover with foil and bake for 25 minutes.
- Remove the foil and bake 10 minutes more until the cheese is bubbly and lightly browned. Let the lasagna rest 10 minutes before slicing.
Notes
Cuisine: Italian
Equipment: Large skillet, Mixing bowl, 8×8 baking dish, Oven