


Halloween often means plenty of candy around the house. These savory appetizers give you some options that are not sweet. I gathered recipes that are simple to put together with everyday ingredients. They work for parties or quick snacks before the trick or treating starts. Each one is designed to be practical and ready when you need it.
Helpful Tips Before You Start
These tips will help your savory appetizers stand out against the sweets.
Make Components Ahead
Prepare dips, fillings, or doughs the day before. This cuts down on last-minute work and keeps everything fresh for serving.
Keep Portions Small
Aim for two-bite sizes that guests can eat while mingling. Smaller pieces also let people sample several options without overdoing it.
Add Crunch to Creamy Bases
Top spreads or cheeses with toasted nuts, seeds, or crispy bits. The texture contrast makes each bite more satisfying next to rich candy.
Season Boldly
Use extra herbs, spices, or salt since sweet flavors can dull the palate. Strong savory notes help these appetizers hold their own.
Cheesy Mummy Jalapeño Poppers
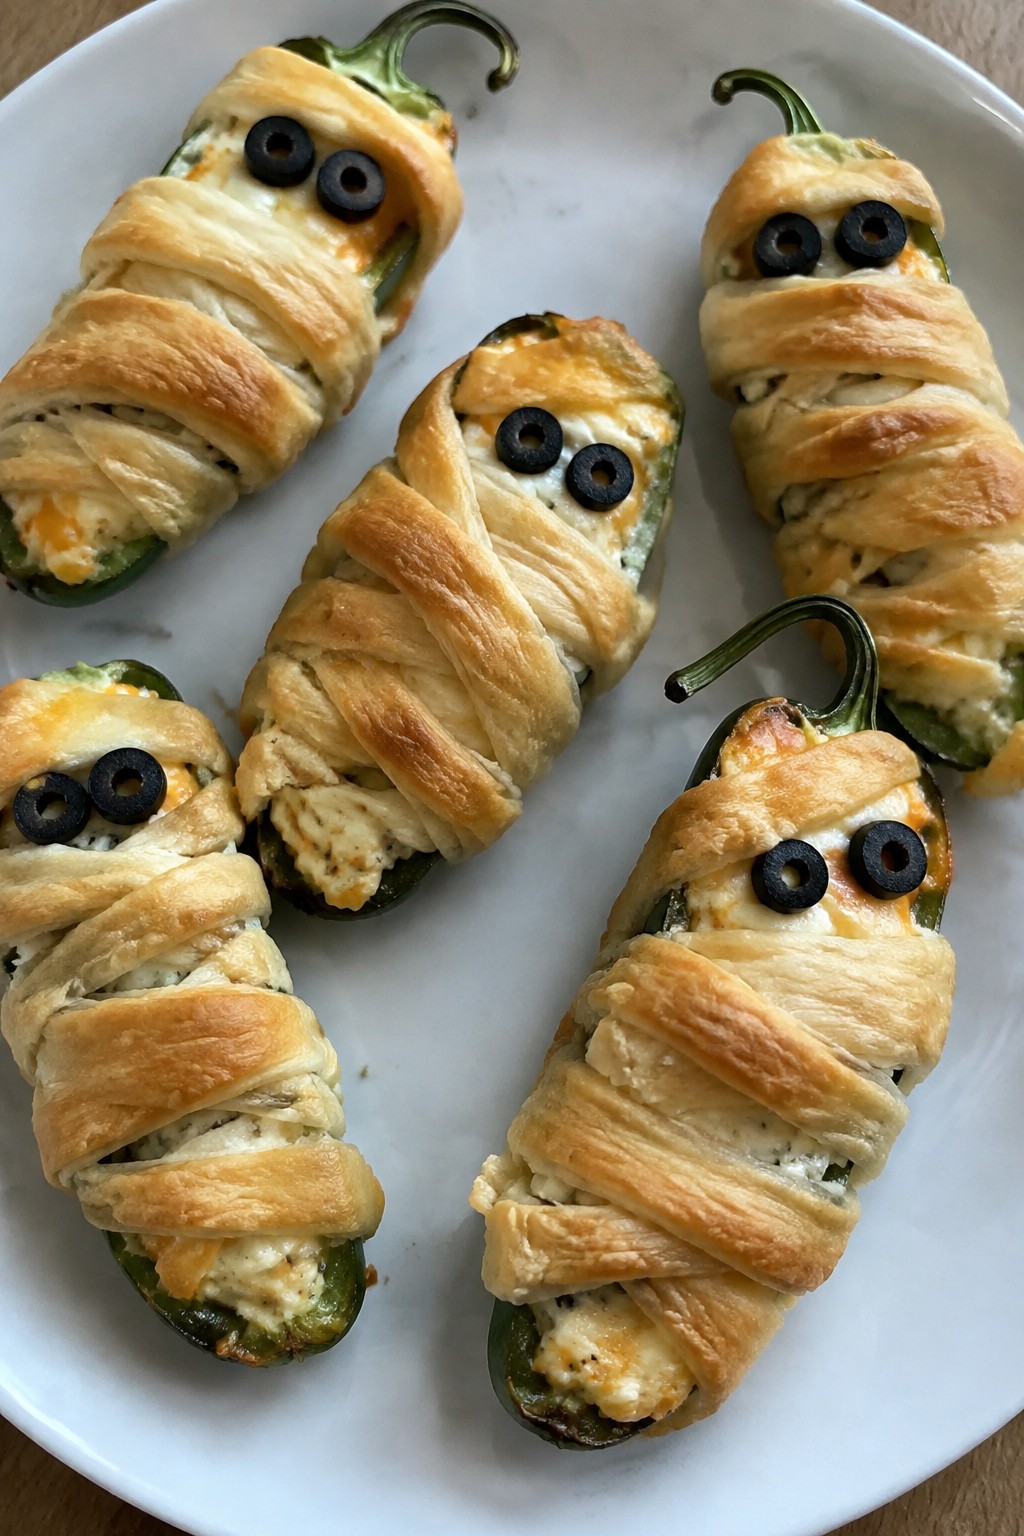
These poppers stuff fresh jalapeños with a simple cheese blend and wrap them in dough strips to form a mummy shape. They fit right into a Halloween spread when you want something savory to offset all the sweets.
The result gives a spicy kick from the peppers, a creamy center, and a light golden crust from the dough. They come together with basic steps and bake on one pan.
Equipment
- Baking sheet
- Mixing bowl
- Knife
Ingredients
- 8 large jalapeño peppers, halved lengthwise and seeded
- 8 ounces cream cheese, softened
- 1 cup shredded cheddar cheese
- 1 teaspoon garlic powder
- 1/4 teaspoon salt
- 1 package refrigerated crescent roll dough
- 16 thin slices black olives
Instructions
- Preheat the oven to 375 degrees and line a baking sheet with parchment paper.
- In a mixing bowl, combine the softened cream cheese, shredded cheddar cheese, garlic powder, and salt until smooth.
- Spoon the cheese mixture into each jalapeño half and fill them evenly.
- Unroll the crescent roll dough on a lightly floured surface and cut it into thin strips.
- Wrap each filled jalapeño half with dough strips, leaving small gaps to show the green pepper underneath.
- Place two olive slices on each popper to form eyes.
- Arrange the wrapped poppers on the prepared baking sheet and bake for 15 to 18 minutes until the dough turns golden.
- Remove from the oven and let them cool for a few minutes before serving.
Notes
Cuisine: American
Equipment: Baking sheet, Mixing bowl, Knife
Olive Spider Deviled Eggs
These olive spider deviled eggs bring a simple savory option to a Halloween table. The creamy filling offers a tangy contrast to all the sweet candy, while the olive spiders give each piece a playful look without extra work.
They suit small gatherings or potlucks because they hold up well at room temperature and travel easily. The smooth yolk mixture balances the firm egg white and the salty bite from the olives.


Equipment
- Pot
- Mixing Bowl
- Knife
Ingredients
- 4 large eggs
- 2 tablespoons mayonnaise
- 1 teaspoon Dijon mustard
- 1/4 teaspoon salt
- 1/8 teaspoon black pepper
- 8 black olives
- 1/4 teaspoon paprika
Instructions
- Place the eggs in a pot and cover with cold water. Bring to a boil, then reduce heat and simmer for 10 minutes.
- Drain the eggs and transfer them to a bowl of ice water. Let them cool for 5 minutes, then peel off the shells.
- Slice each egg in half lengthwise. Scoop the yolks into a mixing bowl and set the whites aside on a plate.
- Mash the yolks with a fork. Stir in the mayonnaise, Dijon mustard, salt, and black pepper until the mixture is smooth.
- Spoon or pipe the yolk mixture back into the egg white halves.
- Cut 4 olives in half lengthwise to form spider bodies. Slice the remaining 4 olives into thin strips to create legs. Place one olive half in the center of each filled egg and arrange 4 to 6 strips around it as legs.
- Sprinkle the eggs lightly with paprika before serving.
Notes
Cuisine: American
Equipment: Pot, Mixing Bowl, Knife
Crispy Bat Wing Buffalo Drumettes
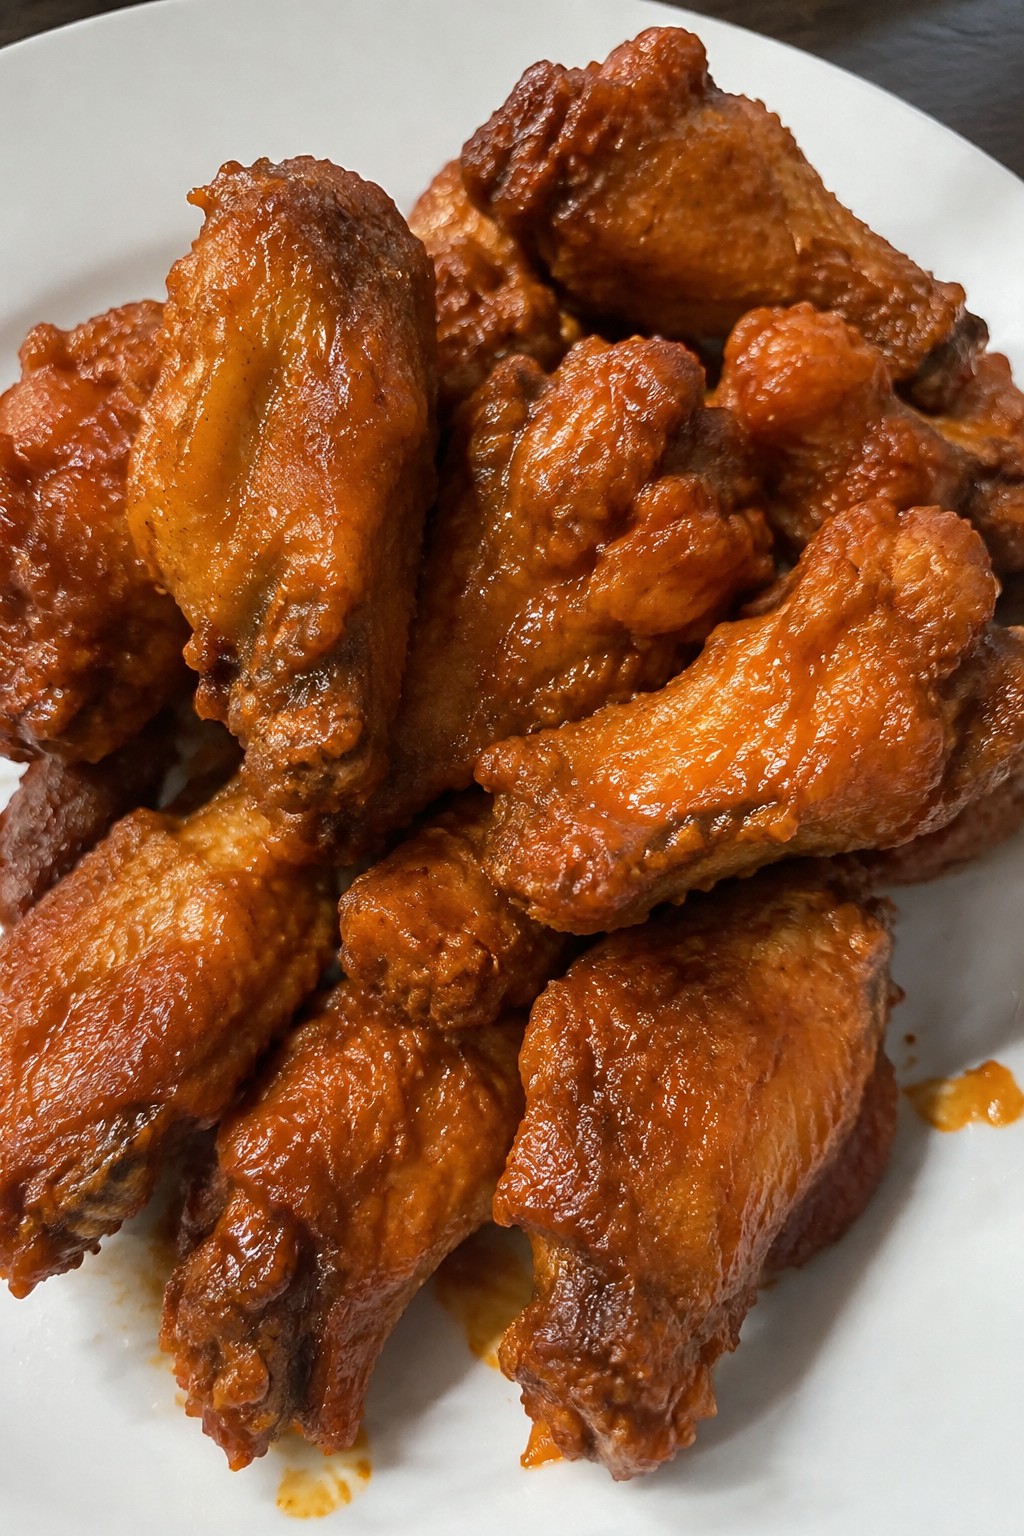
These drumettes get their name from the way the meat fans out during baking, creating a wing shape that fits right into a Halloween spread. They deliver the classic spicy buffalo kick with a crunchy exterior that holds up well next to sweet treats. Serve them hot so the sauce stays glossy and the skin stays crisp.
This recipe works best as a make-ahead party starter. You can prep the wings earlier in the day and finish the sauce right before guests arrive. The heat level stays balanced rather than overwhelming, so they pair nicely with cooler dips and vegetable sides.

Equipment
- Baking Sheet
- Large Bowl
- Small Saucepan
Ingredients
- 2 pounds chicken drumettes
- 1 tablespoon baking powder
- 1 teaspoon salt
- 1 teaspoon garlic powder
- 1/2 teaspoon paprika
- 1/2 teaspoon black pepper
- 1/2 cup Frank’s RedHot sauce
- 4 tablespoons unsalted butter
Instructions
- Heat the oven to 425 degrees and line a baking sheet with parchment paper or foil.
- Pat the drumettes dry with paper towels. In a large bowl, mix the baking powder, salt, garlic powder, paprika, and black pepper.
- Toss the drumettes in the seasoning mix until evenly coated. Arrange them in a single layer on the prepared baking sheet.
- Bake for 40 to 45 minutes, flipping the pieces halfway through, until the skin is deep golden and crisp.
- While the drumettes bake, melt the butter in a small saucepan over low heat. Stir in the hot sauce until combined and remove from heat.
- Transfer the hot drumettes to a clean bowl and pour the sauce over them. Toss gently until every piece is coated.
Notes
Cuisine: American
Equipment: Baking Sheet, Large Bowl, Small Saucepan
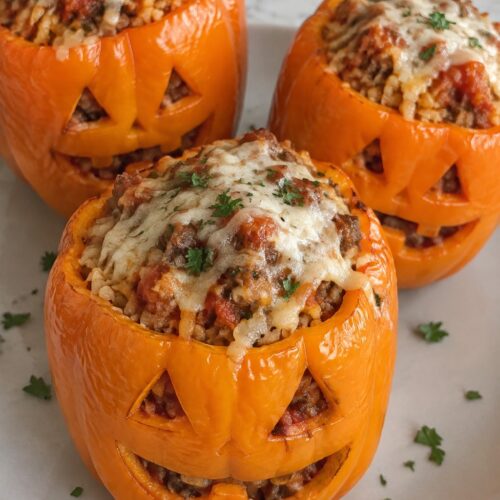
Jack-o’-Lantern Sausage-Stuffed Peppers
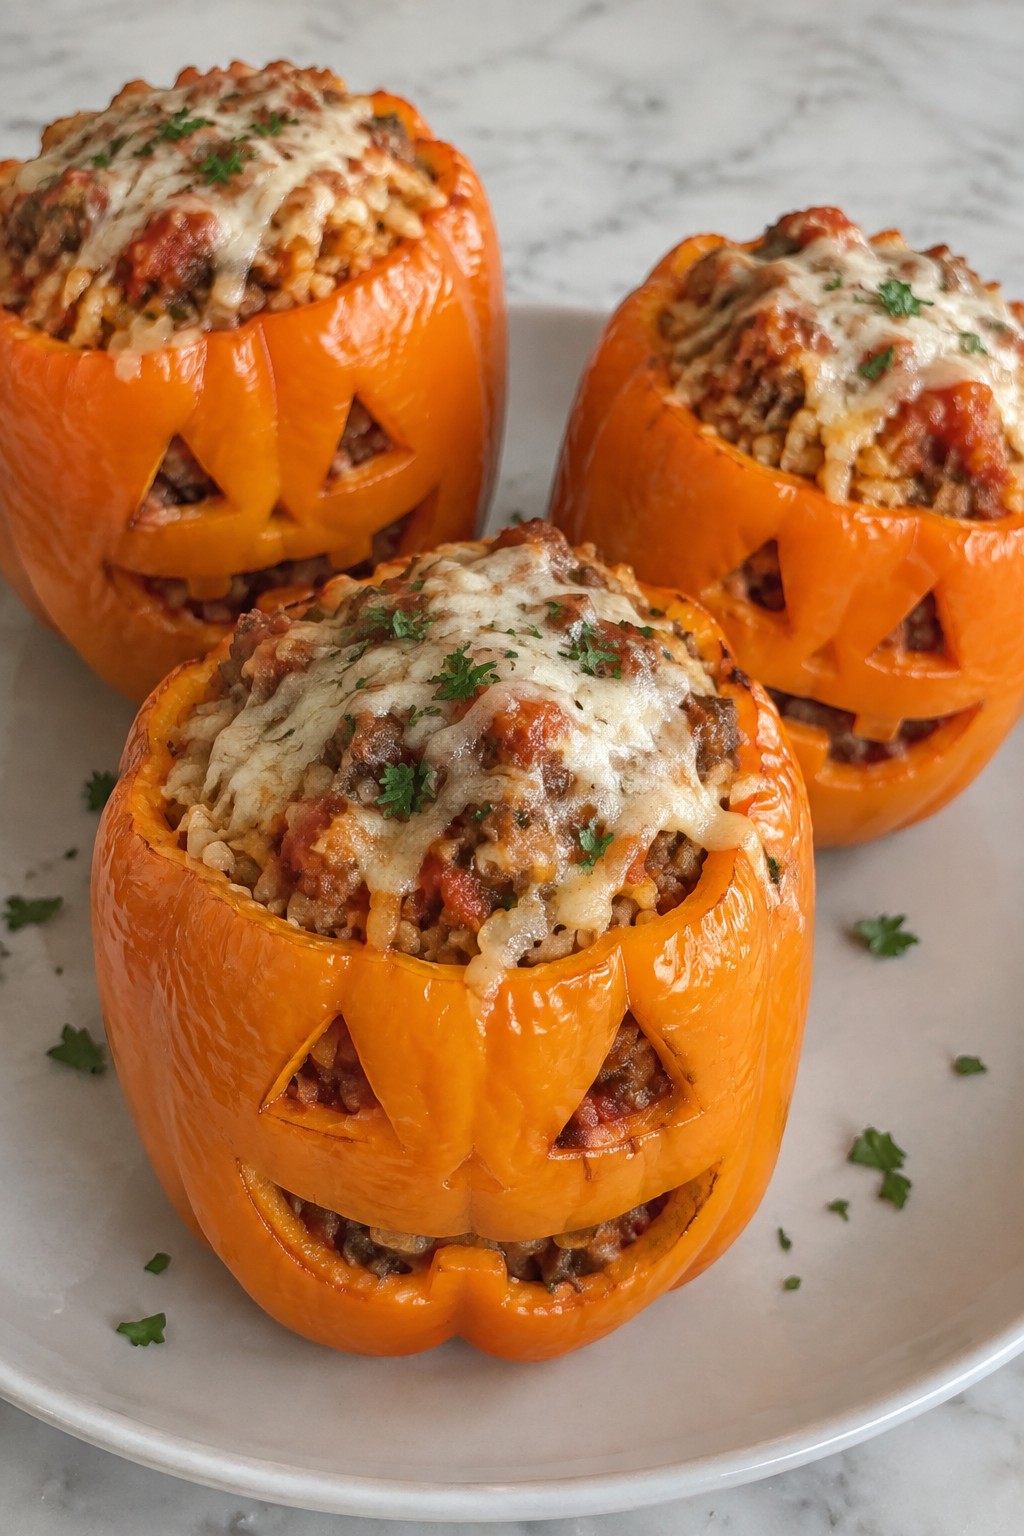
These stuffed peppers bring a playful Halloween touch to the table with carved faces that make them stand out at any gathering. They work well as a savory option when candy is everywhere, offering a hearty bite that feels satisfying without being heavy. The peppers turn tender in the oven while the filling stays moist and flavorful from the sausage and cheese.
Equipment
- Baking Dish
- Large Skillet
- Sharp Knife
Ingredients
- 4 large orange bell peppers
- 1 pound ground Italian sausage
- 1 small onion, diced
- 2 cloves garlic, minced
- 1 cup cooked rice
- 1 cup marinara sauce
- 1 cup shredded mozzarella cheese
- 1 teaspoon Italian seasoning
- Salt and pepper to taste
- Fresh parsley, chopped, for garnish
Instructions
- Preheat the oven to 375 degrees. Cut the tops off each bell pepper and remove the seeds and membranes. Use a small knife to carve simple jack-o’-lantern faces into the front of each pepper.
- Heat a large skillet over medium heat. Add the ground Italian sausage and cook until browned, breaking it up with a spoon as it cooks. Drain any excess fat.
- Add the diced onion and minced garlic to the skillet. Cook for 3 to 4 minutes until the onion softens.
- Stir in the cooked rice, marinara sauce, Italian seasoning, salt, and pepper. Mix well and let it simmer for 2 minutes. Remove from heat and stir in half of the shredded mozzarella cheese.
- Place the carved peppers in a baking dish. Spoon the sausage mixture evenly into each pepper. Top with the remaining mozzarella cheese.
- Bake for 25 to 30 minutes until the peppers are tender and the cheese is melted and lightly browned. Sprinkle with chopped parsley before serving.
Notes
Cuisine: American
Equipment: Baking Dish, Large Skillet, Sharp Knife
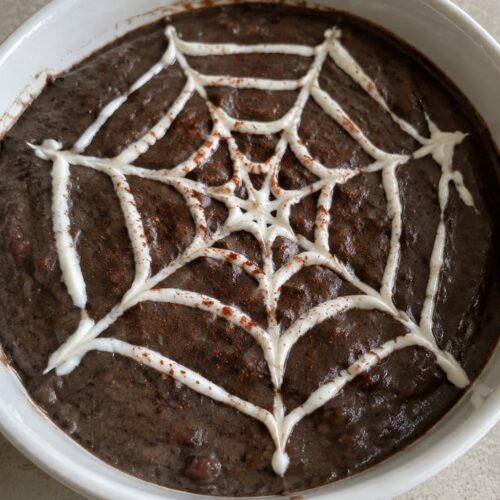
Spiderweb Black Bean and Cheese Dip
This black bean and cheese dip brings a warm, spiced base that stands up to sweet treats on Halloween night. The creamy texture comes from blending beans with melted cheese, while a sour cream spiderweb on top gives it a simple seasonal look that still feels savory and satisfying.
It works well as an early evening starter before trick-or-treating begins. Guests can scoop it with sturdy chips for a filling bite that balances out the candy later.

Equipment
- Skillet
- Potato masher
- Shallow serving dish
- Zip-top bag
Ingredients
- 1 (15-ounce) can black beans, drained and rinsed
- 1 cup shredded Monterey Jack cheese
- 1/2 cup sour cream, divided
- 1 teaspoon ground cumin
- 1/2 teaspoon smoked paprika
- 1 garlic clove, minced
- 2 tablespoons olive oil
- 1/4 teaspoon salt
- Tortilla chips, for serving
Instructions
- Heat the olive oil in a skillet over medium heat. Add the minced garlic, cumin, smoked paprika, and salt. Cook for 1 minute until fragrant.
- Add the black beans to the skillet. Mash them with a potato masher or fork until mostly smooth but still slightly chunky. Stir in 3/4 cup of the shredded cheese until it melts and combines.
- Remove the skillet from heat and stir in 2 tablespoons of the sour cream to make the mixture creamier.
- Transfer the bean mixture to a shallow serving dish and spread it evenly. Sprinkle the remaining 1/4 cup cheese over the top.
- Place the remaining sour cream in a small zip-top bag and snip off one corner. Pipe four concentric circles on the dip surface. Drag a toothpick from the center outward in straight lines to form a spiderweb pattern.
- Serve warm with tortilla chips.
Notes
Cuisine: Mexican
Equipment: Skillet, Potato masher, Shallow serving dish, Zip-top bag
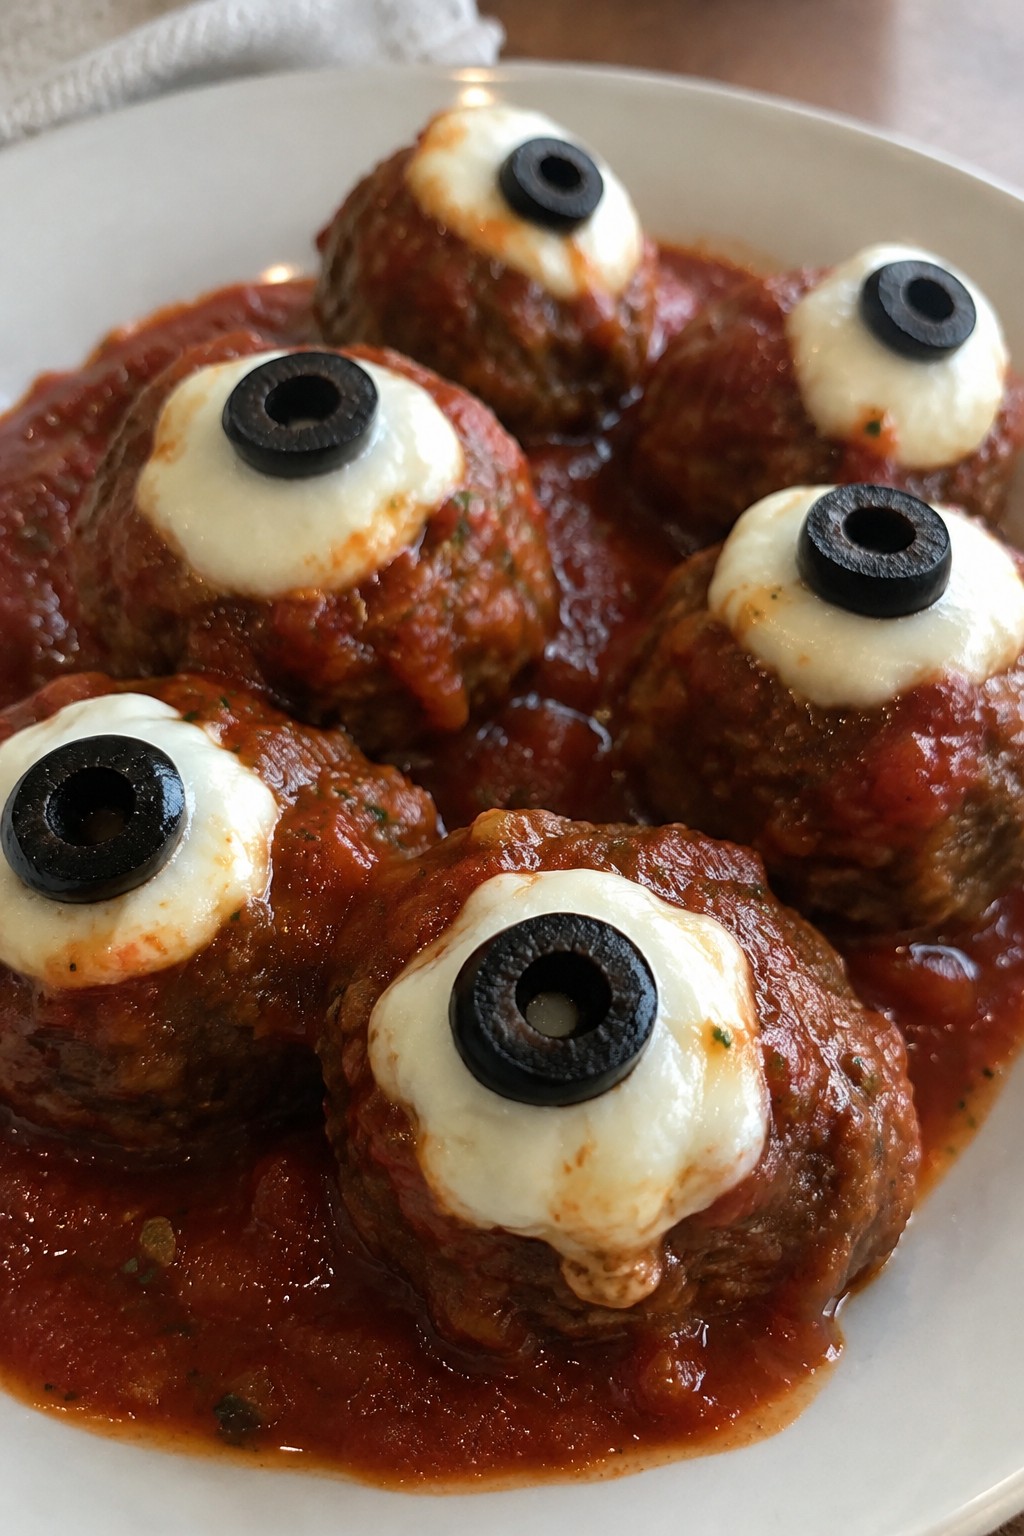
Meatball Eyeballs in Marinara Sauce
These meatball eyeballs offer a simple way to add a savory option to a Halloween table. Tender meatballs cook in marinara sauce and get finished with cheese rounds and olive halves that form the eye details. The dish keeps things warm and filling while the rest of the night leans sweet.
The taste stays grounded in classic Italian flavors with seasoned beef and tomato sauce. Each bite gives a soft center and a bit of chew from the olives on top.
Equipment
- Mixing Bowl
- Baking Sheet
- Large Skillet
Ingredients
- 1 pound ground beef
- 1/2 cup breadcrumbs
- 1 large egg
- 1 teaspoon Italian seasoning
- 1/2 teaspoon salt
- 1/4 teaspoon black pepper
- 2 cups marinara sauce
- 4 ounces mozzarella cheese, cut into small rounds
- 12 black olives, halved
Instructions
- Preheat the oven to 400 degrees. In a mixing bowl combine the ground beef, breadcrumbs, egg, Italian seasoning, salt, and black pepper until evenly mixed.
- Shape the mixture into 12 meatballs and place them on a baking sheet. Bake for 15 to 18 minutes until the centers reach 160 degrees.
- While the meatballs bake, pour the marinara sauce into a large skillet and warm it over medium heat.
- Add the cooked meatballs to the skillet and turn them gently to coat with sauce. Let them simmer for 3 minutes.
- Place one mozzarella round on each meatball, then set an olive half in the center of the cheese to form the eye.
Notes
Cuisine: Italian
Equipment: Mixing Bowl, Baking Sheet, Large Skillet
Witch Finger Prosciutto-Wrapped Asparagus
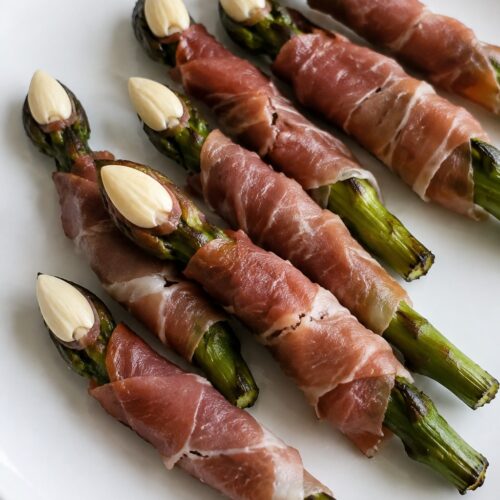
These asparagus bundles turn a simple combination into a fun finger-shaped appetizer that fits right into a Halloween spread. The salty prosciutto adds a savory bite that helps offset all the sweet candy, while the asparagus stays tender with a slight crisp at the ends.
The finished dish offers a nice mix of salty, earthy flavors with a bit of crunch from the nut at the tip. It works well as a quick starter before a meal or as part of a larger savory table.

Equipment
- Baking sheet
- Mixing bowl
- Oven
Ingredients
- 16 asparagus spears, trimmed
- 8 slices prosciutto, halved lengthwise
- 2 tablespoons olive oil
- 1/4 teaspoon salt
- 1/4 teaspoon black pepper
- 16 blanched almonds
Instructions
- Preheat the oven to 400 degrees and line a baking sheet with parchment paper.
- Place the trimmed asparagus in a bowl and toss with the olive oil, salt, and black pepper until evenly coated.
- Wrap each asparagus spear with one halved prosciutto slice, leaving the tip exposed.
- Press one blanched almond onto the exposed tip of each wrapped spear to form the fingernail.
- Arrange the wrapped spears on the prepared baking sheet in a single layer.
- Bake for 10 to 12 minutes until the prosciutto is crisp and the asparagus is tender.
Notes
Cuisine: Italian
Equipment: Baking sheet, Mixing bowl, Oven
Ghostly Parmesan Cauliflower Bites
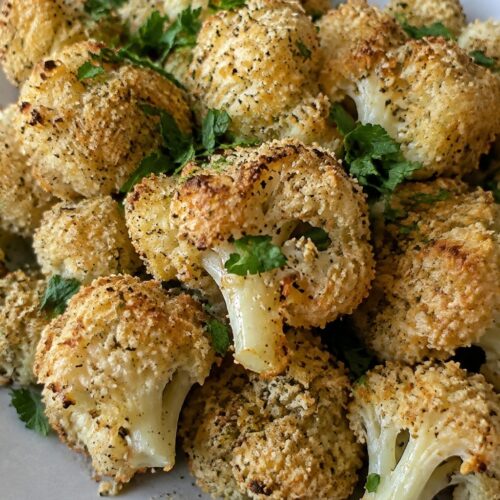
These cauliflower bites deliver a crisp Parmesan crust around tender florets. They make a warm, savory option for Halloween gatherings when you want something hearty to offset all the sweets. The flavor is garlicky and cheesy with a light crunch from the oven bake.
The white coating from the cheese gives them a simple ghostly look that fits the season without extra fuss. They work well served hot from the oven as guests arrive.

Equipment
- Large Mixing Bowl
- Baking Sheet
Ingredients
- 1 large head cauliflower, cut into bite-sized florets
- 2 tablespoons olive oil
- 1 teaspoon garlic powder
- 1/2 teaspoon salt
- 1/4 teaspoon black pepper
- 1 cup grated Parmesan cheese
- 2 tablespoons chopped fresh parsley
Instructions
- Preheat the oven to 425 degrees and line a baking sheet with parchment paper.
- Place the cauliflower florets in a large bowl and drizzle with olive oil. Sprinkle in the garlic powder, salt, and black pepper, then toss until the florets are evenly coated.
- Add the grated Parmesan cheese to the bowl and toss again so each floret picks up a good layer of cheese.
- Spread the coated florets in a single layer on the prepared baking sheet.
- Bake for 20 to 25 minutes until the edges turn golden and the cauliflower is tender when pierced with a fork.
- Remove from the oven and sprinkle with the chopped parsley before serving.
Notes
Cuisine: American
Equipment: Large Mixing Bowl, Baking Sheet
Smoky Vampire Garlic Knots
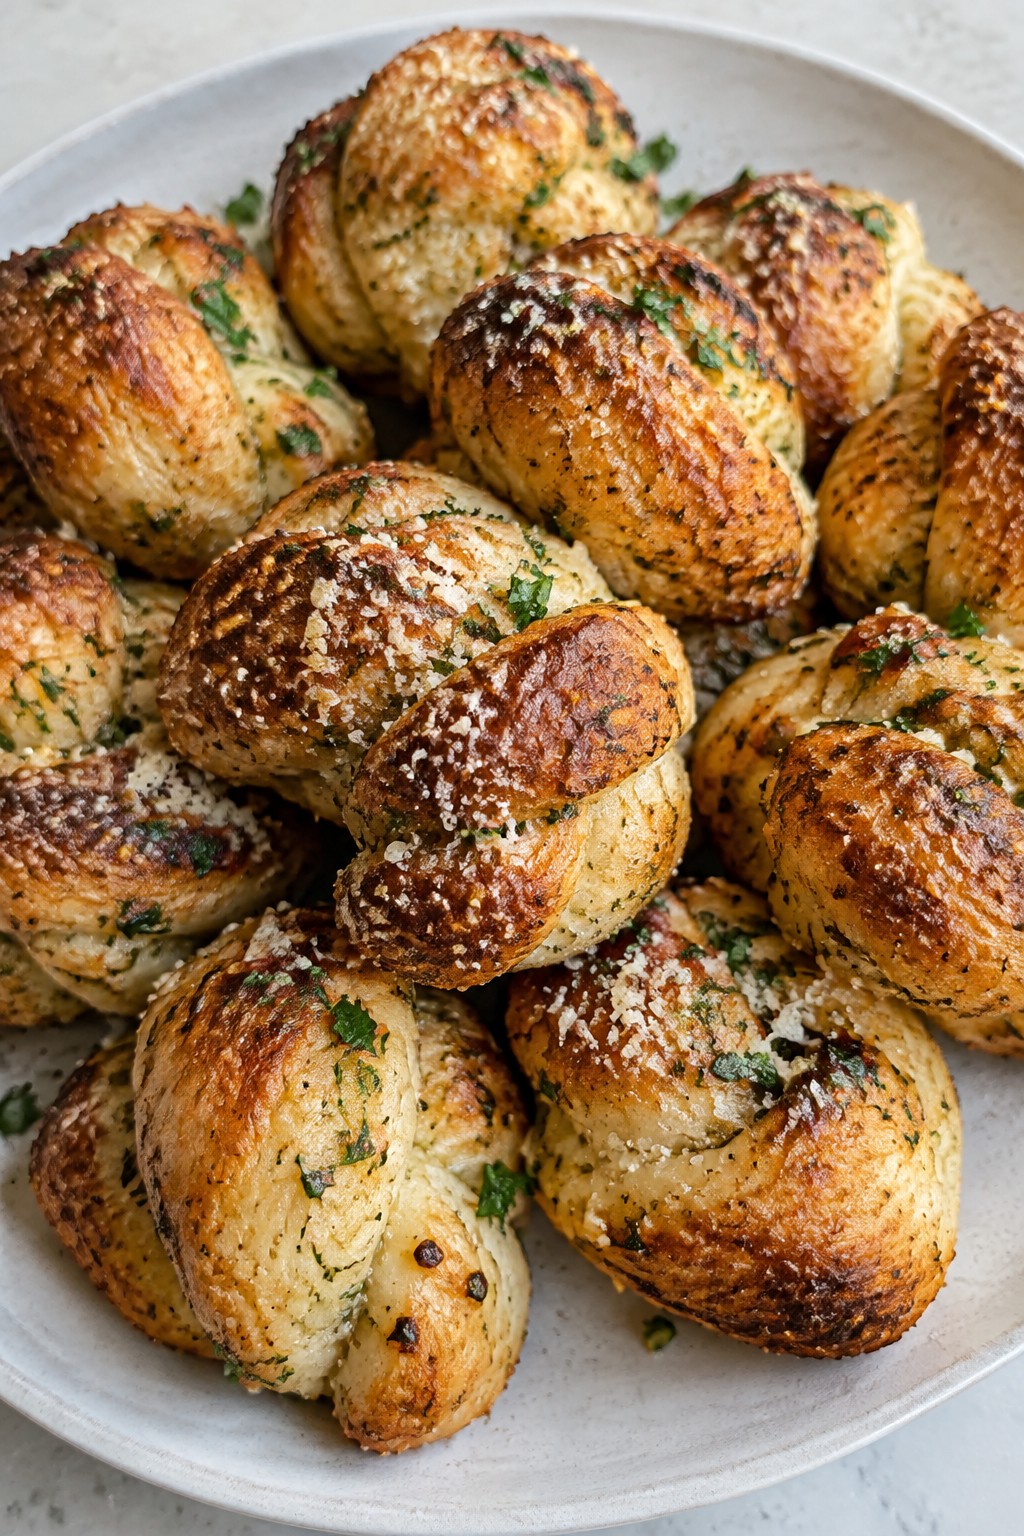
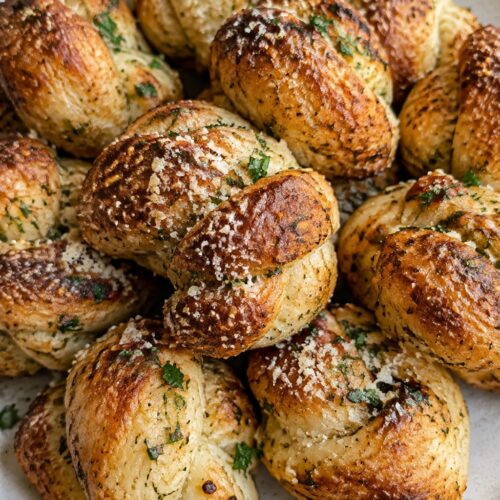
These garlic knots pack plenty of roasted garlic flavor with a smoky edge from paprika. They make a solid savory bite that pairs well with drinks or a spread of other appetizers when candy starts to feel like too much.
The dough bakes up soft in the middle with a lightly crisp surface. A quick toss in garlic butter right after baking keeps them moist and adds the smoky note that sets them apart from plain garlic knots.
Equipment
- Baking sheet
- Mixing bowl
- Small skillet
Ingredients
- 1 pound pizza dough
- 3 tablespoons unsalted butter
- 4 cloves garlic, minced
- 1 teaspoon smoked paprika
- 1/2 teaspoon salt
- 2 tablespoons chopped fresh parsley
- 1/4 cup grated Parmesan cheese
Instructions
- Preheat the oven to 400 degrees F and line a baking sheet with parchment paper. Divide the pizza dough into 8 equal pieces and roll each into a rope about 6 inches long. Tie each rope into a simple knot and place on the prepared sheet.
- Bake the knots for 12 to 15 minutes until golden. While they bake, melt the butter in a small skillet over medium heat.
- Add the minced garlic to the melted butter and cook for 1 minute until fragrant. Stir in the smoked paprika and salt, then remove from heat.
- Transfer the hot knots to a large bowl. Pour the garlic butter over them and toss gently to coat. Sprinkle with the chopped parsley and grated Parmesan, then toss once more before serving.
Notes
Cuisine: American
Equipment: Baking sheet, Mixing bowl, Small skillet
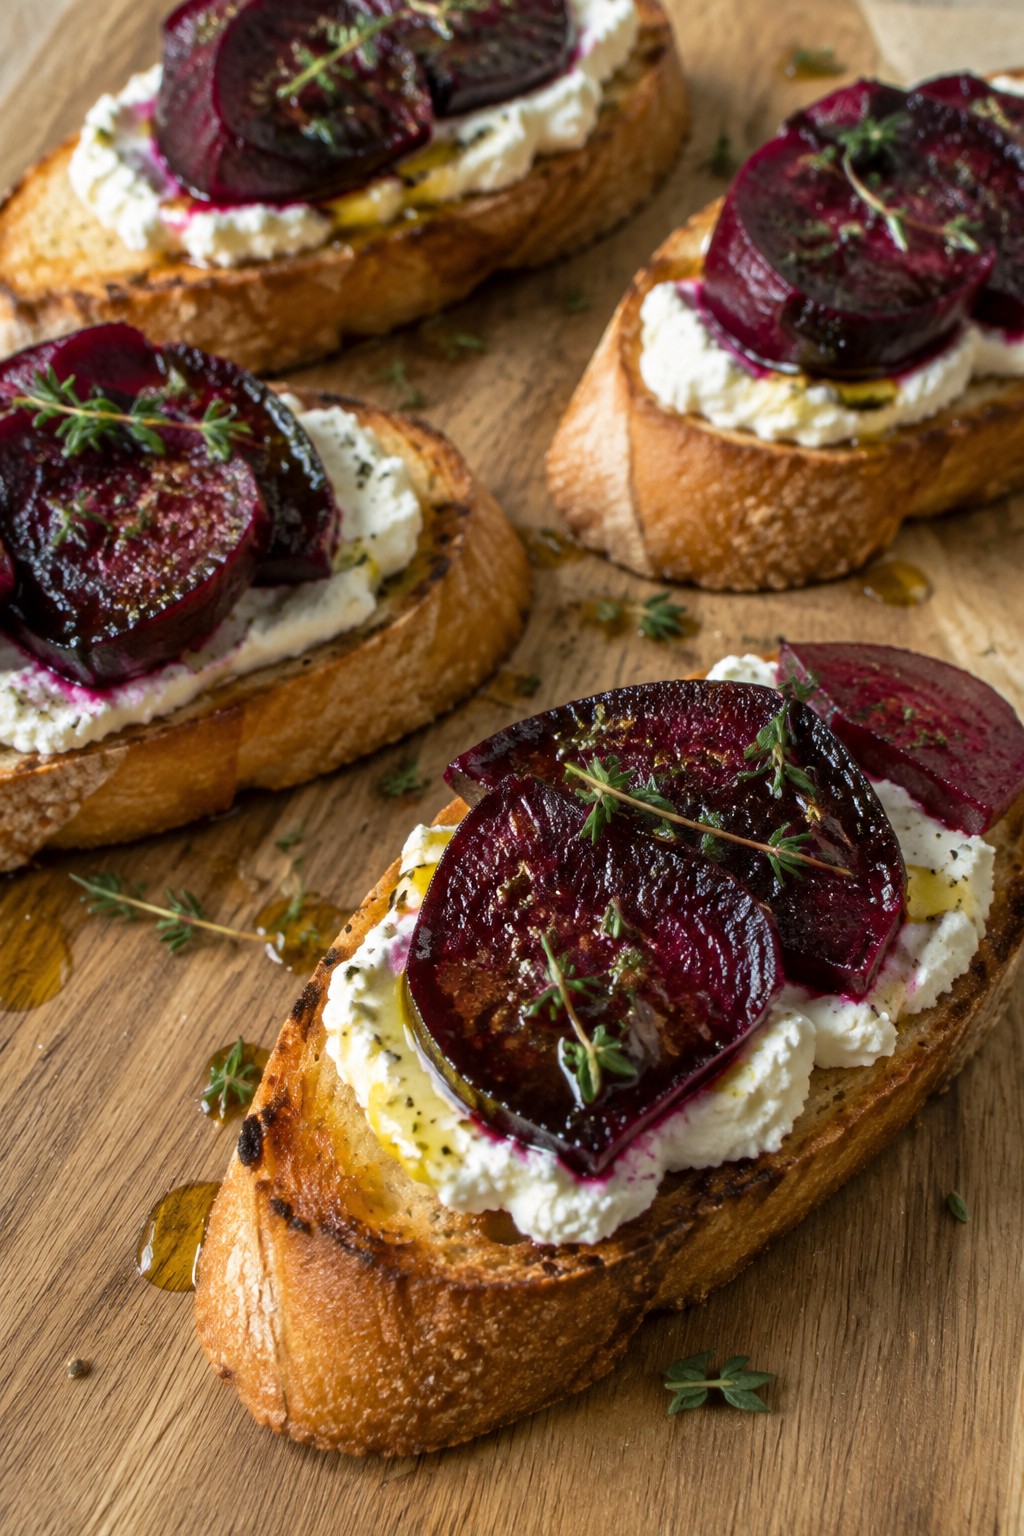
Bloody Beet and Goat Cheese Crostini
These crostini give guests a savory option when candy starts to feel like too much. Roasted beets add a deep red color and earthy note that pairs well with tangy goat cheese on crisp bread. The result is a simple bite that feels festive without extra effort.
It works for a Halloween spread because the components hold up well at room temperature. The texture contrast between crunchy toast, creamy cheese, and tender beets keeps each piece interesting.
Equipment
- Baking sheet
- Oven
- Knife
Ingredients
- 1 baguette, cut into 12 slices
- 2 medium red beets
- 4 ounces goat cheese, softened
- 2 tablespoons olive oil
- 1 garlic clove, halved
- 1 teaspoon fresh thyme leaves
- Salt and black pepper
Instructions
- Heat the oven to 400°F. Wrap the beets in foil and place them on a baking sheet. Roast for 45 minutes until a knife slides in easily. Let them cool, then peel and cut into thin slices.
- Brush both sides of the baguette slices with 1 tablespoon of the olive oil. Place them on the baking sheet and toast for 8 to 10 minutes until golden. Remove from the oven and rub the cut garlic clove over the warm tops.
- Spread a layer of goat cheese on each toasted slice. Arrange the beet slices on top.
- Drizzle the remaining tablespoon of olive oil over the crostini. Sprinkle with thyme leaves and add salt and black pepper to taste.
Notes
Cuisine: American
Equipment: Baking sheet, Oven, Knife
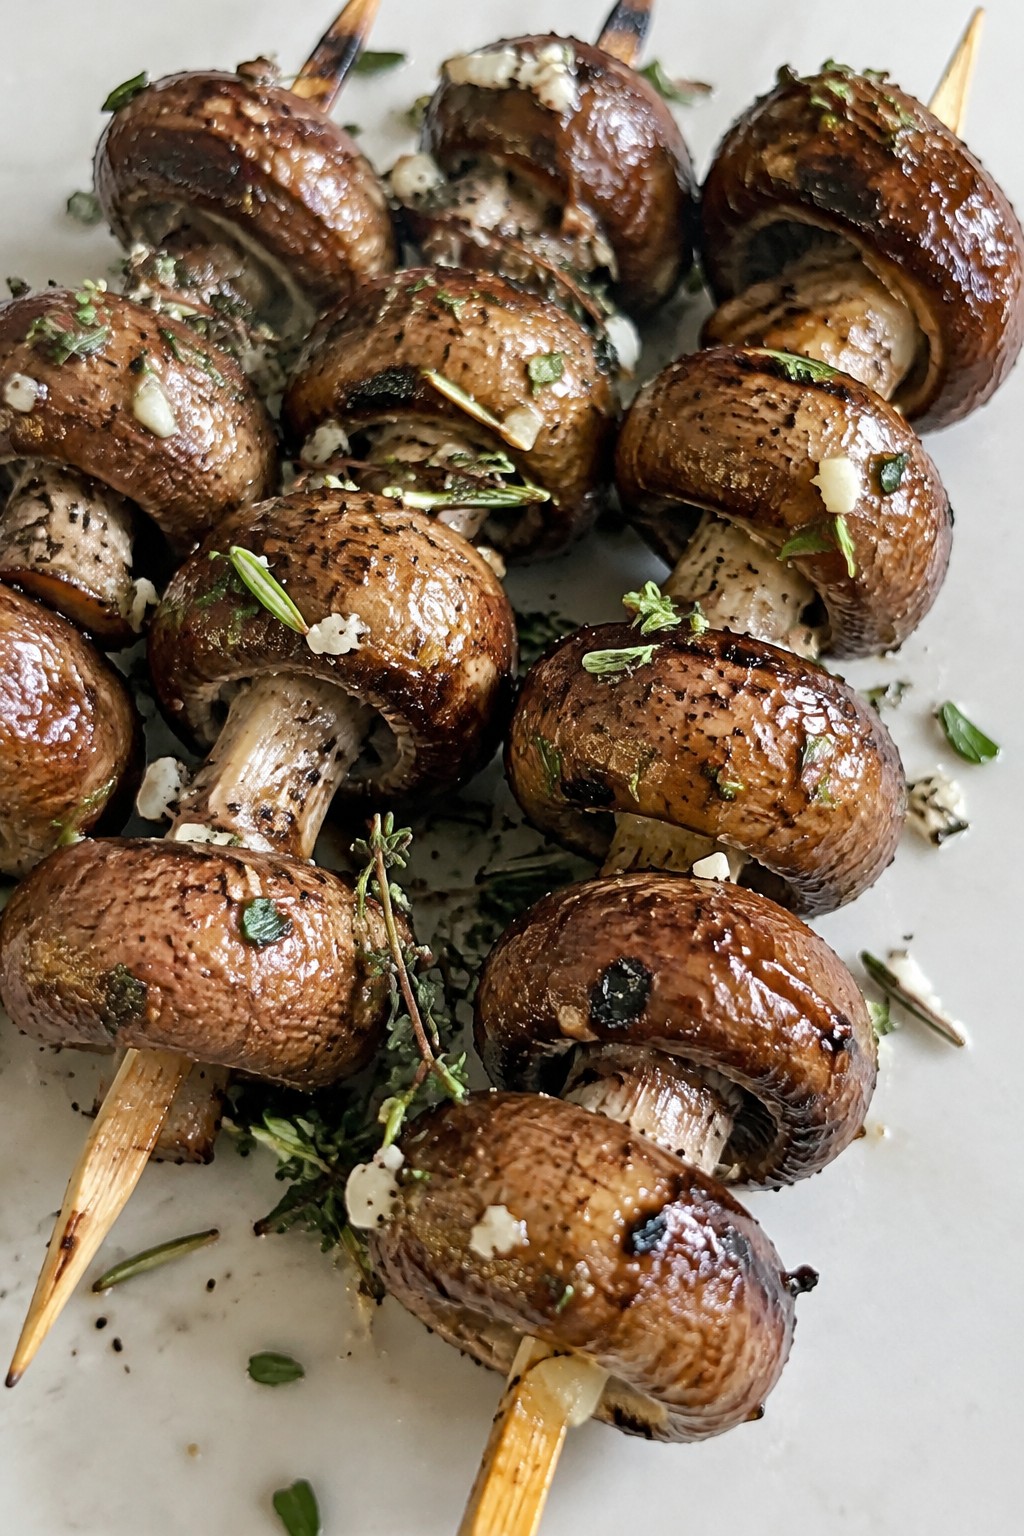
Creepy Crawly Mushroom and Herb Skewers
These skewers bring an earthy, savory bite that pairs well with the sweetness of Halloween candy. They work nicely as a quick appetizer for parties or casual gatherings, where guests can grab a skewer while mingling. The mushrooms turn tender with a light char, while the herbs and garlic add a fresh, aromatic flavor.
Equipment
- Mixing Bowl
- Grill Pan
- Skewers
Ingredients
- 16 ounces cremini mushrooms, stems trimmed
- 1/4 cup olive oil
- 4 garlic cloves, minced
- 2 tablespoons fresh rosemary, chopped
- 2 tablespoons fresh thyme leaves
- 1 teaspoon salt
- 1/2 teaspoon black pepper
- 8 wooden skewers
Instructions
- Soak the wooden skewers in water for 15 minutes to prevent burning during cooking.
- In a mixing bowl, combine the olive oil, minced garlic, chopped rosemary, thyme leaves, salt, and black pepper.
- Add the trimmed cremini mushrooms to the bowl and toss until they are evenly coated with the herb mixture.
- Thread 4 to 5 mushrooms onto each skewer, leaving a small space between them for even cooking.
- Heat a grill pan over medium heat and place the skewers on the pan.
- Cook for 8 to 10 minutes, turning the skewers every 2 to 3 minutes until the mushrooms are tender and lightly browned.
Notes
Cuisine: American
Equipment: Mixing Bowl, Grill Pan, Skewers
