


Halloween is a good time to bake with kids at home. These ideas use ingredients you probably already have and steps that are easy for little hands. Each recipe lets kids help with mixing, cutting, or decorating. You can choose ones that match the time and tools you have. Here are 11 options to try this season.
Helpful Tips Before You Start
These tips will keep baking sessions with kids simple and safe.
Measure Ingredients First
Set out all dry and wet ingredients in bowls before kids start. This cuts down on spills and keeps the process moving.
Choose Kid-Safe Tools
Use plastic knives or cookie cutters instead of sharp knives for cutting dough or fruit. Small hands stay safer this way.
Prep the Workspace
Cover counters with parchment paper or a silicone mat. Cleanup takes less time when spills stay contained.
Let Kids Lead Decorating
Assign tasks like adding sprinkles or drawing faces on cookies with icing. This keeps them engaged without needing perfect results.
Bake in Small Batches
Work with half the dough at a time so kids do not wait long between steps. Fresh batches stay fun from start to finish.
Spiderweb Fudge Brownies
These brownies feature a simple white chocolate web design on top that kids can draw themselves. They turn out rich and fudgy inside with slightly crisp edges. The recipe works well for Halloween afternoons or small family gatherings when you want a quick baking project.
The chocolate base stays moist and dense while the web adds a playful touch without extra work. Kids enjoy watching the lines form as they drag a toothpick through the melted white chocolate.


Equipment
- Mixing Bowl
- Baking Pan
- Saucepan
- Microwave
Ingredients
- 1/2 cup unsalted butter
- 1 cup granulated sugar
- 2 large eggs
- 1/3 cup unsweetened cocoa powder
- 1/2 cup all-purpose flour
- 1 teaspoon vanilla extract
- 1/4 teaspoon salt
- 1/2 cup semisweet chocolate chips
- 1/4 cup white chocolate chips
Instructions
- Preheat the oven to 350°F and line an 8×8 baking pan with parchment paper.
- Melt the butter in a saucepan over low heat, then remove from heat and stir in the sugar until combined.
- Add the eggs and vanilla extract, mixing well after each addition.
- Stir in the cocoa powder, flour, and salt until the batter looks smooth.
- Fold in the semisweet chocolate chips.
- Pour the batter into the prepared pan and spread evenly.
- Bake for 25 minutes, then let the brownies cool completely in the pan.
- Melt the white chocolate chips in the microwave in 20-second bursts, stirring between each.
- Spoon the melted white chocolate into a small zip-top bag, snip a tiny corner, and pipe several circles on top of the cooled brownies.
- Drag a toothpick from the center outward through each circle to create the web pattern, then cut into squares.
Notes
Cuisine: American
Equipment: Mixing Bowl, Baking Pan, Saucepan, Microwave
Pumpkin Ghost Sugar Cookies
These cookies give kids a fun way to bake for Halloween without needing fancy tools. The pumpkin adds moisture so the sugar cookies stay soft, and the simple ghost faces make them festive for little hands to decorate.
They work well as an afternoon activity or a weekend treat when you want something sweet but not too rich. The flavor is mild with a touch of warm spice and a light sweetness from the icing.


Equipment
- Mixing Bowl
- Baking Sheet
- Oven
Ingredients
- 1 1/2 cups all-purpose flour
- 1/2 teaspoon baking powder
- 1/4 teaspoon salt
- 1/2 cup unsalted butter, softened
- 3/4 cup granulated sugar
- 1/2 cup pumpkin puree
- 1 large egg
- 1 teaspoon vanilla extract
- 1 teaspoon pumpkin pie spice
- 1 cup powdered sugar
- 2 tablespoons milk
- 2 tablespoons mini chocolate chips
Instructions
- Heat the oven to 350 degrees and line a baking sheet with parchment paper.
- Stir the flour, baking powder, salt, and pumpkin pie spice together in a bowl.
- In a second bowl, beat the butter and granulated sugar until smooth. Add the pumpkin puree, egg, and vanilla extract and mix well.
- Combine the wet and dry mixtures until a soft dough forms. Scoop rounded tablespoons of dough onto the baking sheet and flatten each slightly.
- Bake for 10 to 12 minutes until the edges are lightly golden. Let the cookies cool on the sheet for a few minutes before moving them to a rack.
- Mix the powdered sugar and milk in a small bowl until the icing is smooth but thick enough to hold its shape.
- Spread the icing over the cooled cookies and press two mini chocolate chips into each one to make ghost eyes.
Notes
Cuisine: American
Equipment: Mixing Bowl, Baking Sheet, Oven
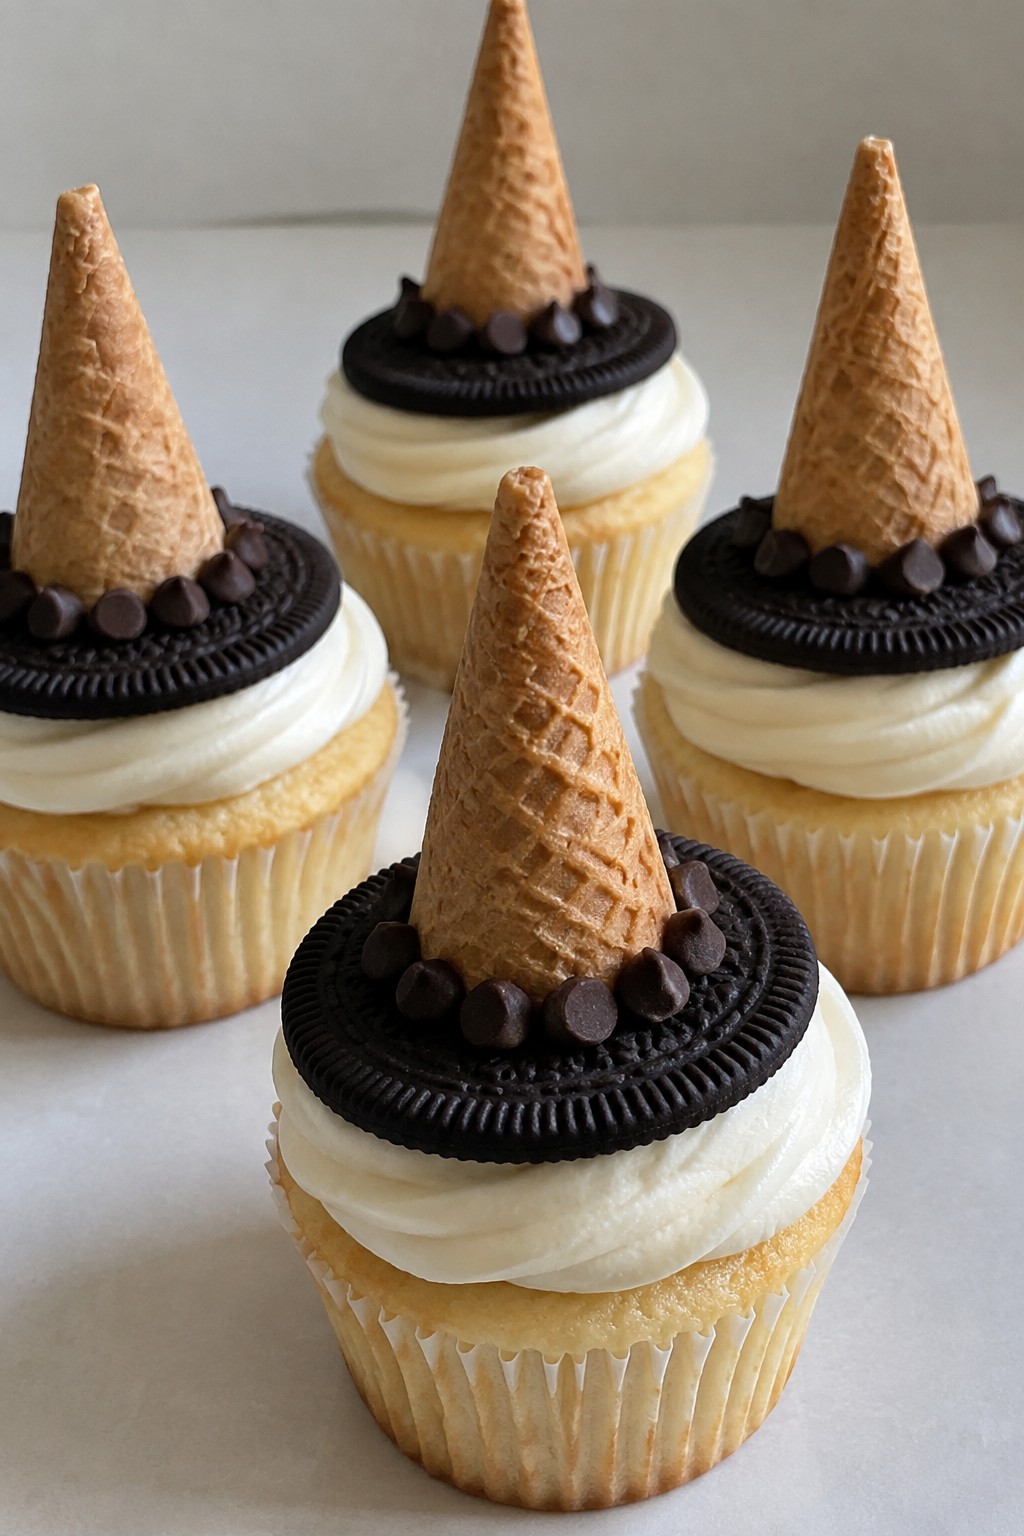
Vanilla Witch Hat Cupcakes
These vanilla witch hat cupcakes give kids a simple way to create Halloween treats at home. The vanilla base stays light while chocolate details turn each cupcake into a pointed witch hat. They suit an afternoon baking session or a small Halloween party.
The flavor stays mild and sweet with a soft crumb that holds up well under frosting. Kids can help with the decorating steps once the cupcakes cool.

Equipment
- Mixing Bowl
- Cupcake Pan
- Oven
- Wire Rack
Ingredients
- 3/4 cup all-purpose flour
- 1/2 cup granulated sugar
- 1/4 cup unsalted butter, softened
- 1 large egg
- 1 teaspoon vanilla extract
- 1/2 cup milk
- 1 1/2 teaspoons baking powder
- 1/4 teaspoon salt
- 1 cup vanilla buttercream frosting
- 4 chocolate sandwich cookies
- 4 sugar cones
- 1/2 cup semisweet chocolate chips
Instructions
- Preheat the oven to 350°F and line a cupcake pan with four paper liners.
- In a mixing bowl, cream the softened butter and sugar until light. Add the egg and vanilla extract, then beat until smooth.
- In a separate bowl, whisk together the flour, baking powder, and salt. Add half the dry mixture to the wet ingredients, followed by half the milk. Repeat with the remaining dry mixture and milk, stirring just until combined.
- Divide the batter evenly among the four liners. Bake for 18 to 20 minutes, or until a toothpick inserted in the center comes out clean. Cool completely on a wire rack.
- Melt the chocolate chips in a microwave-safe bowl in 20-second bursts, stirring between each burst until smooth. Dip the open end of each sugar cone into the melted chocolate and set it on a chocolate sandwich cookie to form the hat shape. Let the chocolate set.
- Spread or pipe vanilla buttercream frosting on each cooled cupcake. Place one cookie-and-cone hat in the center of each frosted cupcake.
Notes
Cuisine: American
Equipment: Mixing Bowl, Cupcake Pan, Oven, Wire Rack
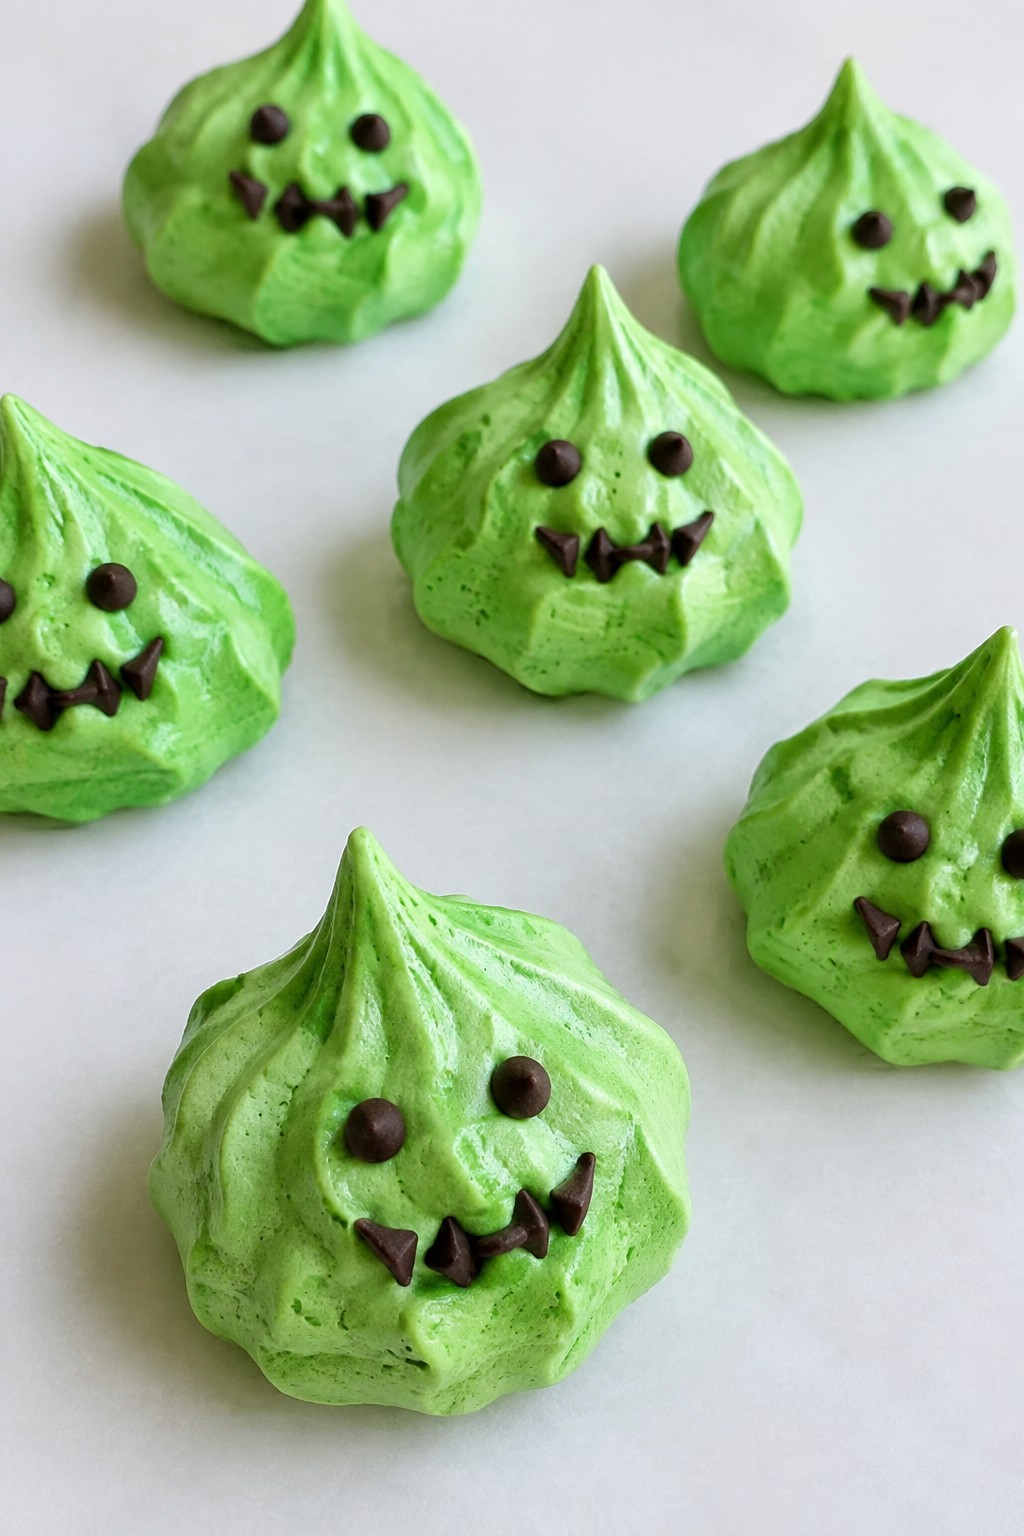
Green Monster Meringue Kisses
These green meringue kisses bring a fun Halloween twist to a simple meringue recipe. Kids enjoy piping the swirls and adding little chocolate chip faces. The result is a light and airy treat with a crisp outside and subtle vanilla sweetness.
This recipe works well for after-school baking or a weekend Halloween activity. The green color stands out on a party table without needing fancy decorations.
Equipment
- Mixing Bowl
- Electric Mixer
- Piping Bag
- Baking Sheet
Ingredients
- 2 large egg whites
- 1/2 cup granulated sugar
- 1/4 teaspoon cream of tartar
- 1 teaspoon vanilla extract
- Green food coloring gel
- 2 tablespoons mini chocolate chips
Instructions
- Preheat the oven to 200 degrees Fahrenheit and line a baking sheet with parchment paper.
- Place the egg whites and cream of tartar in a clean mixing bowl. Beat on medium speed until soft peaks form.
- Add the sugar a little at a time while beating on high speed. Continue until the mixture reaches stiff, glossy peaks.
- Mix in the vanilla extract and enough green food coloring gel to reach a bright green shade.
- Spoon the meringue into a piping bag fitted with a star tip. Pipe small kiss shapes onto the prepared baking sheet.
- Press two mini chocolate chips into each meringue to create eyes.
- Bake for 1 hour and 30 minutes, then turn off the oven and leave the meringues inside to cool completely.
Notes
Cuisine: American
Equipment: Mixing Bowl, Electric Mixer, Piping Bag, Baking Sheet
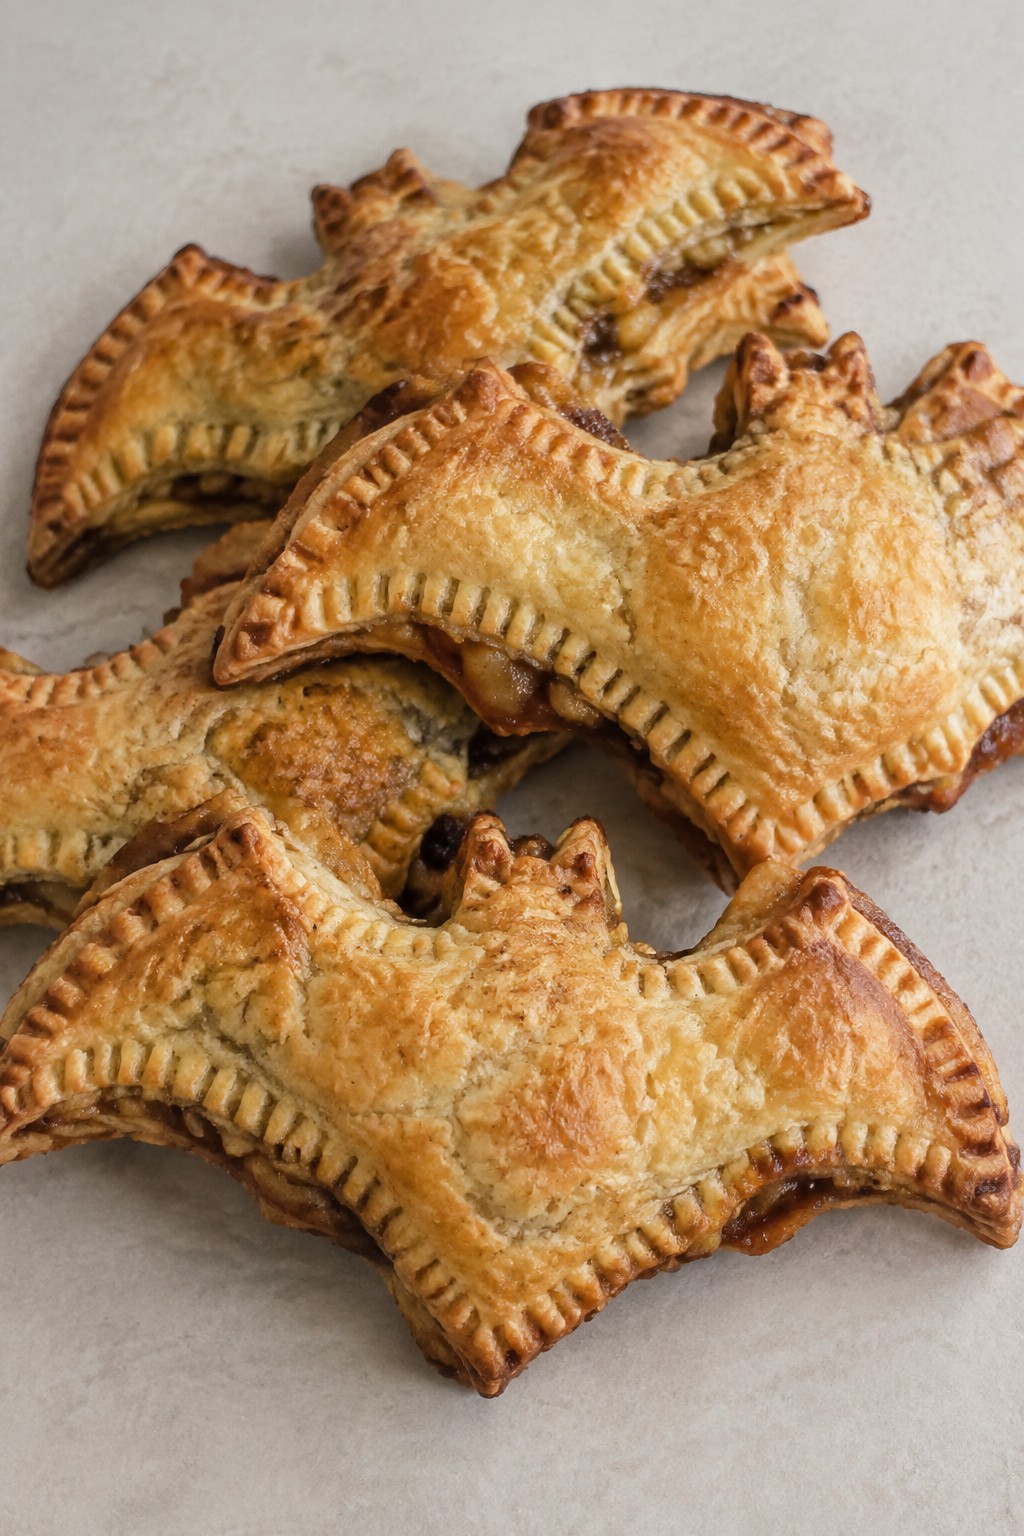
Bat Wing Apple Hand Pies
These hand pies give kids a simple way to shape apple filling into bat wings for Halloween. The flaky crust holds a lightly spiced apple center that tastes warm and familiar. They come together with basic pantry items and work well for an afternoon baking project or a party snack.
The finished pies have a crisp outside and soft, sweet apple bites inside. They fit right into a kids baking session because the steps stay straightforward and hands-on.

Equipment
- Baking sheet
- Mixing bowl
- Pastry brush
- Knife
Ingredients
- 2 refrigerated pie crusts
- 2 large apples, peeled, cored, and diced
- 1/4 cup granulated sugar
- 1 teaspoon ground cinnamon
- 1 tablespoon butter, melted
- 1 egg
- 2 tablespoons water
Instructions
- Preheat the oven to 375°F and line a baking sheet with parchment paper.
- In a mixing bowl, stir together the diced apples, sugar, cinnamon, and melted butter until the apples are evenly coated.
- Unroll one pie crust on a lightly floured surface. Use a knife or bat wing template to cut four wing shapes from the dough. Repeat with the second crust.
- Place half the wing pieces on the baking sheet. Spoon a small amount of apple filling onto the center of each piece, leaving a border around the edges.
- Whisk the egg with the water to make an egg wash. Brush the edges of the filled pieces with the wash, then top each with a second wing piece and press the edges firmly to seal.
- Cut a small slit in the top of each pie for steam to escape, then brush the tops with more egg wash.
- Bake for 18 to 20 minutes until the crust turns golden brown. Let the pies cool on the sheet for a few minutes before serving.
Notes
Cuisine: American
Equipment: Baking sheet, Mixing bowl, Pastry brush, Knife
Candy Corn Swirl Blondies
These blondies bring a fun Halloween twist with a creamy candy corn swirl running through a chewy base. Kids enjoy helping press the ingredients together and watching the colors blend during baking. The result is a sweet, buttery bar with soft pockets of candy corn flavor that feels festive without extra fuss.
This treat works well for an afternoon baking session or as a simple dessert after a costume party. The texture stays moist in the middle with lightly crisp edges.


Equipment
- Mixing Bowl
- Small Saucepan
- 8×8 Baking Pan
Ingredients
- 1/4 cup unsalted butter, melted
- 1/2 cup light brown sugar
- 1 large egg
- 1 teaspoon vanilla extract
- 1/2 cup all-purpose flour
- 1/4 teaspoon baking powder
- 1/4 teaspoon salt
- 1/4 cup white chocolate chips
- 1/2 cup candy corn
- 1 tablespoon heavy cream
Instructions
- Preheat the oven to 350°F and line a small 8×8 baking pan with parchment paper.
- In a mixing bowl, stir together the melted butter and brown sugar until smooth. Add the egg and vanilla extract, then mix until combined.
- Whisk in the flour, baking powder, and salt until no dry streaks remain. Fold in the white chocolate chips.
- In a small saucepan over low heat, combine the candy corn and heavy cream. Stir until the candy corn melts into a smooth, thick mixture.
- Pour the blondie batter into the prepared pan and spread evenly. Drop spoonfuls of the melted candy corn mixture over the top, then use a knife to gently swirl it through the batter.
- Bake for 20 to 22 minutes until the edges turn golden and a toothpick comes out with a few moist crumbs. Cool completely in the pan before cutting into bars.
Notes
Cuisine: American
Equipment: Mixing Bowl, Small Saucepan, 8×8 Baking Pan
Mummy Wrapped Cinnamon Rolls
These mummy wrapped cinnamon rolls give kids a hands-on Halloween baking project with a sweet payoff. The dough strips create a fun bandage effect while the rolls bake up soft and gooey inside with warm cinnamon flavor. They work well for an afternoon activity or a festive breakfast treat.


Equipment
- Baking sheet
- Parchment paper
- Knife
Ingredients
- 4 unbaked cinnamon rolls from a 13.8-ounce tube
- 1 tube refrigerated crescent roll dough
- Icing packet from the cinnamon rolls
- 8 edible candy eyes
Instructions
- Preheat the oven to 350°F and line a baking sheet with parchment paper.
- Place the 4 unbaked cinnamon rolls on the prepared baking sheet, spacing them a few inches apart.
- Open the crescent roll dough and cut it into thin strips about 1/2 inch wide.
- Wrap the strips around each cinnamon roll in a crisscross pattern to resemble mummy bandages, leaving small gaps for the face area.
- Bake for 18 to 22 minutes until the dough is golden brown and the centers are cooked through.
- Let the rolls cool for 5 minutes on the baking sheet.
- Warm the icing packet slightly, then use a small amount to attach 2 candy eyes to each roll in the open face area.
Notes
Cuisine: American
Equipment: Baking sheet, Parchment paper, Knife
Frankenstein Brownie Cake Pops
These Frankenstein Brownie Cake Pops give kids a hands-on project that turns simple brownies into Halloween treats. They work well for an afternoon baking session or a small party activity where everyone adds their own monster details.
The fudgy brownie base holds together with a bit of cream cheese, then gets coated in green chocolate for the face. A few quick decorations create the classic stitched look without much fuss.


Equipment
- Mixing Bowl
- Baking Sheet
- Microwave-Safe Bowl
Ingredients
- 8 ounces baked brownies, cooled and crumbled
- 2 tablespoons cream cheese, softened
- 1 cup green candy melts
- 4 popsicle sticks
- 8 candy eyes
- Black decorating icing
Instructions
- Place the crumbled brownies and cream cheese in a mixing bowl. Stir until the mixture holds together like dough.
- Divide the mixture into four equal portions and roll each into a compact ball or oval shape.
- Push one popsicle stick into the bottom of each brownie ball. Place the pops on a baking sheet and chill for 15 minutes to firm up.
- Melt the green candy melts in a microwave-safe bowl in 30-second bursts, stirring between each until smooth.
- Dip each brownie pop into the melted candy melts, letting excess drip off. Return the pops to the baking sheet.
- Press two candy eyes onto the front of each pop while the coating is still soft. Use the black icing to draw hair across the top and short lines for stitches on the sides. Let the pops set at room temperature until the coating hardens.
Notes
Cuisine: American
Equipment: Mixing Bowl, Baking Sheet, Microwave-Safe Bowl
Skeleton Bone Shortbread Biscuits
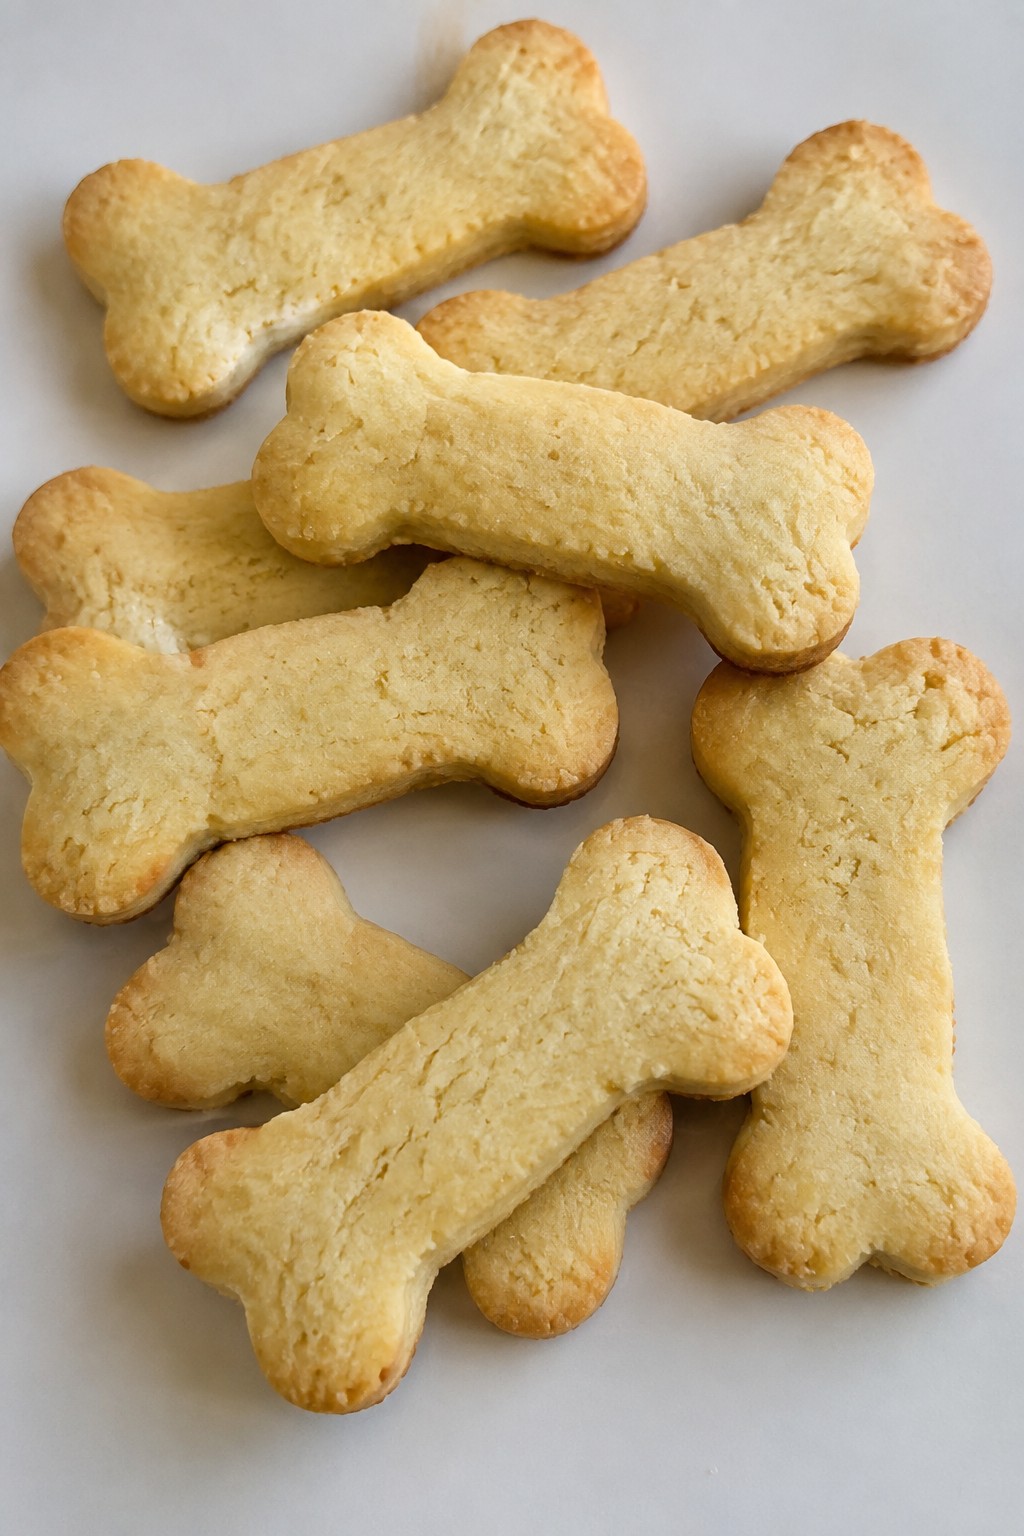
These skeleton bone shortbread biscuits give kids a simple project that turns basic pantry items into Halloween shapes. The dough is easy to handle and holds detail when formed into bone outlines, making it a good choice for an afternoon activity before a party or movie night.
The finished biscuits have a buttery taste and a crisp texture that stays firm once cooled.

Equipment
- Mixing Bowl
- Baking Sheet
- Oven
Ingredients
- 100g unsalted butter, softened
- 50g granulated sugar
- 150g plain flour
- 1 teaspoon vanilla extract
Instructions
- Heat the oven to 180C and line a baking sheet with parchment paper.
- Place the butter and sugar in a mixing bowl and beat until the mixture looks pale and fluffy.
- Add the vanilla extract and stir it through the creamed mixture.
- Tip in the flour and mix until a soft dough forms and no dry streaks remain.
- Divide the dough into four portions and shape each one into a bone by rolling a short log then pressing small balls of dough onto both ends.
- Set the shaped pieces on the prepared baking sheet with space between them.
- Bake for 12 to 15 minutes until the edges turn a light golden color.
- Remove the sheet from the oven and let the biscuits cool fully on the paper before moving them.
Notes
Cuisine: American
Equipment: Mixing Bowl, Baking Sheet, Oven
Haunted House Gingerbread Loaf
This gingerbread loaf gives kids a simple way to join in on Halloween baking. They can stir the batter and then add their own spooky decorations once the loaf cools. The result is a moist slice with gentle spice that feels festive without much fuss.
It works well for an afternoon snack or a small gathering treat. The flavor comes through as warm ginger and molasses with a soft texture that holds up to icing details on top.


Equipment
- Mixing Bowl
- Loaf Pan
- Oven
- Whisk
Ingredients
- 1 1/2 cups all-purpose flour
- 1 teaspoon baking soda
- 2 teaspoons ground ginger
- 1 teaspoon ground cinnamon
- 1/4 cup unsalted butter, softened
- 1/2 cup brown sugar
- 1/3 cup molasses
- 1 large egg
- 3/4 cup hot water
- 1 cup powdered sugar
- 2 tablespoons milk
- Black food coloring
- Assorted Halloween candies
Instructions
- Heat the oven to 350 degrees and grease a small loaf pan.
- In a mixing bowl, stir together the flour, baking soda, ginger, and cinnamon.
- In a second bowl, beat the softened butter with the brown sugar until smooth. Add the molasses and egg and mix well.
- Pour the wet mixture into the dry ingredients. Slowly add the hot water and stir until the batter is even with no dry streaks.
- Pour the batter into the prepared loaf pan and bake for 35 to 40 minutes until a toothpick comes out clean. Let the loaf cool in the pan for 10 minutes, then move it to a rack to cool fully.
- While the loaf cools, whisk the powdered sugar with the milk until thick. Add black food coloring a drop at a time until the icing reaches a dark shade.
- Spread or pipe the black icing over the top of the cooled loaf to form simple house shapes. Press Halloween candies into the icing while it is still soft.
Notes
Cuisine: American
Equipment: Mixing Bowl, Loaf Pan, Oven, Whisk
Jack-o’-Lantern Stuffed Pumpkin Muffins
These Jack-o’-Lantern Stuffed Pumpkin Muffins give kids a hands-on Halloween project with a built-in surprise. The spiced pumpkin batter bakes up soft and moist around a creamy center, and the finished muffins get simple faces drawn on top. They make a good activity for an afternoon at home or a small party treat.
The warm cinnamon flavor pairs with the cool cream cheese filling for a balanced bite that feels seasonal without extra sweetness. Kids can help mix the batter and add the faces once the muffins cool.


Equipment
- Mixing Bowl
- Muffin Tin
- Whisk
Ingredients
- 1 cup pumpkin puree
- 1 cup all-purpose flour
- 1/2 cup sugar
- 1 egg
- 1 teaspoon baking soda
- 1 teaspoon ground cinnamon
- 4 ounces cream cheese, softened
- 2 tablespoons powdered sugar
- Black decorating icing
Instructions
- Heat the oven to 350 degrees and line a muffin tin with four paper liners.
- In a mixing bowl, stir together the pumpkin puree, sugar, egg, baking soda, and cinnamon until smooth.
- Add the flour and mix just until no dry streaks remain.
- Spoon batter into each liner until it is about halfway full.
- In a small bowl, beat the cream cheese and powdered sugar until creamy.
- Drop a spoonful of the cream cheese mixture into the center of each muffin.
- Cover the filling with the remaining batter.
- Bake for 20 to 25 minutes, until a toothpick inserted into the muffin edge comes out clean.
- Let the muffins cool completely in the tin.
- Use the black decorating icing to draw jack-o’-lantern faces on the tops.
Notes
Cuisine: American
Equipment: Mixing Bowl, Muffin Tin, Whisk
