

We all need those go to meals that warm you up without any fuss. This list brings together comfort foods that use simple ingredients you probably already have. Each recipe includes clear instructions so you know exactly what to do. You can pick one for dinner tonight and feel good about how it turns out.
Helpful Tips Before You Start
These tips will help you feel ready to cook any of the comfort recipes with ease.
Read the Whole Recipe
Look through all the steps before you begin. This keeps you from missing small details like prep time or resting periods.
Gather Ingredients First
Pull out everything you need and set it on the counter. Working with a clear space makes the process feel calmer.
Use What You Have
Comfort food recipes often allow simple swaps. Replace one vegetable or cheese with another if that is what is in your fridge.
Taste as You Cook
Add salt, pepper, or herbs gradually. Small adjustments help match the flavors to your own liking.
Creamy Tomato Basil Soup with Grilled Cheese Croutons
This soup brings together ripe tomatoes and fresh basil in a smooth, creamy base that feels both familiar and comforting. It works well for quick weeknight meals or relaxed weekend lunches when you want something warm without much fuss.
The grilled cheese croutons on top add a crispy, cheesy contrast that turns the bowl into a complete meal. The result is a balanced mix of velvety texture and savory crunch that appeals to all ages.


Equipment
- Large pot
- Immersion blender
- Skillet
- Knife
Ingredients
- 2 tablespoons olive oil
- 1 medium onion, diced
- 3 garlic cloves, minced
- 2 cans (14.5 ounces each) diced tomatoes
- 2 cups vegetable broth
- 1/2 cup fresh basil leaves, chopped
- 1/2 cup heavy cream
- Salt and black pepper to taste
- 4 slices sourdough bread
- 4 slices cheddar cheese
- 2 tablespoons butter
Instructions
- Heat the olive oil in a large pot over medium heat. Add the diced onion and cook for 5 minutes until it softens. Stir in the minced garlic and cook for 1 minute more.
- Pour in the diced tomatoes and vegetable broth. Bring the mixture to a simmer and cook for 15 minutes. Remove the pot from the heat and blend the soup until smooth using an immersion blender or regular blender.
- Return the soup to low heat. Stir in the chopped basil and heavy cream. Season with salt and black pepper to taste and keep warm while you prepare the croutons.
- Butter one side of each bread slice. Place two slices buttered side down in a skillet over medium heat. Top each with two slices of cheddar cheese and cover with the remaining bread slices, buttered side up. Cook for 3 to 4 minutes per side until the bread is golden and the cheese melts.
- Remove the sandwiches from the skillet and cut them into small cubes to form croutons. Ladle the soup into bowls and scatter the grilled cheese croutons on top before serving.
Notes
Cuisine: American
Equipment: Large pot, Immersion blender, Skillet, Knife
Classic Beef and Vegetable Stew
This stew combines chunks of beef with everyday vegetables in a savory broth. It works well on busy weeknights or weekends when you want a hands-off meal that fills the kitchen with a comforting aroma. The result is tender meat and soft vegetables in a lightly thickened sauce that feels hearty without being heavy.


Equipment
- Large pot
- Cutting board
- Knife
- Wooden spoon
Ingredients
- 1 pound beef stew meat, cut into 1-inch cubes
- 2 tablespoons olive oil
- 1 medium onion, diced
- 2 carrots, sliced into rounds
- 2 celery stalks, chopped
- 2 medium potatoes, cut into 1-inch cubes
- 3 cups beef broth
- 2 tablespoons tomato paste
- 1 teaspoon dried thyme
- 2 tablespoons all-purpose flour
- Salt and black pepper to taste
Instructions
- Heat the olive oil in a large pot over medium heat. Add the beef cubes and cook until browned on all sides, about 5 minutes.
- Stir in the diced onion, carrots, and celery. Cook for 3 minutes until the onion softens.
- Sprinkle the flour over the mixture and stir for 1 minute to coat everything evenly.
- Add the tomato paste, dried thyme, salt, and pepper. Pour in the beef broth and stir well to combine.
- Bring the stew to a gentle boil, then lower the heat to a simmer. Cover the pot and cook for 45 minutes.
- Add the potato cubes and continue simmering uncovered for 20 more minutes until the potatoes are tender and the broth has thickened slightly.
Notes
Cuisine: American
Equipment: Large pot, Cutting board, Knife, Wooden spoon
One-Pot Chicken and Dumplings
This recipe brings tender chicken and soft vegetables together in a savory broth with fluffy dumplings on top. It works well on busy weeknights or chilly evenings when you want a filling meal without multiple pots to clean. The result is a creamy, herb-scented dish with a mix of hearty textures from the chicken and vegetables and light dumplings that soak up the broth.


Equipment
- Large pot
- Mixing bowl
- Knife
Ingredients
- 2 tablespoons butter
- 1 medium onion, diced
- 3 carrots, peeled and sliced
- 2 celery stalks, chopped
- 1 pound boneless skinless chicken thighs, cut into bite-size pieces
- 4 cups chicken broth
- 1 teaspoon dried thyme
- 1 teaspoon salt
- 1/2 teaspoon black pepper
- 1 cup all-purpose flour
- 2 teaspoons baking powder
- 3/4 cup milk
- 2 tablespoons chopped fresh parsley
Instructions
- Melt the butter in a large pot over medium heat. Add the onion, carrots, and celery. Cook for 5 minutes until the vegetables soften slightly.
- Add the chicken pieces to the pot. Stir and cook for 4 minutes until the chicken is no longer pink on the outside.
- Pour in the chicken broth. Add the thyme, salt, and pepper. Bring the mixture to a simmer and cook for 10 minutes.
- In a mixing bowl, stir together the flour, baking powder, and milk until a thick batter forms. Do not overmix.
- Drop spoonfuls of the batter directly into the simmering broth. Cover the pot and cook for 12 minutes without lifting the lid.
- Remove the pot from the heat. Sprinkle the parsley over the top before serving.
Notes
Cuisine: American
Equipment: Large pot, Mixing bowl, Knife
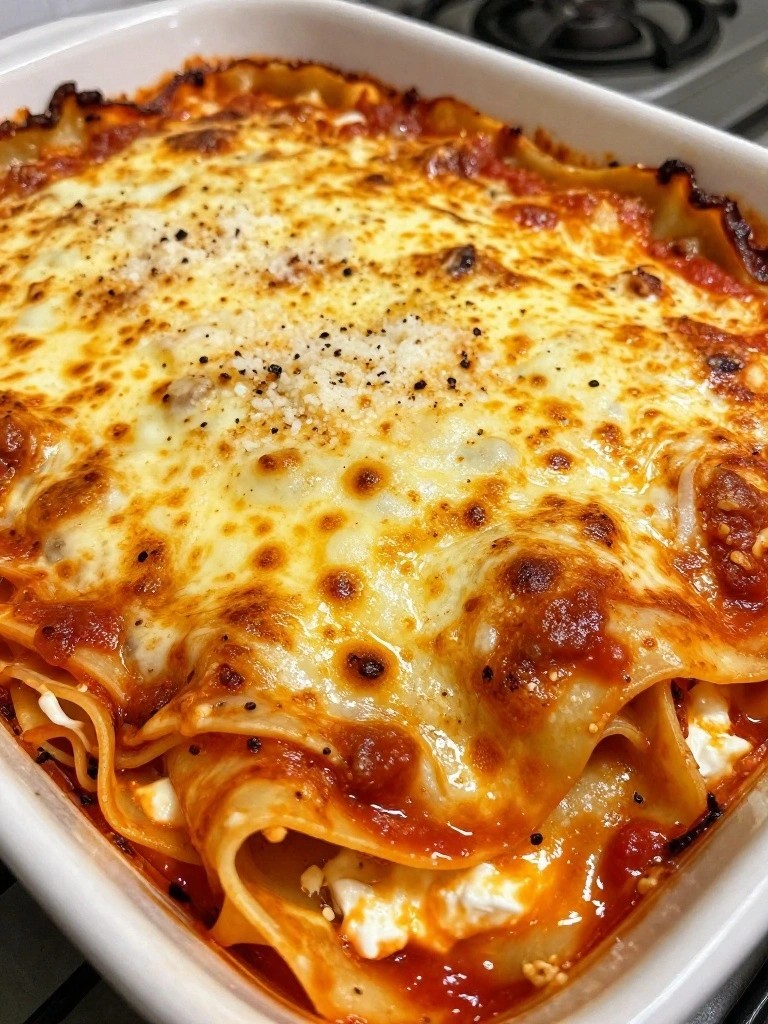
Baked Three-Cheese Lasagna
This baked lasagna brings together three cheeses in simple layers that anyone can put together. It works well for weeknight family meals or when you want a warm dish that feels satisfying without complicated steps.
The finished casserole has tender noodles, creamy cheese filling, and a light tomato sauce that keeps every bite balanced. The top turns golden and the inside stays soft and rich.

Equipment
- Large pot
- 8×8 inch baking dish
- Mixing bowl
Ingredients
- 8 lasagna noodles
- 1 (15-ounce) container ricotta cheese
- 2 cups shredded mozzarella cheese, divided
- 1 cup grated Parmesan cheese, divided
- 3 cups marinara sauce
- 1 large egg
- 1 teaspoon dried basil
- 1/2 teaspoon salt
- 1/4 teaspoon black pepper
Instructions
- Preheat the oven to 375 degrees and lightly grease an 8×8 inch baking dish.
- Bring a large pot of salted water to a boil and cook the lasagna noodles according to package directions until just tender. Drain and set aside.
- In a mixing bowl, combine the ricotta cheese, egg, dried basil, salt, black pepper, and half of the Parmesan cheese. Stir until the mixture is smooth.
- Spread 1 cup of marinara sauce across the bottom of the prepared baking dish.
- Lay 2 noodles over the sauce, then spread half of the ricotta mixture on top. Sprinkle 1/2 cup of mozzarella over the ricotta.
- Repeat the layers once more with sauce, noodles, the remaining ricotta mixture, and another 1/2 cup of mozzarella.
- Add the final 2 noodles, the remaining marinara sauce, the rest of the mozzarella, and the remaining Parmesan.
- Cover the dish with foil and bake for 25 minutes. Remove the foil and bake 10 minutes more until the cheese on top is lightly browned. Let the lasagna rest 10 minutes before slicing.
Notes
Cuisine: Italian
Equipment: Large pot, 8×8 inch baking dish, Mixing bowl
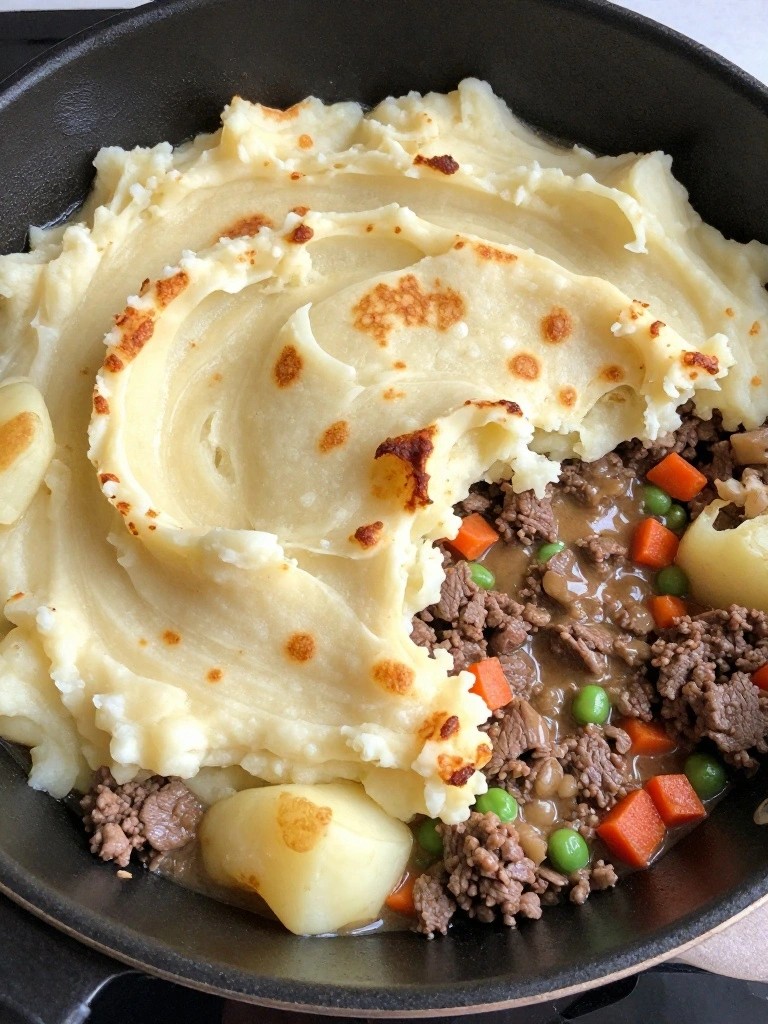
Skillet Shepherd’s Pie with Ground Beef
This skillet shepherd’s pie turns simple pantry staples into a hearty one-pan meal. Ground beef cooks with carrots and peas in a light gravy, then gets covered with a layer of creamy mashed potatoes that brown up nicely on top. It comes together with basic steps and delivers the cozy flavors of the classic dish without extra pots or long prep.
It fits well on a weeknight when you want something filling that still feels homemade. The beef stays tender while the potato topping adds a soft, slightly crisp finish that makes each bite satisfying.

Equipment
- Large Oven-Safe Skillet
- Medium Pot
- Potato Masher
Ingredients
- 1 pound ground beef
- 1 medium onion, diced
- 2 carrots, peeled and diced
- 2 cloves garlic, minced
- 1 cup frozen peas
- 2 tablespoons tomato paste
- 1 cup beef broth
- 1 tablespoon Worcestershire sauce
- 4 medium potatoes, peeled and cubed
- 4 tablespoons butter, divided
- 1/2 cup milk
- 1/2 teaspoon salt
- 1/4 teaspoon black pepper
Instructions
- Place the potatoes in a medium pot and cover with water. Bring to a boil and cook until tender, about 12 minutes. Drain, then mash with 2 tablespoons butter, the milk, salt, and pepper until smooth. Set aside.
- Heat the remaining 2 tablespoons butter in a large oven-safe skillet over medium heat. Add the ground beef and cook until browned, breaking it up with a spoon as it cooks.
- Stir in the onion, carrots, and garlic. Cook for 5 minutes until the vegetables begin to soften.
- Add the tomato paste, beef broth, Worcestershire sauce, and frozen peas. Simmer for 8 minutes until the mixture thickens slightly and the peas are heated through.
- Remove the skillet from the heat. Spread the mashed potatoes evenly over the beef mixture, smoothing the top with the back of a spoon.
- Place the skillet under the broiler for 3 to 4 minutes until the potato topping turns lightly golden. Watch closely to avoid burning.
Notes
Cuisine: American
Equipment: Large Oven-Safe Skillet, Medium Pot, Potato Masher
Slow Cooker Pulled Pork Sandwiches with Coleslaw
This recipe turns a few simple ingredients into tender pulled pork that practically cooks itself. The slow cooker does the heavy lifting, leaving you with juicy meat that pairs well with a crisp homemade coleslaw. It works especially well on busy weekdays when you want a satisfying meal without much hands-on time.
The pork comes out soft and flavorful after simmering in barbecue sauce, while the coleslaw adds a fresh crunch that balances the richness. Served on soft buns, these sandwiches feel like classic comfort food that still comes together easily at home.


Equipment
- Slow Cooker
- Mixing Bowl
- Knife
Ingredients
- 2 pounds pork shoulder
- 1 cup barbecue sauce
- 1 onion, sliced
- 2 cloves garlic, minced
- 1 teaspoon paprika
- 1 teaspoon salt
- 1/2 teaspoon black pepper
- 4 hamburger buns
- 2 cups shredded cabbage
- 1 carrot, shredded
- 1/4 cup mayonnaise
- 1 tablespoon apple cider vinegar
- 1 teaspoon sugar
- Salt and pepper to taste
Instructions
- Place the pork shoulder in the slow cooker. Add the sliced onion, minced garlic, paprika, salt, and black pepper.
- Pour the barbecue sauce over the pork and onions. Cover and cook on low for 8 hours or until the pork is very tender.
- While the pork cooks, make the coleslaw. In a mixing bowl, combine the shredded cabbage, shredded carrot, mayonnaise, apple cider vinegar, sugar, and salt and pepper to taste. Stir well and refrigerate until ready to serve.
- Once the pork is done, remove it from the slow cooker and shred it with two forks. Return the shredded pork to the slow cooker and stir it into the remaining sauce.
- Spoon the pulled pork onto the hamburger buns. Top each sandwich with a generous scoop of coleslaw.
Notes
Cuisine: American
Equipment: Slow Cooker, Mixing Bowl, Knife
Cheesy Broccoli Rice Casserole
This casserole brings together tender rice, fresh broccoli, and plenty of melted cheese in one easy dish. It works well for busy weeknights when you want something warm and filling without much effort. The texture stays creamy while the broccoli keeps a slight bite, and the cheese adds a rich but familiar flavor.


Equipment
- Baking dish
- Skillet
- Saucepan
- Mixing bowl
Ingredients
- 1 cup uncooked white rice
- 2 cups fresh broccoli florets
- 2 cups shredded cheddar cheese, divided
- 1 can (10.5 oz) cream of chicken soup
- 1/2 cup milk
- 1/4 cup diced onion
- 1 tablespoon butter
- 1/2 teaspoon garlic powder
- Salt and black pepper to taste
Instructions
- Cook the rice according to the package directions and set it aside.
- Steam the broccoli florets for 4 minutes until they turn bright green and still feel firm.
- Melt the butter in a skillet over medium heat and cook the diced onion until it softens.
- Stir in the cream of chicken soup, milk, garlic powder, salt, and pepper until the mixture is smooth.
- Combine the cooked rice, steamed broccoli, and half of the shredded cheddar cheese in a large bowl.
- Pour the soup mixture over the rice and broccoli and stir until everything is evenly coated.
- Transfer the mixture to a greased baking dish and sprinkle the remaining cheese on top.
- Bake at 350°F for 20 minutes until the cheese is melted and the edges start to bubble.
Notes
Cuisine: American
Equipment: Baking dish, Skillet, Saucepan, Mixing bowl
Homemade Chicken Noodle Soup
This homemade chicken noodle soup brings simple ingredients together for a warm bowl that feels like a reset button on a busy day. It works well for weeknight dinners or when you want something soothing without much fuss. The broth stays light while the chicken turns tender and the noodles soak up just enough flavor.
The vegetables add a gentle sweetness and the whole dish comes out balanced rather than heavy.


Equipment
- Large pot
- Cutting board
- Knife
- Wooden spoon
Ingredients
- 1 tablespoon olive oil
- 1 onion, diced
- 2 carrots, sliced
- 2 celery stalks, sliced
- 2 cloves garlic, minced
- 1 pound boneless skinless chicken breasts
- 8 cups chicken broth
- 1 teaspoon dried thyme
- 8 ounces egg noodles
- Salt and pepper to taste
- 2 tablespoons fresh parsley, chopped
Instructions
- Heat the olive oil in a large pot over medium heat. Add the onion, carrots, and celery and cook until the vegetables begin to soften.
- Stir in the garlic and cook for one minute until fragrant.
- Place the chicken breasts in the pot and pour in the chicken broth. Add the dried thyme and bring the mixture to a boil.
- Reduce the heat to low and simmer until the chicken is fully cooked, about 15 minutes. Remove the chicken from the pot and shred it with two forks.
- Return the shredded chicken to the pot. Add the egg noodles and cook until they are tender.
- Season with salt and pepper. Ladle the soup into bowls and sprinkle with fresh parsley before serving.
Notes
Cuisine: American
Equipment: Large pot, Cutting board, Knife, Wooden spoon
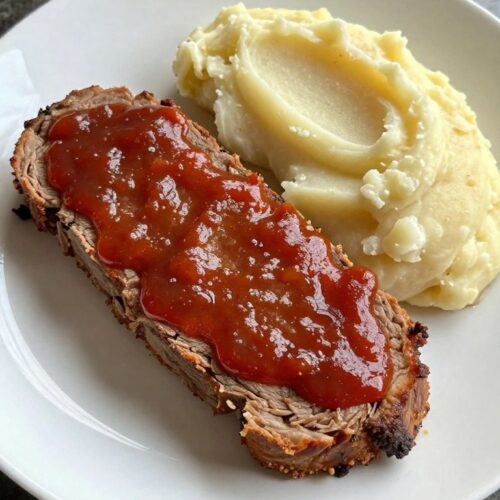
Meatloaf with Garlic Mashed Potatoes
This meatloaf with garlic mashed potatoes is a reliable choice for weeknight meals or casual weekend gatherings. It comes together with basic pantry staples and delivers a filling plate that feels familiar and satisfying.
The meatloaf bakes up tender with a light glaze, while the potatoes turn out creamy and lightly flavored with garlic. Together they create a balanced meal that works well for both adults and kids at the table.

Equipment
- Mixing Bowl
- Loaf Pan
- Large Pot
- Potato Masher
Ingredients
- 1 pound ground beef
- 1/2 cup breadcrumbs
- 1 large egg
- 1/4 cup milk
- 1 small onion, finely chopped
- 4 cloves garlic, minced and divided
- 1 1/2 pounds potatoes, peeled and cubed
- 1/2 cup butter, divided
- 1/2 cup milk
- Salt and black pepper to taste
- 2 tablespoons ketchup
Instructions
- Preheat the oven to 375 degrees and lightly grease a loaf pan. In a mixing bowl combine the ground beef, breadcrumbs, egg, 1/4 cup milk, onion, half the minced garlic, salt, and pepper. Mix until evenly combined but do not overwork the meat.
- Transfer the mixture to the prepared loaf pan and shape it into a loaf. Spread the ketchup evenly over the top. Bake for 50 to 55 minutes until the internal temperature reaches 160 degrees.
- While the meatloaf bakes, place the potatoes in a large pot and cover with cold water. Add a pinch of salt and bring to a boil. Cook until the potatoes are fork-tender, about 15 minutes.
- Drain the potatoes and return them to the pot. Add the remaining minced garlic, 1/4 cup butter, and 1/2 cup milk. Mash until smooth and creamy. Season with additional salt and pepper if needed.
- Remove the meatloaf from the oven and let it rest for 5 minutes. Slice and serve with a scoop of the garlic mashed potatoes on the side.
Notes
Cuisine: American
Equipment: Mixing Bowl, Loaf Pan, Large Pot, Potato Masher
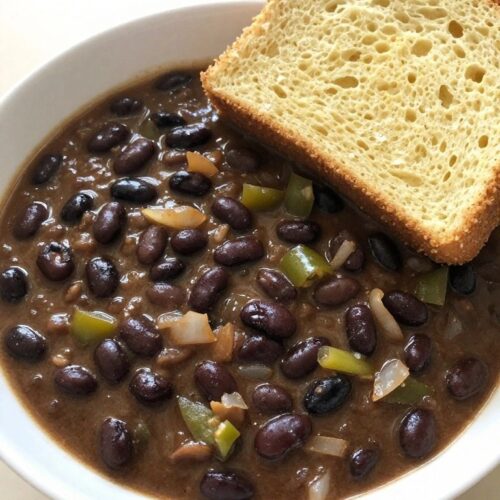
Vegetarian Black Bean Chili with Cornbread
This vegetarian black bean chili offers a hearty bowl of beans and vegetables that feels filling without any meat. The homemade cornbread on the side gives a warm, slightly sweet contrast that makes the whole meal feel complete on a cool evening or after a long day.
The chili simmers into a thick, spiced stew with earthy beans and tender peppers. The cornbread bakes up tender inside with a light golden crust that pairs well with every spoonful.

Equipment
- Large pot
- Mixing bowl
- Baking pan
Ingredients
- 2 tablespoons olive oil
- 1 medium onion, diced
- 1 green bell pepper, diced
- 3 cloves garlic, minced
- 2 cans (15 oz each) black beans, drained and rinsed
- 1 can (14.5 oz) diced tomatoes
- 2 tablespoons chili powder
- 1 teaspoon ground cumin
- 1 cup vegetable broth
- Salt and pepper to taste
- 1 cup cornmeal
- 1 cup all-purpose flour
- 1 tablespoon baking powder
- 1/4 cup sugar
- 1 cup milk
- 1 large egg
- 1/4 cup vegetable oil
Instructions
- Heat the olive oil in a large pot over medium heat. Add the onion and green bell pepper. Cook for 5 minutes until the vegetables soften.
- Stir in the garlic and cook for 1 minute until fragrant.
- Add the black beans, diced tomatoes, chili powder, cumin, vegetable broth, salt, and pepper. Stir everything together and bring the mixture to a simmer.
- Reduce the heat to low and let the chili cook uncovered for 20 minutes, stirring occasionally until it thickens.
- While the chili simmers, preheat the oven to 400 degrees and grease a baking pan.
- In a mixing bowl, combine the cornmeal, flour, baking powder, and sugar. In a separate bowl, whisk together the milk, egg, and vegetable oil.
- Pour the wet ingredients into the dry ingredients and stir until just combined. Spread the batter evenly in the prepared pan.
- Bake the cornbread for 20 minutes until the top turns golden and a toothpick inserted in the center comes out clean.
- Let the cornbread cool for a few minutes, then cut it into squares and serve alongside the chili.
Notes
Cuisine: American
Equipment: Large pot, Mixing bowl, Baking pan
Tuna Noodle Casserole with Crispy Topping
This tuna noodle casserole is a reliable choice when you want a warm meal without much fuss. It combines tender noodles and mild tuna in a creamy sauce, then finishes with a golden breadcrumb layer for contrast. The recipe works well for weeknight dinners or when you need to feed a small group with pantry staples.
The texture stays balanced with soft noodles and a crunchy top, while the flavors stay simple and savory. It is easy to put together and bakes in one dish, which keeps cleanup light.


Equipment
- Large pot
- Colander
- 9×13 inch baking dish
- Mixing bowl
Ingredients
- 8 ounces egg noodles
- 2 cans (5 ounces each) tuna, drained
- 1 can (10.5 ounces) cream of mushroom soup
- 1 cup milk
- 1 cup frozen peas
- 1 cup shredded cheddar cheese
- 1 cup panko breadcrumbs
- 2 tablespoons butter, melted
- 1/2 teaspoon salt
- 1/4 teaspoon black pepper
Instructions
- Preheat the oven to 375 degrees and lightly grease a 9 by 13 inch baking dish.
- Bring a large pot of salted water to a boil and cook the egg noodles according to package directions until just tender. Drain and return them to the pot.
- Stir the cream of mushroom soup, milk, salt, and pepper into the noodles until evenly combined.
- Add the drained tuna, frozen peas, and half of the shredded cheddar cheese. Mix gently so the tuna stays in chunks.
- Transfer the mixture to the prepared baking dish and spread it into an even layer.
- In a small bowl, toss the panko breadcrumbs with the melted butter until coated. Sprinkle the remaining cheddar cheese over the casserole, then top with the buttered breadcrumbs.
- Bake for 25 minutes until the topping is golden and the edges are bubbling. Let it rest for 5 minutes before serving.
Notes
Cuisine: American
Equipment: Large pot, Colander, 9×13 inch baking dish, Mixing bowl
Buttermilk Pancakes with Sausage and Maple Syrup
This breakfast brings together fluffy pancakes made with buttermilk and simple savory sausage links finished with maple syrup. It works well for weekend mornings or any time you want a filling plate without much fuss. The pancakes stay light inside with a slight crisp on the edges while the sausage balances the sweetness of the syrup.
The whole dish comes together in one pan setup and uses everyday ingredients most kitchens already have on hand. It feels comforting yet straightforward enough for new cooks to handle with good results.


Equipment
- Large mixing bowl
- Whisk
- Griddle or large skillet
- Tongs
Ingredients
- 2 cups all-purpose flour
- 2 tablespoons sugar
- 2 teaspoons baking powder
- 1 teaspoon baking soda
- 1/2 teaspoon salt
- 2 cups buttermilk
- 2 large eggs
- 4 tablespoons unsalted butter, melted
- 8 breakfast sausage links
- Maple syrup, for serving
- Butter or oil, for cooking
Instructions
- In a large bowl whisk together the flour, sugar, baking powder, baking soda, and salt until evenly combined.
- In a separate bowl whisk the buttermilk, eggs, and melted butter until smooth.
- Pour the wet mixture into the dry ingredients and stir gently until just combined. Small lumps are fine. Let the batter rest for five minutes.
- Heat a griddle or large skillet over medium heat and add a little butter or oil. Cook the sausage links until browned and cooked through, turning occasionally. Remove and keep warm.
- Using the same griddle, pour 1/4 cup portions of batter for each pancake. Cook until bubbles form on top and the edges look set, then flip and cook until golden on the second side.
- Stack the pancakes on plates, add two sausage links per serving, and drizzle generously with maple syrup.
Notes
Cuisine: American
Equipment: Large mixing bowl, Whisk, Griddle or large skillet, Tongs
Eggplant Parmesan over Spaghetti
This eggplant parmesan over spaghetti layers crispy slices of eggplant with marinara sauce and melted cheese on a bed of pasta. It offers a hearty vegetarian meal that feels comforting and filling without complicated steps.
The dish works well for family dinners or casual weekends when you want something warm and satisfying. The eggplant stays tender inside with a light golden crust, while the spaghetti soaks up the savory tomato sauce and gooey cheese.


Equipment
- Baking sheet
- Baking dish
- Large pot
- Colander
Ingredients
- 2 large eggplants, sliced into 1/2-inch rounds
- 2 large eggs
- 2 cups Italian breadcrumbs
- 1/4 cup olive oil
- 3 cups marinara sauce
- 2 cups shredded mozzarella cheese
- 1/2 cup grated Parmesan cheese
- 12 ounces spaghetti
- Salt and black pepper to taste
- Fresh basil leaves for garnish
Instructions
- Preheat the oven to 400 degrees and line a baking sheet with parchment paper.
- Dip each eggplant slice into the beaten eggs, then coat it evenly with breadcrumbs. Place the slices on the prepared baking sheet.
- Drizzle the olive oil over the coated eggplant slices and season lightly with salt and pepper. Bake for 20 minutes, flipping halfway through, until the coating turns golden.
- Spread 1 cup of marinara sauce in the bottom of a baking dish. Arrange half the baked eggplant slices on top, then spoon more sauce over them and sprinkle with half the mozzarella and Parmesan.
- Repeat the layers with the remaining eggplant, sauce, and cheeses. Bake for 15 minutes until the cheese melts and bubbles.
- While the eggplant bakes, cook the spaghetti in a large pot of salted boiling water according to package directions. Drain the pasta.
- Divide the spaghetti among four plates, top each with eggplant parmesan slices, and garnish with fresh basil leaves.
Notes
Cuisine: Italian
Equipment: Baking sheet, Baking dish, Large pot, Colander
Beef Stroganoff with Egg Noodles
Beef Stroganoff with Egg Noodles combines tender beef strips and mushrooms in a creamy sauce that coats every strand of pasta. It delivers a hearty meal that feels comforting yet straightforward to prepare on any weeknight.
This dish suits family dinners when you want something warm and filling without complicated steps. The sauce stays rich and smooth while the egg noodles provide a soft, chewy texture that balances the savory beef.


Equipment
- Large Skillet
- Large Pot
- Colander
Ingredients
- 1 pound beef sirloin, thinly sliced
- 8 ounces mushrooms, sliced
- 1 medium onion, diced
- 2 cloves garlic, minced
- 2 cups beef broth
- 1 cup sour cream
- 2 tablespoons all-purpose flour
- 2 tablespoons butter
- 8 ounces egg noodles
- Salt and pepper to taste
- Fresh parsley, chopped (for garnish)
Instructions
- Bring a large pot of salted water to a boil and cook the egg noodles according to package directions until al dente. Drain and set aside.
- Melt the butter in a large skillet over medium heat. Add the sliced beef and cook until browned on all sides. Remove the beef and set it aside.
- Add the diced onion, sliced mushrooms, and minced garlic to the same skillet. Cook until the onion softens and the mushrooms release their liquid.
- Sprinkle the flour over the vegetables and stir for one minute to coat everything evenly.
- Slowly pour in the beef broth while stirring to avoid lumps. Simmer the mixture until it thickens into a sauce.
- Reduce the heat to low and stir in the sour cream. Return the beef to the skillet, season with salt and pepper, and heat through gently without letting the sauce boil.
- Spoon the beef and sauce over the cooked egg noodles. Sprinkle with fresh parsley before serving.
Notes
Cuisine: Russian
Equipment: Large Skillet, Large Pot, Colander
Warm Apple Crisp with Vanilla Ice Cream
This warm apple crisp combines soft baked apples with a golden oat topping that stays nicely crunchy. The vanilla ice cream melts slightly over the top and adds a cool finish that balances the warm spices.
It works well after dinner on a weeknight or when you want a simple dessert for a small group. The steps stay straightforward so you can pull it together without much fuss.


Equipment
- Baking Dish
- Mixing Bowl
Ingredients
- 4 medium apples, peeled and sliced
- 1/4 cup granulated sugar
- 1 teaspoon ground cinnamon
- 1 cup rolled oats
- 1/2 cup all-purpose flour
- 1/2 cup brown sugar
- 1/4 cup butter, melted
- Vanilla ice cream, for serving
Instructions
- Preheat the oven to 350 degrees and lightly grease an 8-inch baking dish.
- Place the sliced apples in a mixing bowl. Add the granulated sugar and cinnamon, then stir until the apples are evenly coated.
- Spread the apple mixture into the prepared baking dish in an even layer.
- In the same mixing bowl, combine the rolled oats, flour, and brown sugar. Pour the melted butter over the mixture and stir until it forms a crumbly topping.
- Sprinkle the oat topping evenly over the apples.
- Bake for 35 to 40 minutes until the topping turns golden and the apples feel tender when pierced with a fork.
- Remove the dish from the oven and let it rest for 5 minutes. Serve warm with scoops of vanilla ice cream.
Notes
Cuisine: American
Equipment: Baking Dish, Mixing Bowl