

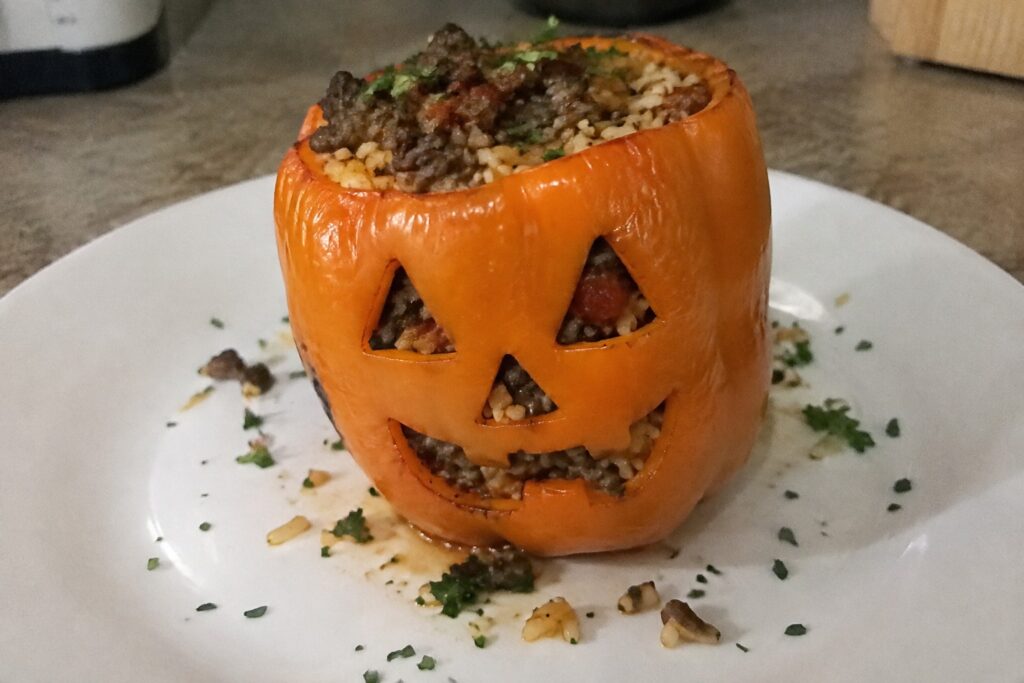
Planning dinner for Halloween night does not have to be complicated. Here are some easy recipes that fit the season. They are all straightforward to put together. Most take under an hour from start to finish. You can pick ones that match what your family likes.
Helpful Tips Before You Start
These tips will help you get the recipes on the table with less stress.
Shop with Overlap in Mind
Many of these recipes use similar ingredients like ground beef, cheese, and pasta. Buy in bulk to cover several meals at once.
Cut Shapes with Cookie Cutters
Press cutters into pizza dough, sandwiches, or cheese slices for quick ghosts, pumpkins, and bats. This step takes just a minute but adds instant holiday appeal.
Prep Components Ahead
Chop onions, brown meat, or mix sauces the day before. Store them in the fridge so assembly goes faster on the night you cook.
Assign Simple Tasks to Helpers
Let kids stir sauces or place toppings. This keeps them busy and turns dinner prep into a shared activity.
Stagger Oven Use
Check cooking times before starting. Bake items that need the same temperature back to back to avoid reheating the oven multiple times.
Jack-o’-Lantern Stuffed Peppers with Turkey and Rice
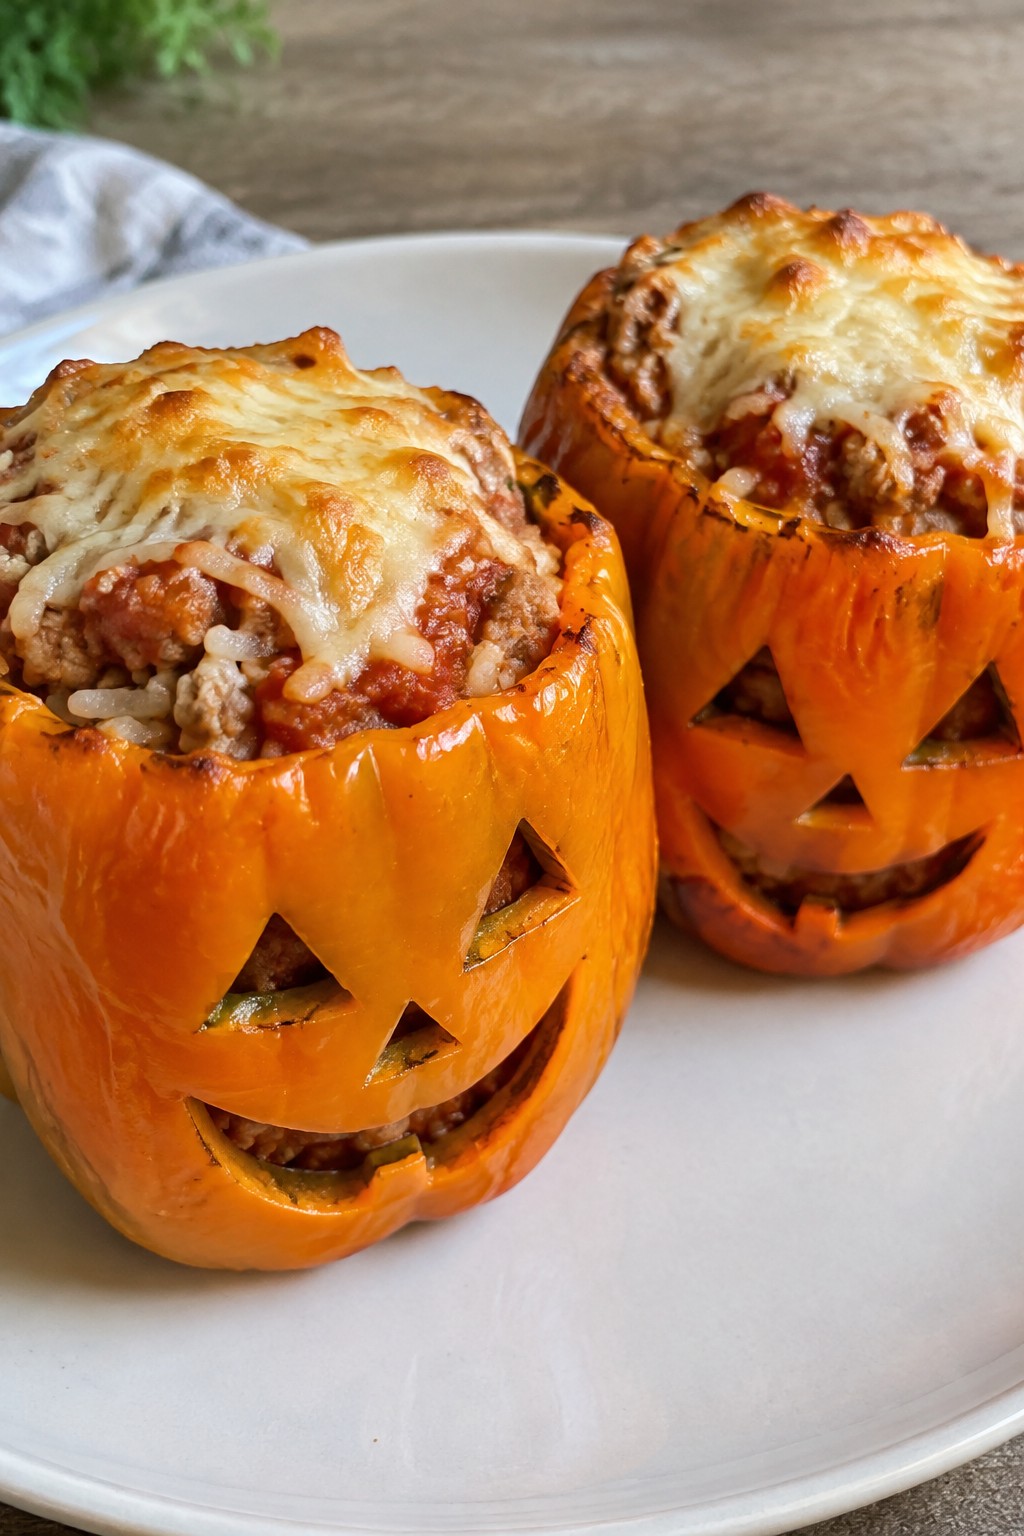
These stuffed peppers bring a simple Halloween touch to dinner without extra fuss. Carving faces into orange bell peppers turns the dish into a festive main that still feels like a regular weeknight meal. The turkey and rice filling stays savory and filling, with tomato sauce adding moisture and mild flavor.
The peppers soften during baking while the cheese on top melts into a light golden layer. It suits families looking for an easy way to mark the holiday at the table.

Equipment
- Baking dish
- Large skillet
- Knife
Ingredients
- 4 large orange bell peppers
- 1 pound ground turkey
- 1 cup cooked white rice
- 1 small onion, diced
- 2 cloves garlic, minced
- 1 (15-ounce) can tomato sauce
- 1 teaspoon Italian seasoning
- 1/2 teaspoon salt
- 1/4 teaspoon black pepper
- 1 cup shredded mozzarella cheese
Instructions
- Preheat the oven to 375°F. Slice the tops off the bell peppers and remove the seeds and membranes. Use a small knife to carve simple jack-o’-lantern faces into the sides of each pepper.
- In a large skillet over medium heat, cook the ground turkey with the diced onion and minced garlic until the turkey is no longer pink.
- Stir the cooked rice, 3/4 cup of the tomato sauce, Italian seasoning, salt, and black pepper into the skillet. Mix until everything is evenly combined and warmed through.
- Stand the carved peppers upright in a baking dish. Spoon the turkey and rice mixture into each pepper until filled.
- Spoon the remaining tomato sauce over the top of each stuffed pepper, then sprinkle the shredded mozzarella cheese evenly across the openings.
- Bake for 25 to 30 minutes until the peppers are tender and the cheese has melted.
Notes
Cuisine: American
Equipment: Baking dish, Large skillet, Knife
Spiderweb Black Bean and Sweet Potato Tacos
These tacos add a simple Halloween touch with a sour cream spiderweb on top. They work well for busy weeknights or a low-key dinner before holiday plans. The roasted sweet potatoes bring soft texture and mild sweetness that pairs with the earthy black beans.
The result is a filling meal that feels festive without extra effort. Corn tortillas keep everything easy to handle and eat by hand.


Equipment
- Baking sheet
- Large skillet
- Zip-top bag
Ingredients
- 2 medium sweet potatoes, peeled and cut into 1/2-inch cubes
- 2 tablespoons olive oil
- 1 teaspoon ground cumin
- 1 teaspoon chili powder
- 1/2 teaspoon salt
- 1 can (15 oz) black beans, drained and rinsed
- 8 small corn tortillas
- 1/2 cup sour cream
Instructions
- Preheat the oven to 400°F. Toss the sweet potato cubes with 1 tablespoon olive oil, cumin, chili powder, and salt on a baking sheet. Spread them in a single layer and roast for 20 minutes until tender and lightly browned.
- While the sweet potatoes roast, heat the remaining 1 tablespoon olive oil in a skillet over medium heat. Add the black beans and cook for 5 minutes, stirring occasionally, until warmed through. Season with a pinch of salt if needed.
- Warm the corn tortillas in a dry skillet or microwave for 20 seconds until pliable.
- Fill each tortilla with a scoop of roasted sweet potatoes and black beans. Place the sour cream in a small zip-top bag, snip off one corner, and pipe concentric circles on top of each taco. Drag a toothpick from the center outward to create the spiderweb pattern.
Notes
Cuisine: Mexican
Equipment: Baking sheet, Large skillet, Zip-top bag
Mummy Meatballs over Creamy Polenta
These mummy meatballs bring a simple Halloween touch to a classic comfort meal. Ground beef meatballs get wrapped in thin strips of dough before baking so they look like little mummies. The creamy polenta underneath adds a smooth, cheesy base that balances the savory meat.
This dish works well for weeknight dinners in October or for small gatherings. Kids enjoy the playful look while adults get a filling plate of meatballs and soft polenta with familiar Italian flavors.


Equipment
- Baking sheet
- Mixing bowl
- Medium pot
- Whisk
Ingredients
- 1 pound ground beef
- 1/4 cup plain breadcrumbs
- 1 large egg
- 1 teaspoon Italian seasoning
- 1/2 teaspoon salt
- 1/4 teaspoon black pepper
- 1 package refrigerated pizza dough
- 8 black olive slices
- 1 cup yellow cornmeal
- 4 cups chicken broth
- 1/2 cup grated Parmesan cheese
- 2 tablespoons butter
- 1/2 cup milk
Instructions
- Preheat the oven to 400 degrees F. Line a baking sheet with parchment paper.
- In a mixing bowl, combine the ground beef, breadcrumbs, egg, Italian seasoning, salt, and pepper. Mix until just combined, then roll into 12 meatballs about 1 1/2 inches wide.
- Place the meatballs on the baking sheet and bake for 15 minutes.
- While the meatballs bake, roll out the pizza dough on a lightly floured surface. Cut it into thin strips about 1/4 inch wide.
- Remove the meatballs from the oven. Wrap several dough strips around each meatball, leaving small gaps for the face. Add two olive slices to each meatball for eyes. Return to the oven for 10 more minutes until the dough is golden.
- Meanwhile, bring the chicken broth to a boil in a medium pot. Slowly whisk in the cornmeal. Reduce heat to low and cook, stirring often, for 10 minutes until thick.
- Stir the Parmesan, butter, and milk into the polenta until smooth and creamy.
- Spoon the polenta onto plates and top with the mummy meatballs.
Notes
Cuisine: American
Equipment: Baking sheet, Mixing bowl, Medium pot, Whisk
Ghostly Chicken Alfredo Pasta Bake
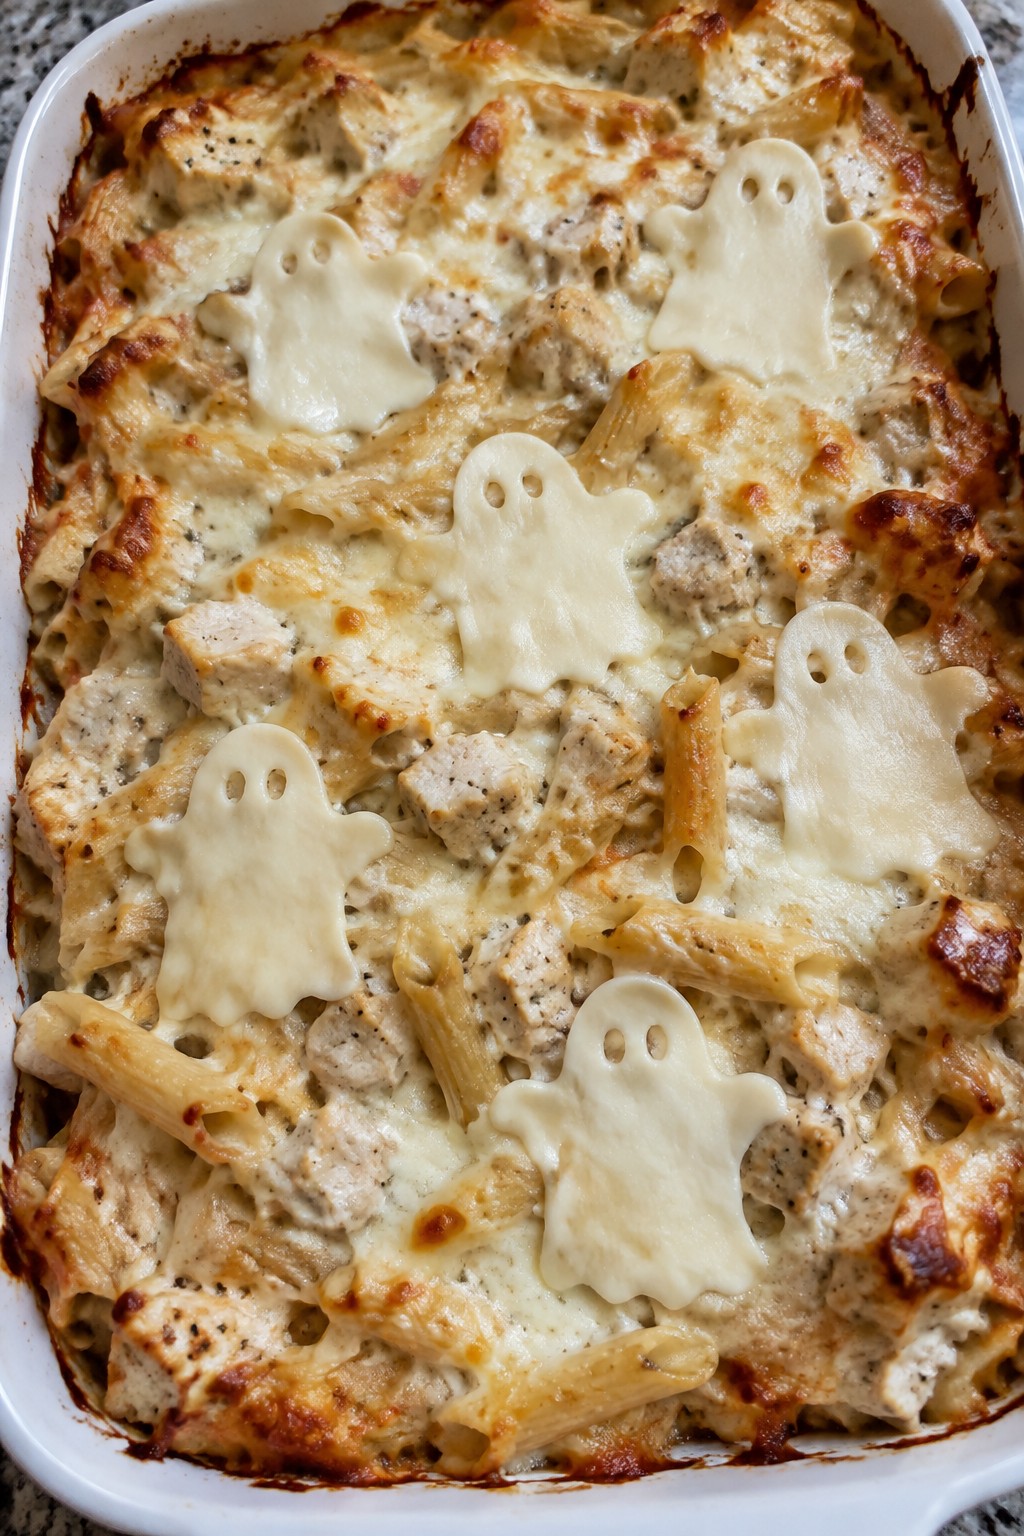
This chicken alfredo pasta bake adds a simple Halloween twist to a family favorite. Cubed chicken and pasta sit in a creamy sauce under a layer of melted cheese with ghost shapes on top. It comes together with basic steps and makes a warm, filling dinner.
The finished dish has a rich, cheesy flavor with tender pasta and chicken pieces throughout. The ghost cutouts stay soft on top while the shredded mozzarella browns lightly around them.
Equipment
- Large Pot
- Large Skillet
- 9×13 Baking Dish
- Knife
Ingredients
- 8 ounces penne pasta
- 1 pound boneless skinless chicken breasts, cut into 1-inch cubes
- 2 tablespoons butter
- 3 cloves garlic, minced
- 2 cups heavy cream
- 1 cup grated Parmesan cheese
- 1 teaspoon salt
- 1/2 teaspoon black pepper
- 1 cup shredded mozzarella cheese
- 4 slices mozzarella cheese
- 1 tablespoon chopped fresh parsley
Instructions
- Bring a large pot of salted water to a boil and cook the penne pasta until al dente. Drain and set aside.
- Melt the butter in a large skillet over medium heat. Add the cubed chicken and cook until no longer pink, about 6 minutes. Stir in the minced garlic and cook for 1 minute more.
- Pour the heavy cream into the skillet with the chicken. Add the grated Parmesan cheese, salt, and black pepper. Stir until the cheese melts and the sauce thickens slightly, about 4 minutes.
- Add the drained pasta to the skillet and stir until everything is coated in the sauce. Transfer the mixture to a greased 9×13 baking dish.
- Sprinkle the shredded mozzarella cheese evenly over the top. Use a small ghost-shaped cookie cutter to cut shapes from the mozzarella slices and arrange them on the surface.
- Bake at 375°F for 20 minutes until the cheese is melted and lightly golden. Remove from the oven and sprinkle with chopped parsley before serving.
Notes
Cuisine: Italian
Equipment: Large Pot, Large Skillet, 9×13 Baking Dish, Knife
Witch’s Cauldron Beef and Pumpkin Chili
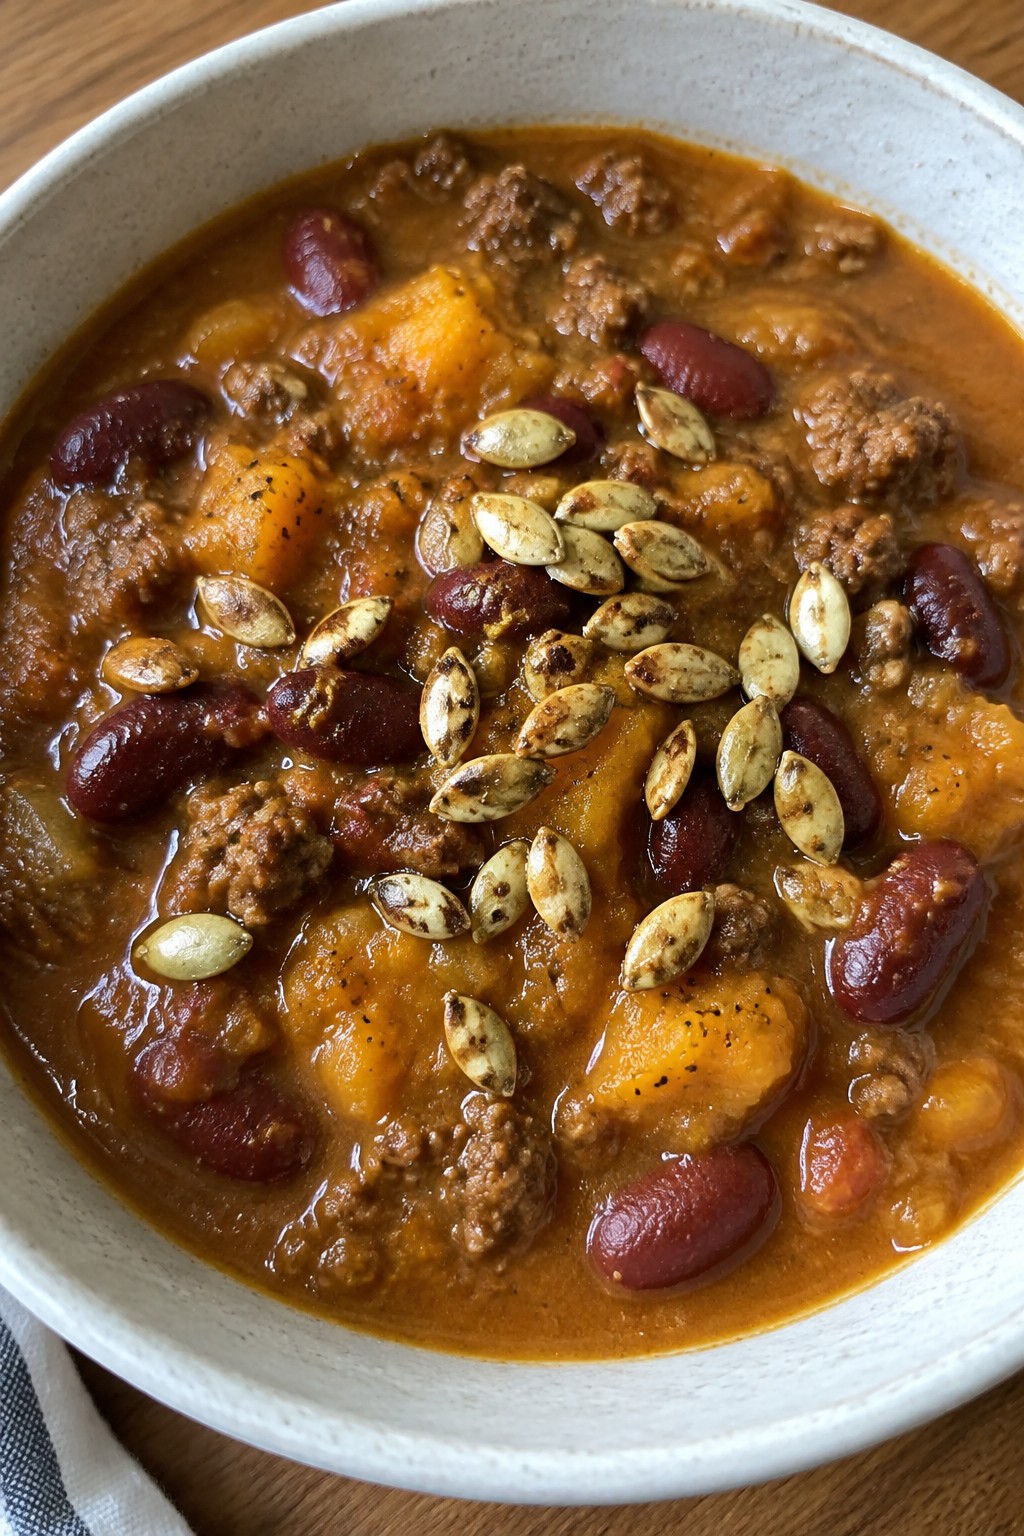
This beef and pumpkin chili makes a filling dinner that fits right into spooky season. The pumpkin adds a subtle sweetness that balances the spices and beef. It works well for weeknight meals or parties since it comes together in one pot and tastes even better the next day.
The result is a thick chili with tender beef and soft beans in a rich, spiced broth. Pumpkin seeds on top add a light crunch without overpowering the dish.

Equipment
- Large pot
- Wooden spoon
- Can opener
Ingredients
- 1 pound ground beef
- 1 medium onion, diced
- 2 garlic cloves, minced
- 2 tablespoons chili powder
- 1 teaspoon ground cumin
- 1 can (15 ounces) pumpkin puree
- 1 can (15 ounces) kidney beans, drained and rinsed
- 1 can (14.5 ounces) diced tomatoes
- 1 cup beef broth
- Salt and pepper, to taste
- Shredded cheddar cheese, for serving
- Sour cream, for serving
- Chopped green onions, for serving
- Roasted pumpkin seeds, for serving
Instructions
- Heat a large pot over medium heat and add the ground beef. Cook until browned, breaking it up with a spoon as it cooks.
- Add the diced onion and minced garlic to the pot. Stir and cook for 3 to 4 minutes until the onion softens.
- Sprinkle in the chili powder and cumin. Stir for 1 minute to coat the meat and release the spices.
- Pour in the pumpkin puree, kidney beans, diced tomatoes, and beef broth. Stir everything together until well combined.
- Bring the mixture to a simmer, then reduce the heat to low. Cook uncovered for 20 minutes, stirring occasionally.
- Taste and add salt and pepper as needed. Ladle into bowls and top with shredded cheddar cheese, sour cream, chopped green onions, and roasted pumpkin seeds.
Notes
Cuisine: American
Equipment: Large pot, Wooden spoon, Can opener
Monster Eyeball Sausage and Veggie Sheet Pan Dinner
This sheet pan dinner turns simple sausages and roasted vegetables into a fun Halloween meal. The sausages stay juicy while the vegetables get crispy edges, and the whole dish comes together with almost no hands-on time. It works well for busy weeknights or casual parties when you want something hearty that still feels festive.
The flavor is savory and slightly garlicky, with the natural sweetness of roasted peppers and potatoes balancing the rich sausages. Adding the mozzarella and olive “eyeballs” at the end gives it a playful look without extra cooking steps.


Equipment
- Baking Sheet
- Knife
- Cutting Board
Ingredients
- 8 link sausages
- 1 lb baby potatoes, halved
- 2 cups broccoli florets
- 1 red bell pepper, sliced
- 2 tablespoons olive oil
- 1 teaspoon garlic powder
- 1/2 teaspoon dried oregano
- Salt and black pepper
- 8 small fresh mozzarella balls
- 8 black olives
Instructions
- Preheat the oven to 425°F and line a large baking sheet with parchment paper or foil.
- Place the sausages, halved baby potatoes, broccoli florets, and sliced red bell pepper on the baking sheet.
- Drizzle the olive oil over everything, then sprinkle with garlic powder, oregano, salt, and black pepper. Toss to coat evenly.
- Spread the ingredients in a single layer and bake for 25 to 30 minutes, turning the sausages and stirring the vegetables halfway through.
- Remove the pan from the oven. Place one mozzarella ball on top of each sausage.
- Slice each black olive in half and set one half on each mozzarella ball to create the eyeball effect. Serve right away.
Notes
Cuisine: American
Equipment: Baking Sheet, Knife, Cutting Board
Bat Wing Buffalo Cauliflower Bowls with Quinoa
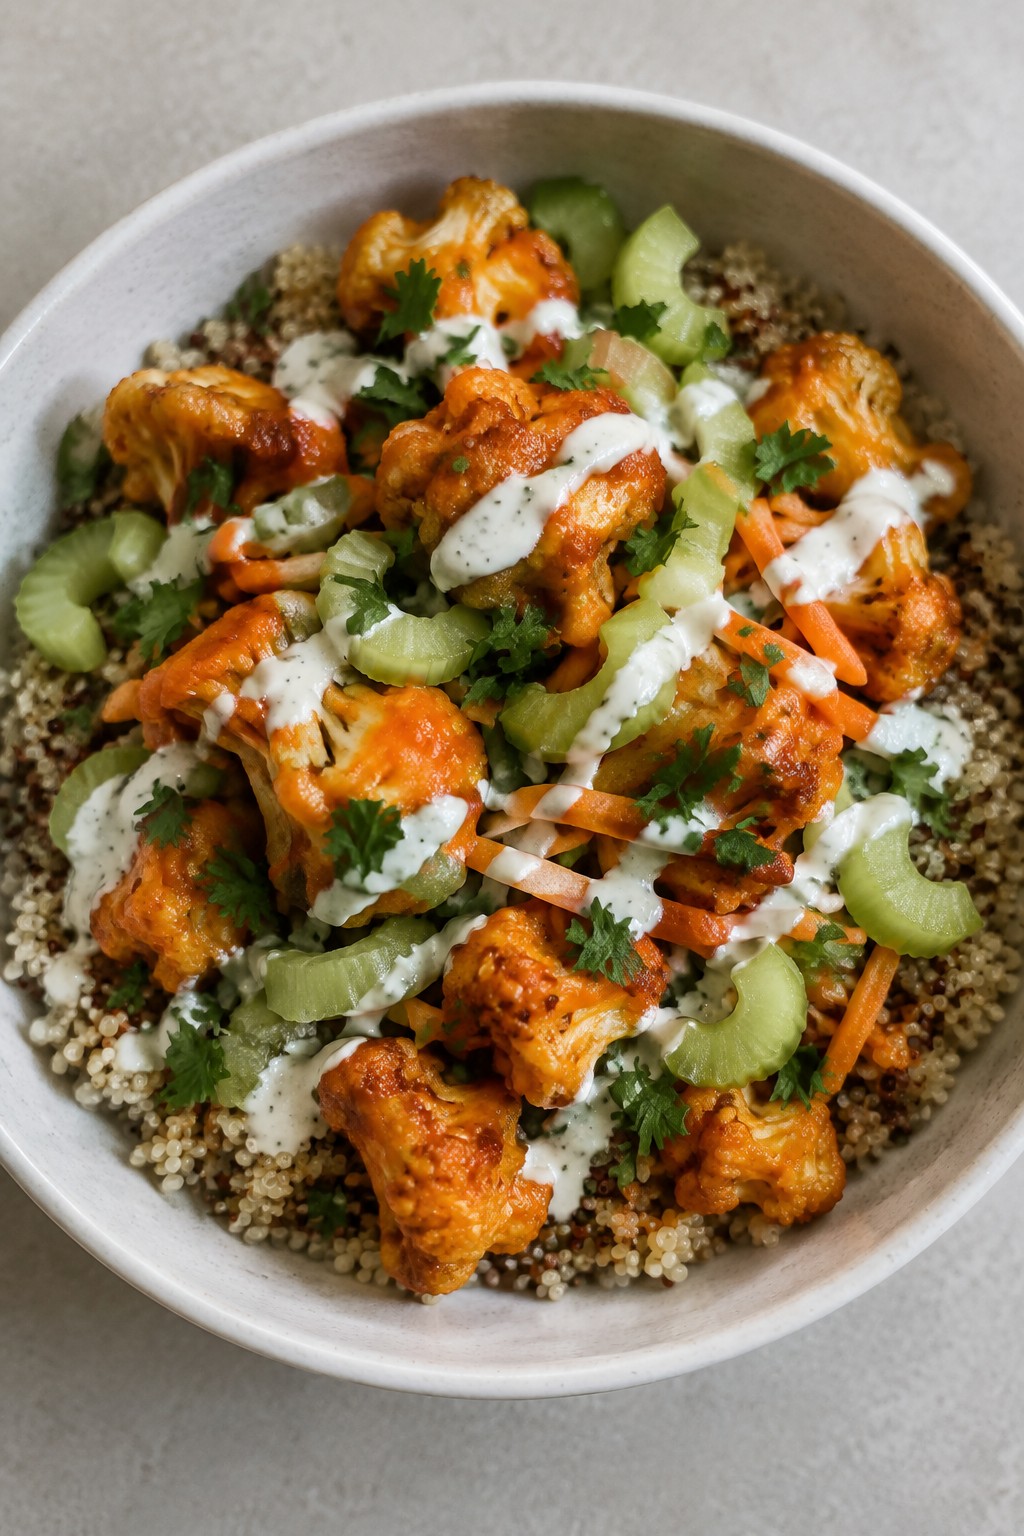
This recipe gives cauliflower a fun bat wing twist with a spicy buffalo coating. The quinoa base keeps the bowls filling enough for dinner while the roasted florets add crunch and heat. It works well on busy weeknights when you want something festive without extra effort.
The flavors stay balanced with cooling ranch and crisp vegetables alongside the bold sauce. You can adjust the spice level easily by choosing a milder buffalo sauce if needed.

Equipment
- Saucepan
- Baking sheet
- Mixing bowl
Ingredients
- 1 cup quinoa
- 2 cups water
- 1 large head cauliflower, cut into small florets
- 1/2 cup buffalo wing sauce
- 2 tablespoons olive oil
- 1 teaspoon garlic powder
- 1/2 teaspoon salt
- 1/4 teaspoon black pepper
- 2 celery stalks, thinly sliced
- 1/2 cup shredded carrots
- 1/4 cup ranch dressing
- 2 tablespoons chopped fresh parsley
Instructions
- Rinse the quinoa under cold water. Place it in a saucepan with the water and bring to a boil. Reduce heat to low, cover, and simmer for 15 minutes until the water is absorbed. Remove from heat and let it sit covered for 5 minutes, then fluff with a fork.
- Preheat the oven to 425 degrees F. Line a baking sheet with parchment paper. In a large bowl, toss the cauliflower florets with olive oil, garlic powder, salt, and black pepper until evenly coated.
- Spread the cauliflower in a single layer on the baking sheet. Roast for 20 minutes, flipping the pieces halfway through, until the edges turn golden and crisp.
- Remove the cauliflower from the oven and immediately toss it in a clean bowl with the buffalo wing sauce until fully coated.
- Divide the cooked quinoa among four bowls. Top each with the buffalo cauliflower, sliced celery, and shredded carrots. Drizzle with ranch dressing and sprinkle with chopped parsley before serving.
Notes
Cuisine: American
Equipment: Saucepan, Baking sheet, Mixing bowl
Bloody Beet Risotto with Crispy Sage
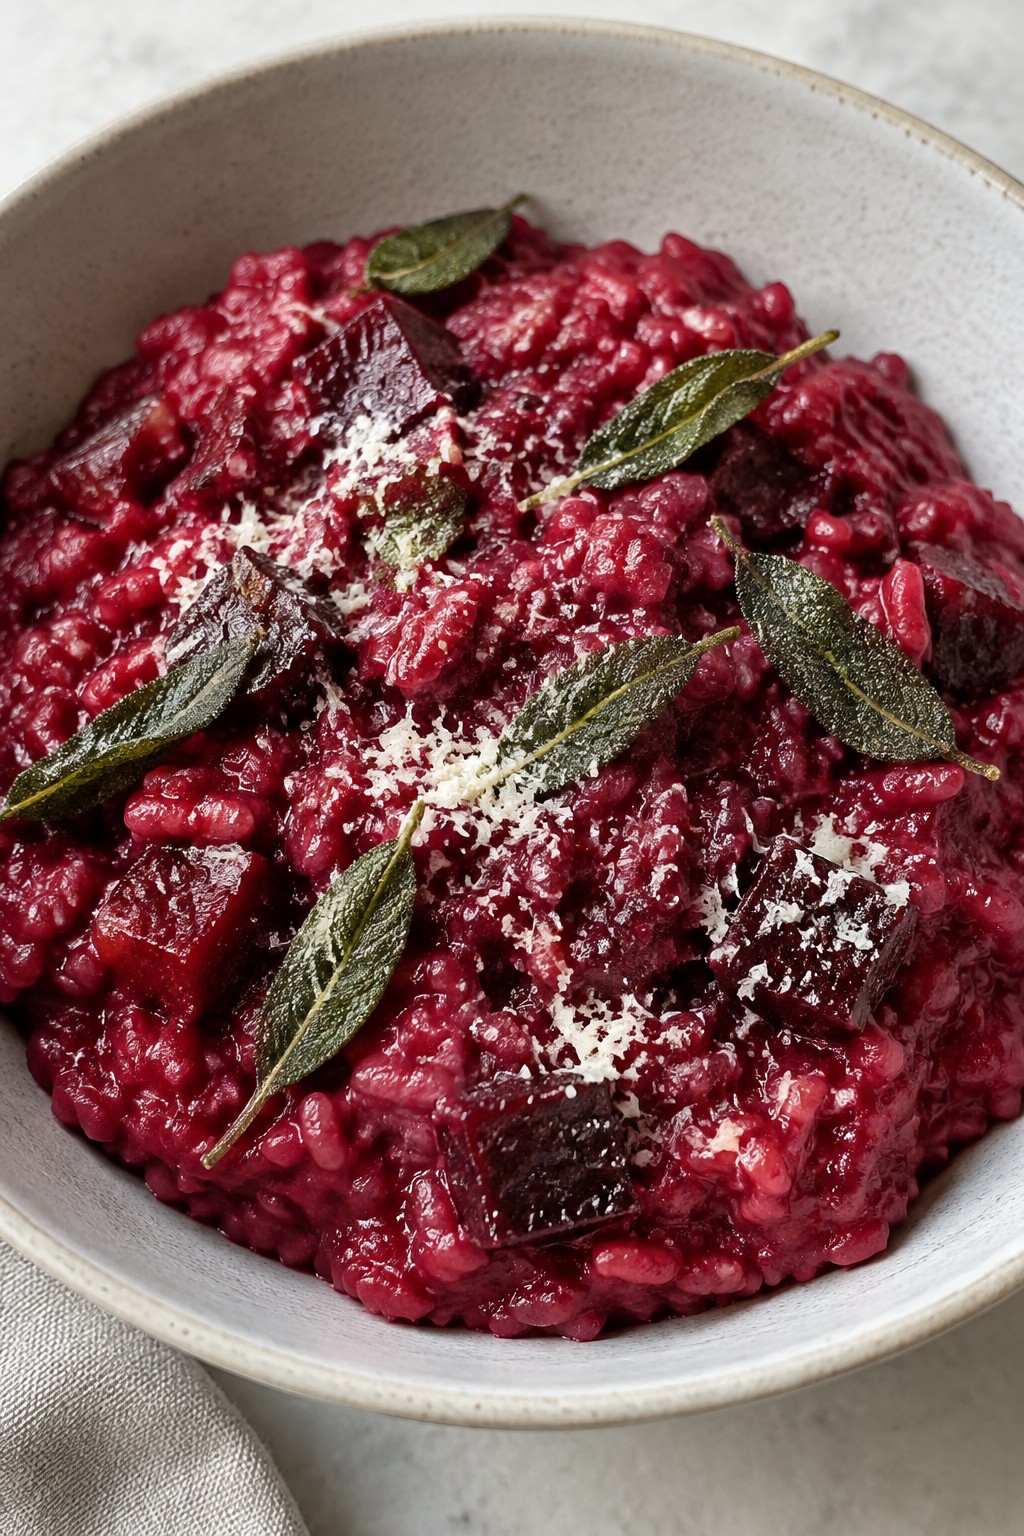
This risotto brings a deep red color to the table without any artificial dyes. Roasted beets give it an earthy sweetness that pairs well with creamy rice and salty Parmesan. The crispy sage on top adds a savory crunch that makes each bite more interesting.
It works well for a Halloween dinner because the color stands out while still tasting like a comforting bowl of risotto. The steps stay simple, and most of the work happens in one pot.
Equipment
- Baking sheet
- Large pot
- Saucepan
- Blender
- Small skillet
Ingredients
- 4 medium beets
- 1 1/2 cups Arborio rice
- 5 cups vegetable broth
- 1 small onion, finely chopped
- 3 garlic cloves, minced
- 1/4 cup olive oil
- 1/2 cup grated Parmesan cheese
- 20 fresh sage leaves
- 2 tablespoons butter
- Salt and black pepper to taste
Instructions
- Preheat the oven to 400°F. Wrap the beets in foil and roast them for 45 minutes until tender. Let them cool, then peel and puree three of them in a blender. Cut the fourth beet into small cubes and set aside.
- Warm the vegetable broth in a saucepan over low heat.
- Heat 2 tablespoons of the olive oil in a large pot over medium heat. Add the onion and cook until soft. Stir in the garlic and cook for one more minute.
- Add the Arborio rice and stir for two minutes until the grains look slightly toasted.
- Ladle in the warm broth one cup at a time, stirring often. Wait until each addition is absorbed before adding the next. Continue until the rice is creamy and cooked through.
- Stir the beet puree, cubed beets, Parmesan, and butter into the rice. Season with salt and pepper.
- Heat the remaining olive oil in a small skillet over medium heat. Add the sage leaves and fry for 30 seconds per side until crisp. Drain on a paper towel.
- Spoon the risotto into bowls and top with the crispy sage leaves.
Notes
Cuisine: Italian
Equipment: Baking sheet, Large pot, Saucepan, Blender, Small skillet
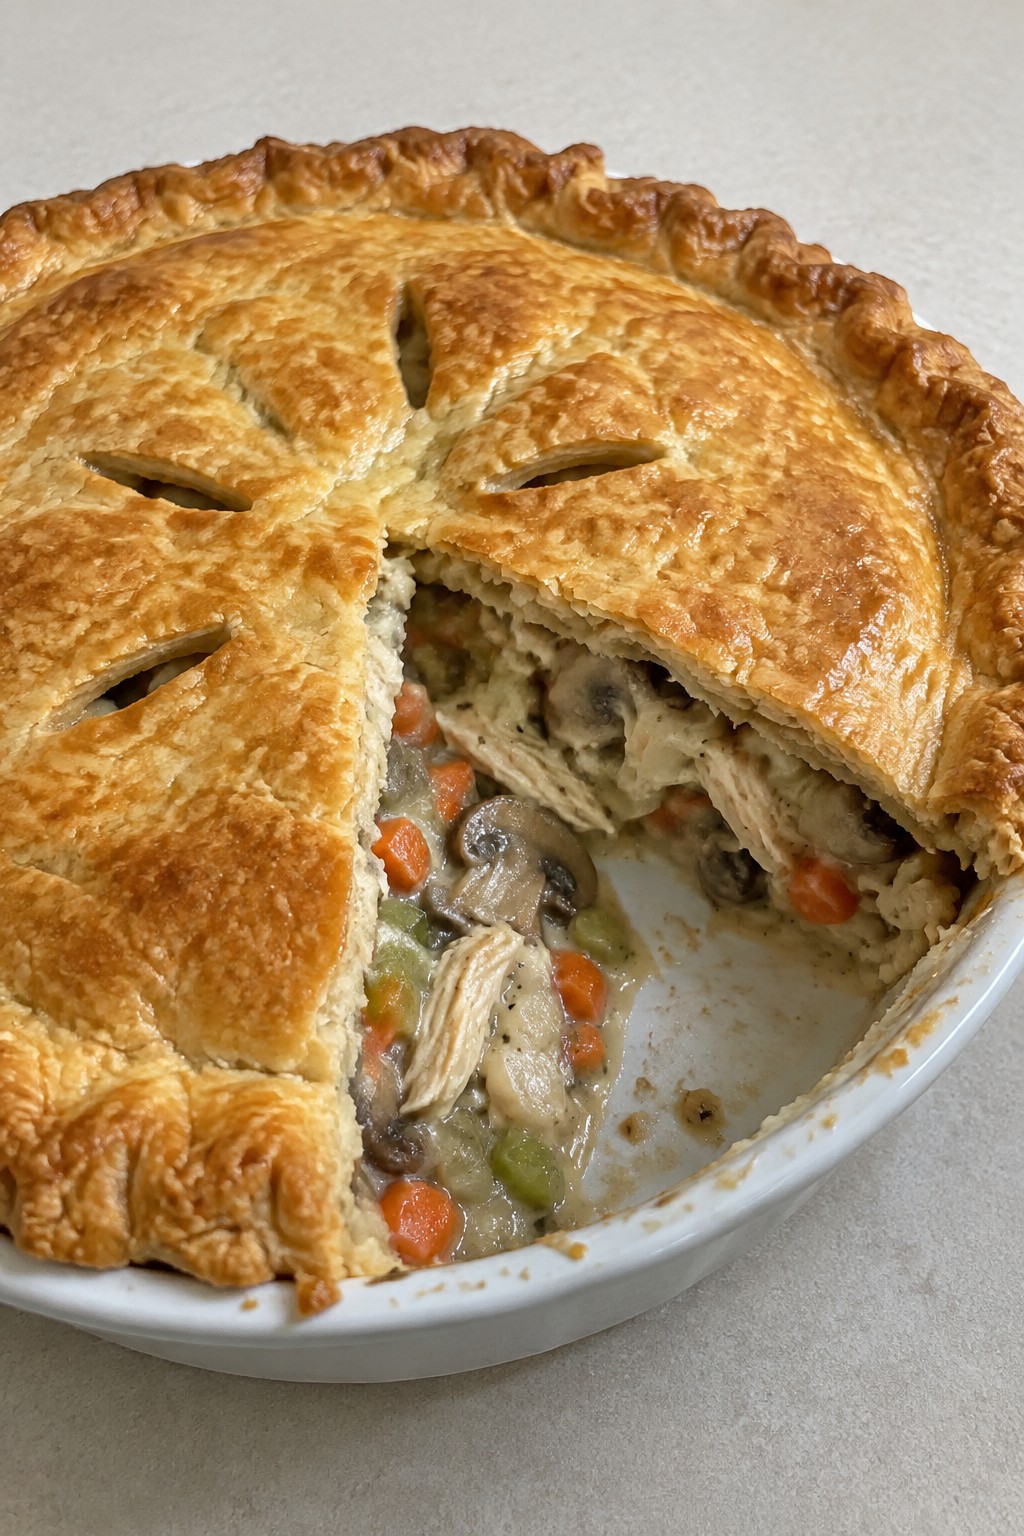
Haunted Forest Mushroom and Chicken Pot Pie
This chicken pot pie brings together tender meat and earthy mushrooms in a creamy filling under a golden crust. It works well for a weeknight Halloween dinner because it comes together with pantry staples and leftover chicken. The result is a savory, hearty dish with soft vegetables and a flaky top that feels comforting on cooler evenings.

Equipment
- Large Skillet
- 9-inch Pie Dish
- Oven
Ingredients
- 2 tablespoons butter
- 1 onion, diced
- 2 carrots, diced
- 2 celery stalks, diced
- 8 ounces mushrooms, sliced
- 2 cloves garlic, minced
- 3 tablespoons all-purpose flour
- 2 cups chicken broth
- 1/2 cup heavy cream
- 2 cups cooked chicken, shredded
- 1 teaspoon dried thyme
- Salt and pepper to taste
- 1 store-bought pie crust
- 1 egg, beaten
Instructions
- Preheat the oven to 400 degrees Fahrenheit and set a 9-inch pie dish nearby.
- Melt the butter in a large skillet over medium heat. Add the onion, carrots, and celery, then cook for 4 minutes until they begin to soften.
- Stir in the mushrooms and garlic. Cook for another 5 minutes until the mushrooms release their liquid and start to brown.
- Sprinkle the flour over the vegetables and stir for 1 minute to coat everything evenly.
- Slowly pour in the chicken broth while stirring, then add the heavy cream. Continue stirring until the mixture thickens, about 3 minutes.
- Add the shredded chicken and thyme. Season with salt and pepper, then remove the skillet from the heat.
- Transfer the filling to the pie dish. Lay the pie crust over the top, trim any excess, and crimp the edges. Cut a few small slits in the center for steam.
- Brush the crust with the beaten egg. Bake for 25 minutes until the crust is golden and the filling bubbles at the edges.
Notes
Cuisine: American
Equipment: Large Skillet, 9-inch Pie Dish, Oven
Creepy Crawly Garlic Butter Shrimp Stir-Fry
This garlic butter shrimp stir-fry brings bold flavor to the table with tender shrimp and crisp vegetables in a simple sauce. The broccoli florets add a fun shape that fits right into a Halloween meal, while the quick cooking keeps everything easy for busy weeknights.
The dish tastes savory and garlicky with a light touch of sweetness and heat. It works well as a fast dinner that still feels a little special for the holiday.


Equipment
- Large Skillet
- Knife
- Cutting Board
Ingredients
- 1 pound large shrimp, peeled and deveined
- 3 tablespoons butter
- 5 garlic cloves, minced
- 3 cups broccoli florets
- 1 cup sliced mushrooms
- 2 tablespoons soy sauce
- 1 tablespoon honey
- 1 teaspoon red pepper flakes
- 2 green onions, sliced
- Cooked rice, for serving
Instructions
- Melt 2 tablespoons of the butter in a large skillet over medium heat. Add the minced garlic and cook for 30 seconds until fragrant.
- Add the broccoli florets and sliced mushrooms to the skillet. Stir and cook for 4 minutes until the vegetables start to soften.
- Push the vegetables to the side of the skillet. Add the shrimp in a single layer and cook for 2 minutes per side until pink and opaque.
- Stir in the soy sauce, honey, and red pepper flakes. Add the remaining tablespoon of butter and toss everything together for 1 minute until the sauce coats the shrimp and vegetables.
- Remove the skillet from the heat. Sprinkle the sliced green onions over the top and serve the stir-fry over cooked rice.
Notes
Cuisine: Asian
Equipment: Large Skillet, Knife, Cutting Board
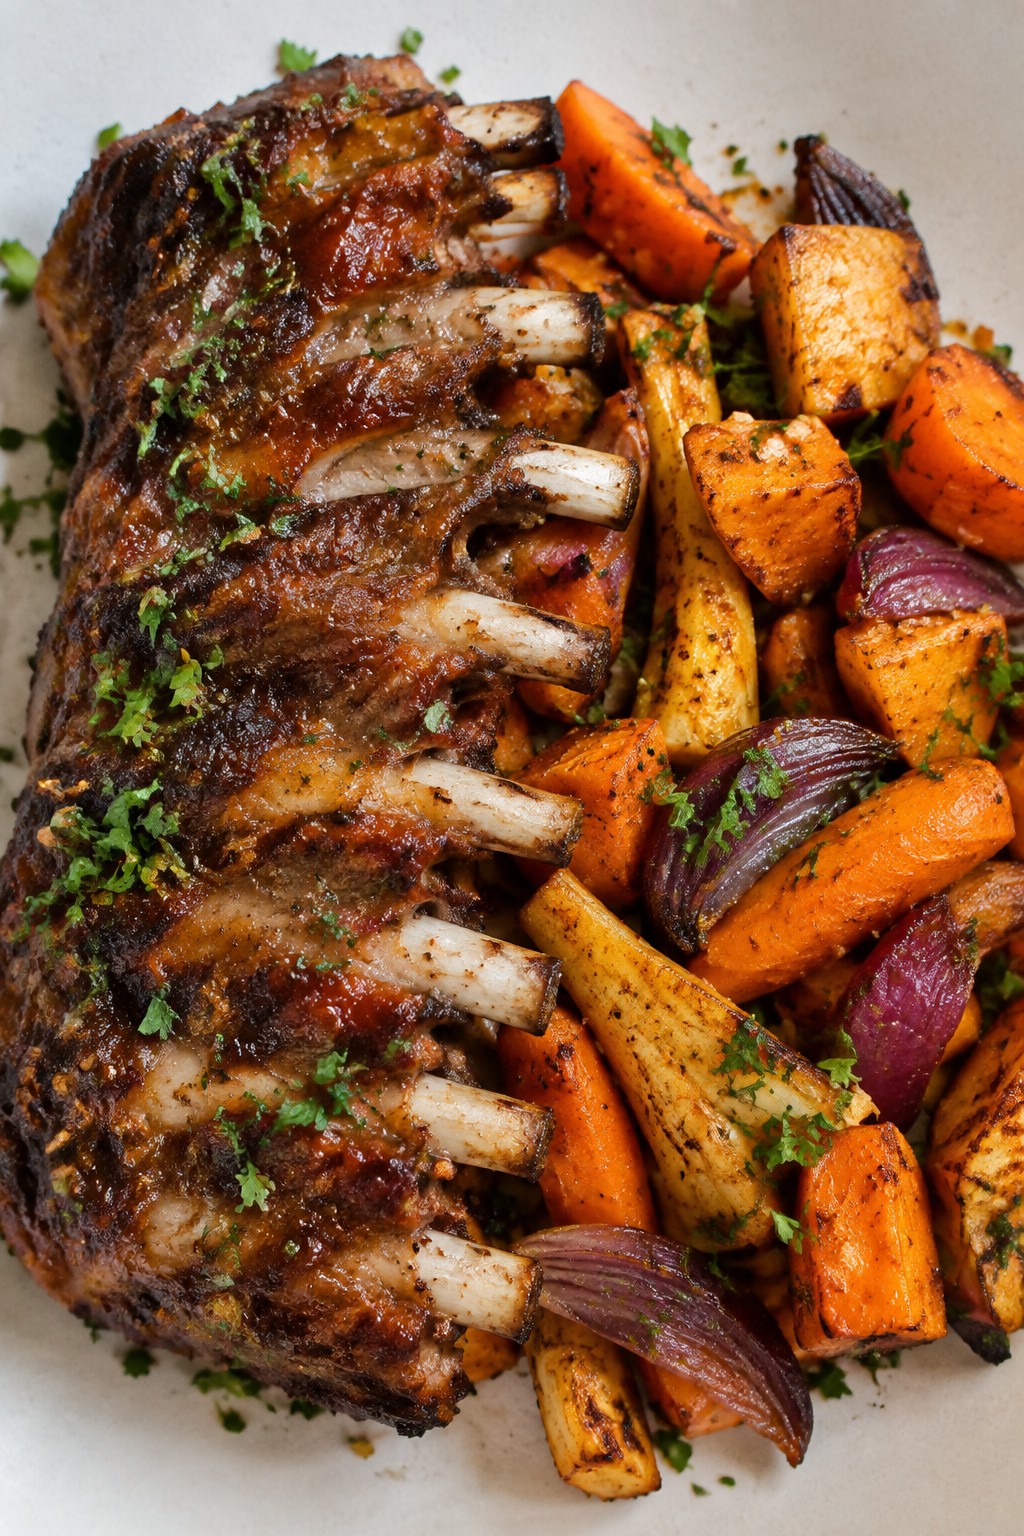
Skeleton Ribs with Roasted Root Vegetables
This recipe turns a simple rack of ribs into a fun Halloween centerpiece. The ribs stay tender while the root vegetables roast until caramelized and sweet. It works well for a weeknight dinner or a casual party because most of the work happens on one pan.
The finished dish tastes savory and earthy with a light smoky note from the paprika. The vegetables soak up the seasoning from the ribs and add nice contrast in texture.
Equipment
- Baking sheet
- Large mixing bowl
- Oven
Ingredients
- 2 racks baby back ribs (about 3 pounds total)
- 4 large carrots, peeled and cut into chunks
- 3 parsnips, peeled and cut into chunks
- 2 sweet potatoes, peeled and cubed
- 1 red onion, sliced
- 3 tablespoons olive oil
- 2 teaspoons salt
- 1 teaspoon black pepper
- 1 tablespoon paprika
- 2 teaspoons garlic powder
- Fresh parsley for garnish
Instructions
- Preheat the oven to 375 degrees. Line a large baking sheet with foil.
- Pat the ribs dry and rub them all over with 2 tablespoons of the olive oil, 1 teaspoon of the salt, the black pepper, paprika, and garlic powder.
- Place the ribs on the baking sheet in a slightly curved shape so they resemble a rib cage.
- In a large bowl, toss the carrots, parsnips, sweet potatoes, and red onion with the remaining 1 tablespoon olive oil and 1 teaspoon salt.
- Spread the vegetables around the ribs on the same baking sheet.
- Roast for 1 hour and 15 minutes, or until the ribs are tender and the vegetables are browned at the edges.
- Remove from the oven and let rest for 5 minutes. Arrange the ribs on a platter to emphasize the skeleton shape and scatter the roasted vegetables around them. Sprinkle with fresh parsley before serving.
Notes
Cuisine: American
Equipment: Baking sheet, Large mixing bowl, Oven
