


Halloween is a good time to bake cookies that kids can help with. These recipes use ingredients that are easy to find at the store. You will see ideas for shapes and decorations that do not take too long. Some work well for parties while others are simple enough for a weeknight. Each one includes clear steps so you can follow along without extra stress.
Helpful Tips Before You Start
These tips will help your cookies keep their shapes and decorations look neat.
Chill the dough
Chill the dough for at least one hour before rolling and cutting. Cold dough holds Halloween shapes like bats and pumpkins better during baking.
Cool cookies fully
Let cookies cool on the baking sheet for five minutes, then move them to a wire rack. Warm cookies will smear or melt icing.
Use gel food coloring
Gel colors create bright shades for ghosts and witches without thinning royal icing. Start with small amounts and mix to match your design.
Set up your station
Fill piping bags and sort sprinkles before you begin decorating. This keeps the process quick and prevents icing from setting too soon.
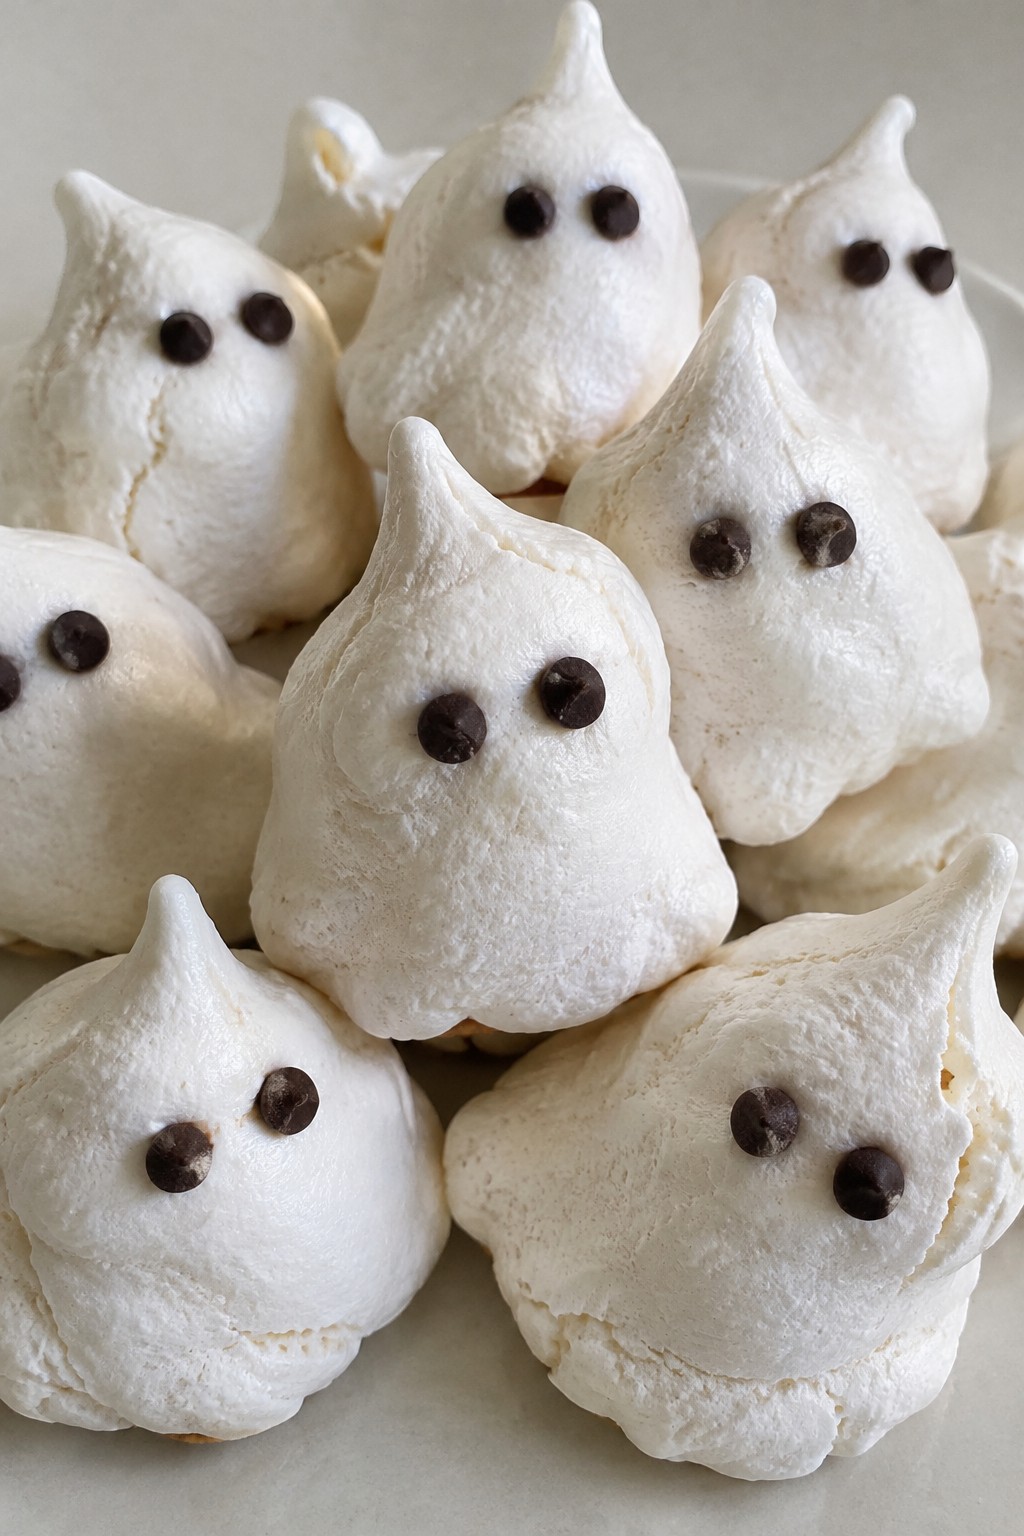
Ghostly Meringue Cookies with Chocolate Chip Eyes
These meringue cookies bring a light and airy treat to Halloween baking. They work well for parties or after-school snacks because they look playful without much effort. The cookies have a crisp shell that gives way to a soft center, with just a hint of sweetness.

Equipment
- Mixing Bowl
- Electric Mixer
- Piping Bag
- Baking Sheet
Ingredients
- 2 large egg whites
- 1/2 cup granulated sugar
- 1/4 teaspoon cream of tartar
- 1/2 teaspoon vanilla extract
- 1/4 cup mini chocolate chips
Instructions
- Preheat the oven to 200 degrees F and line a baking sheet with parchment paper.
- Place the egg whites in a clean mixing bowl and add the cream of tartar.
- Beat the mixture on medium speed until soft peaks form.
- Gradually add the sugar while beating on high speed until stiff, glossy peaks form.
- Mix in the vanilla extract on low speed until combined.
- Spoon the meringue into a piping bag fitted with a round tip.
- Pipe ghost shapes onto the prepared baking sheet, leaving space between each one.
- Press two mini chocolate chips into the top of each ghost to form eyes.
- Bake for 2 hours, then turn off the oven and let the cookies cool inside with the door closed.
Notes
Cuisine: American
Equipment: Mixing Bowl, Electric Mixer, Piping Bag, Baking Sheet
Pumpkin Cheesecake Thumbprint Cookies
These cookies combine a soft pumpkin spice base with a creamy cheesecake filling in the center. They work well for Halloween gatherings or as a simple weekend bake when you want something a bit different from plain sugar cookies. The texture stays tender with a slight chew, and the filling adds a cool, tangy contrast to the warm spices.
The thumbprint shape makes them easy to fill and fun to arrange on a platter. They taste best the day they are made but hold up well for a couple of days if stored properly.


Equipment
- Mixing Bowl
- Baking Sheet
- Parchment Paper
Ingredients
- 1 cup all-purpose flour
- ½ cup unsalted butter, softened
- ⅓ cup granulated sugar
- ½ cup pumpkin puree
- 1 teaspoon ground cinnamon
- ½ teaspoon vanilla extract
- 4 ounces cream cheese, softened
- 2 tablespoons powdered sugar
Instructions
- Preheat the oven to 350°F and line a baking sheet with parchment paper.
- In a mixing bowl, beat the softened butter and granulated sugar until light and creamy.
- Stir in the pumpkin puree, cinnamon, and vanilla extract until fully combined.
- Add the flour and mix until a soft dough forms.
- Scoop the dough into 12 small balls and place them on the prepared baking sheet. Use your thumb or the back of a teaspoon to press a small well into the center of each ball.
- In a separate bowl, mix the cream cheese and powdered sugar until smooth.
- Spoon a small amount of the cream cheese mixture into each well.
- Bake for 12 to 14 minutes until the edges are lightly golden. Let the cookies cool on the baking sheet for 5 minutes before moving them to a wire rack.
Notes
Cuisine: American
Equipment: Mixing Bowl, Baking Sheet, Parchment Paper
Bat-Shaped Chocolate Sandwich Cookies with Orange Cream Filling
These bat-shaped cookies bring a simple Halloween twist to sandwich treats. The dark chocolate cookies hold a smooth orange cream filling that adds brightness without extra fuss. They suit afternoon baking sessions or small gatherings where you want something themed but straightforward.
The cookies turn out crisp with a tender bite, while the filling stays creamy and lightly citrusy. Kids can help with cutting the shapes or spreading the filling once the cookies cool.
Equipment
- Mixing Bowl
- Baking Sheet
- Cookie Cutter
Ingredients
- 1 cup all-purpose flour
- 1/4 cup unsweetened cocoa powder
- 1/2 cup unsalted butter, softened
- 1/4 cup granulated sugar
- 1 egg yolk
- 1 teaspoon vanilla extract
- 1/2 teaspoon baking powder
- 1/4 teaspoon salt
- 1/4 cup unsalted butter, softened (for filling)
- 1 cup powdered sugar (for filling)
- 1 tablespoon fresh orange juice (for filling)
- 1 teaspoon orange zest (for filling)
Instructions
- Mix the flour, cocoa powder, baking powder, and salt in a bowl. Set aside.
- Beat the softened butter and granulated sugar until light. Add the egg yolk and vanilla extract, then mix until combined.
- Stir the dry ingredients into the butter mixture until a dough forms. Wrap and chill the dough for 30 minutes.
- Roll the dough to 1/4 inch thick on a lightly floured surface. Cut out 8 bat shapes with a cookie cutter and place them on a lined baking sheet.
- Bake at 350°F for 10 to 12 minutes until the edges feel firm. Let the cookies cool completely on the sheet.
- Beat the filling butter with powdered sugar, orange juice, and orange zest until smooth and spreadable.
- Pair the cooled cookies into 4 sandwiches. Spread the orange cream on one cookie of each pair and press the second cookie on top.
Notes
Cuisine: American
Equipment: Mixing Bowl, Baking Sheet, Cookie Cutter
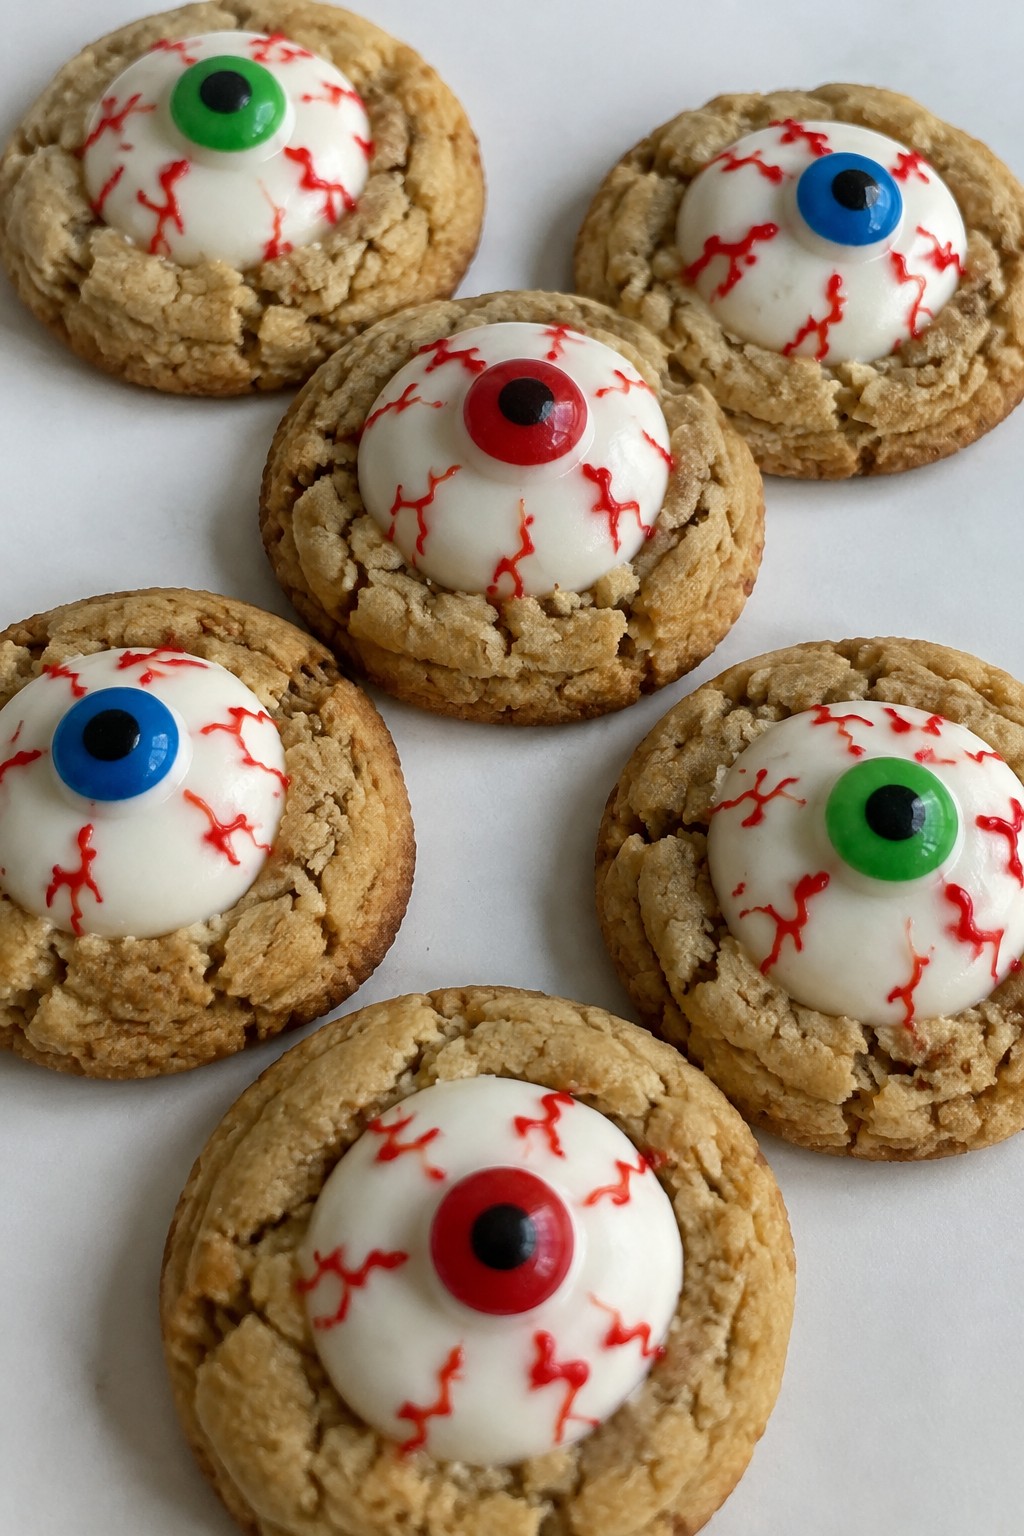
Monster Eyeball Peanut Butter Blossoms
These cookies bring a playful Halloween twist to classic peanut butter blossoms. The soft, chewy peanut butter base holds a round white center that gets topped with a candy eyeball and red gel veins. They work well for parties or after-school treats when you want something quick to shape and decorate.
The flavor stays rich and nutty with a slight sweetness from the sugar, while the texture stays tender in the middle with lightly crisp edges. Kids enjoy pressing on the eyes, and the finished cookies look striking on a platter without needing advanced skills.

Equipment
- Mixing Bowl
- Baking Sheet
- Oven
Ingredients
- ½ cup creamy peanut butter
- ¼ cup unsalted butter, softened
- ¼ cup granulated sugar
- ¼ cup brown sugar
- 1 large egg
- 1 teaspoon vanilla extract
- 1 cup all-purpose flour
- ½ teaspoon baking soda
- ¼ teaspoon salt
- 12 candy eyeballs
- Red decorating gel
Instructions
- Heat the oven to 350°F and line a baking sheet with parchment paper.
- In a mixing bowl, beat the peanut butter, butter, granulated sugar, and brown sugar until smooth and creamy.
- Add the egg and vanilla extract, then mix until fully combined.
- Stir in the flour, baking soda, and salt until a soft dough forms.
- Scoop the dough into 12 equal portions and roll each into a ball. Place the balls on the prepared baking sheet and flatten slightly with your palm.
- Bake for 9 to 11 minutes until the edges look set. Remove from the oven and let the cookies cool on the sheet for 5 minutes.
- While the cookies are still warm, gently press one candy eyeball into the center of each cookie.
- Once the cookies have cooled completely, use the red decorating gel to draw short lines around each eyeball to create veins.
Notes
Cuisine: American
Equipment: Mixing Bowl, Baking Sheet, Oven
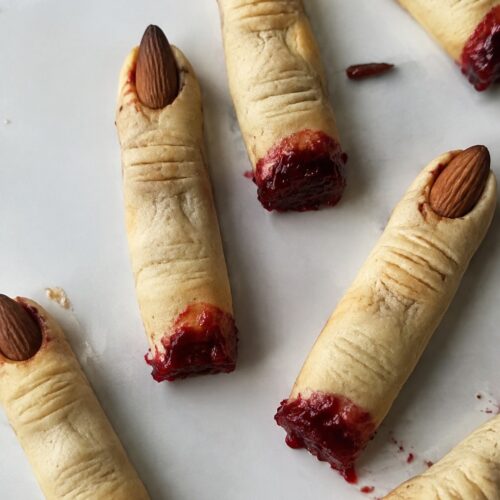
Witch Finger Almond Cookies with Raspberry Jam
These cookies bring a playful Halloween twist to classic almond shortbread. The dough comes together quickly and shapes easily into finger forms that bake up crisp on the outside with a tender center. A touch of almond extract gives them a nutty aroma that pairs well with the bright tartness of raspberry jam.
They work well for a small gathering or as part of a cookie platter. Kids and adults enjoy pressing the almonds into place and dipping the finished fingers into jam for a spooky effect.

Equipment
- Mixing Bowl
- Baking Sheet
- Oven
Ingredients
- 1 cup all-purpose flour
- 1/2 cup almond flour
- 1/2 cup unsalted butter, softened
- 1/4 cup granulated sugar
- 1 large egg
- 1 teaspoon almond extract
- 1/4 teaspoon salt
- 12 whole almonds
- 1/4 cup raspberry jam
Instructions
- Preheat the oven to 350°F and line a baking sheet with parchment paper.
- In a mixing bowl, cream the softened butter and sugar until light and fluffy.
- Beat in the egg and almond extract until fully combined.
- Stir in the all-purpose flour, almond flour, and salt to form a soft dough.
- Divide the dough into 12 equal pieces and roll each into a thin log about 4 inches long.
- Place the logs on the prepared baking sheet and press an almond into one end of each to form a fingernail.
- Use a knife to add light knuckle lines across the middle of each log.
- Bake for 12 to 15 minutes until the edges turn lightly golden.
- Cool the cookies on the baking sheet for 5 minutes, then transfer to a wire rack.
- Serve the cooled cookies with raspberry jam for dipping.
Notes
Cuisine: American
Equipment: Mixing Bowl, Baking Sheet, Oven
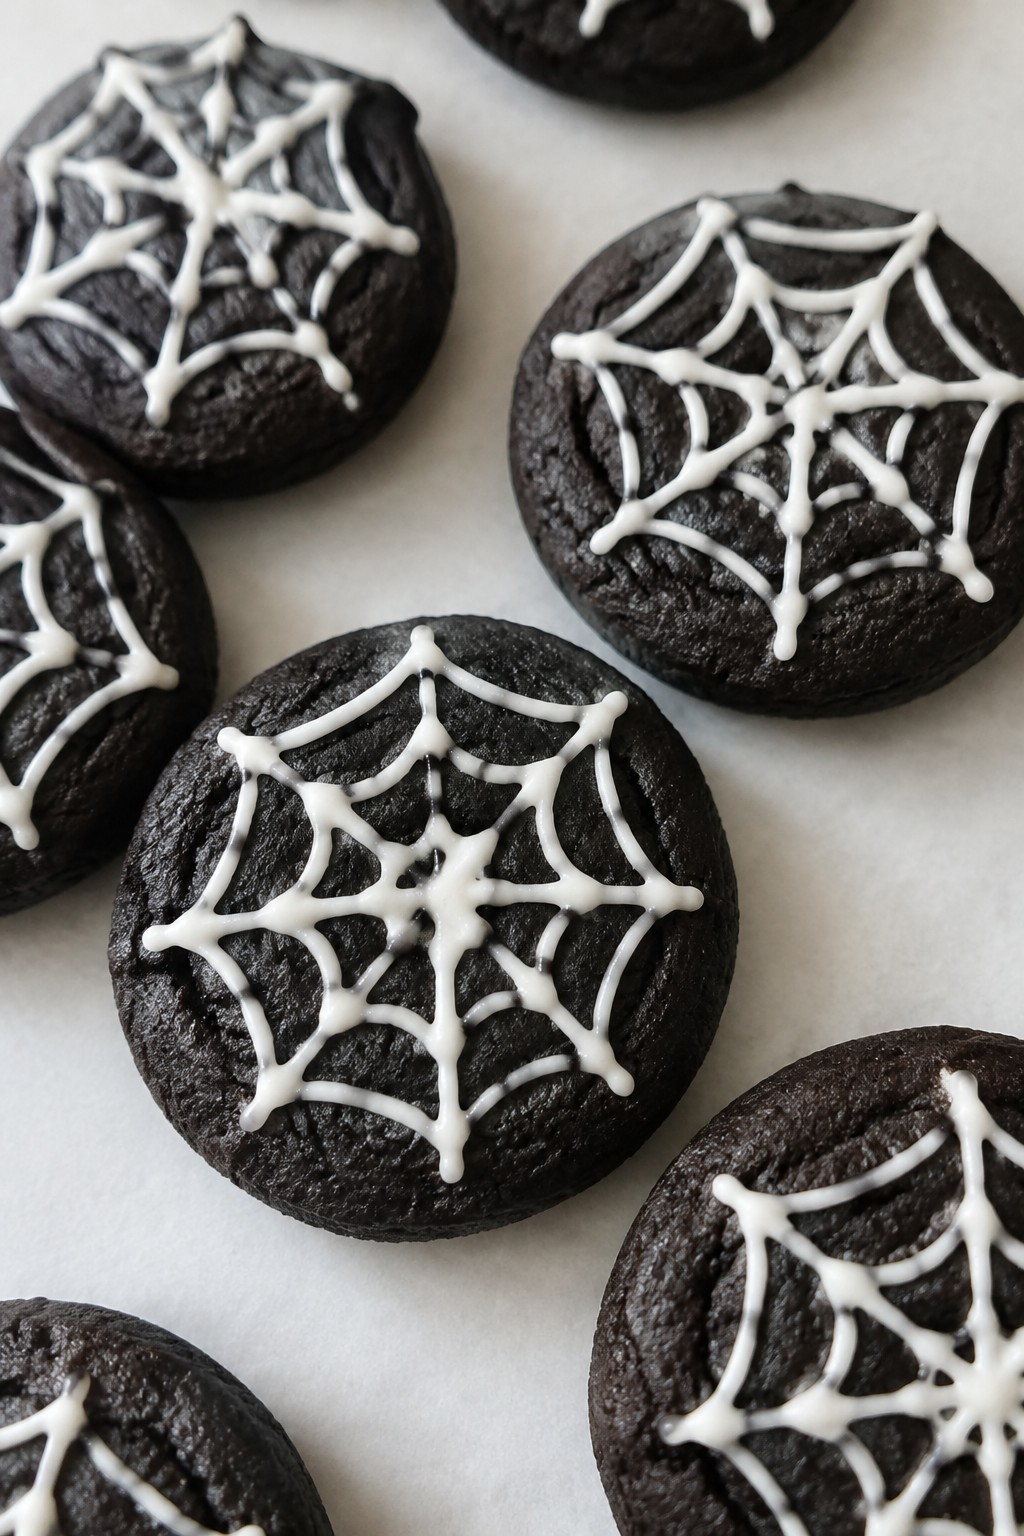
Spiderweb Iced Black Cocoa Sugar Cookies
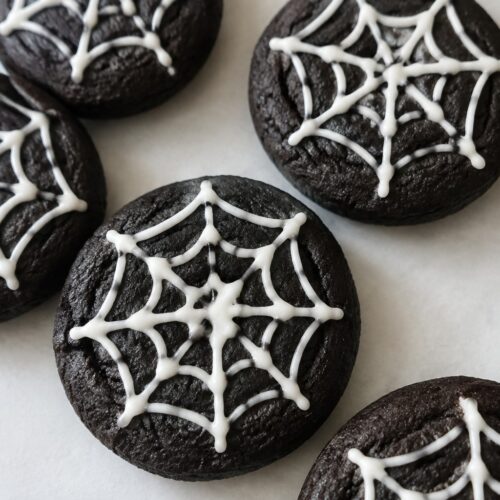
These black cocoa sugar cookies stand out with their deep color and bold chocolate flavor. The white icing spiderwebs add a simple Halloween detail that looks impressive without much effort. They turn out crisp at the edges and soft in the center.
The recipe works well for parties or an afternoon baking session with family. The dark base makes the web design pop, and the sweet icing balances the rich cocoa taste.
Equipment
- Mixing Bowl
- Baking Sheet
- Piping Bag
- Toothpick
Ingredients
- 1 1/4 cups all-purpose flour
- 1/2 cup black cocoa powder
- 1/2 cup unsalted butter, softened
- 3/4 cup granulated sugar
- 1 large egg
- 1 teaspoon vanilla extract
- 1/2 teaspoon baking powder
- 1/4 teaspoon salt
- 1 1/2 cups powdered sugar
- 4 tablespoons milk
- Black food coloring
Instructions
- Preheat the oven to 350°F and line a baking sheet with parchment paper.
- Whisk the flour, black cocoa powder, baking powder, and salt in a bowl.
- In a separate bowl, beat the butter and granulated sugar until light. Add the egg and vanilla extract, then mix until combined.
- Stir the dry ingredients into the wet mixture until a dough forms.
- Roll the dough into 12 small balls and place them on the baking sheet. Flatten each slightly with your hand.
- Bake for 10 to 12 minutes, then let the cookies cool completely on the sheet.
- Mix the powdered sugar and milk in a bowl until smooth to make the white icing.
- Place half the white icing in a piping bag. Add black food coloring to the remaining icing and place it in a second piping bag.
- Flood each cookie with the white icing. Pipe thin black lines across the top, then drag a toothpick through the lines to form a web pattern. Let the icing set.
Notes
Cuisine: American
Equipment: Mixing Bowl, Baking Sheet, Piping Bag, Toothpick
Jack-o’-Lantern Decorated Brown Butter Shortbread
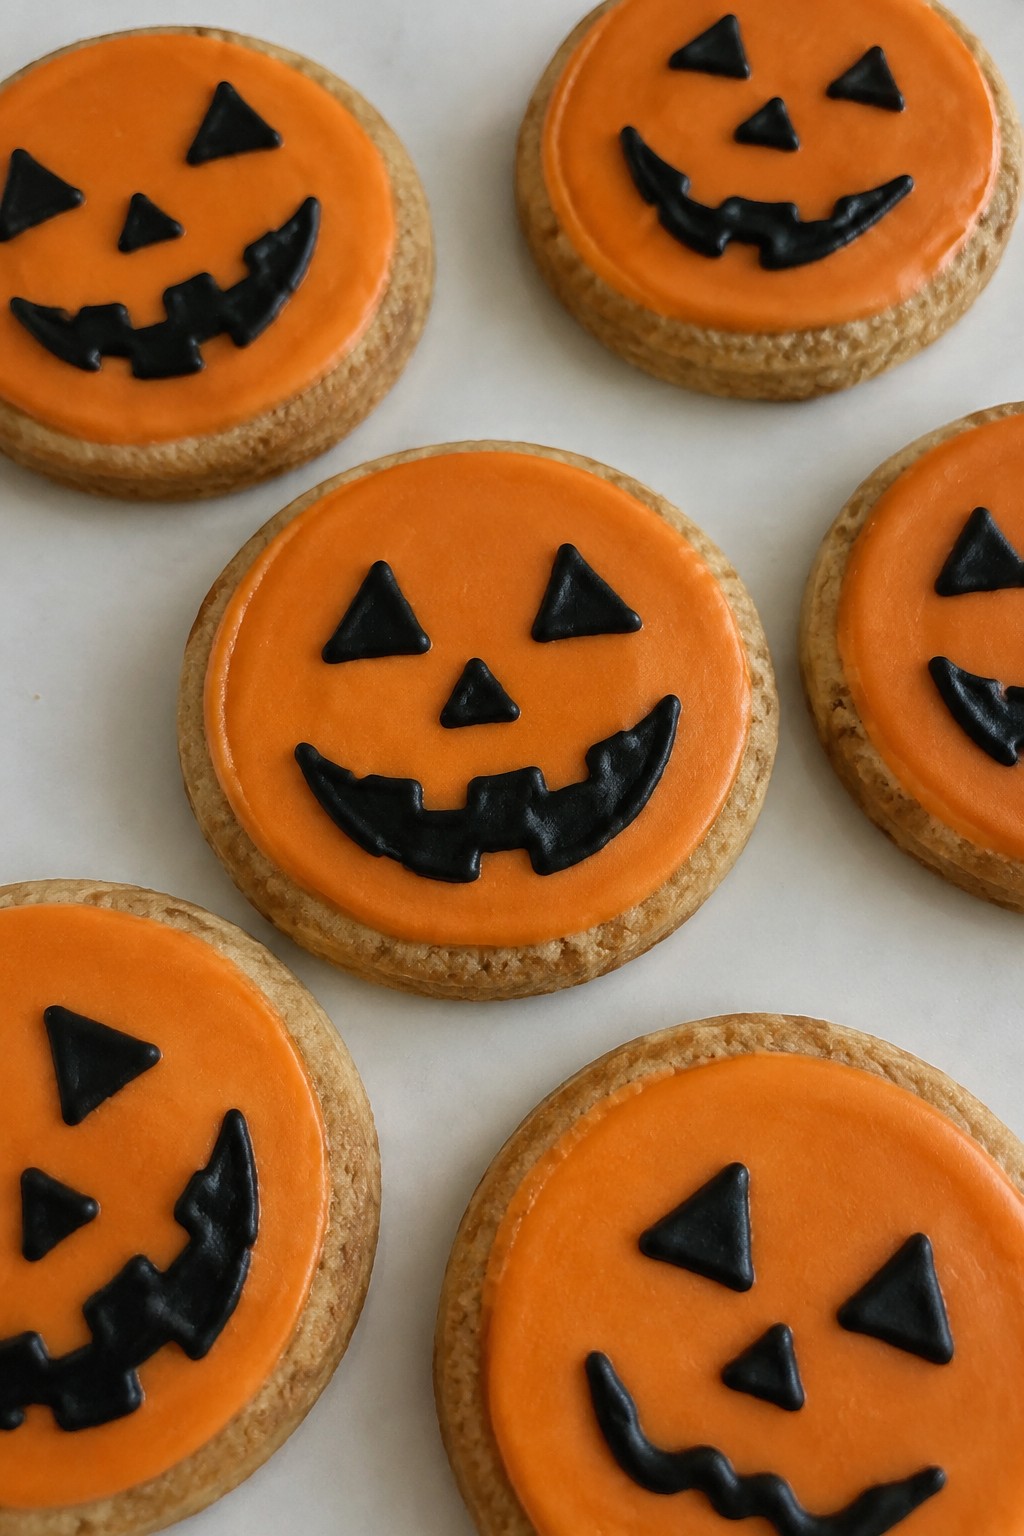
Brown butter gives these shortbread cookies a rich, nutty taste that pairs well with the sweet icing on top. The crisp texture holds up nicely when you add the jack-o’-lantern faces, making them a good choice for Halloween cookie swaps or family baking afternoons.
They work best when you want a simple dough that still feels special once decorated. The orange icing and black details turn plain rounds into festive pumpkins without much extra work.

Equipment
- Skillet
- Mixing bowls
- Baking sheet
- Wire rack
- Piping bag
Ingredients
- 1/2 cup unsalted butter
- 1 cup all-purpose flour
- 1/4 cup granulated sugar
- 1/2 teaspoon vanilla extract
- 1/4 teaspoon salt
- 1 cup powdered sugar
- 2 tablespoons milk
- Orange food coloring
- Black food coloring
Instructions
- Melt the butter in a skillet over medium heat and cook it until it turns golden brown and smells nutty. Pour it into a mixing bowl and let it cool for a few minutes.
- Stir the flour, granulated sugar, vanilla extract, and salt into the cooled brown butter until a dough forms. Shape the dough into a disk, wrap it, and chill for 20 minutes.
- Heat the oven to 350 degrees and line a baking sheet with parchment. Roll the dough to 1/4-inch thickness and cut out 3-inch circles. Place them on the sheet and bake for 12 to 14 minutes until the edges are lightly golden.
- Cool the cookies completely on a wire rack. Mix the powdered sugar with milk until smooth, then divide the icing into two bowls. Tint one bowl orange and the other black.
- Spread orange icing over each cookie. Once set, pipe black icing to draw jack-o’-lantern faces on top.
Notes
Cuisine: American
Equipment: Skillet, Mixing bowls, Baking sheet, Wire rack, Piping bag
Caramel Apple Spice Crinkle Cookies
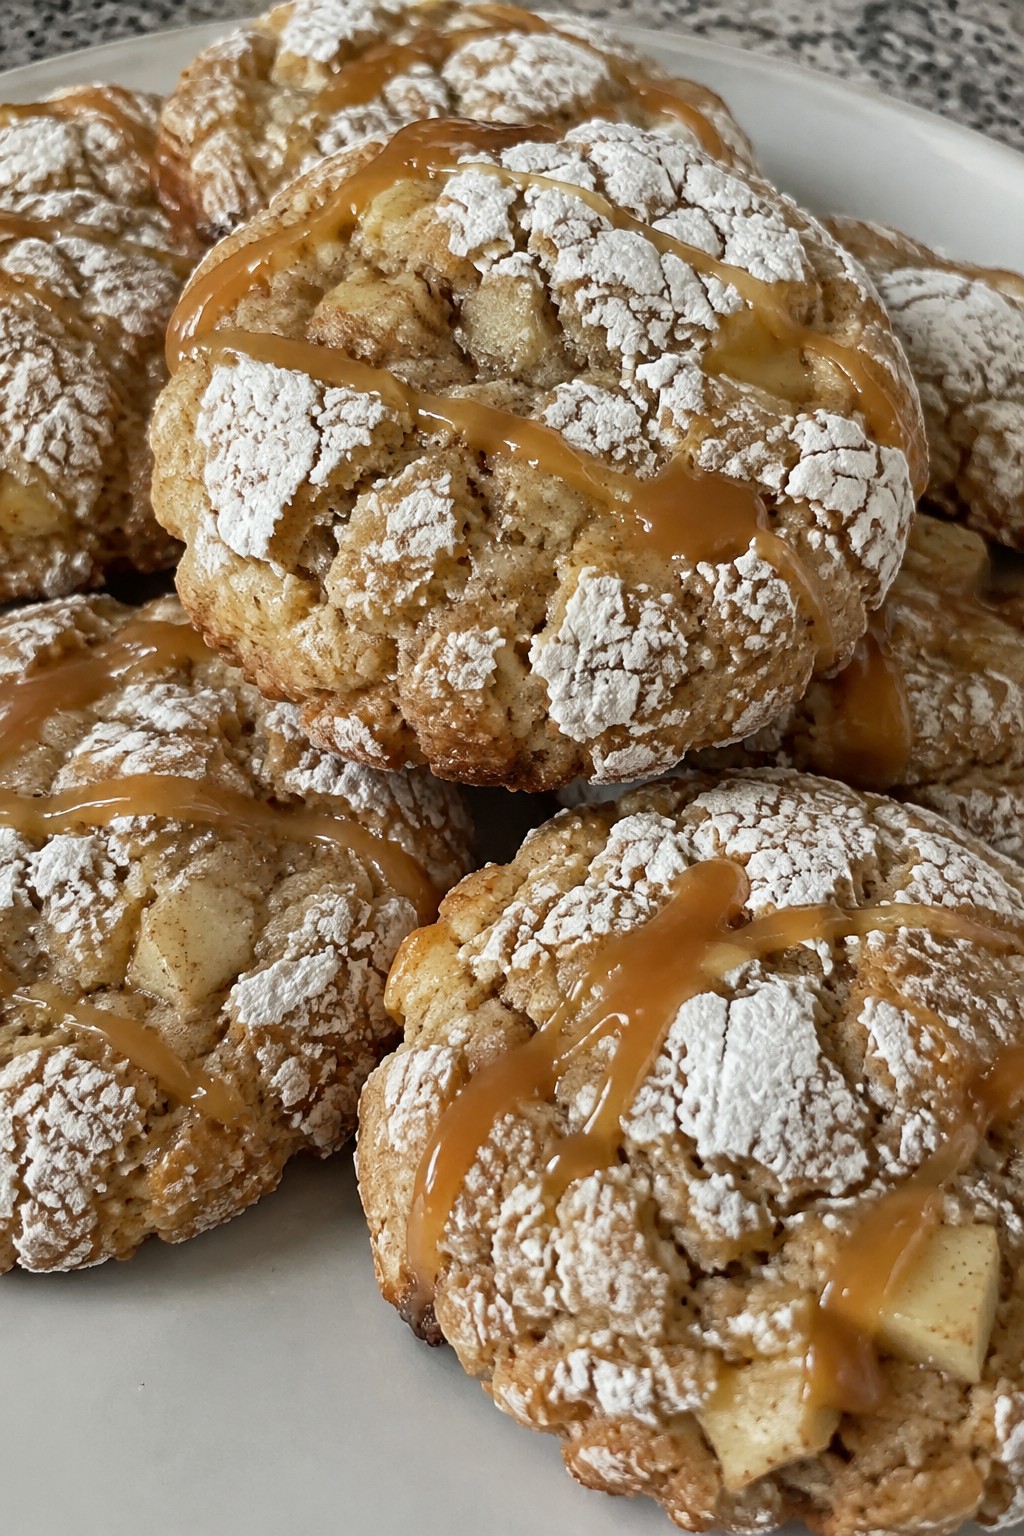
These cookies capture the cozy taste of caramel apples in a soft, spiced treat. The crinkle effect comes from a powdered sugar coating that bakes into a crackled top. They work well for Halloween baking sessions or weekend family activities.
The dough holds small apple pieces for bursts of fruit while warm spices add depth. A simple caramel drizzle at the end ties the flavors together without extra fuss.

Equipment
- Mixing Bowl
- Baking Sheet
- Oven
Ingredients
- 1 cup all-purpose flour
- 1 teaspoon baking powder
- 2 teaspoons apple pie spice
- 1/4 cup unsalted butter, softened
- 1/2 cup brown sugar
- 1 large egg
- 1/2 teaspoon vanilla extract
- 1/2 cup finely diced apple
- 1/4 cup powdered sugar
- 2 tablespoons caramel sauce
Instructions
- Preheat the oven to 350 degrees and line a baking sheet with parchment paper.
- Stir together the flour, baking powder, and apple pie spice in a bowl.
- In a second bowl, beat the butter and brown sugar until light. Add the egg and vanilla extract and mix until smooth.
- Fold the dry ingredients into the wet mixture until just combined, then stir in the diced apple.
- Scoop the dough into eight portions and roll each in powdered sugar to coat fully.
- Place the coated balls on the baking sheet and bake for 10 to 12 minutes until the edges set.
- Remove from the oven and let the cookies cool on the sheet for five minutes before transferring to a rack.
- Drizzle the cooled cookies with caramel sauce.
Notes
Cuisine: American
Equipment: Mixing Bowl, Baking Sheet, Oven
Candy Corn Swirl Buttercream Sandwich Cookies
These sandwich cookies bring a playful Halloween touch with their colorful buttercream filling. The crisp cookies hold a creamy center that captures the sweet, nostalgic taste of candy corn. They work well for parties, school events, or a weekend bake with family.
The finished cookies offer a nice contrast between the tender cookie layers and the smooth, swirled filling. The candy corn adds both flavor and a gentle marbled look without extra dyes.


Equipment
- Mixing Bowl
- Baking Sheet
- Electric Mixer
Ingredients
- 1 1/4 cups all-purpose flour
- 1/2 cup unsalted butter, softened
- 1/4 cup granulated sugar
- 1 large egg yolk
- 1 teaspoon vanilla extract
- 1/4 teaspoon baking powder
- 1/4 teaspoon salt
- 1/2 cup unsalted butter, softened (for filling)
- 1 1/2 cups powdered sugar
- 2 tablespoons heavy cream
- 1/3 cup candy corn, melted
- 1 teaspoon vanilla extract (for filling)
Instructions
- Preheat the oven to 350 degrees F and line a baking sheet with parchment paper.
- In a mixing bowl, cream the 1/2 cup softened butter with the granulated sugar until light. Add the egg yolk and 1 teaspoon vanilla extract, then mix until combined.
- Stir in the flour, baking powder, and salt until a soft dough forms. Roll the dough to 1/4-inch thickness and cut into 8 small rounds.
- Place the rounds on the baking sheet and bake for 10 to 12 minutes until the edges are lightly golden. Cool completely on a wire rack.
- For the filling, beat the remaining 1/2 cup softened butter with the powdered sugar and heavy cream until smooth. Mix in the second teaspoon of vanilla extract.
- Stir the melted candy corn into the buttercream to create a gentle swirl.
- Spread or pipe the filling onto the flat side of four cooled cookies. Top each with a second cookie and press gently to seal.
Notes
Cuisine: American
Equipment: Mixing Bowl, Baking Sheet, Electric Mixer
Frankenstein Green Matcha Brownie Cookies
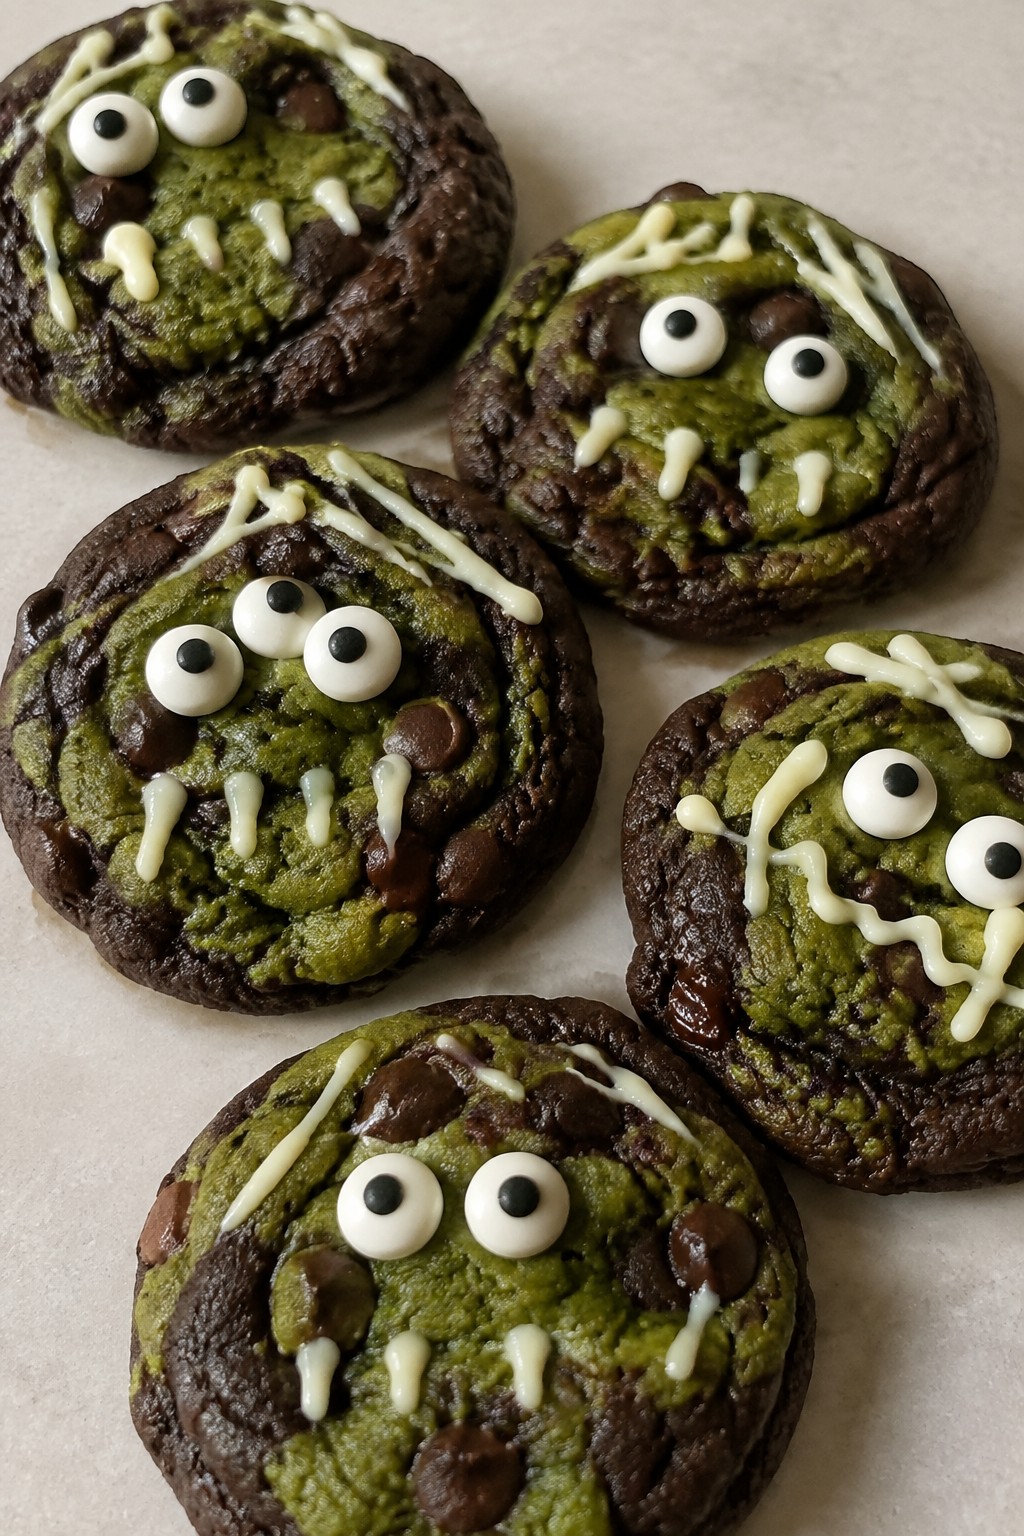
These Frankenstein Green Matcha Brownie Cookies stand out for Halloween with their bright green color from matcha and deep chocolate flavor. They offer a chewy cookie edge with a fudgy center that feels like a brownie in cookie form. The simple decorations turn them into fun monster faces that appeal to both kids and adults during October gatherings.
They work well for a small batch when you want something festive without making dozens of cookies. The matcha adds an earthy note that pairs nicely with the cocoa and chocolate chips.

Equipment
- Mixing Bowls
- Baking Sheet
- Whisk
- Parchment Paper
Ingredients
- ¾ cup all-purpose flour
- ¼ cup unsweetened cocoa powder
- 1 tablespoon matcha powder
- ½ teaspoon baking powder
- ¼ teaspoon salt
- ⅓ cup unsalted butter, softened
- ½ cup brown sugar
- 1 large egg
- ½ teaspoon vanilla extract
- ¼ cup chocolate chips
- 8 candy eyes
- 2 tablespoons white chocolate, melted
Instructions
- Preheat the oven to 350 degrees and line a baking sheet with parchment paper.
- Whisk together the flour, cocoa powder, matcha powder, baking powder, and salt in a bowl.
- In a separate bowl, beat the softened butter and brown sugar until light and fluffy.
- Add the egg and vanilla extract to the butter mixture and mix until combined.
- Stir the dry ingredients into the wet ingredients until a dough forms, then fold in the chocolate chips.
- Scoop the dough into 8 portions and place them on the baking sheet, flattening each slightly.
- Bake for 10 to 12 minutes until the edges are set but the centers still look soft.
- Remove from the oven and immediately press two candy eyes onto each cookie while warm.
- Drizzle the melted white chocolate over the cookies to create stitch-like lines across the faces.
Notes
Cuisine: American
Equipment: Mixing Bowls, Baking Sheet, Whisk, Parchment Paper
Bloody Red Velvet Cookies with Cream Cheese Drizzle
These red velvet cookies bring a bright crimson color and soft, cake-like texture that fits right into a Halloween baking session. The cream cheese drizzle adds a tangy finish that contrasts nicely with the mild cocoa flavor. They work well for an afternoon activity with kids or as a simple dessert to share at a small gathering.


Equipment
- Mixing bowls
- Baking sheet
- Parchment paper
- Whisk
- Electric mixer or spoon
Ingredients
- 1 cup all-purpose flour
- 2 tablespoons unsweetened cocoa powder
- 1/2 teaspoon baking soda
- 1/4 teaspoon salt
- 1/2 cup granulated sugar
- 1/4 cup unsalted butter, softened
- 1 large egg
- 1 tablespoon red food coloring
- 1 teaspoon vanilla extract
- 4 ounces cream cheese, softened
- 1/4 cup powdered sugar
- 1 tablespoon milk
Instructions
- Preheat the oven to 350 degrees and line a baking sheet with parchment paper.
- In a medium bowl, whisk together the flour, cocoa powder, baking soda, and salt.
- In a separate bowl, beat the granulated sugar and softened butter until light and fluffy.
- Add the egg, red food coloring, and vanilla extract to the butter mixture and stir until fully combined.
- Gradually mix the dry ingredients into the wet ingredients until a dough forms.
- Scoop tablespoon-sized portions of dough onto the prepared baking sheet and flatten each slightly.
- Bake for 10 to 12 minutes until the edges are set. Let the cookies cool on the sheet for 5 minutes before moving to a wire rack.
- While the cookies cool, beat the cream cheese, powdered sugar, and milk in a small bowl until smooth.
- Drizzle the cream cheese mixture over the cooled cookies using a spoon or piping bag.
Notes
Cuisine: American
Equipment: Mixing bowls, Baking sheet, Parchment paper, Whisk, Electric mixer or spoon
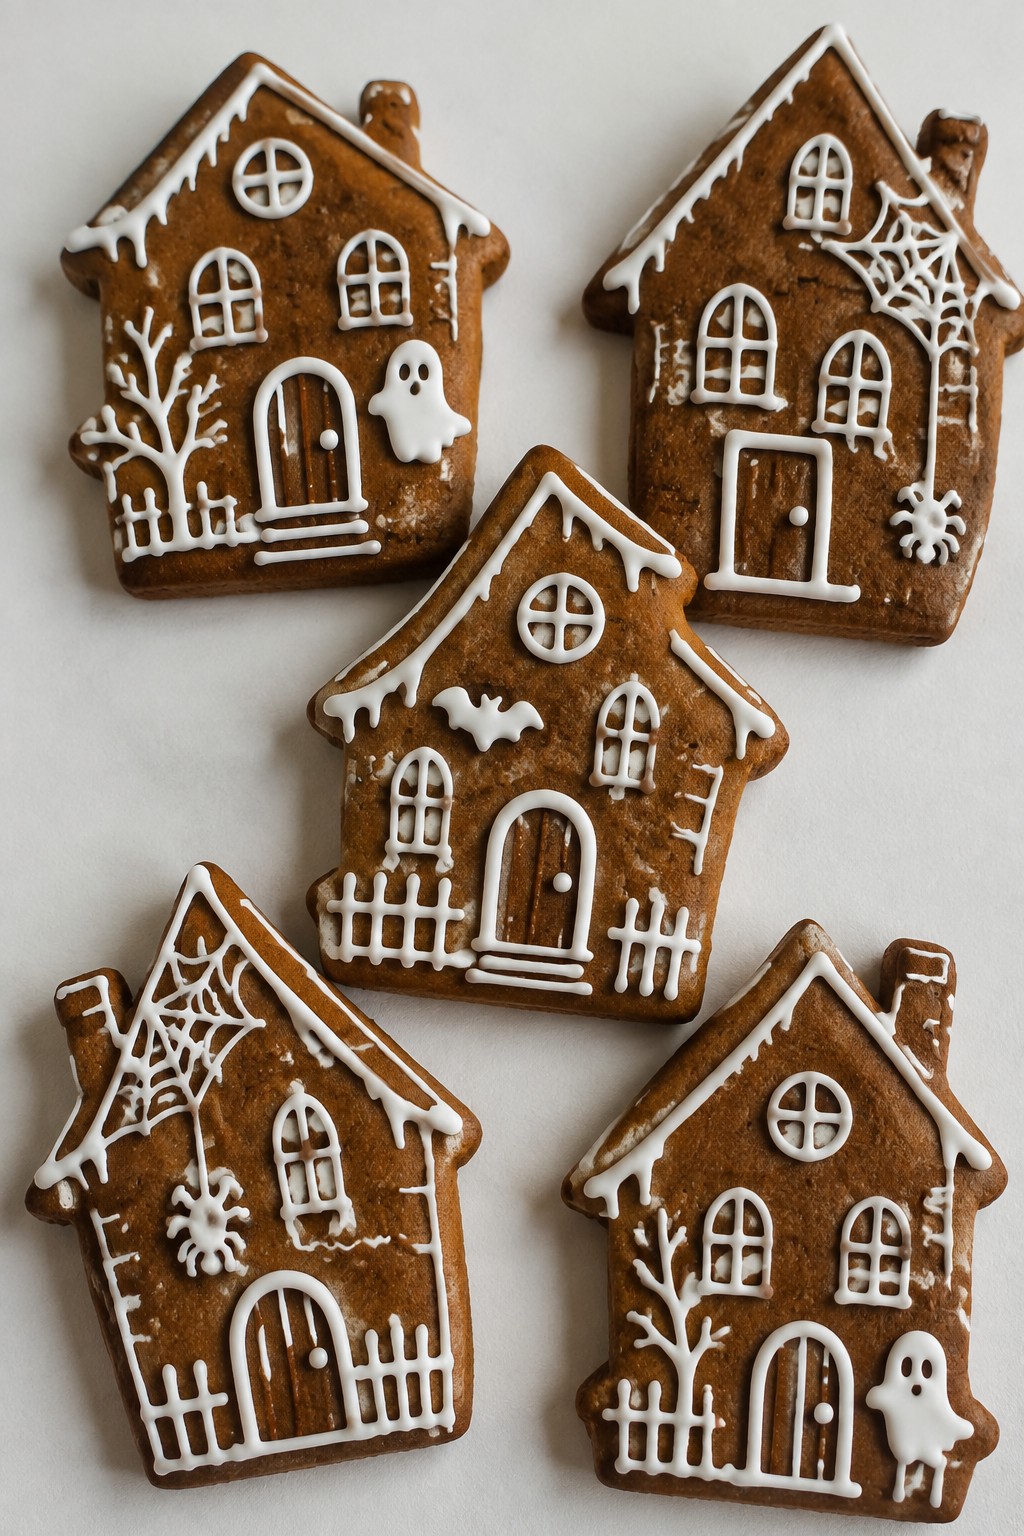
Haunted House Gingerbread Cookies with Royal Icing
These cookies turn classic gingerbread into a Halloween activity. Cut the dough into simple house shapes and use royal icing to draw on windows, doors, and spooky details. The result is a crisp cookie with warm spice and a sweet, hard icing shell that holds up well for decorating.
They work well for a weekend baking session with kids or as a make-ahead treat for parties. The flavor comes from ginger and molasses, balanced by the sugary icing on top.

Equipment
- Mixing bowls
- Baking sheets
- Wire rack
- Piping bags
Ingredients
- 2 cups all-purpose flour
- 1 teaspoon ground ginger
- 1 teaspoon ground cinnamon
- ½ teaspoon baking soda
- ¼ teaspoon salt
- ½ cup unsalted butter, softened
- ½ cup brown sugar
- ¼ cup molasses
- 1 large egg
- 2 cups powdered sugar
- 2 tablespoons meringue powder
- ¼ cup water
Instructions
- Mix the flour, ginger, cinnamon, baking soda, and salt in a bowl.
- In a second bowl, beat the butter and brown sugar until smooth. Add the molasses and egg and mix until combined.
- Stir the dry ingredients into the wet mixture until a dough forms. Wrap the dough and chill it for 30 minutes.
- Roll the dough to ¼ inch thick on a floured surface. Cut into house shapes with a cookie cutter.
- Place the shapes on a baking sheet and bake at 350°F for 8 to 10 minutes. Let them cool completely on a wire rack.
- Whisk the powdered sugar, meringue powder, and water until the icing reaches a pipeable consistency.
- Pipe outlines and details onto the cooled cookies to create haunted house designs. Let the icing set before serving.
Notes
Cuisine: American
Equipment: Mixing bowls, Baking sheets, Wire rack, Piping bags
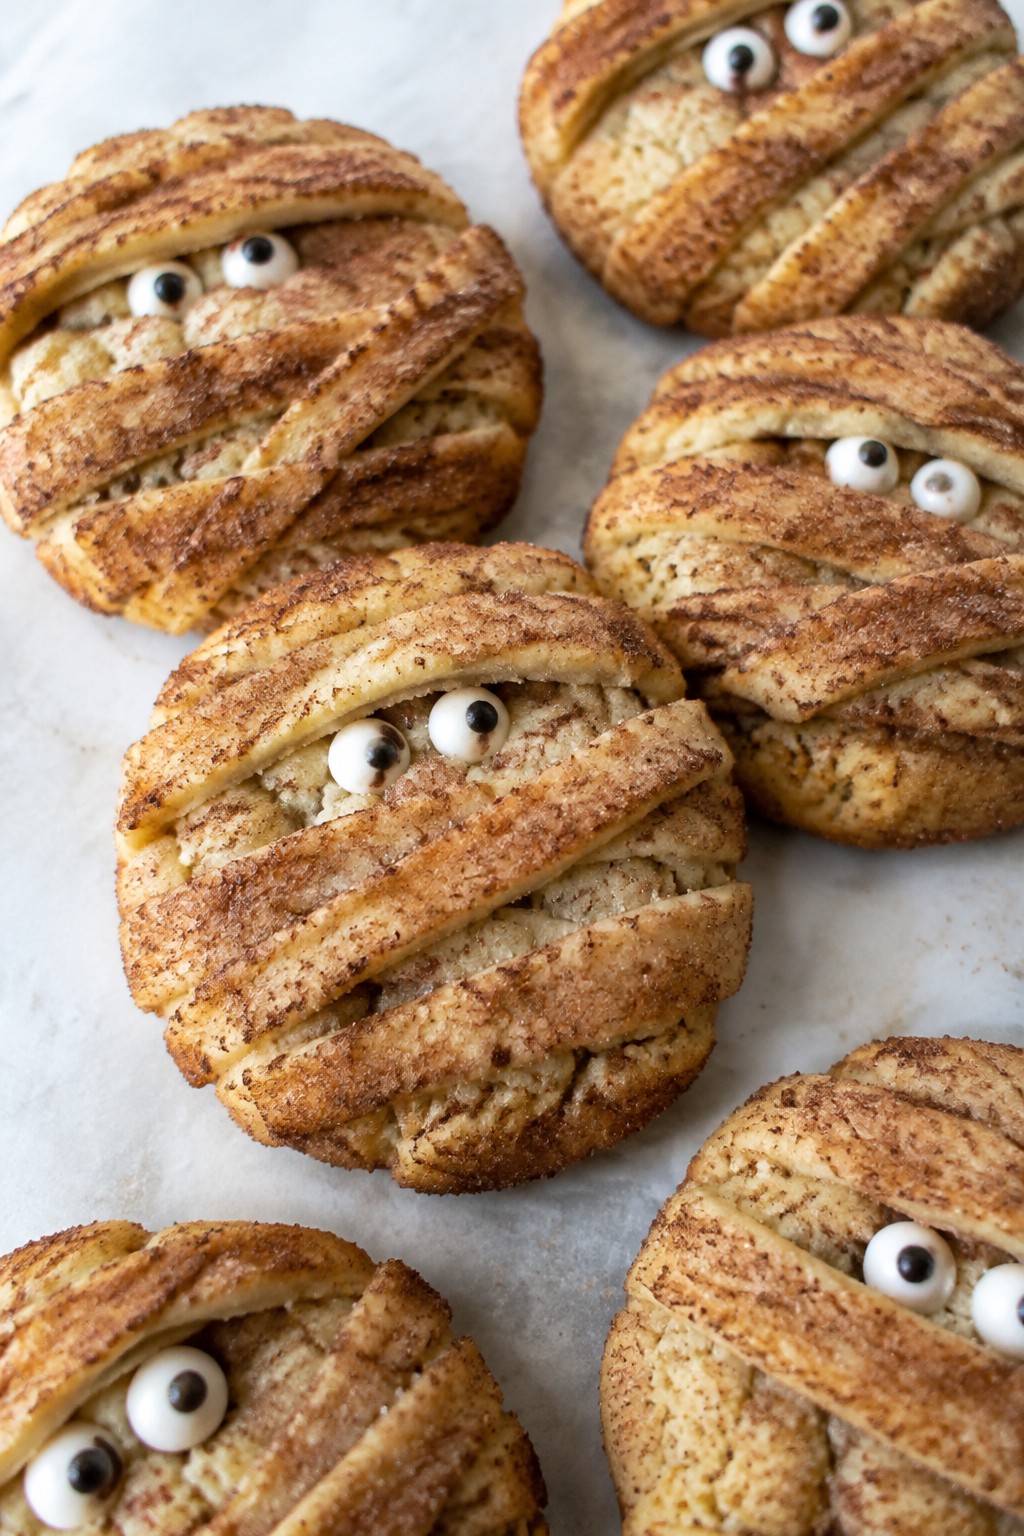
Mummy Wrapped Snickerdoodles with Cinnamon Sugar Bands
These snickerdoodles take on a simple Halloween twist with strips of dough wrapped around each cookie before baking. The cinnamon sugar coating on the bands gives them a spiced finish that matches the cookie base. They come out soft in the middle with a light crunch on the edges.
The recipe suits an afternoon baking session with kids or a low-key Halloween gathering. The flavor stays true to classic snickerdoodles while the wrapped shape adds visual interest without extra tools or steps.

Equipment
- Mixing Bowl
- Baking Sheet
- Rolling Pin
Ingredients
- 1 1/4 cups all-purpose flour
- 3/4 cup granulated sugar, divided
- 1/4 cup unsalted butter, softened
- 1 large egg
- 1 teaspoon cream of tartar
- 1/2 teaspoon baking soda
- 1/4 teaspoon salt
- 2 tablespoons ground cinnamon
Instructions
- Heat the oven to 375 degrees and line a baking sheet with parchment paper.
- In a mixing bowl, cream the butter with 1/2 cup sugar until light. Add the egg and mix until smooth.
- Stir in the flour, cream of tartar, baking soda, and salt until a soft dough forms. Divide the dough into two portions.
- Roll one portion into eight small balls and place them on the baking sheet. Flatten each ball slightly.
- Roll the remaining dough into thin strips. Wrap two or three strips around each cookie to create a mummy bandage effect.
- Mix the remaining 1/4 cup sugar with the cinnamon. Sprinkle the mixture generously over the wrapped cookies so the bands pick up the coating.
- Bake for 10 to 12 minutes until the edges turn golden. Let the cookies cool on the sheet for a few minutes before moving them.
Notes
Cuisine: American
Equipment: Mixing Bowl, Baking Sheet, Rolling Pin
