

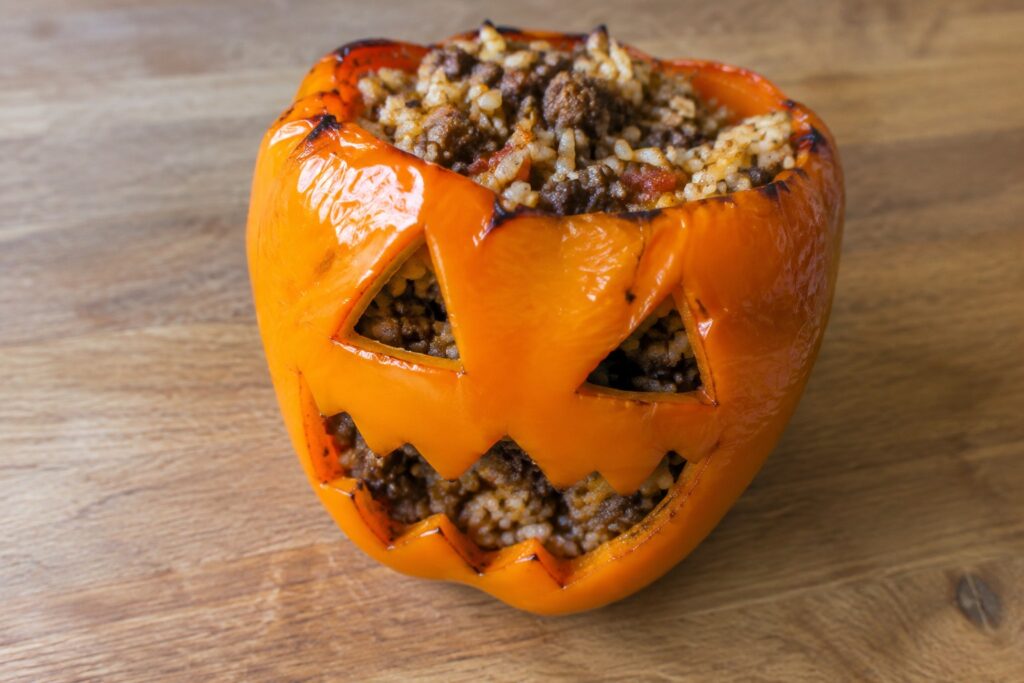
Halloween calls for some new food ideas on the table. I collected 11 simple recipes that fit parties or family dinners. Most use basic ingredients and clear steps. You can pick what works for your time and group size. These ideas focus on real results you can serve right away.
Helpful Tips Before You Start
A bit of planning keeps your Halloween dishes simple and stress free.
Pick recipes that match your time
Choose a mix of make ahead items and quick assembly dishes so you are not cooking everything the same day.
Set up a decoration station
Keep sprinkles, candy eyes, and colored icing in small bowls so everyone can add details fast.
Label dishes for guests
Note common allergens on cards next to each item to help people with restrictions.
Use sturdy platters
Heavy boards and trays hold up better when kids reach for snacks or when you move food outside.
Jack-o’-Lantern Quinoa Stuffed Peppers
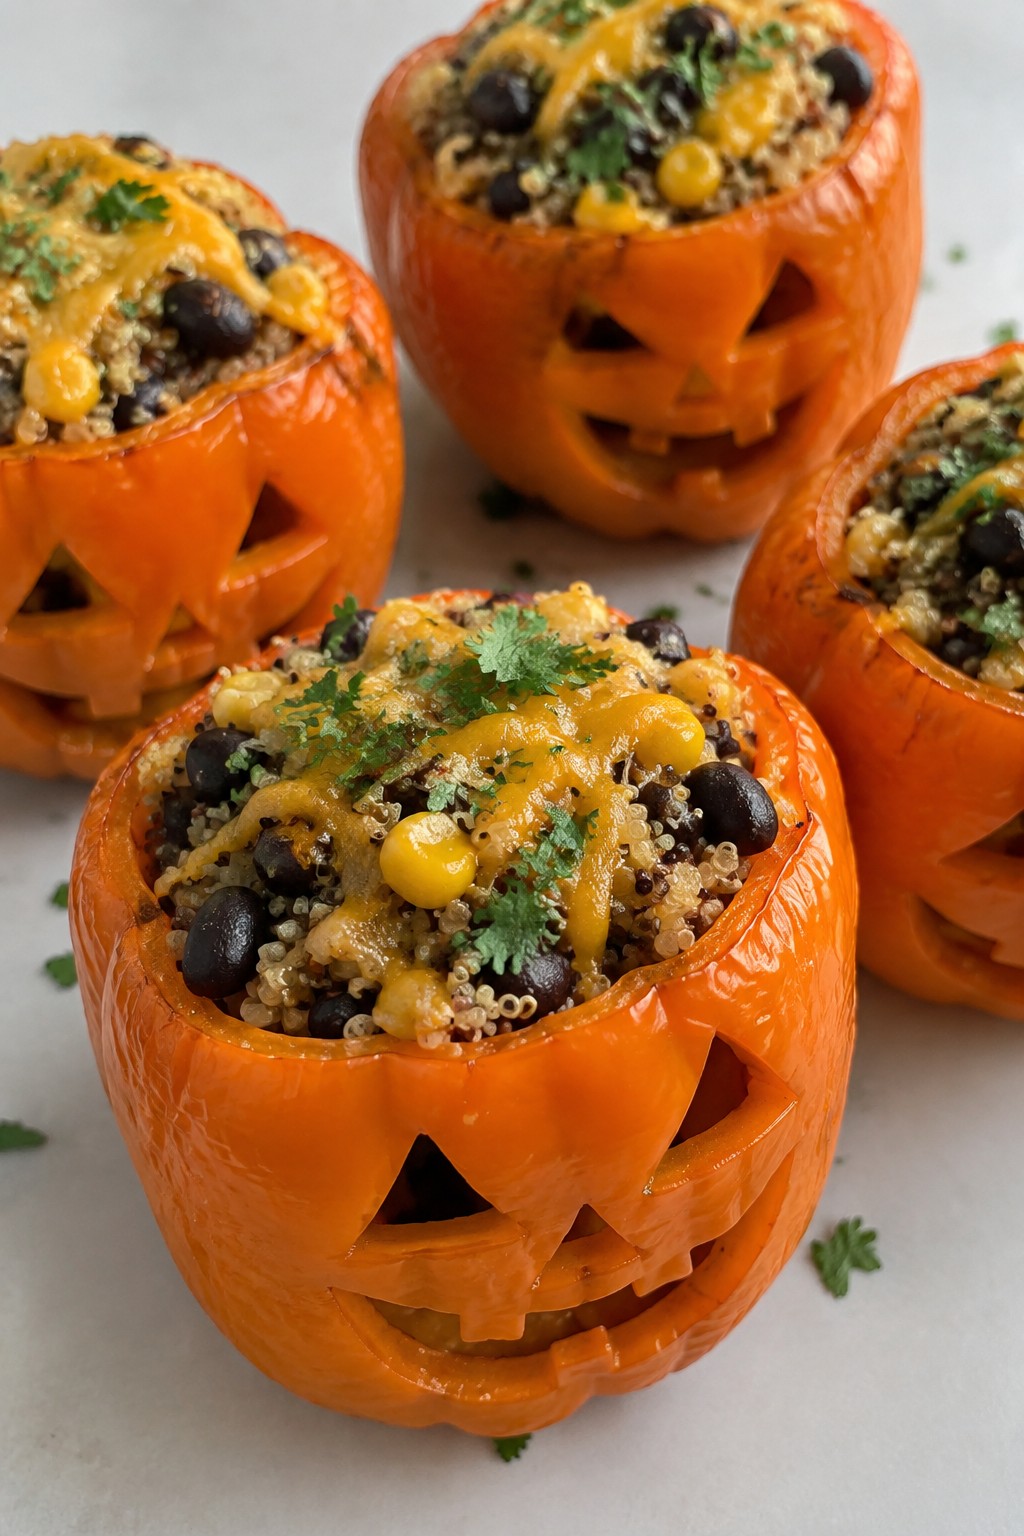
These stuffed peppers bring a playful touch to a Halloween table. Orange bell peppers are carved with simple faces before they are filled with a savory quinoa mixture and baked until tender. The result is a hearty main that feels festive without extra fuss.
The filling combines fluffy quinoa with beans, corn, and mild spices for a satisfying bite. It works well for a weeknight dinner or a holiday gathering where you want something colorful and plant-based.

Equipment
- Saucepan
- Skillet
- Baking dish
- Knife
Ingredients
- 4 large orange bell peppers
- 1 cup uncooked quinoa
- 2 cups vegetable broth
- 1 small onion, diced
- 2 cloves garlic, minced
- 1 cup canned black beans, drained and rinsed
- 1 cup corn kernels
- 1 teaspoon ground cumin
- 1 teaspoon chili powder
- 1/2 teaspoon salt
- 1/4 teaspoon black pepper
- 1/2 cup shredded cheddar cheese
- 2 tablespoons chopped fresh cilantro
Instructions
- Preheat the oven to 375 degrees F. Cut the tops off each orange bell pepper and scoop out the seeds and membranes. Use a small knife to carve simple jack-o’-lantern faces on the front of each pepper.
- Rinse the quinoa under cold water. Place it in a saucepan with the vegetable broth. Bring to a boil, then reduce heat to low, cover, and simmer for 15 minutes until the liquid is absorbed.
- While the quinoa cooks, heat a skillet over medium heat. Add the diced onion and minced garlic. Cook for 3 to 4 minutes until the onion softens.
- Stir the black beans, corn, cumin, chili powder, salt, and black pepper into the skillet. Cook for 2 minutes to warm through.
- Fluff the cooked quinoa with a fork and add it to the skillet. Mix everything until evenly combined.
- Stand the carved peppers upright in a baking dish. Spoon the quinoa mixture into each pepper until full. Sprinkle shredded cheddar cheese over the tops.
- Bake for 25 to 30 minutes until the peppers are tender and the cheese is melted. Remove from the oven and sprinkle with chopped cilantro before serving.
Notes
Cuisine: American
Equipment: Saucepan, Skillet, Baking dish, Knife
Mummy-Wrapped Pork Meatloaf with Roasted Root Vegetables
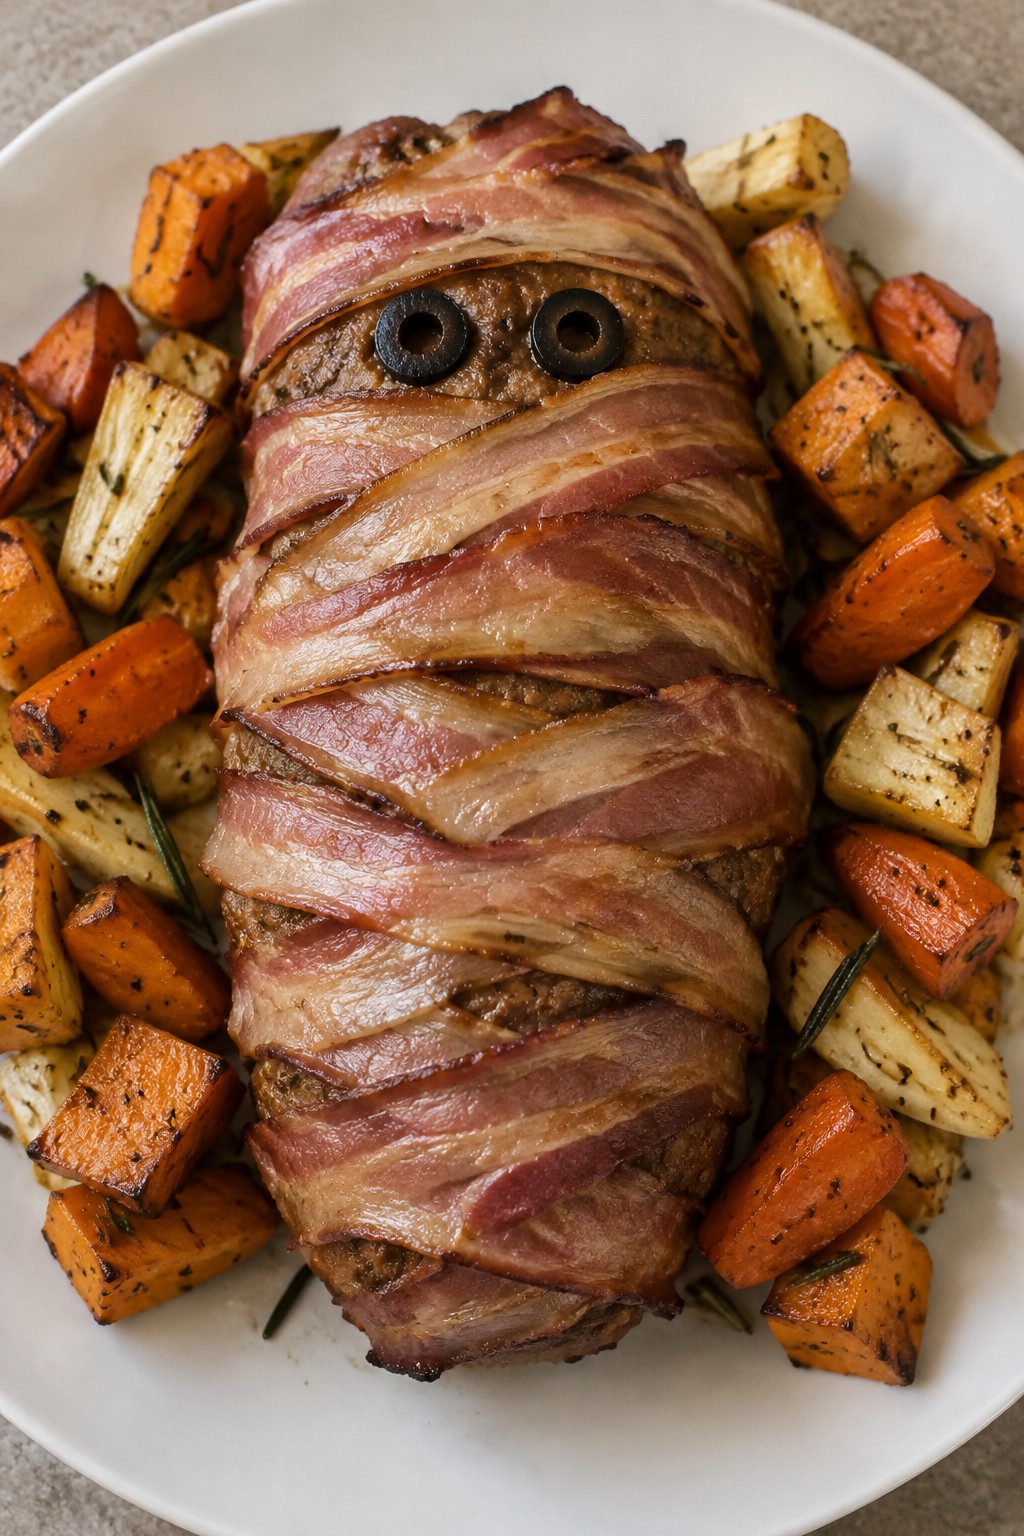
This meatloaf brings a playful touch to a Halloween spread without extra fuss. The bacon strips form a simple mummy wrap that looks fun on the table, while the pork stays juicy inside. Roasted root vegetables add earthy flavor and a soft texture that pairs well with the meat.
It works nicely for a weeknight dinner or a small holiday gathering. The overall taste is savory and comforting, with herbs in the meatloaf and a light rosemary note on the vegetables.
Equipment
- Baking sheet
- Mixing bowl
- Oven
Ingredients
- 1 lb ground pork
- 1/2 cup plain breadcrumbs
- 1 large egg
- 1 small onion, finely chopped
- 2 cloves garlic, minced
- 1 tsp dried thyme
- 1/2 tsp salt
- 1/4 tsp black pepper
- 8 slices bacon
- 3 carrots, peeled and cut into chunks
- 2 parsnips, peeled and cut into chunks
- 2 medium sweet potatoes, peeled and cubed
- 2 tbsp olive oil
- 1 tsp dried rosemary
- 4 black olives, sliced
Instructions
- Preheat the oven to 375°F. Line a baking sheet with parchment paper.
- In a large bowl, combine the ground pork, breadcrumbs, egg, onion, garlic, thyme, salt, and pepper. Mix until evenly blended, then shape into a loaf about 8 inches long.
- Lay the bacon slices across the loaf in overlapping strips to cover the top and sides like bandages. Place the wrapped loaf on the baking sheet.
- In a separate bowl, toss the carrots, parsnips, and sweet potatoes with the olive oil and rosemary. Spread the vegetables around the meatloaf on the same baking sheet.
- Bake for 50 to 55 minutes, until the meatloaf reaches 160°F inside and the bacon is crisp. Remove from the oven and let the meatloaf rest for 5 minutes.
- Place sliced olives on the meatloaf to form eyes. Slice the meatloaf and serve with the roasted vegetables.
Notes
Cuisine: American
Equipment: Baking sheet, Mixing bowl, Oven
Spiderweb Black Bean Enchiladas
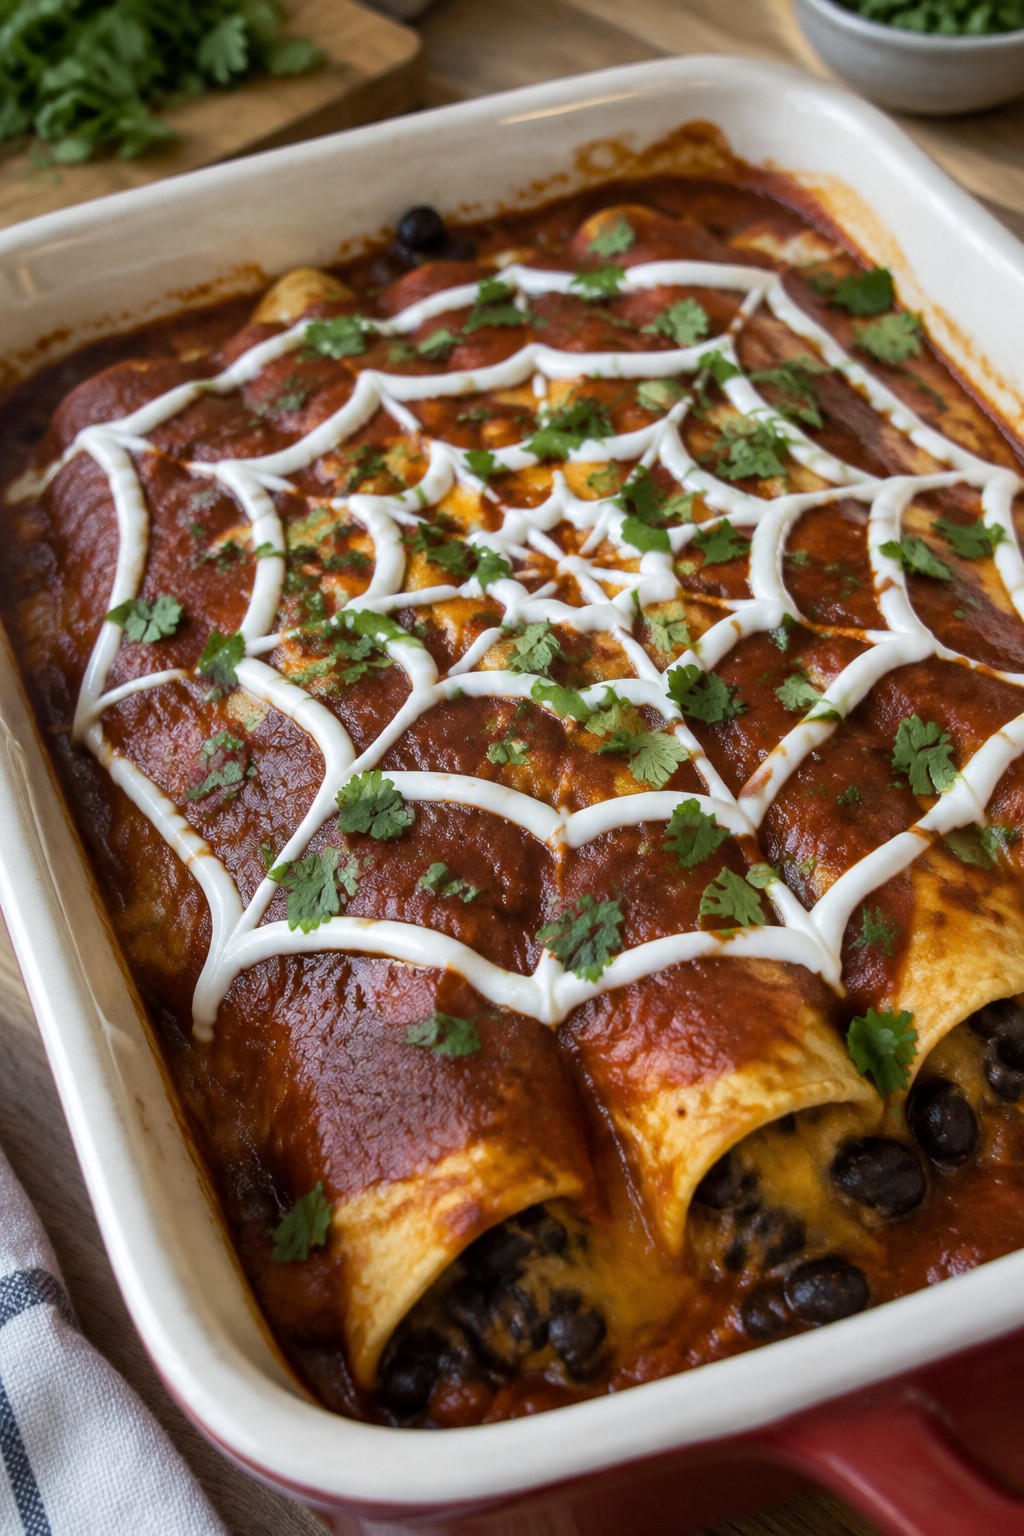
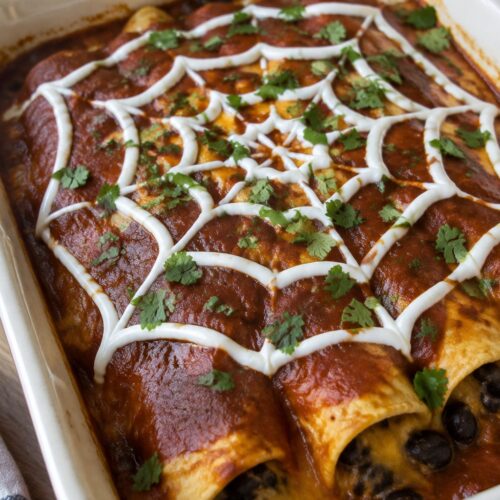
These enchiladas bring a fun Halloween twist to the table with a simple sour cream spiderweb on top. The black bean filling stays hearty and well seasoned while the red enchilada sauce gives nice color contrast. They work well for a casual holiday dinner or as part of a larger spread of spooky snacks.
The finished dish tastes savory with mild spice and creamy pockets from the melted cheese. Corn tortillas hold their shape after baking and the sour cream web stays visible without soaking in.
Equipment
- Skillet
- 9×13 Baking Dish
- Oven
Ingredients
- 8 corn tortillas
- 2 cans (15 oz each) black beans, drained and rinsed
- 1 small onion, diced
- 2 cloves garlic, minced
- 1 teaspoon ground cumin
- 1 teaspoon chili powder
- 1/2 teaspoon salt
- 2 cups red enchilada sauce
- 2 cups shredded cheddar cheese
- 1/2 cup sour cream
- 2 tablespoons chopped cilantro
Instructions
- Preheat the oven to 375°F and lightly grease a 9×13 baking dish.
- Heat a skillet over medium heat and cook the onion and garlic until soft, about 4 minutes.
- Stir in the black beans, cumin, chili powder, and salt. Cook for 3 minutes, then remove from heat.
- Warm the tortillas briefly so they are flexible. Spoon the bean mixture down the center of each tortilla, add a little cheese, and roll them up.
- Place the rolled tortillas seam side down in the baking dish. Pour the enchilada sauce evenly over the top and sprinkle with the remaining cheese.
- Bake for 20 minutes until the cheese is melted and bubbly.
- Let the enchiladas cool for 5 minutes. Place the sour cream in a small zip bag, snip off one corner, and pipe circles across the top. Drag a knife through the circles to form a web pattern.
- Sprinkle with cilantro before serving.
Notes
Cuisine: Mexican
Equipment: Skillet, 9×13 Baking Dish, Oven
Graveyard Taco Salad with Tortilla Tombstones
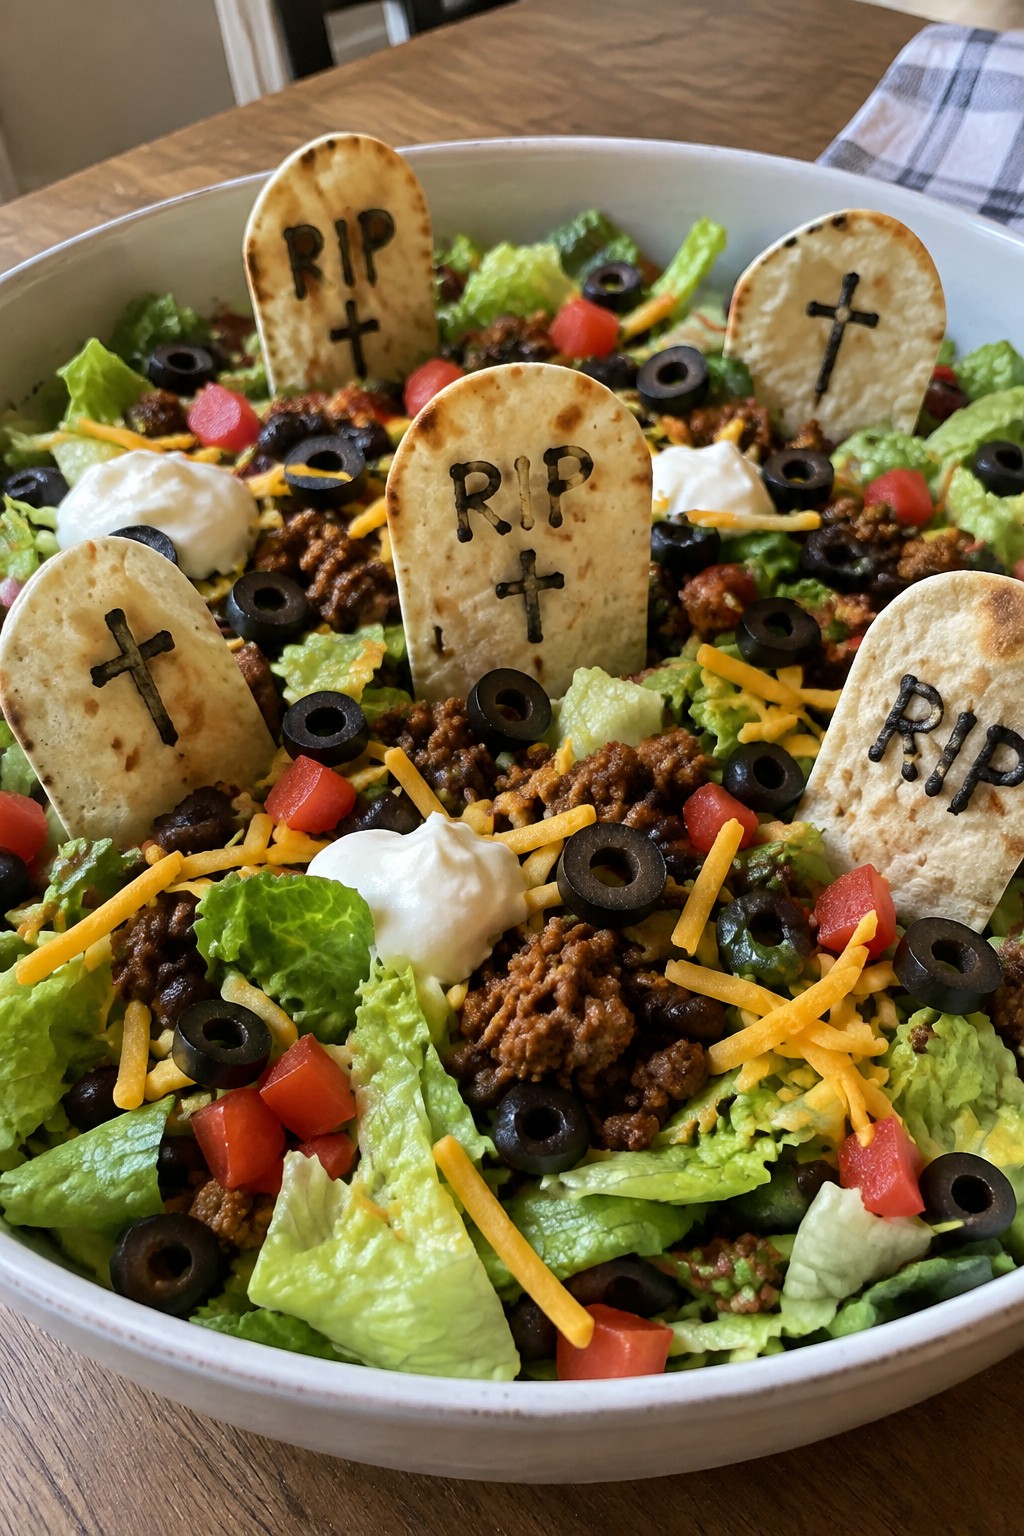
This taco salad brings a playful Halloween touch to the table with crisp tortilla tombstones standing among the greens. It works well for family dinners or small gatherings when you want something hearty yet simple to put together. The mix offers seasoned beef, fresh vegetables, and creamy toppings with plenty of crunch from the lettuce and baked tortillas.

Equipment
- Skillet
- Baking sheet
- Mixing bowl
Ingredients
- 1 pound ground beef
- 2 tablespoons taco seasoning
- 6 cups chopped romaine lettuce
- 2 ripe tomatoes, diced
- 1 15-ounce can black beans, rinsed and drained
- 1 cup shredded cheddar cheese
- 4 large flour tortillas
- 1/2 cup sour cream
- 1/4 cup sliced black olives
Instructions
- Preheat the oven to 375 degrees. Cut each flour tortilla into a tombstone shape using a knife. Place the shapes on a baking sheet and bake for 8 to 10 minutes until they turn crisp and lightly golden.
- Heat a skillet over medium heat. Add the ground beef and cook until browned, breaking it up with a spoon as it cooks. Stir in the taco seasoning and 1/4 cup water, then simmer for 3 minutes until the liquid reduces.
- In a large bowl, combine the chopped romaine lettuce, diced tomatoes, and rinsed black beans. Toss lightly to mix the base ingredients.
- Spoon the seasoned beef over the salad mixture. Sprinkle the shredded cheddar cheese evenly across the top.
- Press the baked tortilla tombstones upright into the salad. Use small amounts of sour cream to pipe simple letters like RIP on a few tombstones, then scatter the sliced black olives around the base as garnish.
Notes
Cuisine: Mexican
Equipment: Skillet, Baking sheet, Mixing bowl
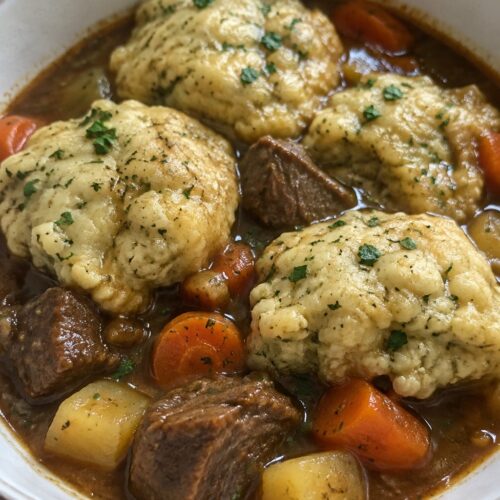
Witch’s Cauldron Beef Stew with Herb Dumplings
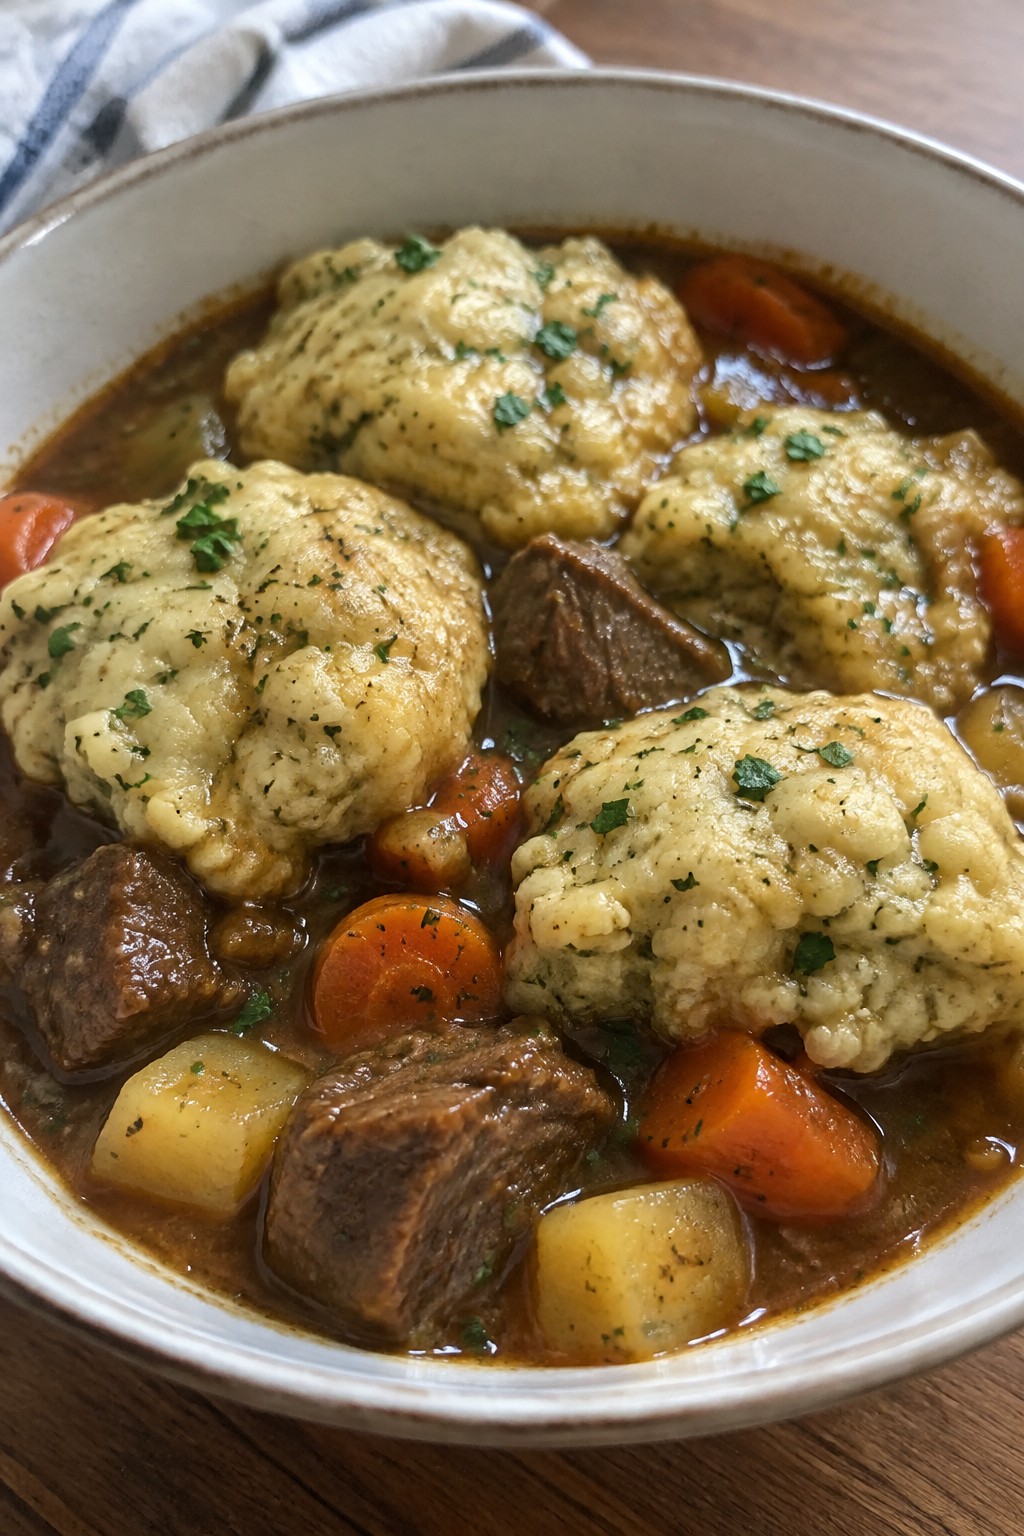
This beef stew makes a solid choice for a Halloween dinner because it cooks in one pot and fills the table with a dark, hearty look. Tender chunks of beef and root vegetables simmer in a thick broth, while the herb dumplings steam on top to create a soft, bread-like layer that soaks up the juices.
The result is a rich, savory meal with balanced herbal notes and a mix of firm vegetables and tender meat. It suits cool evenings when you want something warming that still feels special for the holiday.
Equipment
- Dutch Oven
- Mixing Bowl
- Wooden Spoon
Ingredients
- 1.5 pounds beef chuck, cut into 1-inch cubes
- 2 tablespoons olive oil
- 1 large onion, diced
- 3 carrots, sliced into rounds
- 2 medium potatoes, cubed
- 4 cups beef broth
- 2 tablespoons tomato paste
- 1 teaspoon dried thyme
- 2 bay leaves
- 1 teaspoon salt
- 1/2 teaspoon black pepper
- 1 cup all-purpose flour
- 1.5 teaspoons baking powder
- 2 tablespoons chopped fresh parsley
- 1/2 cup milk
- 2 tablespoons butter, melted
Instructions
- Heat the olive oil in a large Dutch oven over medium-high heat. Add the beef cubes and brown them on all sides for about 6 minutes. Remove the beef and set it aside.
- Add the diced onion to the same pot and cook for 3 minutes until it softens. Stir in the tomato paste and cook for 1 minute more.
- Return the beef to the pot along with the carrots, potatoes, beef broth, thyme, bay leaves, salt, and pepper. Bring the mixture to a boil, then reduce the heat to low, cover, and simmer for 1 hour.
- While the stew simmers, prepare the dumplings. In a mixing bowl, combine the flour, baking powder, parsley, and a pinch of salt. Stir in the milk and melted butter until a soft dough forms.
- After the stew has simmered for 1 hour, drop spoonfuls of the dumpling dough onto the surface of the stew. Cover the pot and cook for 15 minutes without lifting the lid so the dumplings steam through.
Notes
Cuisine: American
Equipment: Dutch Oven, Mixing Bowl, Wooden Spoon
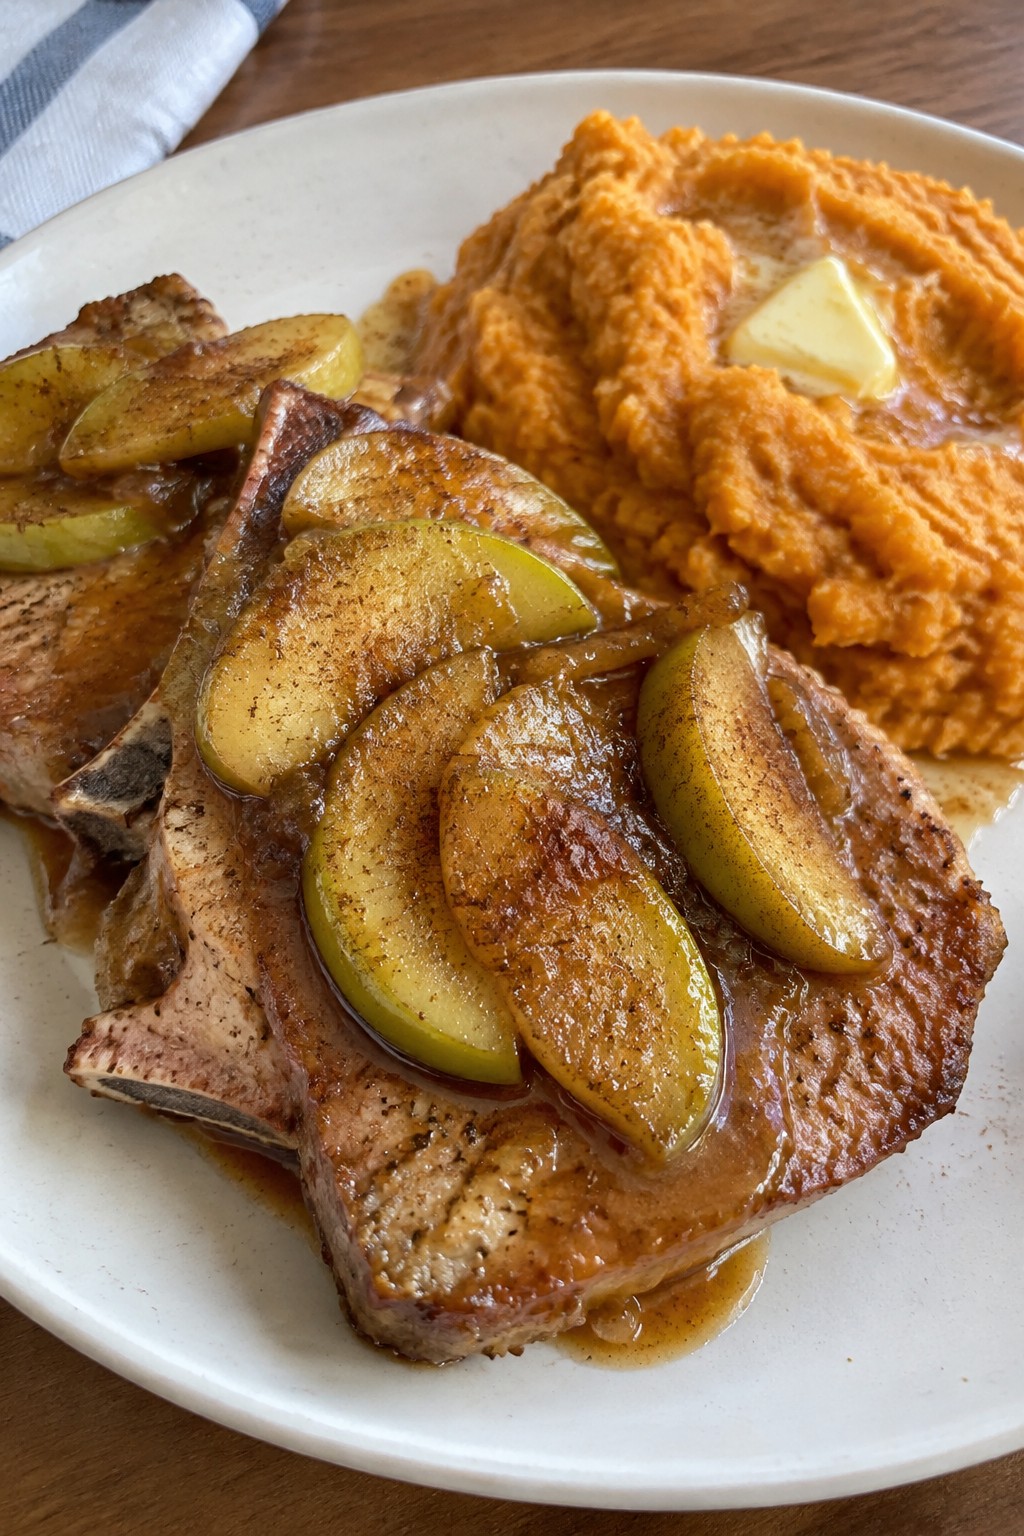
Caramel Apple Pork Chops with Mashed Sweet Potatoes
This dish pairs savory pork chops with a quick caramel apple topping for a sweet and salty balance that fits right into fall gatherings. It works especially well for Halloween dinners when you want a hearty main that still nods to seasonal flavors without extra fuss. The mashed sweet potatoes bring a creamy contrast to the tender chops and soft apple slices.
Equipment
- Large pot
- Large skillet
- Potato masher
Ingredients
- 4 bone-in pork chops, about 1 inch thick
- 2 Granny Smith apples, cored and sliced
- 1/4 cup caramel sauce
- 1 teaspoon cinnamon
- 4 medium sweet potatoes, peeled and cubed
- 3 tablespoons butter, divided
- 1/4 cup milk
- 1 tablespoon olive oil
- Salt and pepper to taste
Instructions
- Place the sweet potatoes in a large pot and cover with water. Bring to a boil and cook until tender, about 15 minutes. Drain and return to the pot.
- Add 2 tablespoons butter, milk, and a pinch of salt to the sweet potatoes. Mash until smooth and set aside.
- Season both sides of the pork chops with salt and pepper. Heat olive oil in a large skillet over medium-high heat. Cook the chops for 5 to 6 minutes per side until browned and cooked through. Remove to a plate.
- Lower the heat to medium and add the remaining tablespoon of butter to the same skillet. Add the apple slices and cinnamon. Cook for 3 to 4 minutes until the apples soften slightly.
- Stir in the caramel sauce and let it warm through for 1 minute. Spoon the caramel apples over the pork chops and serve with the mashed sweet potatoes.
Notes
Cuisine: American
Equipment: Large pot, Large skillet, Potato masher
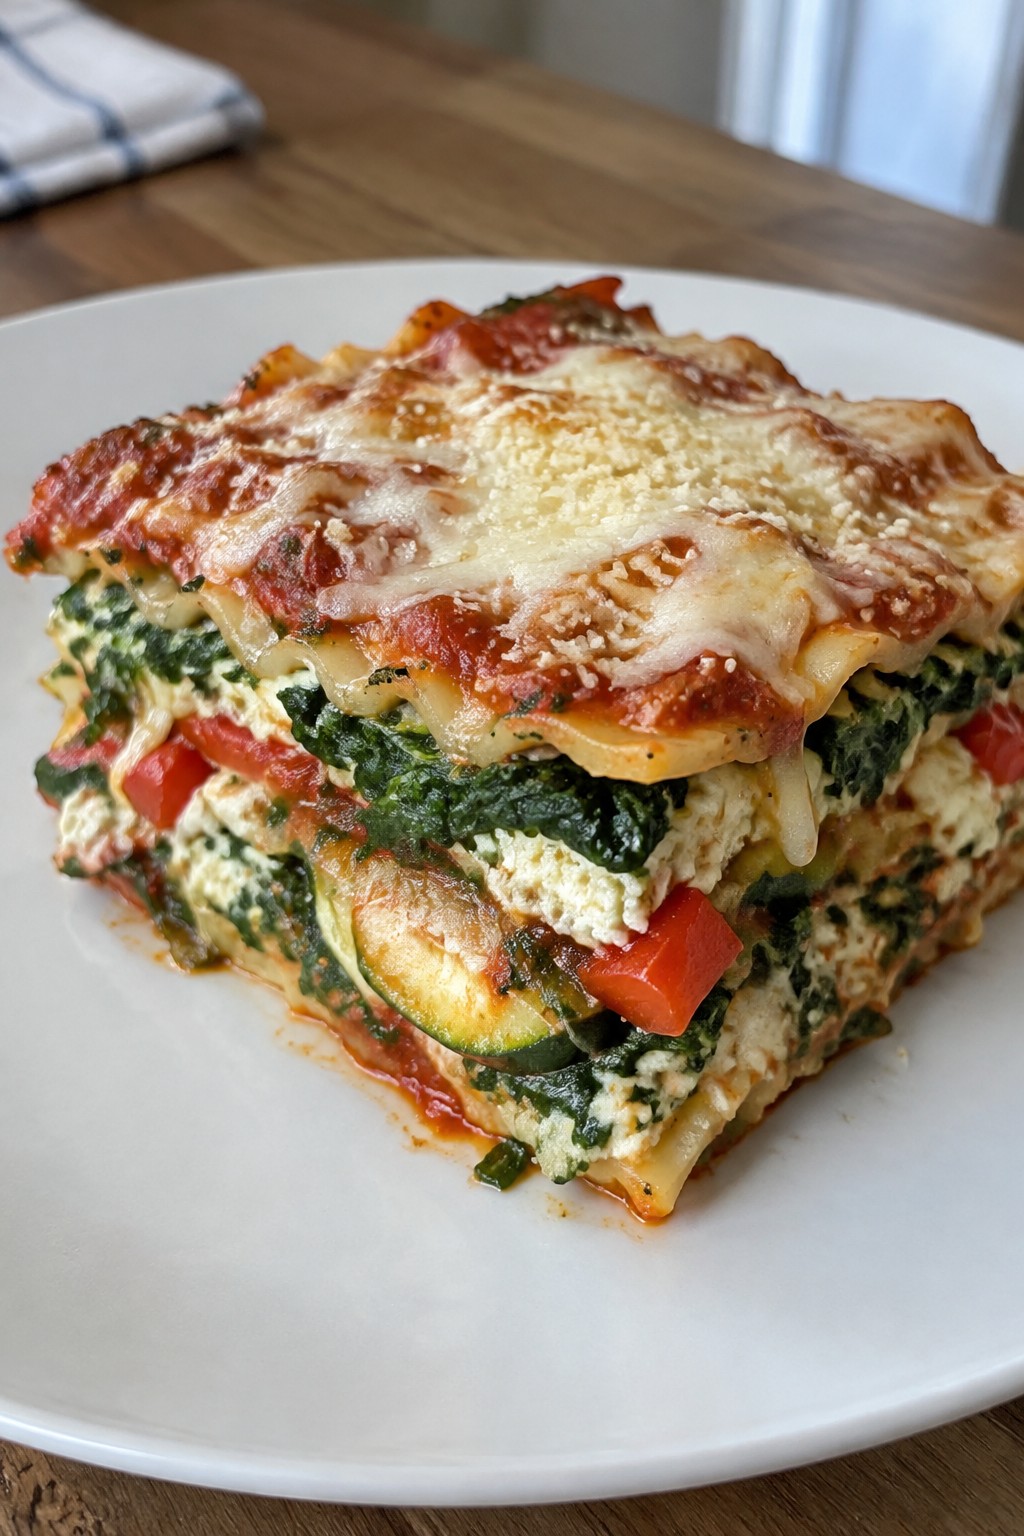
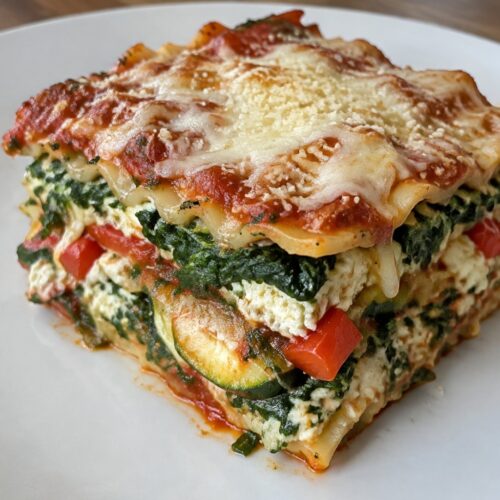
Monster Veggie Lasagna with Spinach Layers
This veggie lasagna fits right into a Halloween table with its vivid green spinach layers that peek through each slice. It makes a filling meatless main that still feels festive and fun. The texture stays creamy from the ricotta while the vegetables add a slight bite.
It works well for a weeknight dinner or a holiday gathering when you want something different from typical party fare. The flavor stays savory and balanced with tomato sauce and mild cheese.
Equipment
- Large Skillet
- Mixing Bowl
- 8×8 Baking Dish
Ingredients
- 8 no-boil lasagna noodles
- 15 oz ricotta cheese
- 10 oz fresh spinach
- 24 oz marinara sauce
- 2 cups shredded mozzarella cheese
- 1/2 cup grated parmesan cheese
- 1 medium zucchini, thinly sliced
- 1 red bell pepper, diced
- 2 garlic cloves, minced
- 1 small onion, chopped
- 2 tbsp olive oil
- Salt and pepper to taste
Instructions
- Preheat the oven to 375°F. Heat the olive oil in a skillet over medium heat.
- Add the onion, garlic, and red bell pepper to the skillet. Cook until the onion turns soft.
- Stir in the zucchini slices and cook for another two minutes. Season with salt and pepper, then remove the skillet from heat.
- Mix the fresh spinach into the ricotta cheese in a bowl until evenly combined.
- Spread a thin layer of marinara sauce in the bottom of an 8×8 baking dish. Add two noodles, then half the ricotta spinach mixture, half the cooked vegetables, and a third of the mozzarella.
- Repeat the layers once more, ending with the final two noodles, remaining marinara, and the rest of the mozzarella and parmesan on top.
- Cover the dish with foil and bake for 25 minutes. Remove the foil and bake for 10 more minutes until the cheese browns lightly.
Notes
Cuisine: Italian
Equipment: Large Skillet, Mixing Bowl, 8×8 Baking Dish
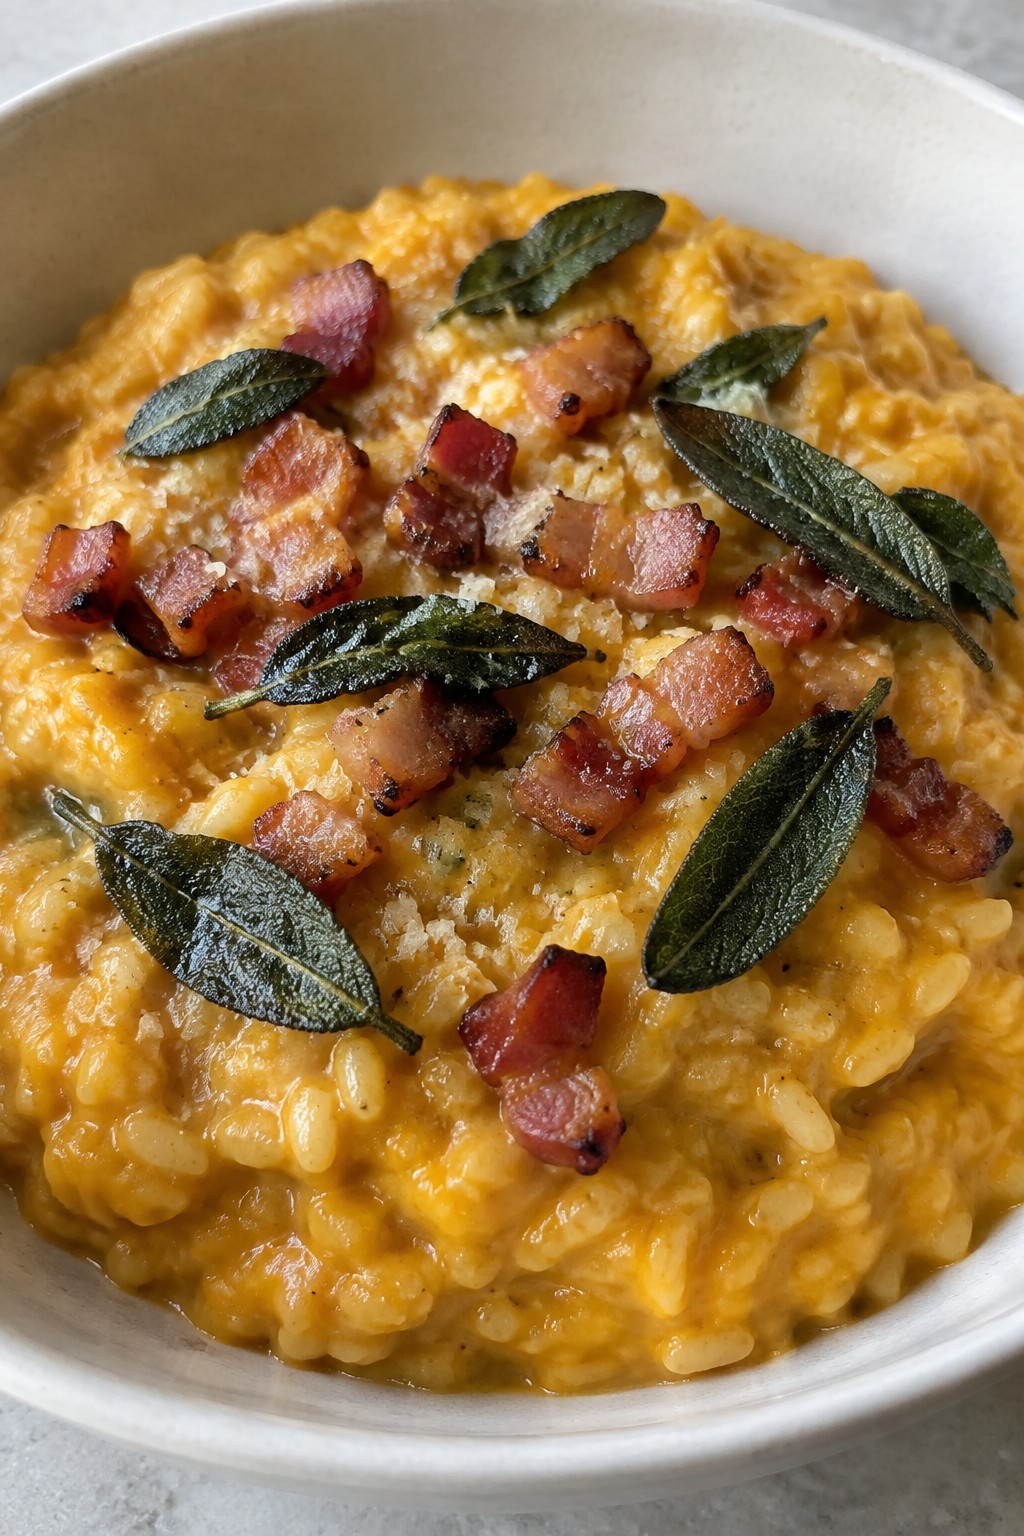
Pumpkin Spice Risotto with Crispy Sage and Pancetta
This risotto brings a subtle fall twist to a classic creamy dish. The pumpkin adds earthiness while a light touch of spice keeps it interesting without overpowering the savory notes. It works well as a side for holiday gatherings or a cozy weeknight meal when you want something warm and comforting.
The texture stays rich and velvety from the slow addition of broth, while the pancetta and sage deliver salty crunch on top. The flavors balance sweet pumpkin with herbal sage and meaty pancetta for a dish that feels festive yet straightforward.

Equipment
- Large skillet
- Saucepan
- Wooden spoon
Ingredients
- 1 1/2 cups Arborio rice
- 4 cups chicken broth
- 1 cup pumpkin puree
- 4 ounces pancetta, diced
- 12 fresh sage leaves
- 1 small onion, finely chopped
- 2 cloves garlic, minced
- 1/2 cup grated Parmesan cheese
- 3 tablespoons butter
- 1 tablespoon olive oil
- 1 teaspoon pumpkin pie spice
- Salt and black pepper to taste
Instructions
- Heat the olive oil in a large skillet over medium heat. Add the diced pancetta and cook until it turns golden and crisp. Remove the pancetta with a slotted spoon and set it aside.
- Add the sage leaves to the same skillet and fry them for about 30 seconds until crisp. Remove the sage and set it aside with the pancetta.
- Add 1 tablespoon of butter to the skillet. Stir in the onion and cook until softened. Add the garlic and cook for 1 minute more.
- Stir in the Arborio rice and cook for 2 minutes until the grains look slightly translucent. Add the pumpkin puree and pumpkin pie spice, then mix well.
- Begin adding the chicken broth one ladle at a time, stirring often. Wait until each addition is mostly absorbed before adding the next. Continue until the rice is tender and creamy, about 18 to 20 minutes.
- Remove the skillet from the heat. Stir in the remaining 2 tablespoons of butter and the grated Parmesan cheese. Season with salt and black pepper.
- Top each serving with the crispy pancetta and fried sage leaves.
Notes
Cuisine: Italian
Equipment: Large skillet, Saucepan, Wooden spoon
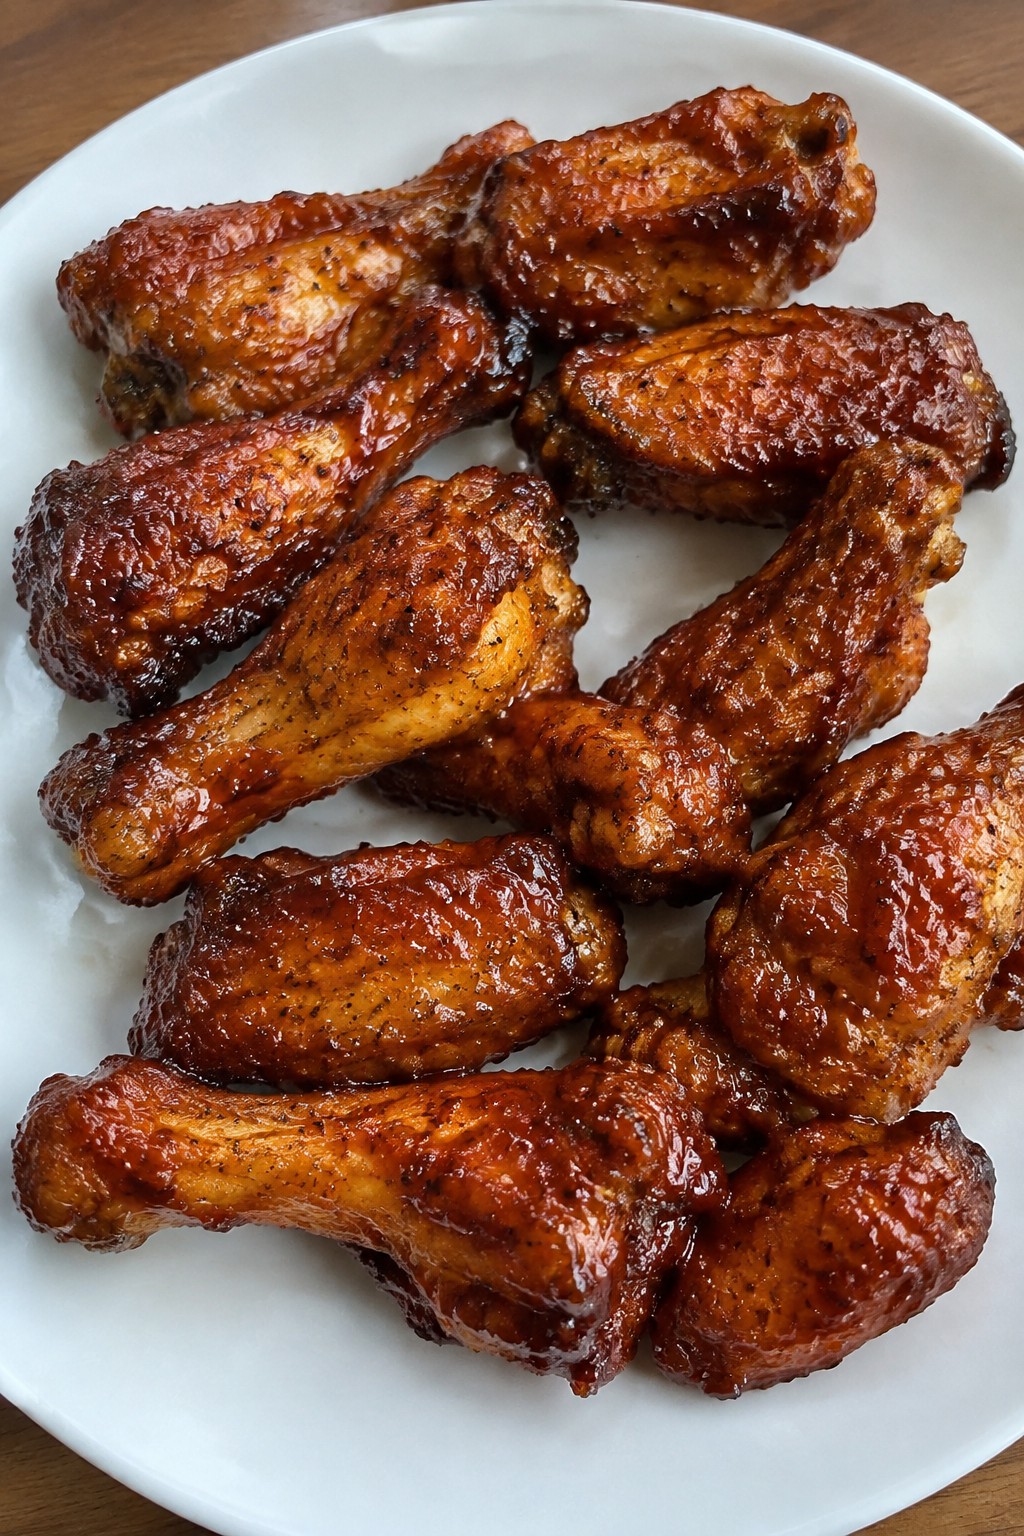
Skeleton Bone Chicken Wings with Smoky BBQ Sauce
These wings earn their name from the way the pieces can be laid out on a platter to suggest bones, which adds a playful touch to a Halloween table. The chicken stays crisp on the outside while the smoky sauce brings a balanced sweet and tangy flavor that pairs well with the savory meat.
This recipe serves 4 people. – 2 pounds chicken wings, separated into drumettes and flats – 2 tablespoons olive oil – 1 teaspoon salt – 1/2 teaspoon black pepper – 1 cup ketchup – 2 tablespoons apple cider vinegar – 2 tablespoons brown sugar – 1 teaspoon smoked paprika – 1/2 teaspoon garlic powder – 1/2 teaspoon onion powder
### Instructions 1. Preheat the oven to 400 degrees F and line a baking sheet with parchment paper. 2. Place the chicken wings in a large bowl and toss them with the olive oil, salt, and black pepper until evenly coated. 3. Spread the wings in a single layer on the prepared baking sheet. Bake for 40 minutes, flipping them halfway through, until the skin is golden and crisp. 4. While the wings bake, combine the ketchup, apple cider vinegar, brown sugar, smoked paprika, garlic powder, and onion powder in a small saucepan. 5. Bring the sauce mixture to a simmer over medium heat, stirring often, and cook for 5 minutes until it thickens slightly. Remove from heat. 6. Transfer the baked wings to a clean bowl and pour the warm sauce over them. Toss gently until all pieces are coated. 7. Arrange the wings on a serving platter in a scattered pattern that suggests bones.
### Extra Tips For the best visual effect, alternate drumettes and flats when plating so the shapes stand out. If the sauce thickens too much while sitting, stir in a teaspoon of water to loosen it before tossing the wings. Leftovers keep in the fridge for up to three days and reheat well in a 350-degree oven for 10 minutes to restore crispness.
Course: Appetizer Cuisine: American Equipment: Baking sheet, Large bowl, Small saucepan, Oven
Serves 4 people.
Instructions
- Preheat the oven to 400 degrees F and line a baking sheet with parchment paper.
- Place the chicken wings in a large bowl and toss them with the olive oil, salt, and black pepper until evenly coated.
- Spread the wings in a single layer on the prepared baking sheet. Bake for 40 minutes, flipping them halfway through, until the skin is golden and crisp.
- While the wings bake, combine the ketchup, apple cider vinegar, brown sugar, smoked paprika, garlic powder, and onion powder in a small saucepan.
- Bring the sauce mixture to a simmer over medium heat, stirring often, and cook for 5 minutes until it thickens slightly. Remove from heat.
- Transfer the baked wings to a clean bowl and pour the warm sauce over them. Toss gently until all pieces are coated.
- Arrange the wings on a serving platter in a scattered pattern that suggests bones.
Extra Tips
For the best visual effect, alternate drumettes and flats when plating so the shapes stand out. If the sauce thickens too much while sitting, stir in a teaspoon of water to loosen it before tossing the wings. Leftovers keep in the fridge for up to three days and reheat well in a 350-degree oven for 10 minutes to restore crispness.Course: Appetizer Cuisine: American Equipment: Baking sheet, Large bowl, Small saucepan, Oven
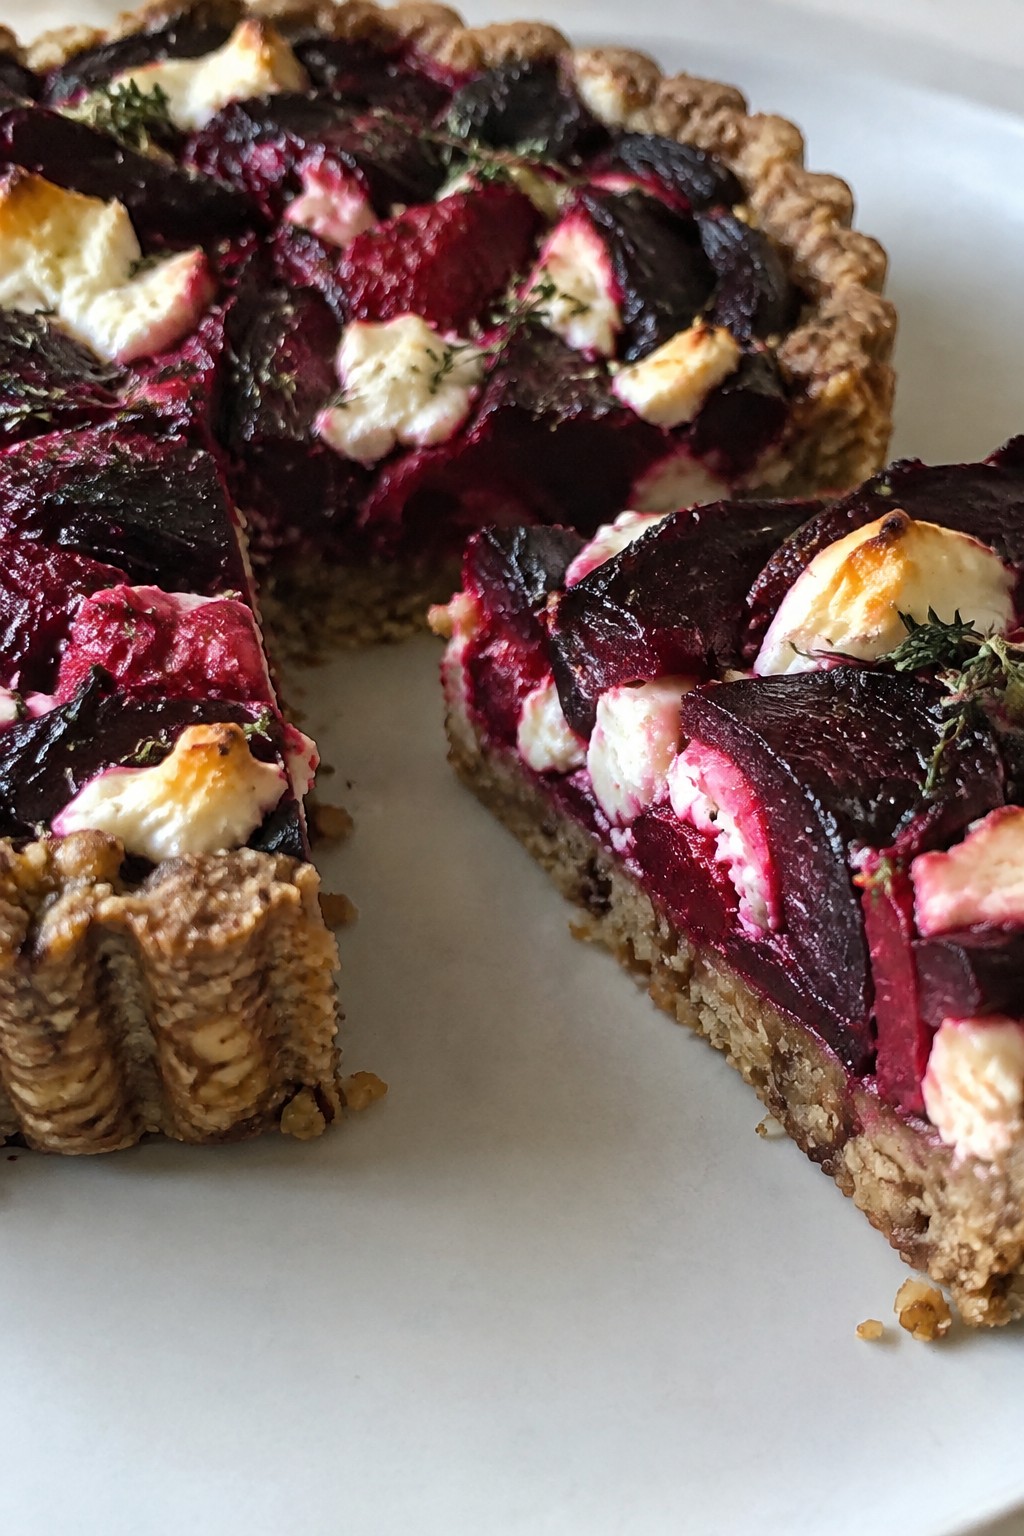
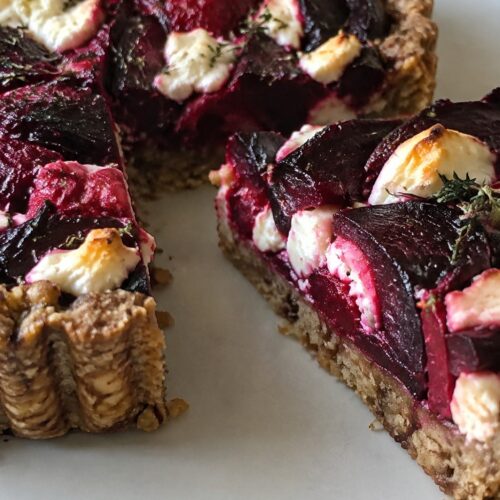
Bloody Beet and Goat Cheese Tart with Walnut Crust
This tart uses roasted beets to create a deep red filling that stands out on a holiday spread. The walnut crust gives a hearty, nutty base while the goat cheese adds a creamy tang that cuts through the earthiness of the beets. It fits well as a starter for a Halloween dinner or as part of a larger appetizer table.
The finished tart has a firm sliceable texture with a slight crunch from the crust and soft pockets of cheese throughout. Beets and walnuts keep the flavors grounded without needing extra spices.
Equipment
- Food processor
- 9-inch tart pan
- baking sheet
- mixing bowl
Ingredients
- 1 1/2 cups walnuts, divided
- 1 cup all-purpose flour
- 5 tablespoons unsalted butter, chilled and cubed
- 1/4 teaspoon salt
- 2 medium beets
- 6 ounces goat cheese, divided
- 2 large eggs
- 1/2 cup heavy cream
- 1 teaspoon fresh thyme leaves
Instructions
- Heat the oven to 375 degrees. Place the beets on a baking sheet and roast for 45 minutes until tender. Let them cool, then peel and slice into thin rounds.
- In a food processor, pulse 1 cup of the walnuts until finely ground. Add the flour, butter, and salt. Pulse until the mixture forms a dough that holds together when pressed.
- Press the dough into the bottom and up the sides of a 9-inch tart pan. Bake the crust for 15 minutes, then remove from the oven.
- In a bowl, mash 4 ounces of the goat cheese with the eggs and cream until smooth. Stir in the thyme.
- Chop the remaining 1/2 cup walnuts and fold them into the cheese mixture. Spread the filling into the baked crust.
- Arrange the sliced beets over the top. Crumble the remaining 2 ounces of goat cheese across the surface.
- Bake the tart for 25 minutes until the filling is set and lightly golden at the edges. Cool for 10 minutes before slicing.
Notes
Cuisine: American
Equipment: Food processor, 9-inch tart pan, baking sheet, mixing bowl
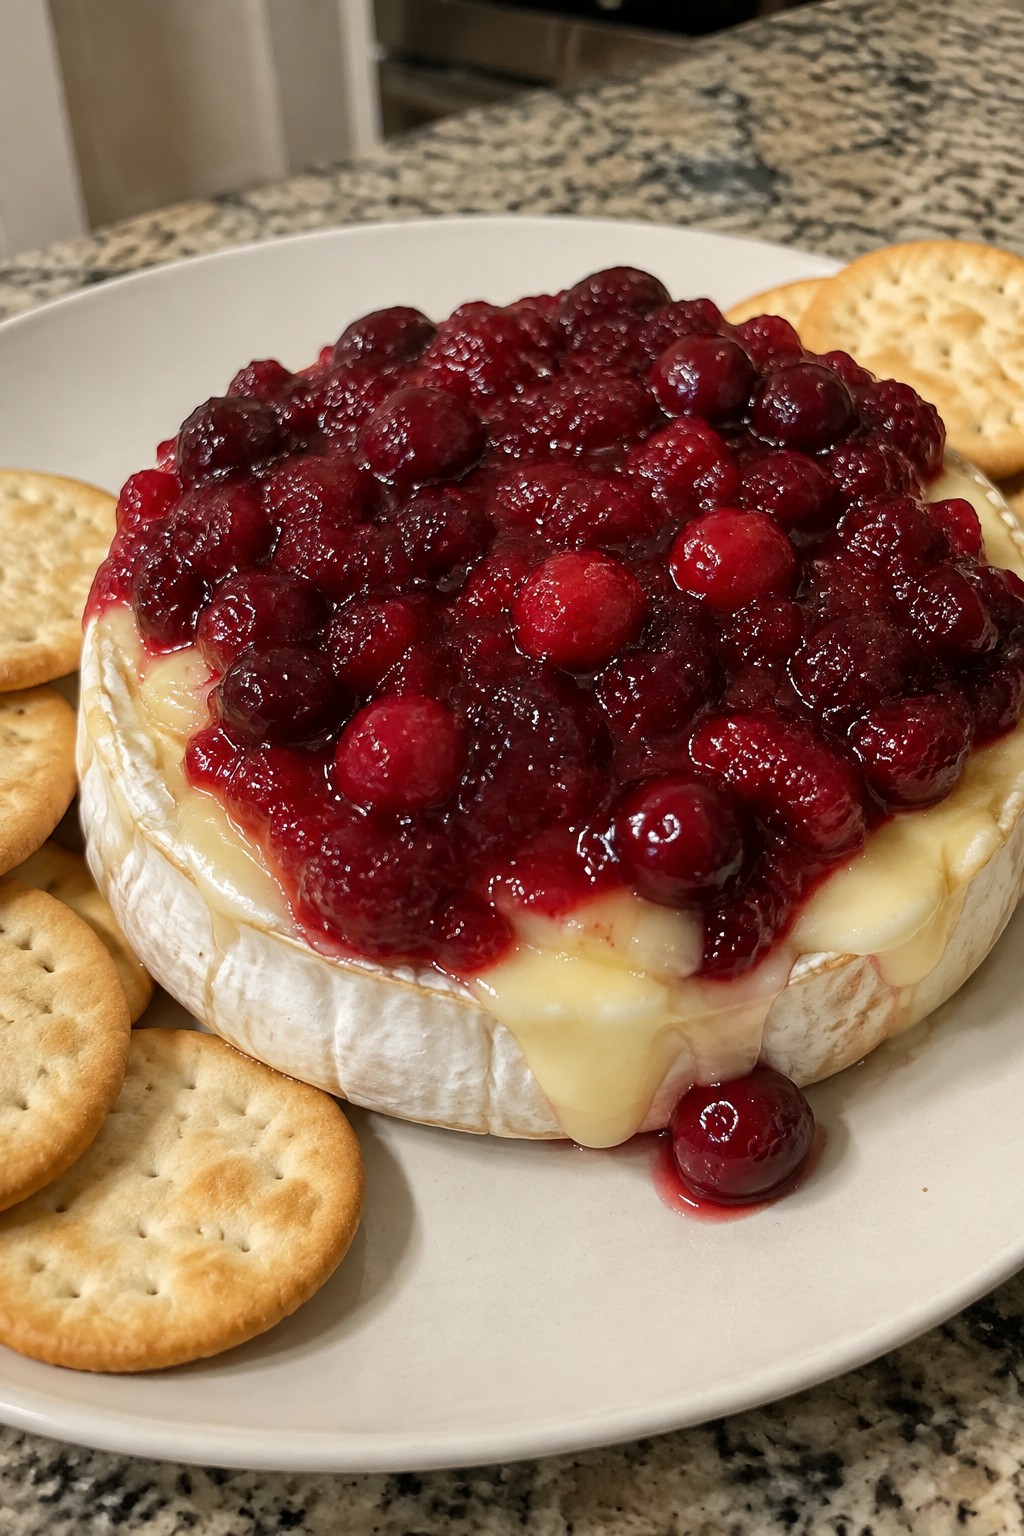
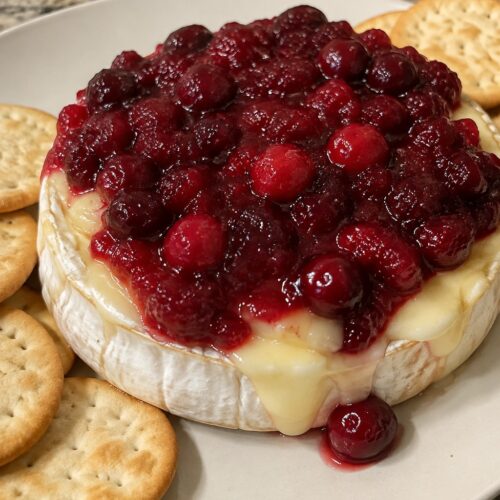
Ghostly Baked Brie with Cranberry Compote and Crackers
This baked brie makes a simple centerpiece for a Halloween spread. The warm cheese pairs with a tart cranberry topping and crisp crackers for easy sharing at parties or casual gatherings.
The melted brie offers a creamy texture while the compote adds bright acidity and the crackers provide crunch. It comes together with minimal effort and fits right into a festive table.
Equipment
- Baking sheet
- Small saucepan
Ingredients
- 1 (8-ounce) wheel of brie cheese
- 2 cups fresh cranberries
- 1/2 cup granulated sugar
- 1/4 cup water
- 1 tablespoon orange juice
- Crackers, for serving
Instructions
- Preheat the oven to 350 degrees F. Place the brie wheel on a parchment-lined baking sheet.
- Bake the brie for 15 minutes until the center feels soft when pressed lightly.
- While the brie bakes, combine the cranberries, sugar, water, and orange juice in a small saucepan.
- Bring the mixture to a simmer over medium heat and cook for 8 to 10 minutes, stirring occasionally, until the cranberries burst and the sauce thickens slightly.
- Remove the brie from the oven and spoon the warm cranberry compote over the top.
- Arrange crackers around the brie on a serving plate.
Notes
Cuisine: American
Equipment: Baking sheet, Small saucepan
