


Planning a kids Halloween party often means finding food that is simple to make and still appealing to little ones. These ideas focus on recipes with everyday ingredients and minimal steps. You will see a mix of sweet and savory options that work for different party sizes. Each one includes clear instructions so you can decide what fits your time and supplies. Here are 11 Halloween themed food ideas to consider for your next gathering.
Helpful Tips Before You Start
These tips will help the recipes go smoothly and keep the focus on fun for the kids.
Get Kids Involved Early
Let them add simple touches like candy eyes or sprinkles. This keeps them busy and makes the treats feel more special to them.
Prepare Parts Ahead of Time
Bake cookies or cut fruit the day before the party. It reduces last-minute work and leaves more time for decorating.
Check for Allergies First
Ask parents about nut, dairy, or gluten issues. Have a plain option ready so every child can join in.
Keep Designs Age-Appropriate
Use bright colors and cute shapes for younger guests. Skip anything too spooky that might upset small kids.
Mummy Hot Dog Roll-Ups
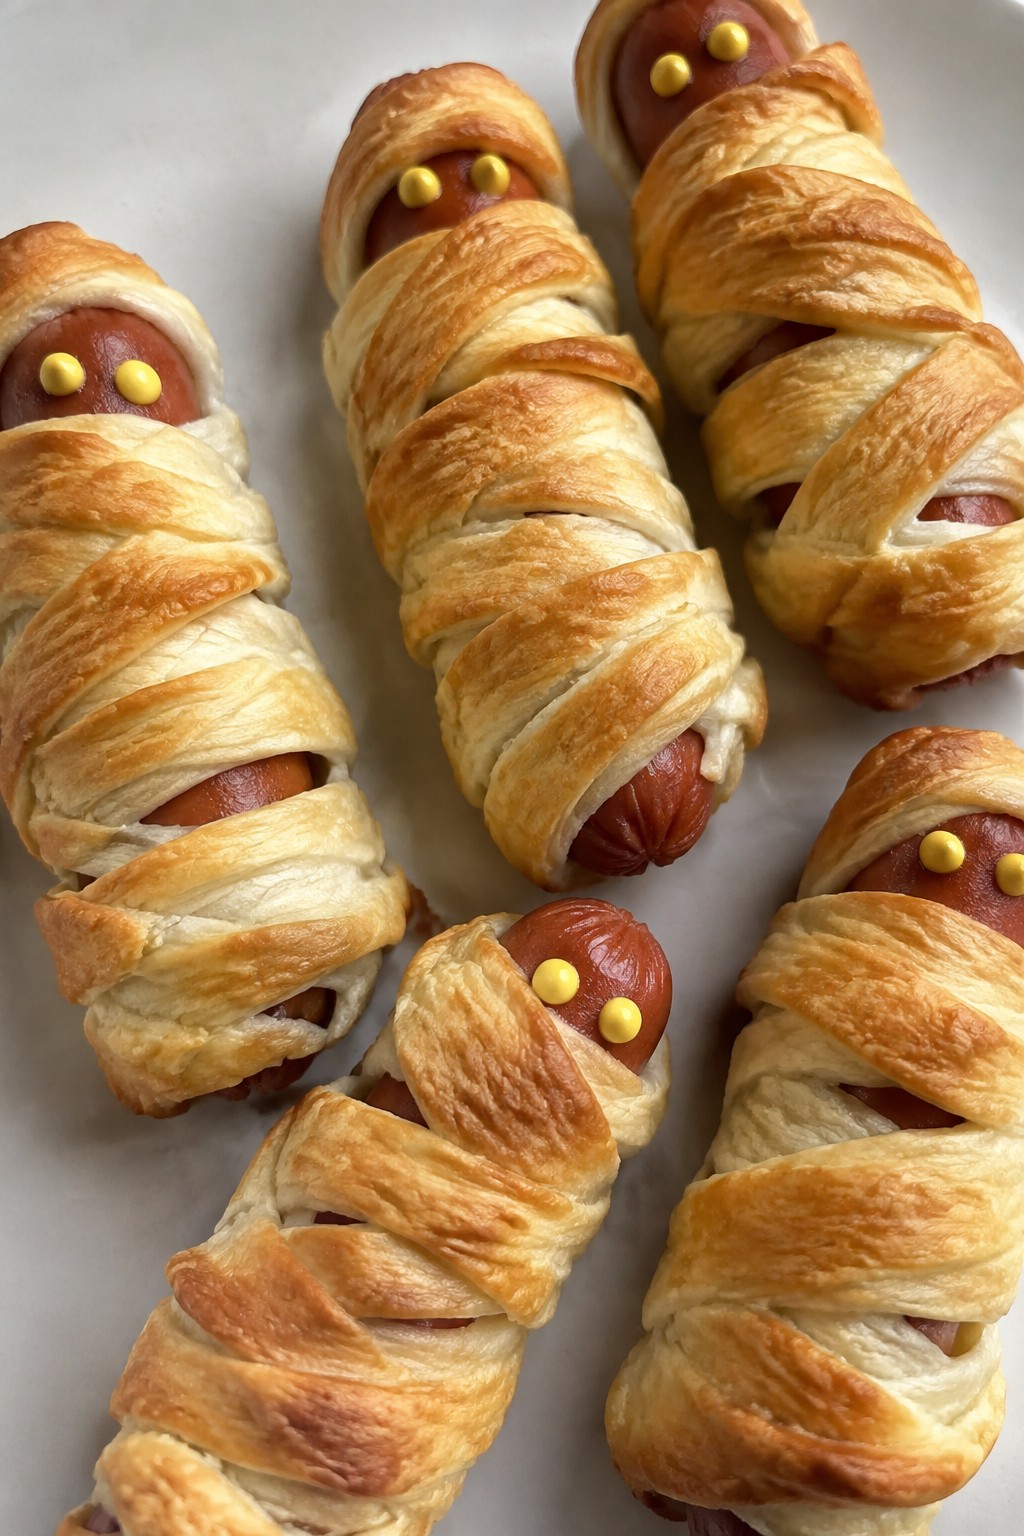
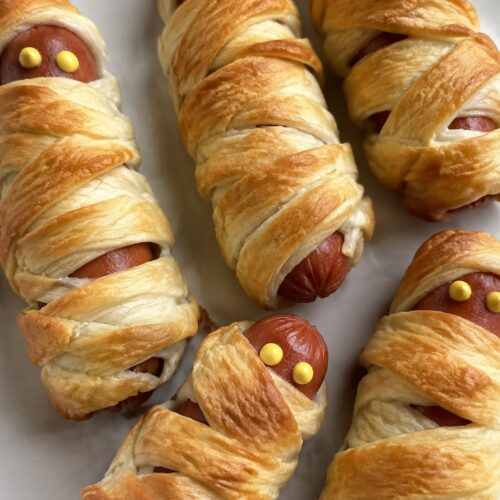
These mummy hot dog roll-ups bring a playful touch to any kids’ Halloween party spread. The hot dogs stay juicy inside while the dough bakes up golden and crisp on the outside. Kids enjoy the fun bandage look, and the simple savory flavor pairs well with classic party dips.
They work especially well as a quick finger food when you need something easy that still feels themed. The finished bites have a soft bread exterior with a satisfying snap from the hot dog inside.
Equipment
- Baking Sheet
- Knife
Ingredients
- 4 all-beef hot dogs
- 1 can (8 oz) refrigerated crescent roll dough
- 1 tablespoon yellow mustard
Instructions
- Heat the oven to 375 degrees and line a baking sheet with parchment paper.
- Unroll the crescent dough on a clean surface and press the seams together to form one sheet.
- Cut the dough into thin strips about half an inch wide.
- Wrap the strips around each hot dog, leaving a small gap near one end for the face and overlapping slightly to create a bandage effect.
- Place the wrapped hot dogs on the baking sheet and bake for 12 to 15 minutes until the dough is golden brown.
- Remove from the oven and let them cool for two minutes.
- Use a small amount of mustard to dot two eyes on the exposed part of each hot dog.
Notes
Cuisine: American
Equipment: Baking Sheet, Knife
Jack-o’-Lantern Stuffed Bell Peppers
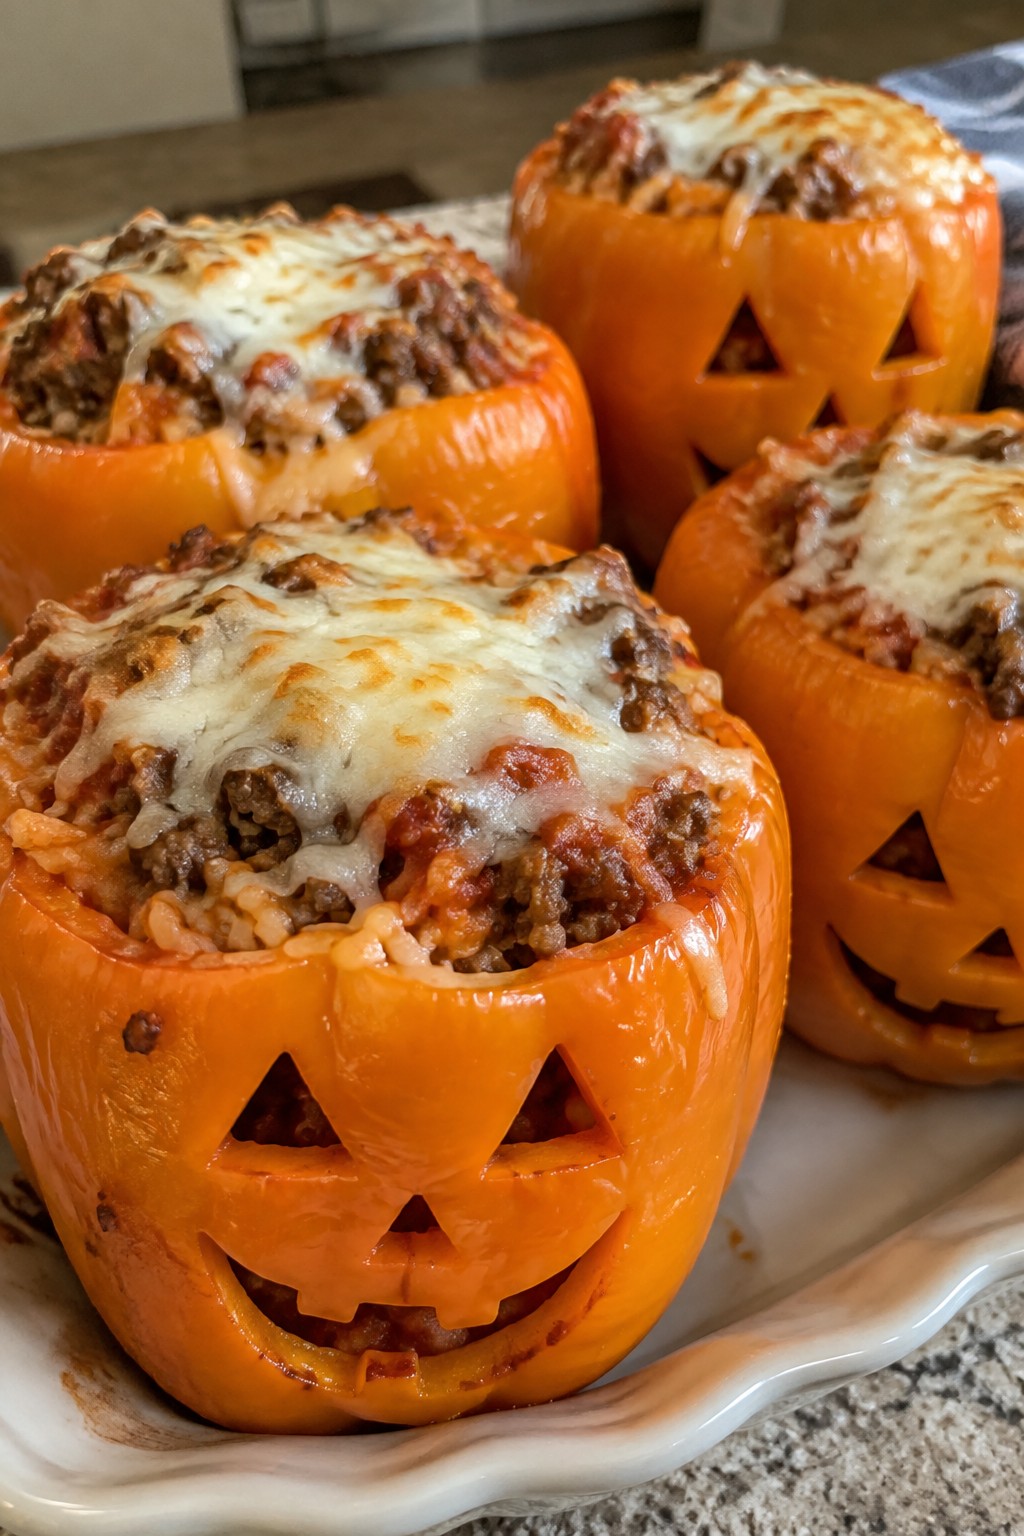
These jack-o’-lantern stuffed bell peppers bring a playful Halloween touch to kids’ parties. The orange peppers are carved with simple faces before baking, which makes them fun to serve without extra decorations. The filling stays mild and familiar so children eat them easily.
The dish combines savory beef with rice and tomato sauce for a soft texture that is easy to chew. Melted cheese on top adds a bit of creaminess that appeals to young guests.

Equipment
- Oven
- Large Skillet
- Baking Dish
- Sharp Knife
Ingredients
- 4 large orange bell peppers
- 1 lb ground beef
- 1 small onion, finely chopped
- 2 cloves garlic, minced
- 1 cup cooked white rice
- 1 cup marinara sauce
- 1 cup shredded mozzarella cheese
- 1 teaspoon Italian seasoning
- Salt and pepper to taste
Instructions
- Preheat the oven to 375°F and lightly grease a baking dish.
- Cut the tops off each orange bell pepper and remove the seeds and membranes. Use a small knife to carve simple jack-o’-lantern faces on the front of each pepper.
- Place the carved peppers in the prepared baking dish and set aside.
- In a large skillet over medium heat, cook the ground beef until browned, breaking it up as it cooks.
- Add the chopped onion and minced garlic to the skillet and cook for 3 minutes until the onion softens.
- Stir in the cooked white rice, marinara sauce, Italian seasoning, salt, and pepper. Cook for 2 minutes until everything is heated through.
- Remove the skillet from heat and stir in half of the shredded mozzarella cheese until melted.
- Spoon the beef mixture evenly into each carved pepper.
- Sprinkle the remaining mozzarella cheese over the tops of the filled peppers.
- Bake for 25 minutes until the peppers are tender and the cheese is melted and lightly browned.
Notes
Cuisine: American
Equipment: Oven, Large Skillet, Baking Dish, Sharp Knife
Spiderweb Mini Pizzas
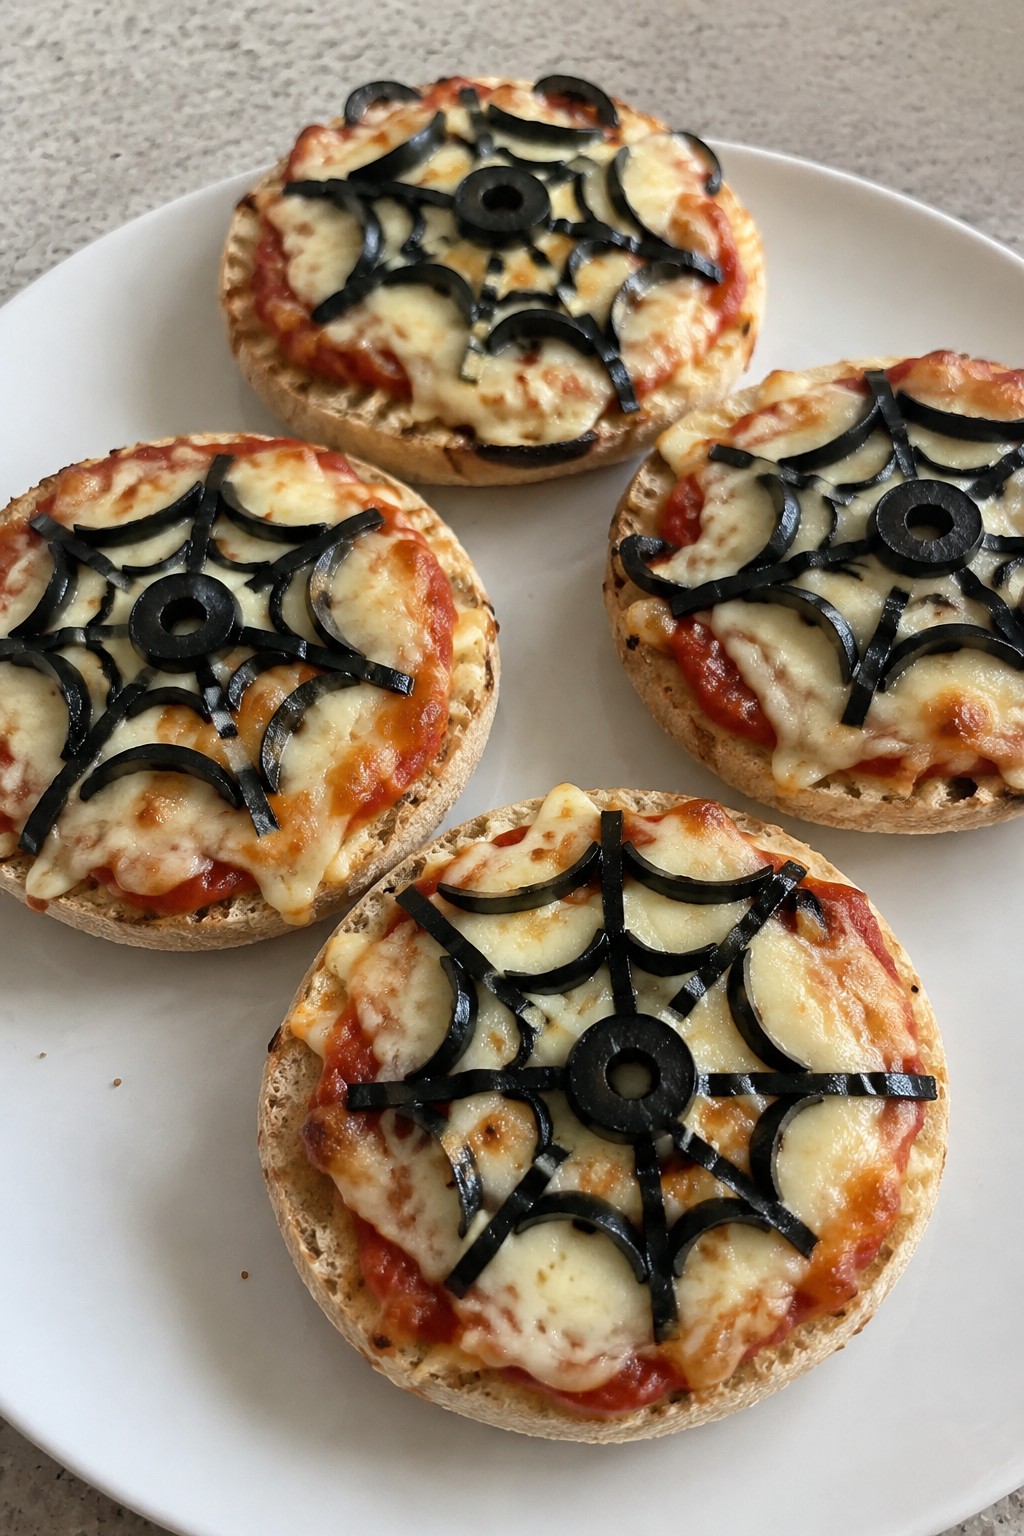
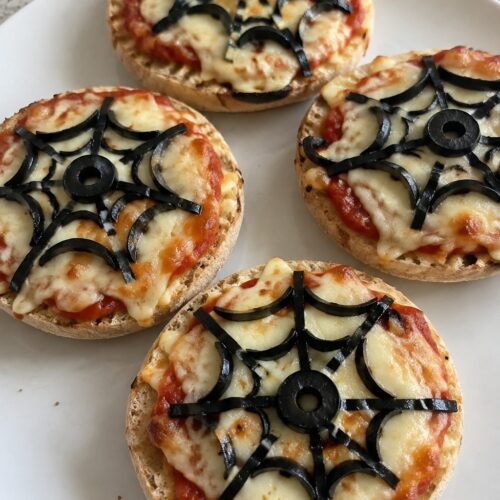
These mini pizzas bring a simple Halloween twist to a kid favorite. They work well for parties because each one is sized for small hands and the spiderweb design comes together quickly with basic pantry items. The result is a crisp base with melted cheese and a savory topping that still tastes like regular pizza.
The flavor stays mild and cheesy, with the olives adding a salty note that balances the sauce. Kids enjoy the look while parents appreciate how little extra work the pattern requires.
Equipment
- Baking Sheet
- Spoon
- Knife
Ingredients
- 4 English muffins, split in half
- 1/2 cup pizza sauce
- 1 1/2 cups shredded mozzarella cheese
- 1/4 cup sliced black olives
Instructions
- Heat the oven to 400 degrees and line a baking sheet with parchment paper.
- Place the English muffin halves cut side up on the baking sheet.
- Spread about 1 tablespoon of pizza sauce on each muffin half.
- Sprinkle roughly 3 tablespoons of mozzarella cheese over the sauce on each half.
- Arrange the sliced black olives on top of the cheese to form a spiderweb pattern on each pizza.
- Bake for 8 to 10 minutes until the cheese melts and the edges turn golden.
- Remove from the oven and let cool for a minute before serving.
Notes
Cuisine: American
Equipment: Baking Sheet, Spoon, Knife
Ghostly Banana Pops
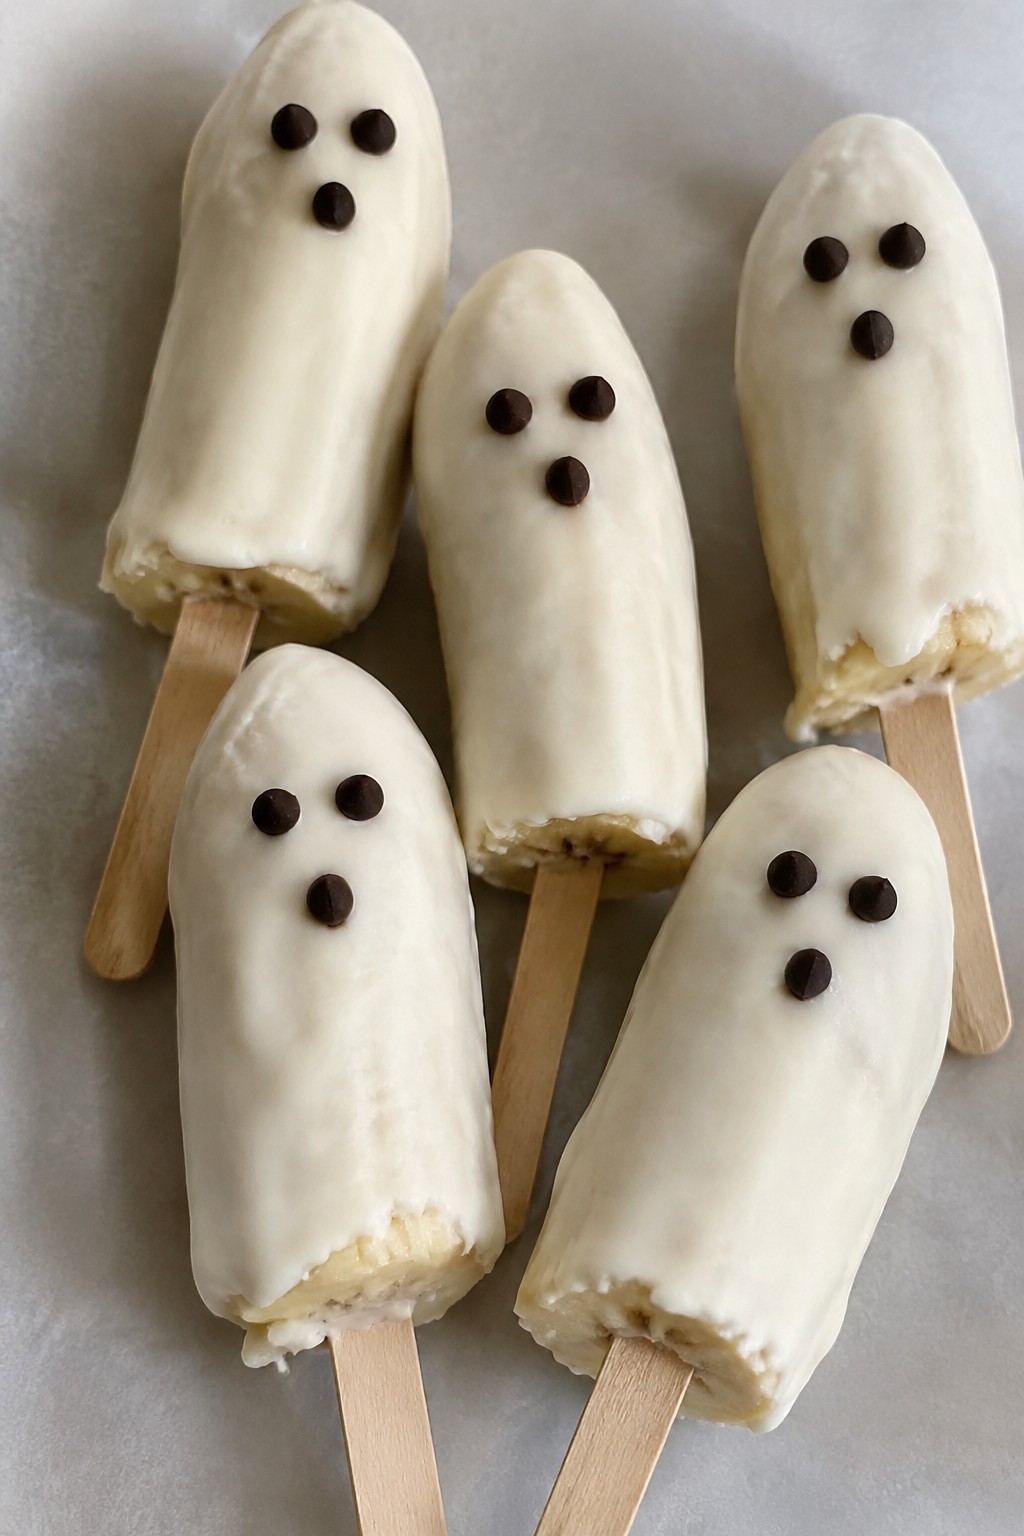
These Ghostly Banana Pops bring a simple, fun treat to kids’ Halloween parties. They require only a few ingredients and turn basic bananas into something that feels festive without much effort.
The frozen banana stays cool and creamy inside while the white coating sets into a smooth shell. Mini chocolate chips add the ghost faces that kids enjoy spotting on the plate.

Equipment
- Baking sheet
- Parchment paper
- Microwave-safe bowl
- Popsicle sticks
Ingredients
- 4 medium bananas
- 4 wooden popsicle sticks
- 1 cup white chocolate chips
- 1 tablespoon coconut oil
- 2 tablespoons mini chocolate chips
Instructions
- Peel the bananas and insert one popsicle stick into the cut end of each banana. Place the bananas on a parchment-lined baking sheet and freeze for at least two hours until firm.
- Combine the white chocolate chips and coconut oil in a microwave-safe bowl. Heat in 20-second intervals, stirring between each, until the mixture is fully melted and smooth.
- Remove the frozen bananas from the freezer. Dip each banana into the melted white chocolate, turning to coat evenly and letting excess drip back into the bowl.
- Immediately press three or four mini chocolate chips into the white coating on each banana to form eyes and a mouth. Return the coated bananas to the baking sheet.
- Freeze the pops for another 15 minutes until the coating is set. Serve straight from the freezer.
Notes
Cuisine: American
Equipment: Baking sheet, Parchment paper, Microwave-safe bowl, Popsicle sticks
Witch Finger Pretzel Rods
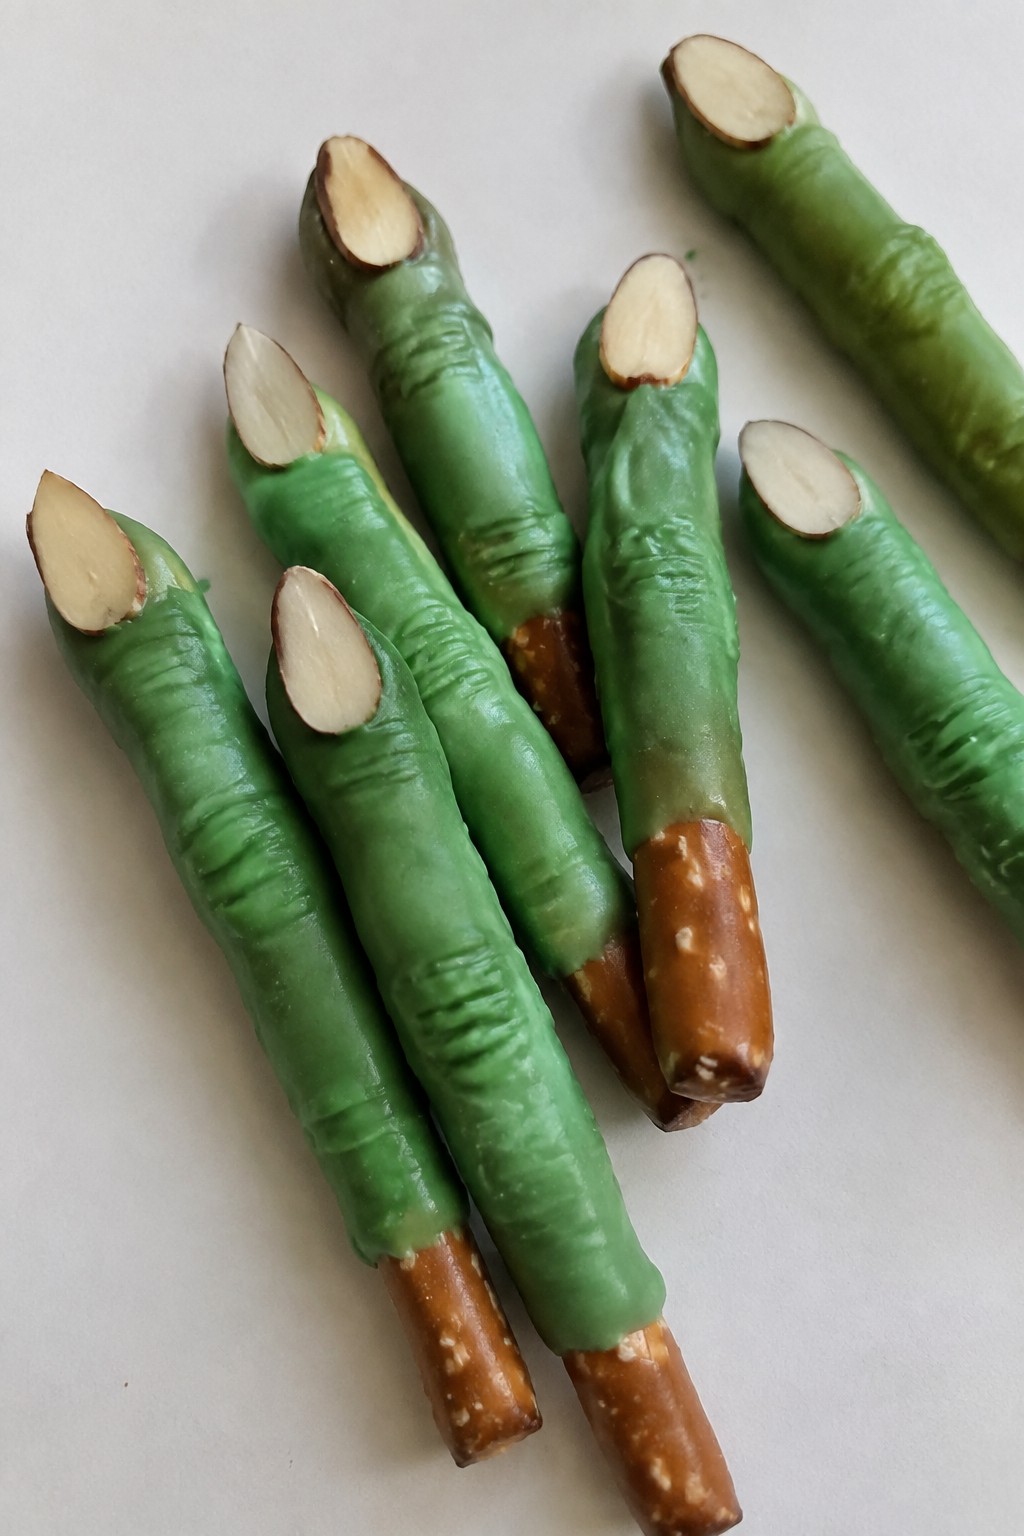
These Witch Finger Pretzel Rods bring a light spooky element to kids’ party tables without much effort. They combine the salty snap of pretzels with a thin sweet coating that sets quickly.
The finished treats look like green witch fingers and work well as a make-ahead snack that travels easily to school events or home parties.

Equipment
- Microwave-safe bowl
- Baking sheet
- Parchment paper
Ingredients
- 12 pretzel rods
- 8 ounces green candy melts
- 12 sliced almonds
Instructions
- Line a baking sheet with parchment paper and set it aside.
- Place the green candy melts in a microwave-safe bowl. Heat in 30-second bursts, stirring after each, until the candy is smooth and fully melted.
- Dip each pretzel rod into the melted candy, leaving roughly 2 inches bare at one end.
- Set the coated pretzel on the lined baking sheet. Press one sliced almond onto the tip of the coated end while the candy is still soft.
- Repeat with the remaining pretzels. Allow the coating to harden at room temperature before moving the rods.
Notes
Cuisine: American
Equipment: Microwave-safe bowl, Baking sheet, Parchment paper
Pumpkin Patch Dirt Pudding Cups
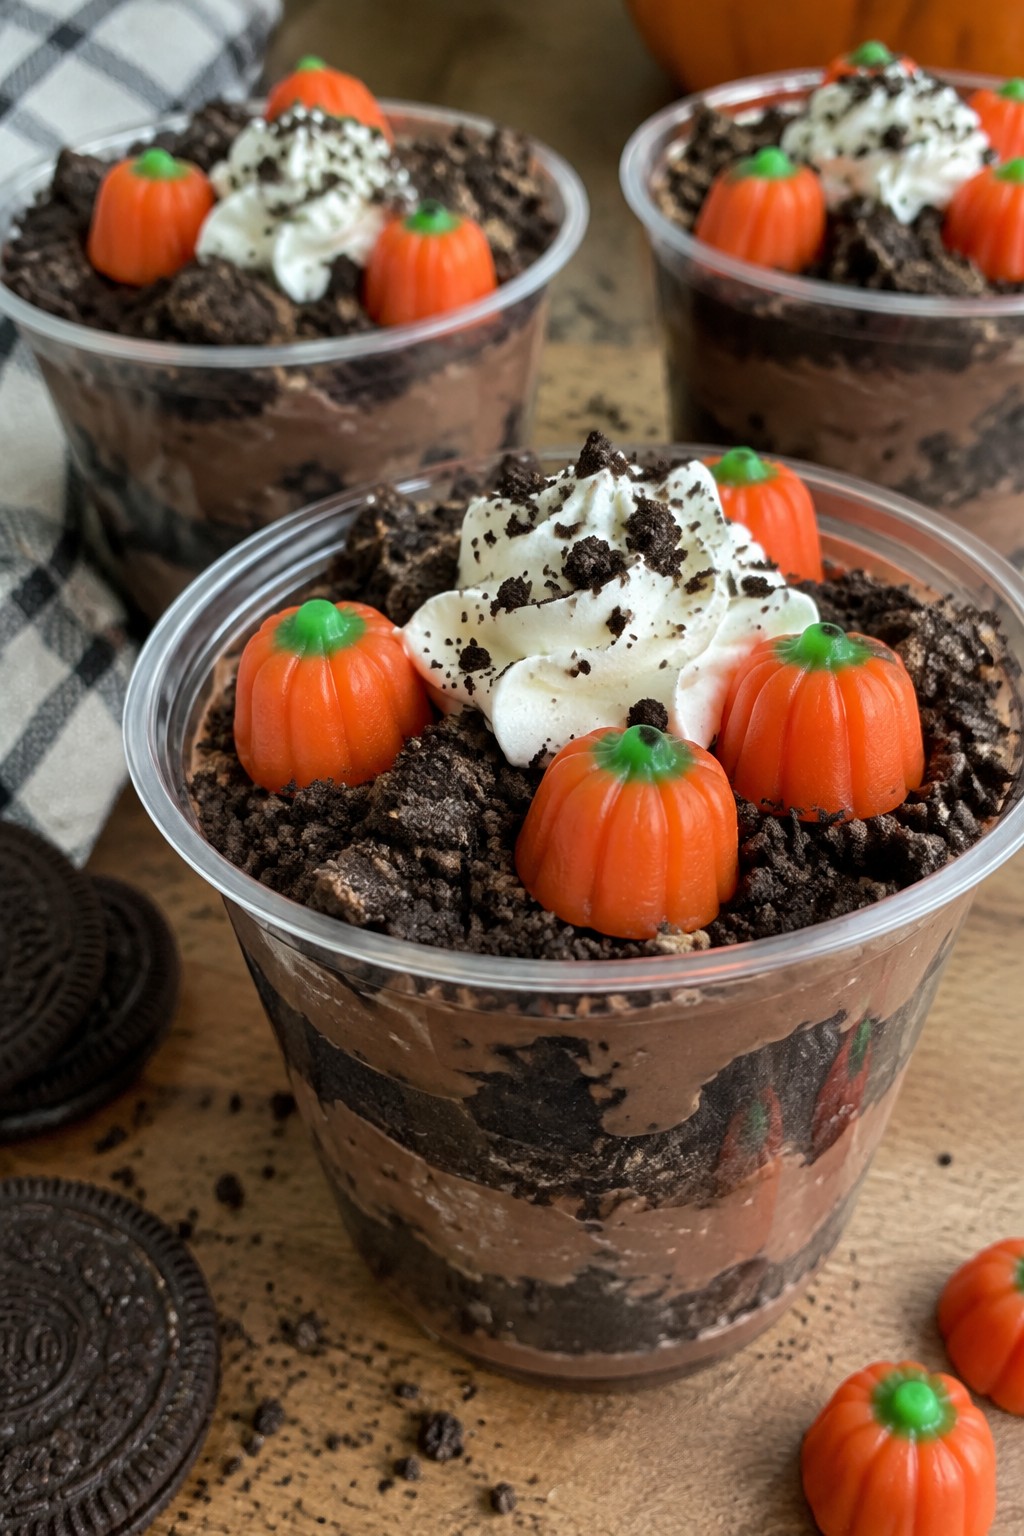
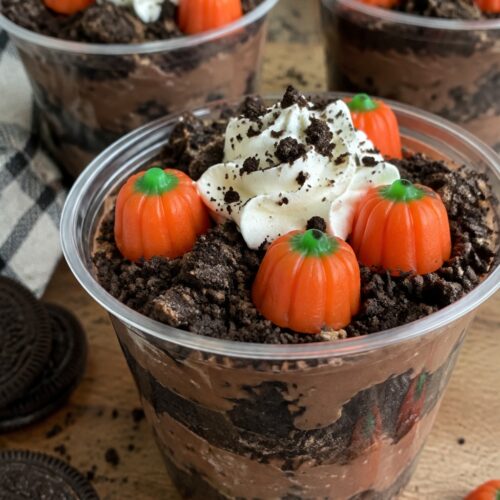
These cups turn classic dirt pudding into a simple Halloween treat for kids. Each serving layers creamy chocolate pudding with crunchy cookie crumbs and finishes with candy pumpkins on top. The result gives a mild chocolate flavor with a soft texture and a bit of crunch from the cookies. They work well for party tables or small group activities where children can help assemble their own.
Equipment
- Mixing Bowl
- Whisk
- Zip-top Bag
- Rolling Pin
- 4 Small Cups
Ingredients
- 1 (3.9 oz) box instant chocolate pudding mix
- 2 cups cold milk
- 12 Oreo cookies
- 8 candy pumpkins
- 1/2 cup whipped topping
Instructions
- Pour the instant chocolate pudding mix into a mixing bowl. Add the cold milk and whisk for two minutes until the mixture thickens.
- Place the Oreo cookies in a zip-top bag and crush them with a rolling pin until they form coarse crumbs.
- Spoon a layer of pudding into each of four small cups. Add a layer of cookie crumbs on top. Repeat the layers once more.
- Finish each cup with a small dollop of whipped topping. Place two candy pumpkins on the topping of every cup.
Notes
Cuisine: American
Equipment: Mixing Bowl, Whisk, Zip-top Bag, Rolling Pin, 4 Small Cups
Monster Claw Chicken Tenders
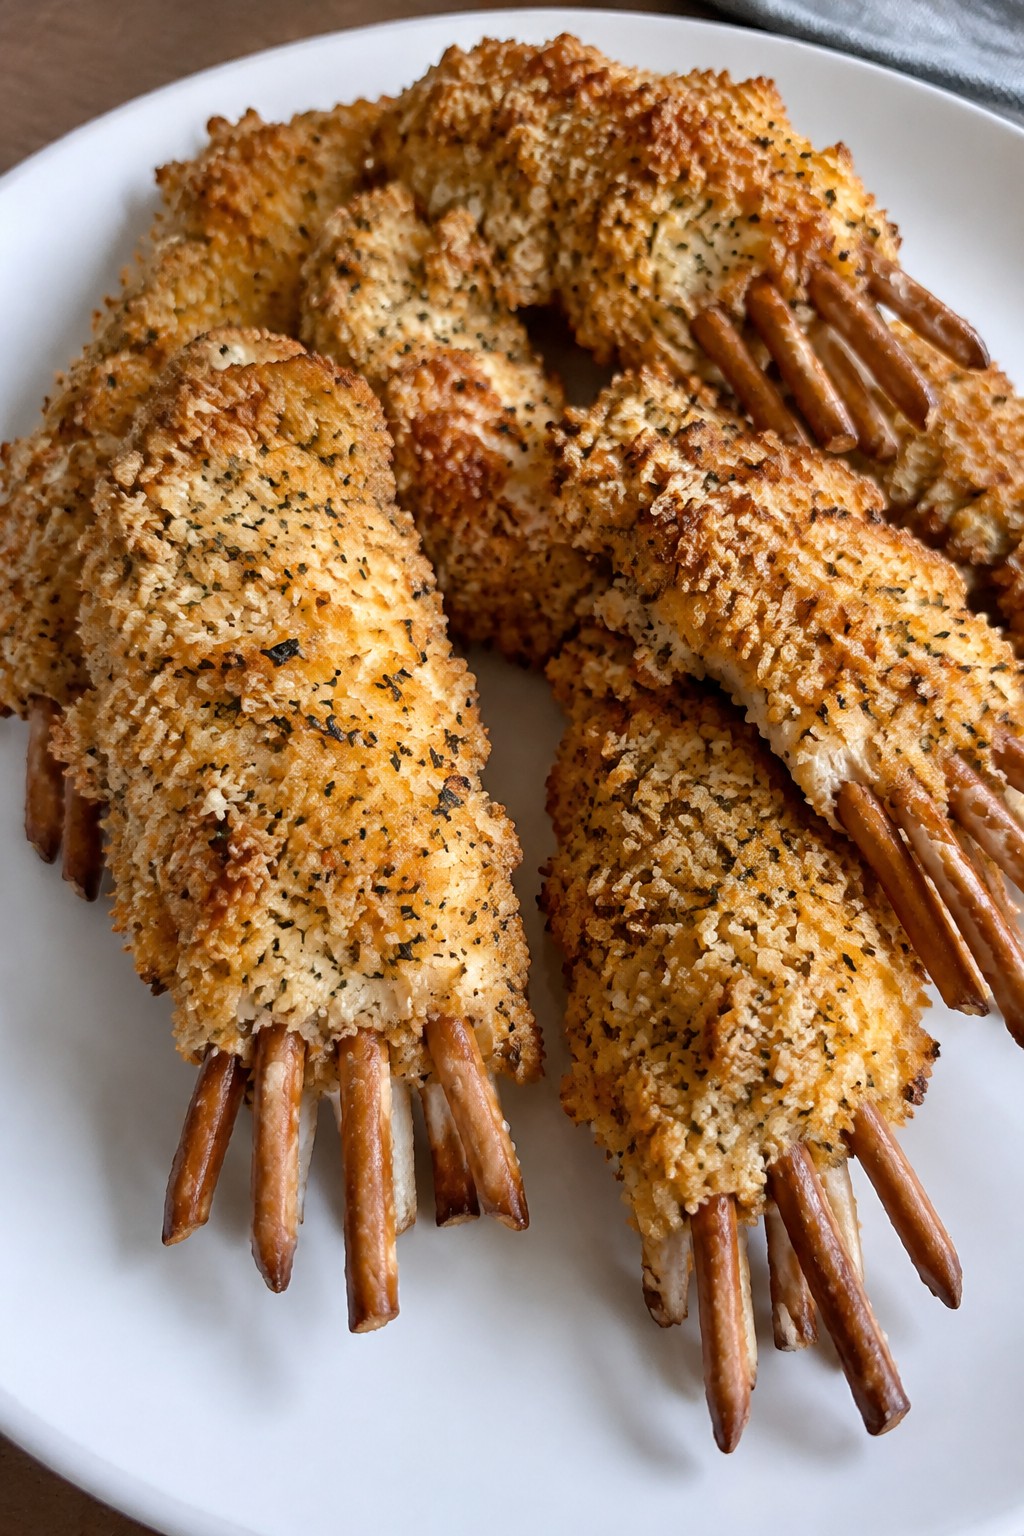
These chicken tenders get a fun twist for Halloween parties with a crunchy coating and a simple pretzel addition that turns each piece into a monster claw. Kids enjoy the crispy outside and tender inside, and the shape makes them easy to pick up without utensils. They work well on a buffet table or as a main bite at an afternoon gathering.
The flavor stays mild and savory so it appeals to young guests while still feeling like a proper meal. The breadcrumbs and Parmesan create a solid crunch that holds up even after sitting out for a bit.

Equipment
- Baking sheet
- Mixing bowls
- Parchment paper
Ingredients
- 1 pound chicken tenders
- 1 cup panko breadcrumbs
- 1/2 cup grated Parmesan cheese
- 1 teaspoon dried oregano
- 2 large eggs
- 1/2 cup all-purpose flour
- 1/2 teaspoon salt
- 1/4 teaspoon black pepper
- 12 thin pretzel sticks
- 1/2 cup barbecue sauce
Instructions
- Preheat the oven to 400 degrees and line a baking sheet with parchment paper.
- In a shallow bowl, mix the panko breadcrumbs, Parmesan cheese, and dried oregano.
- In a second bowl, beat the eggs. In a third bowl, combine the flour, salt, and black pepper.
- Dip each chicken tender first in the flour mixture, then in the beaten eggs, and finally in the breadcrumb mixture, pressing lightly so the coating sticks.
- Place the coated tenders on the prepared baking sheet and bake for 18 to 20 minutes until golden and cooked through.
- Remove from the oven and let them cool for 3 minutes. Gently push one pretzel stick into the wider end of each tender to form the claw shape.
- Arrange on a platter and serve with barbecue sauce for dipping.
Notes
Cuisine: American
Equipment: Baking sheet, Mixing bowls, Parchment paper
Bat-Shaped PB&J Pinwheels
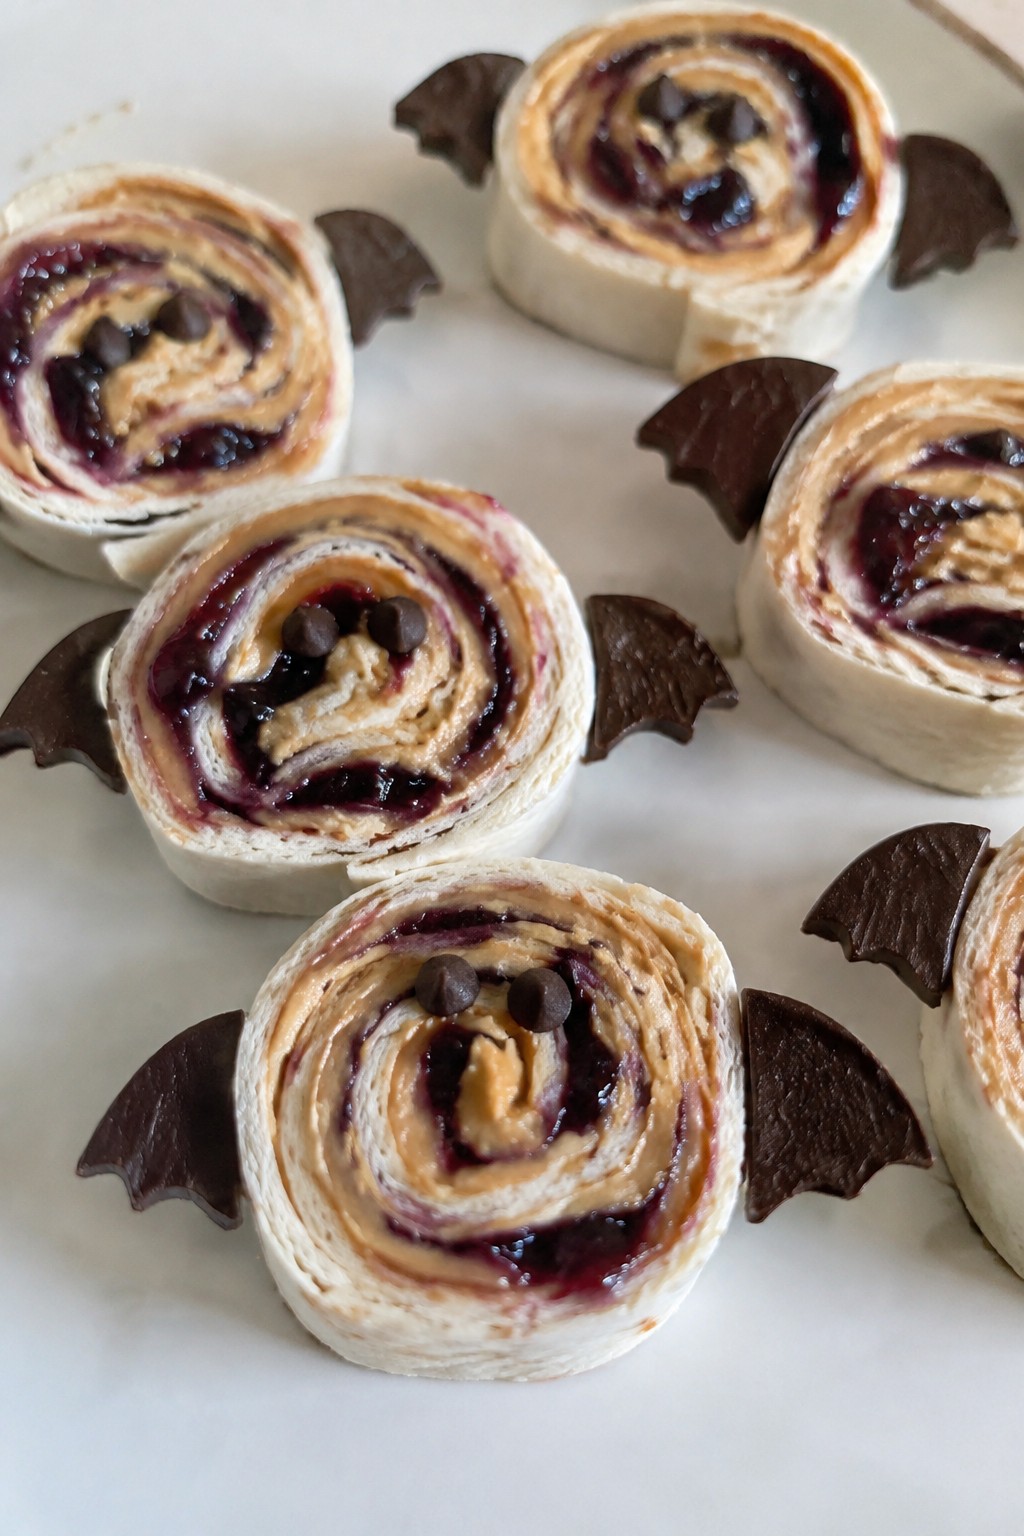
These pinwheels turn a classic lunch favorite into a fun finger food that fits right into a kids’ Halloween party spread. The rolled tortilla slices hold peanut butter and jelly together in neat rounds that are easy to pick up and eat without much mess. Kids enjoy the familiar sweet and salty flavors with a soft, slightly chewy texture from the tortilla.
They work well as part of a larger snack table because they can be made ahead and served at room temperature. The grape jelly gives a deep color that pairs with the Halloween theme while keeping the taste mild enough for most children.

Equipment
- Cutting board
- Sharp knife
- Plate
Ingredients
- 4 large flour tortillas
- 1/2 cup creamy peanut butter
- 1/2 cup grape jelly
- 2 tablespoons mini chocolate chips
Instructions
- Lay one tortilla flat on a cutting board. Spread 2 tablespoons of peanut butter evenly over the surface, leaving a small border around the edge. Add 2 tablespoons of grape jelly on top of the peanut butter and spread it into an even layer.
- Roll the tortilla tightly from one end to the other to form a log. Repeat with the remaining three tortillas. Place the logs seam-side down on a plate and chill them for 10 minutes so they hold their shape when sliced.
- Remove the logs from the refrigerator. Use a sharp knife to cut each log into 1-inch slices. Arrange the pinwheels on a serving plate and press two mini chocolate chips into the top of each slice to create simple bat faces.
Notes
Cuisine: American
Equipment: Cutting board, Sharp knife, Plate
Skeleton Veggie Platter with Ranch
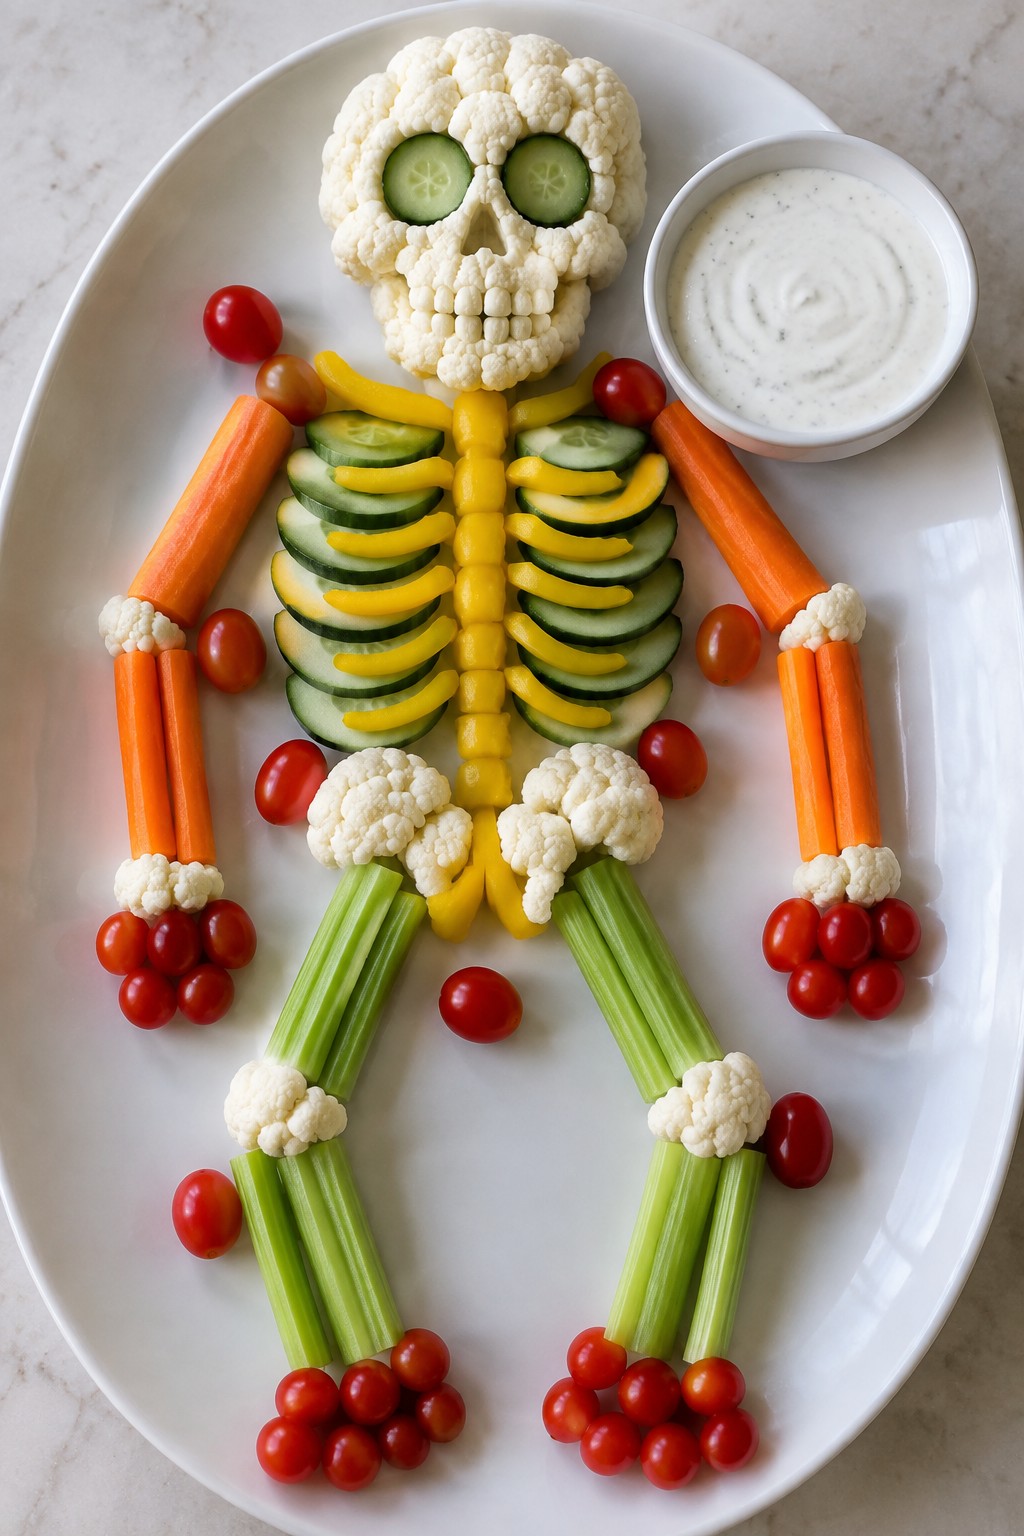
This skeleton veggie platter turns basic produce into a playful centerpiece for kids’ Halloween parties. The vegetables are arranged to look like a skeleton, which helps draw children to the snack table without much extra effort.
The crisp textures of the raw veggies stand out against the smooth, cool ranch. It works well as a light option amid heavier party foods and keeps kids engaged while they dip and eat.

Equipment
- Large platter
- Cutting board
- Knife
Ingredients
- 1 head cauliflower, cut into florets
- 4 carrots, peeled and cut into sticks
- 4 celery stalks, cut into sticks
- 1 cucumber, sliced into rounds
- 1 yellow bell pepper, cut into strips
- 1 cup cherry tomatoes
- 1 1/2 cups ranch dressing
Instructions
- Prepare all vegetables according to the ingredient list and set them aside in separate bowls for easy assembly.
- Place a large round cauliflower floret at the top of a serving platter to form the skull.
- Line up several carrot and celery sticks vertically below the skull to create the spine and rib cage.
- Arrange cucumber rounds and additional celery sticks at the base to shape the pelvis and leg bones.
- Use yellow bell pepper strips and cherry tomatoes to form arm bones and hands on either side of the rib cage.
- Spoon the ranch dressing into a small bowl and place it near the platter for dipping.
Notes
Cuisine: American
Equipment: Large platter, Cutting board, Knife
Candy Corn Layered Parfaits
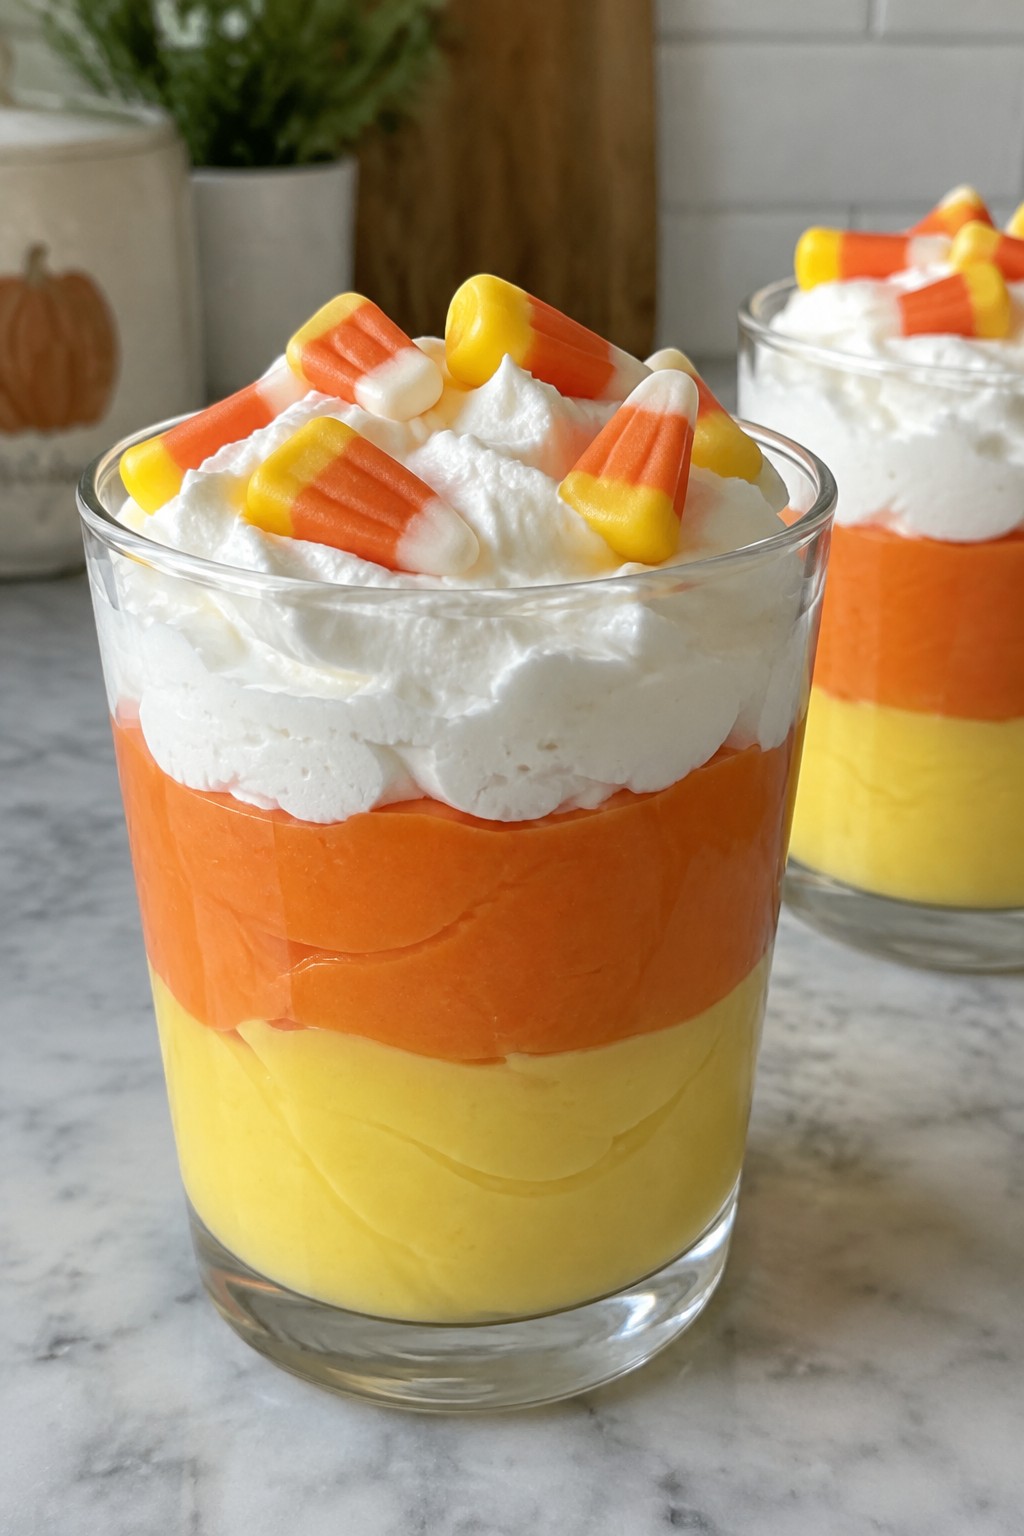
These parfaits bring the classic candy corn look to the table in a simple layered form that kids enjoy spotting at parties. The creamy vanilla base gets split into yellow and orange sections, then topped with a white layer for a clean finish that matches the candy’s stripes. The result is a sweet treat with smooth textures and a bit of chew from the candy on top.
This option works well for small Halloween gatherings where you want something quick to assemble ahead of time. It stays light enough for kids while still feeling like a special dessert.
Equipment
- Mixing bowls
- Spoons
- Small glasses or jars
Ingredients
- 2 cups prepared vanilla pudding
- Yellow food coloring
- Orange food coloring
- 1 cup whipped cream
- 12 candy corn pieces
Instructions
- Divide the vanilla pudding into two equal portions in separate bowls. Add a few drops of yellow food coloring to one portion and stir until the color is even. Add a few drops of orange food coloring to the second portion and stir until the color is even.
- Spoon the yellow pudding into the bottom of four small glasses or jars, using about 1/4 cup per glass. Add the orange pudding on top of the yellow layer in each glass, again using about 1/4 cup per glass. Finish each parfait with a layer of whipped cream.
- Place three candy corn pieces on top of the whipped cream in each glass before serving.
Notes
Cuisine: American
Equipment: Mixing bowls, Spoons, Small glasses or jars
Frankenstein Avocado Toast Bites
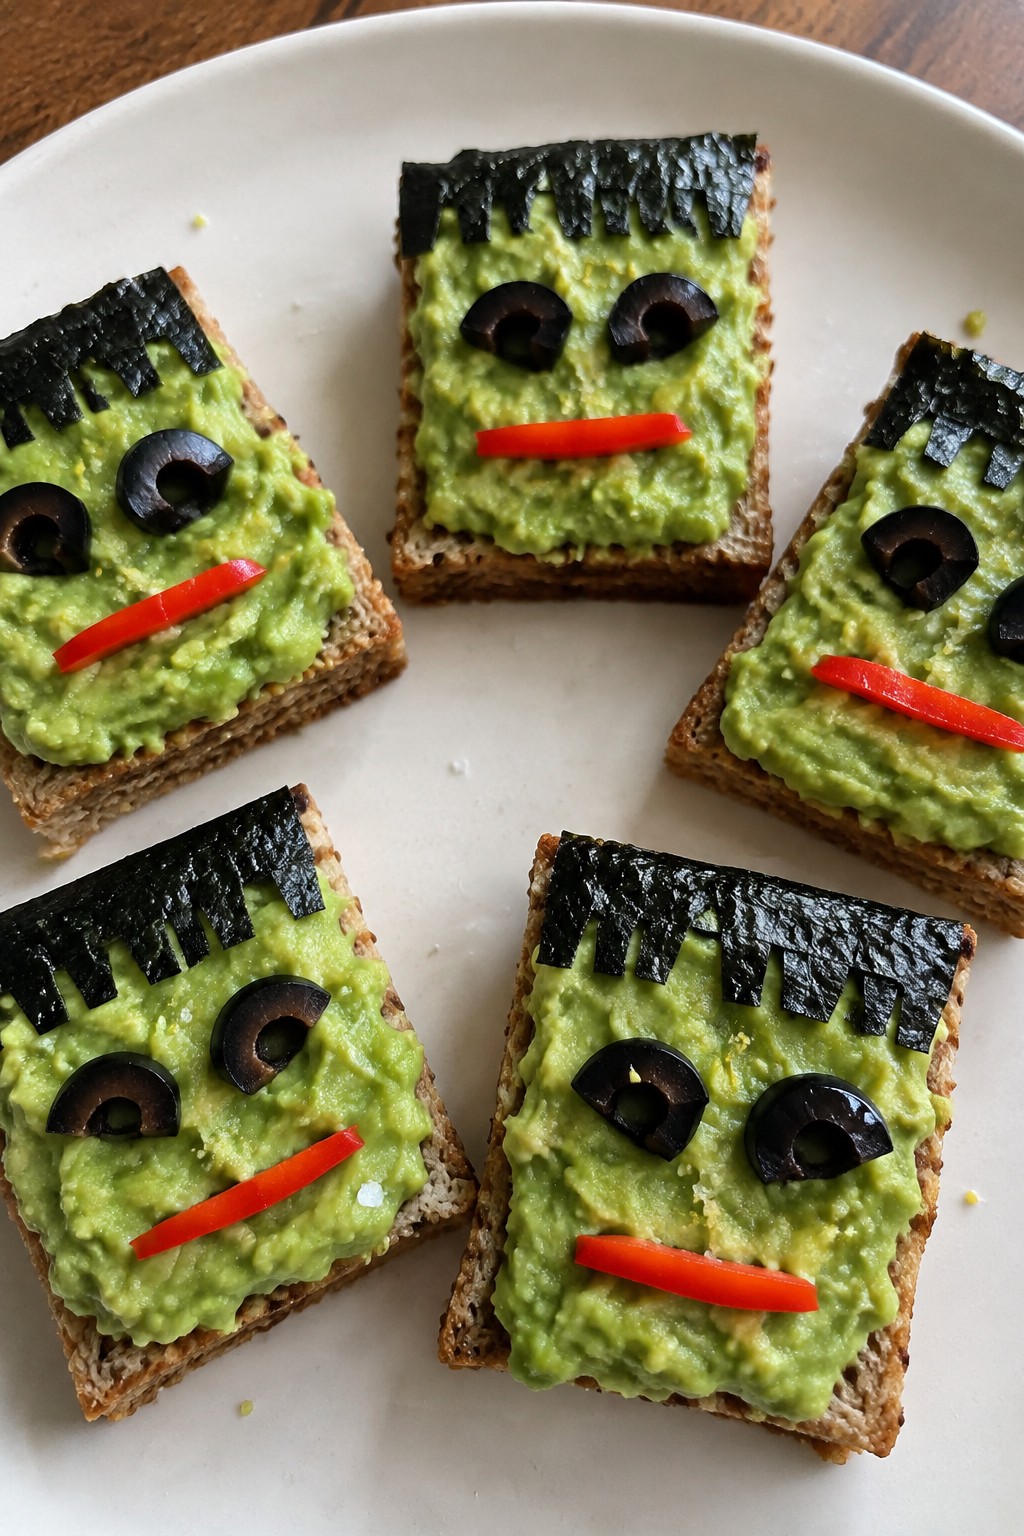
These Frankenstein Avocado Toast Bites turn simple avocado toast into a fun activity for kids at Halloween parties. The green spread creates a monster-like base that children can decorate with a few easy toppings.
The result is a creamy, lightly tangy bite with crisp toast underneath. It fits well as a lighter snack amid sweeter party foods.

Equipment
- Toaster
- Mixing bowl
- Knife
Ingredients
- 4 slices whole wheat bread
- 2 ripe avocados
- 1 tablespoon lemon juice
- 1/4 teaspoon salt
- 1 nori sheet
- 8 black olives
- 4 thin strips red bell pepper
Instructions
- Toast the four slices of bread until they are golden and firm.
- Cut each toasted slice into three small rectangles to create bite-sized pieces.
- Mash the avocados in a bowl with the lemon juice and salt until mostly smooth.
- Spread the mashed avocado evenly over the toast rectangles.
- Cut thin strips from the nori sheet and place them across the top of each piece to form hair.
- Slice the black olives and add two slices to each bite for eyes, plus one slice on each side for bolts.
- Lay one red bell pepper strip below the eyes on each bite to create a mouth.
Notes
Cuisine: American
Equipment: Toaster, Mixing bowl, Knife
