


Bringing a dish to a Halloween potluck does not have to take a lot of time. I focused on recipes that use ingredients most people keep on hand and can be made ahead. Each one has a simple holiday touch without needing special tools or skills. You will find both sweet and savory options that travel well and serve a crowd. They should give you several realistic choices for your next event.
Helpful Tips Before You Start
A bit of planning helps your Halloween dishes travel well and stay appealing at the potluck.
Choose Sturdy Recipes
Pick finger foods or items that hold up in a car ride. Avoid anything that needs last minute assembly or delicate toppings.
Use Good Containers
Bring lidded dishes or trays that stack safely. Pack a cooler if the food needs to stay cold until serving time.
Prep Decorations Separately
Add spooky touches like candy eyes or sprinkles right before serving. This keeps them from melting or shifting during transport.
Label Ingredients Clearly
Write a small card with the dish name and common allergens. Potluck guests often want to know what they are eating.
Mummy Jalapeño Poppers with Cool Ranch Dip
These jalapeño poppers work well for potlucks because they travel easily and hold up at room temperature. The stuffed peppers get wrapped in strips of dough so they look like mummies, which adds a light flaky texture on the outside while the inside stays creamy and a bit spicy. The cool ranch dip on the side keeps the heat in check without overpowering the filling.


Equipment
- Baking sheet
- Mixing bowl
- Knife
Ingredients
- 8 large jalapeños
- 8 ounces cream cheese, softened
- 1 cup shredded cheddar cheese
- 1 teaspoon garlic powder
- 8 ounces crescent roll dough
- 1/2 cup ranch dressing
- 2 tablespoons sour cream
- 1 teaspoon dried dill
- 4 black olives, sliced
Instructions
- Preheat the oven to 375 degrees and line a baking sheet with parchment paper.
- Cut each jalapeño in half lengthwise and remove the seeds and membranes.
- In a mixing bowl, combine the cream cheese, cheddar cheese, and garlic powder until evenly mixed.
- Spoon the cheese mixture into each jalapeño half and press it down firmly.
- Unroll the crescent roll dough and cut it into thin strips about half an inch wide.
- Wrap the dough strips around each stuffed jalapeño, leaving small gaps so the green pepper shows through like mummy bandages.
- Place the wrapped poppers on the baking sheet and bake for 15 to 18 minutes until the dough is golden.
- While the poppers bake, stir together the ranch dressing, sour cream, and dried dill in a small bowl to make the dip.
- Let the poppers cool for a few minutes, then add two olive slices to each one as eyes before serving with the dip.
Notes
Cuisine: American
Equipment: Baking sheet, Mixing bowl, Knife
Spiderweb Seven-Layer Taco Dip with Tortilla Chips
This seven-layer taco dip brings a fun Halloween twist to any potluck table. The spiderweb design on top makes it stand out without extra effort, and the classic taco flavors stay familiar and crowd-pleasing. It works well as a make-ahead option that travels easily and holds up during a party.
The layers combine creamy, savory, and fresh elements for good texture contrast. Refried beans form the base, followed by seasoned sour cream, guacamole, salsa, cheese, and simple toppings. The web is created right before serving so it stays sharp.
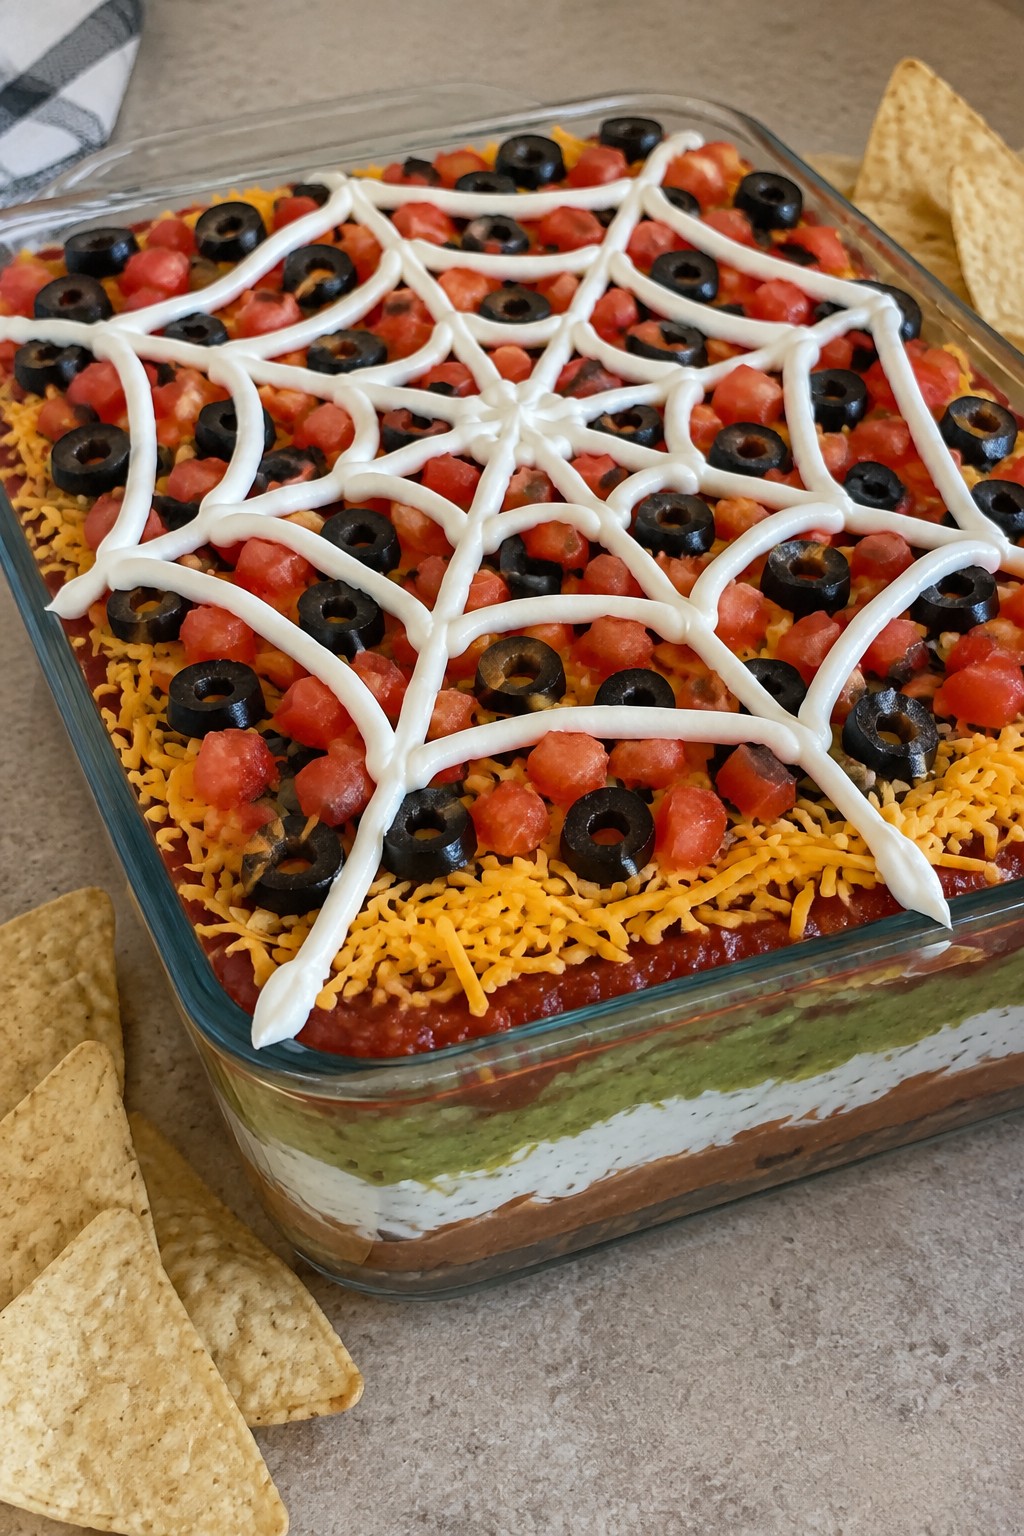
Serves 4 people.
Ingredients
- 1 can (16 oz) refried beans
- 1 cup sour cream, divided
- 1 teaspoon taco seasoning
- 1 cup guacamole
- 1 cup salsa
- 1 cup shredded cheddar cheese
- 1/2 cup diced tomatoes
- 1/4 cup sliced black olives
- Tortilla chips, for serving
Instructions
- Spread the refried beans evenly across the bottom of a medium serving dish.
- Mix 3/4 cup sour cream with the taco seasoning in a small bowl. Spread this mixture over the beans.
- Add the guacamole in an even layer over the sour cream mixture.
- Spread the salsa over the guacamole.
- Sprinkle the shredded cheddar cheese across the salsa.
- Scatter the diced tomatoes and black olives over the cheese.
- Place the remaining 1/4 cup sour cream in a small zip-top bag and snip off one corner. Pipe the sour cream in concentric circles over the top of the dip. Drag a toothpick from the center outward in several lines to create a spiderweb pattern.
- Serve with tortilla chips on the side.
Extra Tips
Pipe the sour cream web just before guests arrive so the lines stay clean. If the dip sits for a while, the web can soften, so keep a small bag of extra sour cream on hand to refresh it. Use a clear glass dish if you have one to show off the layers.Course: Appetizer Cuisine: Mexican Equipment: Medium serving dish, Mixing bowl, Small zip-top bag
Graveyard Dirt Pudding Cups with Gummy Worms
These graveyard dirt pudding cups add a playful Halloween touch to potluck tables. They come together with basic ingredients and travel easily in a cooler or covered tray. Guests of all ages tend to grab one right away.
The chocolate pudding stays creamy while the cookie layer gives a light crunch. Gummy worms add a chewy element that fits the theme. The whole dessert feels light enough after heavier potluck dishes.
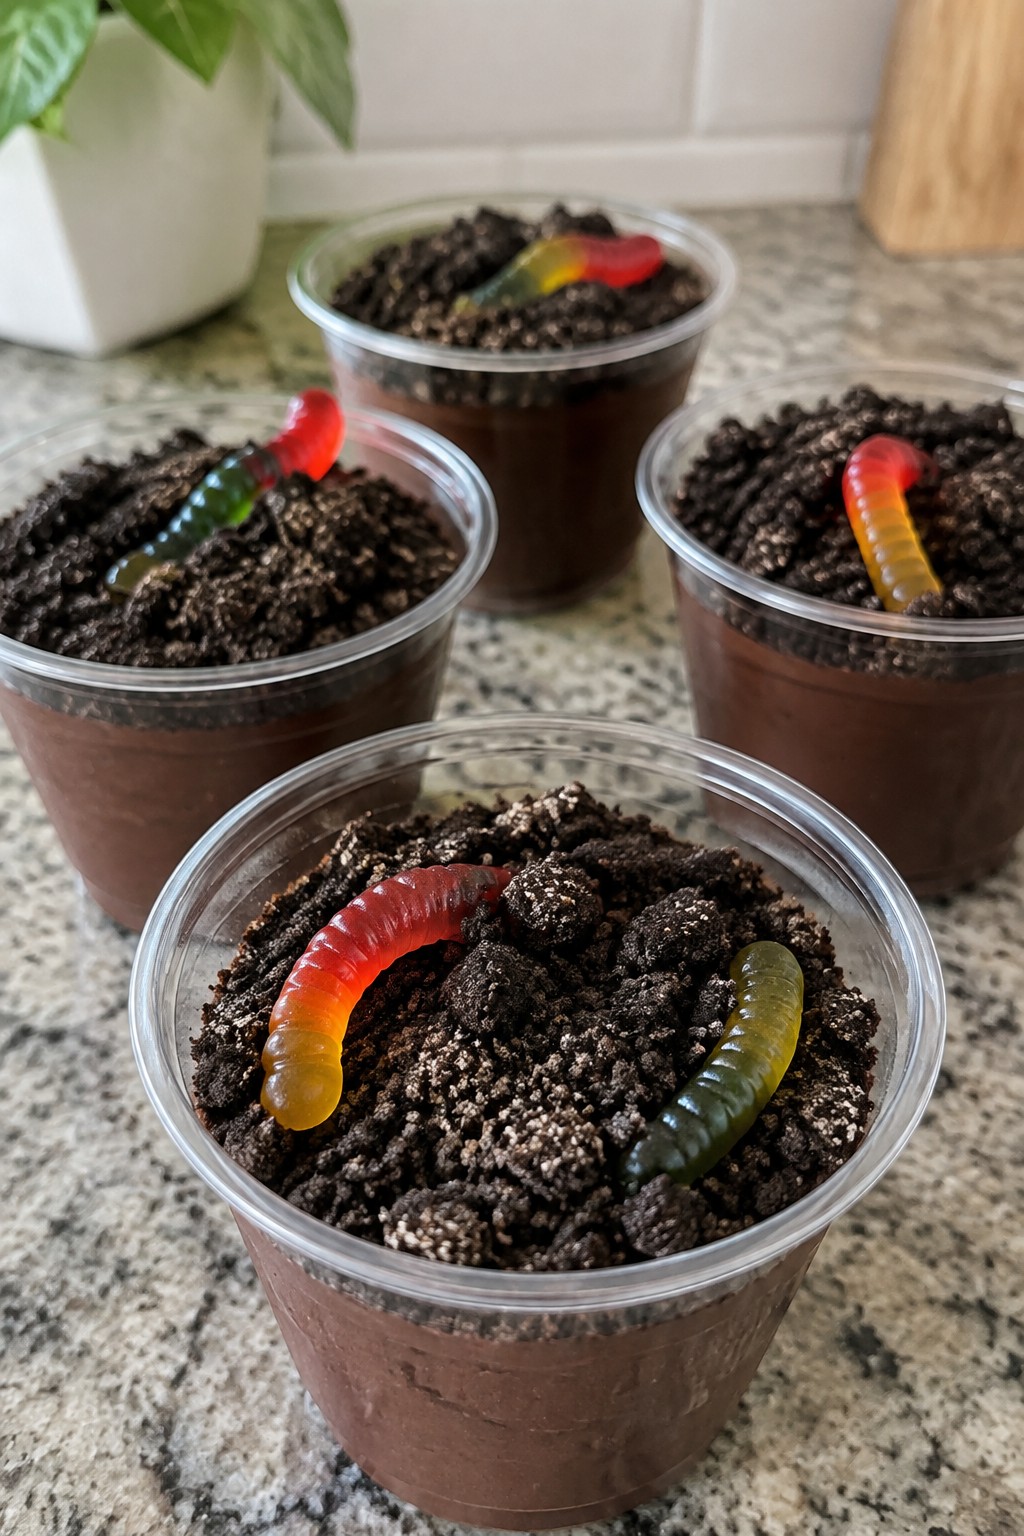
Serves 4 people.
Ingredients
- 1 box (3.9 oz) instant chocolate pudding mix
- 2 cups cold milk
- 12 chocolate sandwich cookies
- 12 gummy worms
Instructions
- Pour the pudding mix and cold milk into a mixing bowl. Whisk for two minutes until the mixture thickens. Set it aside for five minutes to finish setting.
- Place the chocolate sandwich cookies in a zip-top bag and crush them with a rolling pin until they form fine crumbs.
- Spoon the set pudding into four clear cups, filling each one about two-thirds full.
- Sprinkle a thick layer of cookie crumbs over the pudding in each cup to create the dirt effect.
- Push three gummy worms partway into the cookie crumbs on top of each cup so they appear to emerge from the dirt.
Extra Tips
Prepare the pudding and crush the cookies the night before, then assemble the cups a few hours before the potluck so the crumbs stay crisp. Clear plastic cups let the layers show through and make serving simple at a shared table.Course: Dessert Cuisine: American Equipment: Mixing bowl, Whisk, Rolling pin, Serving cups
Witch’s Cauldron Beef Chili with Cornbread Dippers
This chili works well for potlucks because it travels easily and stays hot in a slow cooker or insulated pot. The beef and beans create a thick base that holds up during serving, while the cornbread dippers give guests an easy way to scoop without extra utensils.
The dish has a savory, spiced beef flavor balanced by the slight sweetness of the cornbread. The dippers stay firm enough to hold their shape when dipped, adding a soft texture contrast to the chunky chili.
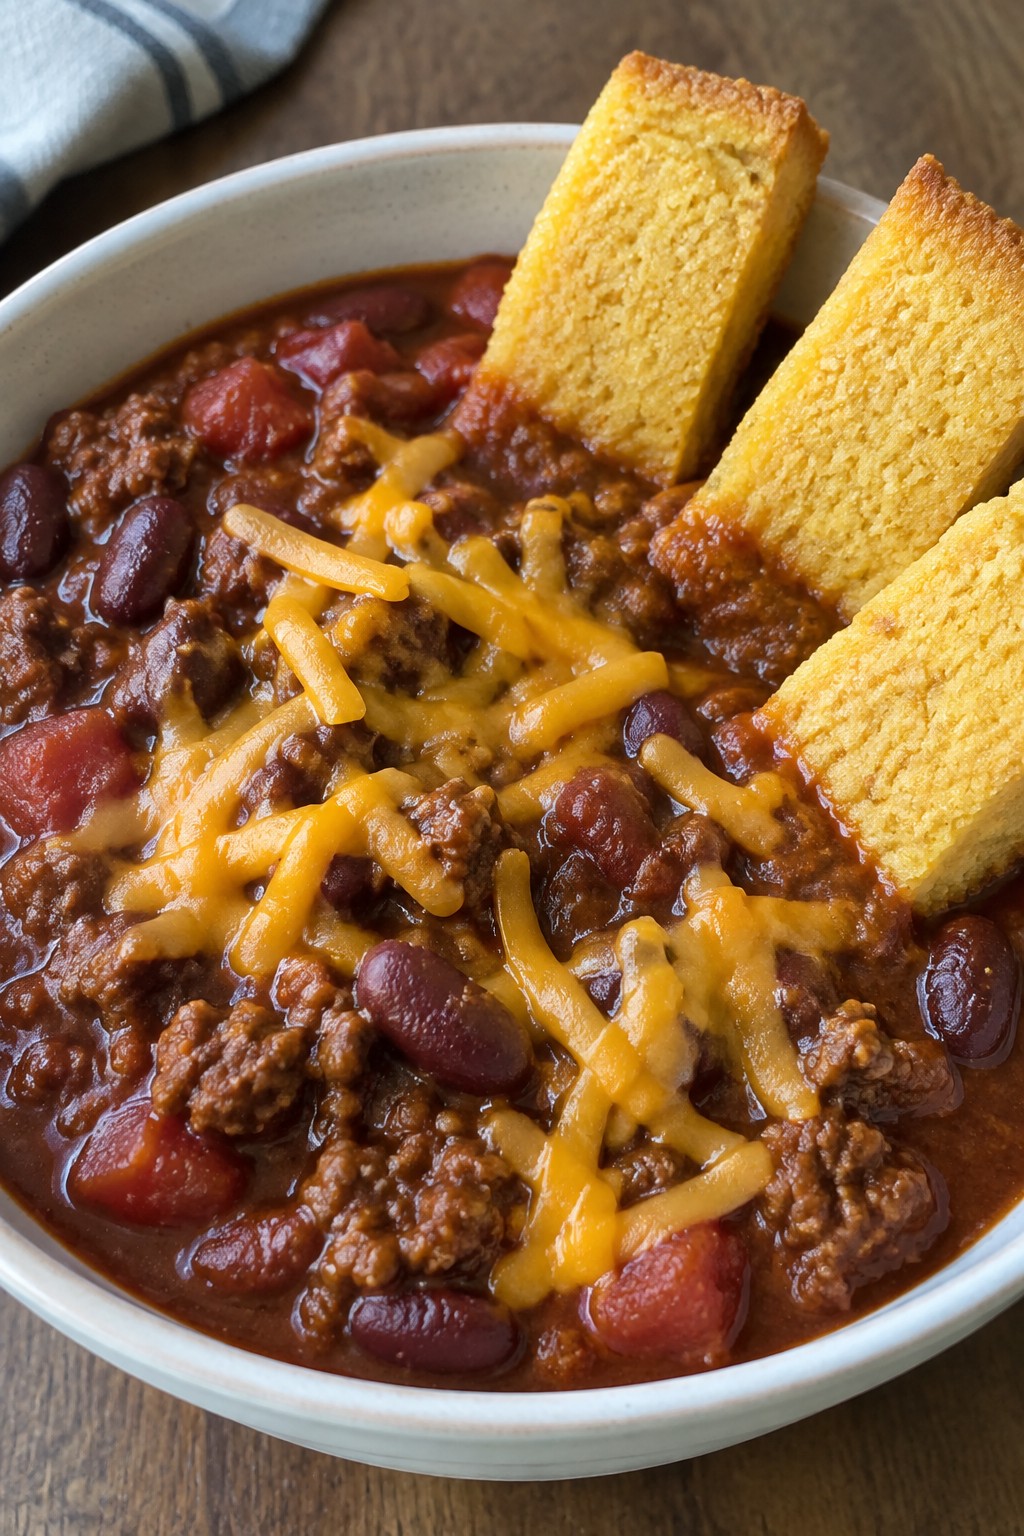

Equipment
- Large pot
- Mixing bowl
- Baking pan
Ingredients
- 1 pound ground beef
- 1 medium onion, diced
- 2 cloves garlic, minced
- 2 tablespoons chili powder
- 1 teaspoon ground cumin
- 1 can (14 oz) diced tomatoes
- 1 can (15 oz) kidney beans, drained
- Salt and pepper to taste
- 1 cup cornmeal
- 1 cup all-purpose flour
- 1 tablespoon baking powder
- 1 egg
- 1 cup milk
- 2 tablespoons melted butter
- 1 cup shredded cheddar cheese
Instructions
- Brown the ground beef in a large pot over medium heat. Add the diced onion and minced garlic, then cook until the onion softens.
- Stir in the chili powder and cumin. Cook for one minute to toast the spices.
- Add the diced tomatoes and kidney beans. Season with salt and pepper. Simmer uncovered for 20 minutes, stirring occasionally.
- While the chili simmers, heat the oven to 400°F. In a mixing bowl, combine the cornmeal, flour, and baking powder. In a separate bowl, whisk the egg, milk, and melted butter. Pour the wet mixture into the dry ingredients and stir until just combined.
- Spread the batter into a greased 8-inch square pan. Bake for 15 to 18 minutes until the top is lightly golden. Cool slightly, then cut into strips for dipping.
- Ladle the chili into bowls and top each serving with shredded cheddar cheese. Serve the cornbread strips on the side.
Notes
Cuisine: American
Equipment: Large pot, Mixing bowl, Baking pan
Ghostly Cheese Ball Platter with Crackers and Veggies
This cheese ball platter adds a light spooky element to potlucks with its white ghost shapes set against colorful crackers and vegetables. It works well as a make-ahead appetizer that travels easily and holds up at room temperature for a few hours.
The flavor is mild and savory from the blended cheeses, with a creamy interior and crisp edges from the crackers and raw vegetables.


Equipment
- Mixing bowl
- serving platter
Ingredients
- 8 ounces cream cheese, softened
- 1 cup shredded mozzarella cheese
- 1/2 teaspoon garlic powder
- 1/4 teaspoon salt
- 1/4 teaspoon black pepper
- 4 black olives, sliced into rounds
- 20 assorted crackers
- 1 cup mixed raw vegetables such as carrot sticks, celery sticks, and cucumber slices
Instructions
- Place the softened cream cheese, shredded mozzarella, garlic powder, salt, and black pepper in a mixing bowl. Stir until the mixture is smooth and evenly combined.
- Divide the cheese mixture into four equal portions. Shape each portion by hand into a small ghost form with a rounded top and a slightly tapered bottom.
- Press two olive slices onto the front of each ghost to create eyes. Set the shaped ghosts on a serving platter.
- Arrange the crackers and mixed vegetables around the ghosts on the same platter so guests can easily reach both the cheese and the dippers.
Notes
Cuisine: American
Equipment: Mixing bowl, serving platter
Pumpkin Patch Sausage Skewers with Maple Glaze
These skewers bring a fun fall twist to any potluck spread. The combination of savory sausage and tender pumpkin pieces gets coated in a simple maple glaze that caramelizes nicely. They travel well and hold up at room temperature, making them practical for sharing.
The flavor leans sweet and smoky with warm cinnamon notes. Each bite gives a good mix of juicy sausage and soft pumpkin without needing utensils.


Equipment
- Baking sheet
- Mixing bowl
- Wooden skewers
- Pastry brush
Ingredients
- 12 oz smoked sausage links, cut into 1-inch pieces
- 2 cups peeled pumpkin, cut into 1-inch cubes
- 1/4 cup pure maple syrup
- 2 tablespoons olive oil
- 1 teaspoon ground cinnamon
- 1/2 teaspoon salt
- 1/4 teaspoon black pepper
- 8 wooden skewers
- Fresh thyme sprigs for garnish
Instructions
- Soak the wooden skewers in water for 10 minutes while you prepare the other ingredients. Thread the sausage pieces and pumpkin cubes onto the skewers, alternating them evenly.
- Preheat the oven to 400 degrees F and line a baking sheet with parchment paper. Place the assembled skewers on the sheet in a single layer.
- In a small bowl, stir together the maple syrup, olive oil, cinnamon, salt, and black pepper. Brush the glaze generously over all sides of the skewers.
- Bake for 20 minutes, turning the skewers once halfway through. The pumpkin should be fork-tender and the edges of the sausage lightly browned.
- Remove from the oven and let the skewers rest for 5 minutes. Garnish with fresh thyme sprigs before serving.
Notes
Cuisine: American
Equipment: Baking sheet, Mixing bowl, Wooden skewers, Pastry brush
Creepy Crawly Black Bean and Corn Salad Cups
These salad cups bring a fun visual twist to any potluck spread. The black bean and corn filling stays fresh and filling while the olive garnishes add a simple Halloween detail that stands out on a shared table. Guests can grab one or two without needing plates or utensils.
The mix gives a bright, tangy flavor with a bit of crunch from the peppers and onion. Served in lettuce leaves, the cups stay light yet satisfying for an afternoon or evening gathering.


Equipment
- Mixing Bowl
- Can Opener
- Knife
Ingredients
- 1 can (15 oz) black beans, drained and rinsed
- 1 can (15 oz) corn kernels, drained
- 1 red bell pepper, diced
- 1/2 red onion, finely chopped
- 1/4 cup fresh cilantro, chopped
- 2 limes, juiced
- 3 tablespoons olive oil
- 1 teaspoon ground cumin
- Salt and black pepper to taste
- 8 small romaine lettuce leaves
- 12 black olives
Instructions
- In a large mixing bowl, combine the black beans and corn.
- Add the diced red bell pepper, chopped red onion, and cilantro to the bowl.
- In a small bowl, whisk together the lime juice, olive oil, cumin, salt, and black pepper.
- Pour the dressing over the bean mixture and stir until everything is evenly coated.
- Lay out the romaine lettuce leaves on a serving platter.
- Spoon the salad evenly into each lettuce leaf to form the cups.
- Slice four olives in half lengthwise for the spider bodies. Cut the remaining olives into thin strips to use as legs.
- Place one olive half on top of each filled cup and arrange four olive strips around it to form the legs.
Notes
Cuisine: Mexican
Equipment: Mixing Bowl, Can Opener, Knife
Frankenstein Avocado Deviled Eggs
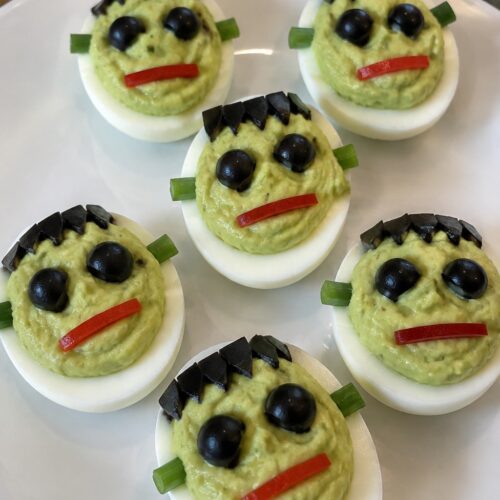
These Frankenstein Avocado Deviled Eggs bring a fun green twist to a classic potluck dish. The avocado gives the filling a smooth texture and mild flavor that pairs well with the egg whites. They travel easily and add a playful Halloween touch without much extra work.
The recipe keeps things simple with basic ingredients and quick assembly. Each egg half gets a creamy filling and simple face details that make the monster theme clear. They taste fresh and light, which balances heavier potluck options.
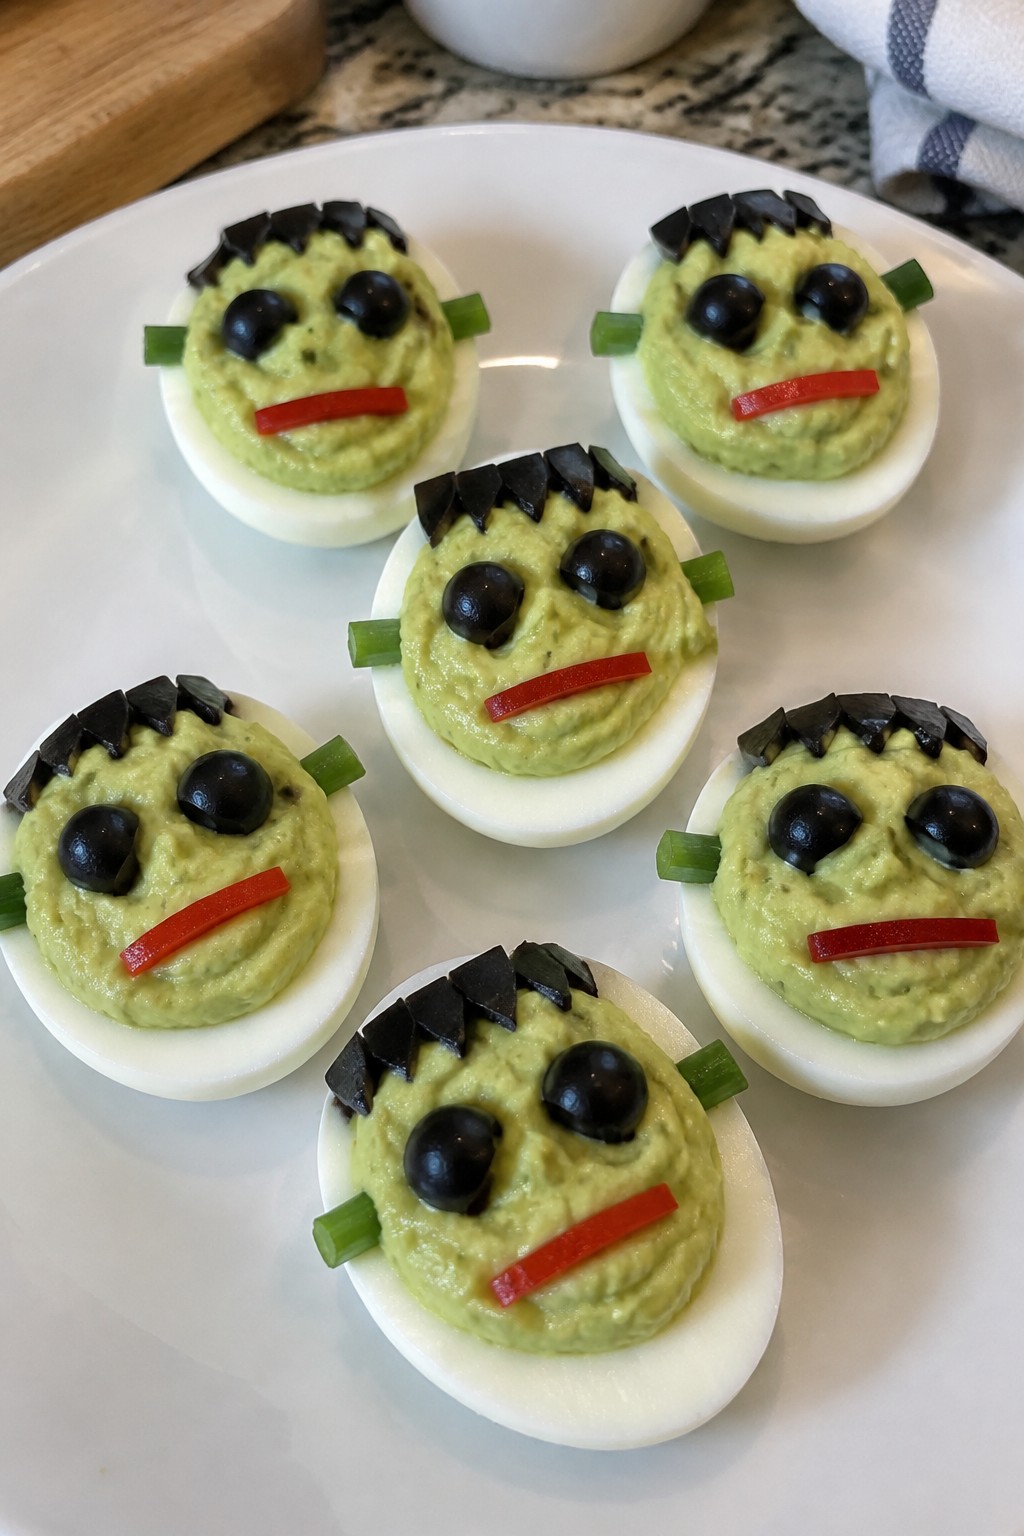
Equipment
- Pot
- Mixing Bowl
- Knife
Ingredients
- 4 large eggs
- 1 ripe avocado
- 1 teaspoon yellow mustard
- 1/4 teaspoon salt
- 1/4 teaspoon black pepper
- 8 black olive halves
- 4 thin strips red bell pepper
Instructions
- Place the eggs in a pot and cover with water. Bring to a boil, then reduce heat and simmer for 10 minutes. Drain the water and cool the eggs under cold running water.
- Peel the eggs and slice each one in half lengthwise. Gently remove the yolks and place them in a bowl.
- Mash the yolks with a fork. Add the avocado, mustard, salt, and black pepper. Mix until smooth and creamy.
- Spoon the filling back into the egg white halves, mounding it slightly.
- Add two olive halves to each filled egg for eyes. Place one red bell pepper strip below the eyes to form a mouth.
Notes
Cuisine: American
Equipment: Pot, Mixing Bowl, Knife
Bloody Finger Hot Dog Sliders on Pretzel Buns
These sliders turn regular hot dogs into finger-shaped bites that fit right into a Halloween potluck table. The pretzel buns give a sturdy, salty base that holds up well when served buffet style.
The hot dogs stay juicy inside while the ketchup adds a tangy finish that ties the whole thing together. They come together quickly and travel easily to a shared gathering.


Equipment
- Large Skillet
- Sharp Knife
- Baking Sheet
Ingredients
- 8 all-beef hot dogs
- 8 pretzel slider buns
- 1/2 cup ketchup
- 8 sliced almonds
Instructions
- Use a sharp knife to cut shallow horizontal lines across each hot dog to create knuckle marks. Leave the ends intact.
- Heat a large skillet over medium heat and cook the hot dogs for 6 to 8 minutes, turning them until they are warmed through and lightly browned.
- Place one hot dog into each pretzel slider bun.
- Press one sliced almond onto the tip of each hot dog to form a fingernail and secure it with a small amount of ketchup.
- Spoon the remaining ketchup around the base of each hot dog so it looks like it is oozing from the cut end.
Notes
Cuisine: American
Equipment: Large Skillet, Sharp Knife, Baking Sheet
Caramel Apple Nachos with Halloween Sprinkles
This no-bake treat turns crisp apple slices into a shareable platter that fits right into a potluck spread. The mix of tart fruit, sticky caramel, and colorful sprinkles gives a sweet crunch that feels festive without much effort.
It works well for Halloween gatherings because it comes together fast and travels easily. The texture stays light and fresh, with the caramel adding just enough richness to balance the apples.


Equipment
- Knife
- Serving platter
Ingredients
- 4 large Granny Smith apples
- ½ cup caramel sauce
- ¼ cup Halloween sprinkles
Instructions
- Core and slice the apples into thin wedges. Place them in a single layer on a large serving platter.
- Warm the caramel sauce slightly if it is too thick to drizzle. Pour it evenly over the apple slices.
- Scatter the Halloween sprinkles across the top so every section gets some color and crunch.
- Serve right away while the apples remain crisp.
Notes
Cuisine: American
Equipment: Knife, Serving platter
Skeleton Bone Veggie Platter with Hummus Dip
This recipe turns a standard veggie tray into a Halloween potluck hit. Crisp vegetables are sliced into shapes that resemble bones, then arranged around a bowl of creamy hummus. The result is a fresh, crunchy dish with a smooth, savory dip that balances the textures.
It works well when you need something light among heavier potluck dishes. The neutral flavors let the vegetables stand out while the hummus adds a familiar, comforting element everyone can enjoy.


Equipment
- Cutting board
- Sharp knife
- Serving platter
- Small bowl
Ingredients
- 4 large carrots
- 6 celery stalks
- 1 large cucumber
- 2 red bell peppers
- 2 cups prepared hummus
- 8 black olives
Instructions
- Peel the carrots and cut each one into long, thick sticks with a knob at each end to resemble bones. Trim the celery stalks into similar lengths and shapes.
- Slice the cucumber lengthwise into thin sticks. Cut the red bell peppers into strips that match the length of the carrot pieces.
- Spoon the hummus into a small bowl and place it in the center of a large platter. Arrange the carrot, celery, cucumber, and pepper pieces around the bowl in a loose skeleton shape.
- Slice the black olives in half and set two halves near the top of the platter to mark the skull area if desired.
Notes
Cuisine: American
Equipment: Cutting board, Sharp knife, Serving platter, Small bowl
