


Bringing a dish to a potluck often means dealing with travel time and keeping everything in good shape. These recipes focus on options that hold up well in a car or on public transit. I chose them because they can be made ahead and still look presentable once you arrive. You will see a mix of appetizers, sides, and desserts with tips for packing and storage. Each one aims to reduce last minute stress when heading out to an event.
Tips for Travel-Friendly Potlucks
A few practical choices keep dishes fresh during the ride and ready to serve at the potluck.
Cool Everything First
Let hot foods reach room temperature before packing. Trapped steam quickly turns crisp edges soft and ruins the texture.
Keep Toppings Separate
Pack garnishes, sauces, and crunchy elements in small lidded jars. Add them right before serving so nothing wilts or gets soggy.
Choose Solid Containers
Use leakproof, stackable boxes with tight seals. Shallow containers work better than deep ones for even cooling and easy stacking in a car.
Bring Ice Packs for Cold Items
Anything with mayo, dairy, or fresh produce stays safer and fresher with an ice pack underneath. Wrap the pack in a towel so condensation does not pool inside the container.
Assemble Some Dishes on Site
Salads and layered dips often travel better in parts. Carry the base and mix-ins separately, then combine them once you arrive.
Mediterranean Orzo Salad with Cherry Tomatoes and Olives
This orzo salad travels well because the pasta stays firm and the ingredients hold their shape during transport. It works nicely for potlucks since it can be made ahead and served at room temperature without losing appeal. The dish offers a bright mix of sweet tomatoes, briny olives, and creamy feta with a light lemon dressing.


Equipment
- Large pot
- Colander
- Mixing bowl
Ingredients
- 8 ounces orzo pasta
- 1 pint cherry tomatoes, halved
- 1/2 cup Kalamata olives, pitted and halved
- 4 ounces feta cheese, crumbled
- 1/4 cup chopped fresh parsley
- 3 tablespoons olive oil
- 2 tablespoons lemon juice
- 1 teaspoon dried oregano
- Salt and black pepper to taste
Instructions
- Bring a large pot of salted water to a boil. Add the orzo and cook according to package directions until al dente. Drain in a colander and rinse briefly under cool water to stop the cooking.
- Place the drained orzo in a large mixing bowl. Add the halved cherry tomatoes, halved olives, crumbled feta, and chopped parsley.
- In a small bowl, whisk together the olive oil, lemon juice, dried oregano, salt, and black pepper until combined.
- Pour the dressing over the orzo mixture and toss gently until everything is evenly coated. Adjust salt and pepper if needed before serving.
Notes
Cuisine: Mediterranean
Equipment: Large pot, Colander, Mixing bowl
Crispy Sesame Chicken Wings with Scallions
These wings bring a light, nutty flavor and a satisfying crunch that holds up well during travel. They work especially well for potlucks because they taste good at room temperature and do not rely on heavy sauces that can turn soggy in transit. The sesame seeds add visual appeal while the scallions give a fresh finish.
The recipe uses a simple oven method to keep the skin crisp without deep frying. A quick glaze coats the wings evenly so they look neat when plated at the event.


Equipment
- Baking sheet
- Large bowl
- Small bowl
Ingredients
- 2 pounds chicken wings, split at joints
- 2 tablespoons vegetable oil
- 1/4 cup soy sauce
- 2 tablespoons honey
- 1 tablespoon sesame oil
- 2 cloves garlic, minced
- 1 teaspoon fresh ginger, grated
- 1/4 cup sesame seeds
- 4 scallions, thinly sliced
- Salt and black pepper
Instructions
- Heat the oven to 425°F and line a baking sheet with foil. Toss the chicken wings with vegetable oil, salt, and pepper in a large bowl until evenly coated.
- Spread the wings in a single layer on the baking sheet. Bake for 40 minutes, turning once halfway through, until the skin is golden and crisp.
- While the wings bake, stir together the soy sauce, honey, sesame oil, garlic, and ginger in a small bowl to make the glaze.
- Remove the wings from the oven and transfer them to a clean large bowl. Pour the glaze over the hot wings and toss until fully coated.
- Sprinkle the sesame seeds and sliced scallions over the wings and toss once more before transferring to a serving platter.
Notes
Cuisine: Asian
Equipment: Baking sheet, Large bowl, Small bowl
Rainbow Vegetable Platter with Roasted Red Pepper Hummus
This platter brings bright colors and fresh crunch to a potluck table. The vegetables stay crisp during travel when packed in separate containers, and the hummus travels well in a sealed jar without losing its texture.
It suits gatherings where you need something light yet satisfying. The roasted red pepper adds a gentle smokiness that pairs nicely with the raw vegetables.


Equipment
- Food processor
- knife
- cutting board
- serving platter
Ingredients
- 2 carrots, peeled and cut into sticks
- 1 red bell pepper, sliced
- 1 yellow bell pepper, sliced
- 1 cucumber, sliced into rounds
- 1 cup cherry tomatoes
- 2 cups broccoli florets
- 1 can (15 oz) chickpeas, drained and rinsed
- 2 roasted red peppers
- 2 tablespoons tahini
- 1 garlic clove
- Juice of 1 lemon
- 2 tablespoons olive oil
- 1/2 teaspoon cumin
- Salt to taste
Instructions
- Place the chickpeas, roasted red peppers, tahini, garlic clove, lemon juice, olive oil, cumin, and a pinch of salt into a food processor.
- Blend the mixture until smooth, stopping once to scrape down the sides if needed.
- Taste the hummus and add more salt if desired, then transfer it to a small container with a tight lid.
- Arrange the carrot sticks, bell pepper slices, cucumber rounds, cherry tomatoes, and broccoli florets on a serving platter or in a shallow container with compartments.
- Cover the vegetables tightly with plastic wrap or a lid for transport.
Notes
Cuisine: Mediterranean
Equipment: Food processor, knife, cutting board, serving platter
Southwest Black Bean and Quinoa Salad
This salad travels well and holds its texture after hours in a cooler or on a buffet table. The quinoa and black beans create a sturdy base that does not wilt, while the lime dressing keeps the flavors bright without making the vegetables soggy.
The dish offers a mix of earthy beans, fluffy quinoa, sweet corn, and crisp peppers. It works for potlucks, office lunches, or road trips where you need a dish that still looks fresh when you arrive.


Equipment
- Saucepan
- Mixing Bowl
- Whisk
Ingredients
- 1 cup quinoa
- 2 cups water
- 1 (15-ounce) can black beans, drained and rinsed
- 1 cup corn kernels
- 1 red bell pepper, diced
- 1/4 cup red onion, finely chopped
- 1/4 cup fresh cilantro, chopped
- Juice of 2 limes
- 2 tablespoons olive oil
- 1 teaspoon ground cumin
- 1/2 teaspoon chili powder
- 1/2 teaspoon salt
- 1/4 teaspoon black pepper
Instructions
- Rinse the quinoa under cold water. Place it in a saucepan with the water and bring to a boil. Reduce heat to low, cover, and simmer for 15 minutes until the water is absorbed. Remove from heat and let the quinoa rest for 5 minutes, then fluff with a fork and cool to room temperature.
- In a large mixing bowl, combine the cooled quinoa, black beans, corn, red bell pepper, and red onion. In a small bowl, whisk together the lime juice, olive oil, cumin, chili powder, salt, and black pepper. Pour the dressing over the salad and toss until everything is evenly coated.
- Add the chopped cilantro and stir gently to distribute. Cover the bowl and chill for at least 30 minutes before serving to let the flavors blend.
Notes
Cuisine: Mexican
Equipment: Saucepan, Mixing Bowl, Whisk
Italian Antipasto Skewers with Mozzarella
These skewers pack the bright, salty flavors of a classic Italian antipasto platter into an easy handheld format. They travel well in a cooler and stay neat and colorful on the table without any risk of wilting or spilling. The mix of creamy mozzarella, cured salami, and briny olives gives a satisfying balance of textures that holds up during transport.
They work especially well for potlucks where you want something that looks assembled rather than tossed together at the last minute. You can put them together the night before and simply drizzle the balsamic glaze right before serving.


Equipment
- Wooden skewers
- Serving platter
Ingredients
- 12 wooden skewers
- 12 cherry tomatoes
- 12 bocconcini mozzarella balls
- 12 slices Genoa salami
- 12 Kalamata olives
- 12 fresh basil leaves
- 1/4 cup balsamic glaze
Instructions
- Lay out all 12 skewers on a clean surface. Thread one cherry tomato onto each skewer first.
- Fold one slice of salami in half and slide it onto the skewer right after the tomato.
- Add one bocconcini mozzarella ball next.
- Thread one Kalamata olive onto the skewer.
- Finish each skewer with one fresh basil leaf at the top.
- Arrange the finished skewers on a platter and drizzle the balsamic glaze lightly over the top just before serving.
Notes
Cuisine: Italian
Equipment: Wooden skewers, Serving platter
Thai Mango and Cabbage Slaw with Peanuts
This slaw combines crisp cabbage with sweet mango and crunchy peanuts for a dish that stays fresh during travel. It works well for potlucks because the sturdy vegetables hold up without wilting, and the bright flavors develop nicely after a short rest. The result is a mix of sweet, tangy, and nutty notes with plenty of texture.


Equipment
- Large mixing bowl
- Whisk
- Knife
Ingredients
- 4 cups shredded green cabbage
- 2 ripe mangoes, peeled and julienned
- 1 cup shredded carrots
- 1/2 red onion, thinly sliced
- 1/2 cup fresh cilantro leaves
- 1/2 cup roasted peanuts, roughly chopped
- 3 tablespoons lime juice
- 2 tablespoons soy sauce
- 1 tablespoon sesame oil
- 1 tablespoon honey
- 1 clove garlic, minced
- 1 teaspoon grated fresh ginger
Instructions
- Whisk the lime juice, soy sauce, sesame oil, honey, garlic, and ginger in a small bowl until the honey dissolves.
- Place the cabbage, mangoes, carrots, and red onion in a large mixing bowl.
- Pour the dressing over the vegetables and toss well to coat everything evenly.
- Cover and refrigerate for at least 30 minutes to let the flavors blend.
- Just before serving, sprinkle the cilantro leaves and chopped peanuts over the top.
Notes
Cuisine: Thai
Equipment: Large mixing bowl, Whisk, Knife
Moroccan Spiced Carrot and Chickpea Salad
This salad holds up well for potlucks because the carrots stay crisp and the chickpeas add hearty texture that does not wilt during travel. The warm spices pair with bright lemon for a balanced flavor that feels fresh even after sitting for a few hours.
It works best when brought to room temperature before serving, and the simple dressing keeps everything tasting light without turning soggy.


Equipment
- Mixing bowl
- box grater
- small bowl
- whisk
Ingredients
- 5 medium carrots, peeled and shredded
- 1 (15 oz) can chickpeas, drained and rinsed
- 3 tablespoons olive oil
- 1 teaspoon ground cumin
- 1 teaspoon ground coriander
- 1/2 teaspoon ground cinnamon
- Juice of 1 lemon
- 1/4 cup raisins
- 1/4 cup chopped almonds
- 2 tablespoons chopped fresh parsley
- Salt and black pepper
Instructions
- Place the shredded carrots and drained chickpeas in a large mixing bowl.
- In a small bowl, whisk together the olive oil, cumin, coriander, cinnamon, lemon juice, salt, and pepper until smooth.
- Pour the dressing over the carrots and chickpeas, then toss until everything is evenly coated.
- Stir in the raisins and chopped parsley.
- Top with the chopped almonds just before serving.
Notes
Cuisine: Moroccan
Equipment: Mixing bowl, box grater, small bowl, whisk
Japanese Soba Noodle Salad with Edamame
This soba noodle salad travels well because the noodles hold their texture and the light dressing keeps the flavors bright without wilting. Edamame adds protein and color that stays fresh even after a car ride or time on a buffet table.
It suits potlucks since it needs no reheating and tastes best served at room temperature. The taste is savory and nutty with a clean finish from the rice vinegar and sesame.


Equipment
- Large pot
- Colander
- Mixing bowl
Ingredients
- 8 ounces soba noodles
- 1 1/2 cups shelled edamame
- 3 green onions, thinly sliced
- 1/4 cup soy sauce
- 2 tablespoons sesame oil
- 1 tablespoon rice vinegar
- 1 teaspoon grated fresh ginger
- 2 tablespoons sesame seeds
Instructions
- Bring a large pot of water to a boil and cook the soba noodles according to the package directions. Drain them in a colander and rinse under cold water until completely cool.
- In the same pot, cook the edamame in boiling water for 4 minutes. Drain and rinse under cold water to cool.
- In a large mixing bowl, whisk together the soy sauce, sesame oil, rice vinegar, and grated ginger until smooth.
- Add the cooled noodles, edamame, and sliced green onions to the bowl. Toss gently until everything is evenly coated with the dressing.
- Sprinkle the sesame seeds over the top and give the salad one final light toss before transferring to a travel container.
Notes
Cuisine: Japanese
Equipment: Large pot, Colander, Mixing bowl
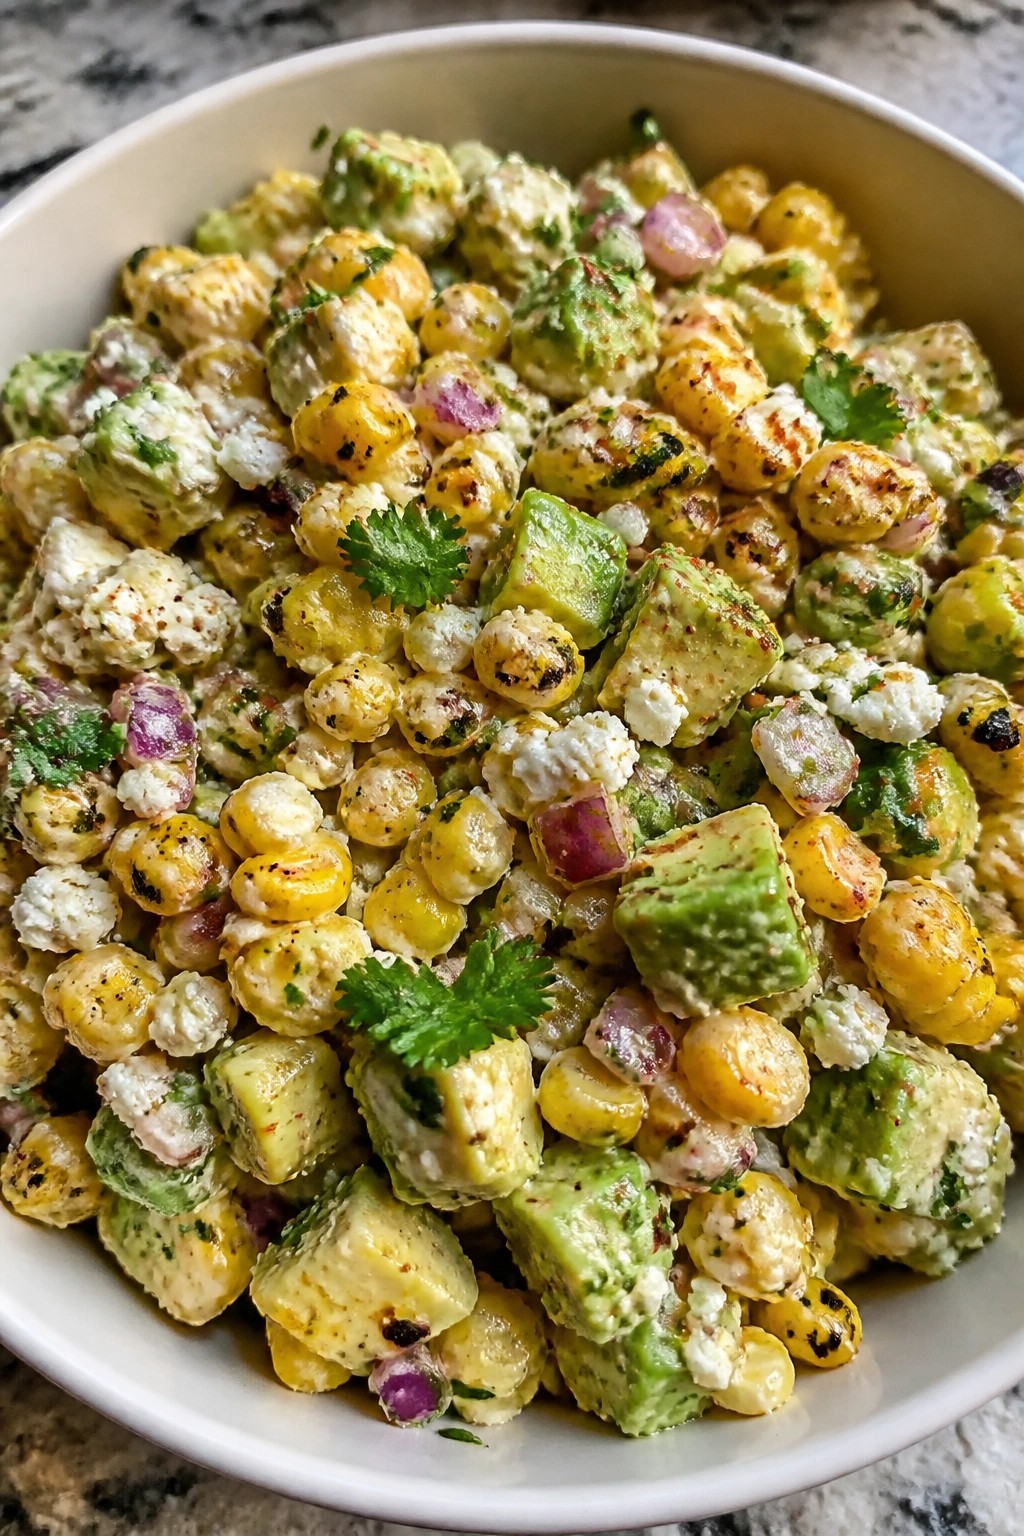
Mexican Street Corn and Avocado Salad
This salad turns classic Mexican street corn into a dish that travels well to gatherings. Grilled corn stays firm during transport, and the bright lime dressing keeps the flavors lively even after a few hours. It suits potlucks because you can grill the corn and mix the base ahead, then add the avocado right before serving so it stays fresh and green.
The result is sweet charred corn against creamy avocado, with salty cheese and a light chili kick. Red onion adds crunch without overpowering the other ingredients.

Equipment
- Grill or broiler
- Large mixing bowl
- Knife
Ingredients
- 4 ears corn, husked
- 2 ripe avocados, diced
- 1/4 cup mayonnaise
- Juice of 2 limes
- 1/3 cup crumbled cotija cheese
- 1 teaspoon chili powder
- 1/4 cup diced red onion
- 1/4 cup chopped cilantro
- Salt and black pepper to taste
Instructions
- Grill or broil the corn until kernels are lightly charred in spots, turning occasionally. Let cool, then cut the kernels off the cobs into a large bowl.
- In a small bowl, stir together the mayonnaise, lime juice, chili powder, salt, and pepper until smooth.
- Add the corn kernels, red onion, cilantro, and cotija cheese to the dressing. Toss gently to coat everything evenly.
- Fold in the diced avocado last, stirring just enough to distribute without mashing the pieces.
Notes
Cuisine: Mexican
Equipment: Grill or broiler, Large mixing bowl, Knife
Greek Lemon-Herb Potato Salad
This potato salad travels well because the olive oil dressing keeps the potatoes firm and the flavors stay bright even after sitting for a few hours. It works especially well for potlucks since it needs no refrigeration to stay safe and holds its texture without wilting greens or heavy mayonnaise.
The dish has a fresh, tangy taste from lemon and herbs with a light, slightly creamy feel from the feta. Red onion adds a mild crunch that stays pleasant even after transport.


Equipment
- Large pot
- Mixing bowl
- Baking sheet
Ingredients
- 1.5 pounds baby potatoes, halved
- 1/4 cup olive oil
- Juice and zest of 2 lemons
- 2 garlic cloves, minced
- 1 teaspoon dried oregano
- 1/4 cup fresh dill, chopped
- 1/4 cup fresh parsley, chopped
- 1/2 small red onion, thinly sliced
- 1/2 cup crumbled feta cheese
- 1/2 teaspoon salt
- 1/4 teaspoon black pepper
Instructions
- Place the halved baby potatoes in a large pot and cover with cold water. Add the salt and bring to a boil. Cook for 12 to 15 minutes until the potatoes are tender but still hold their shape.
- Drain the potatoes and spread them on a baking sheet to cool for 10 minutes. This step keeps them from getting soggy when dressed.
- In a large mixing bowl, whisk together the olive oil, lemon juice, lemon zest, minced garlic, dried oregano, salt, and black pepper.
- Add the cooled potatoes to the bowl along with the sliced red onion. Toss gently to coat everything evenly with the dressing.
- Sprinkle the chopped dill, parsley, and crumbled feta over the top. Toss once more just before serving so the herbs stay fresh and the feta does not break down.
Notes
Cuisine: Mediterranean
Equipment: Large pot, Mixing bowl, Baking sheet
Vietnamese Rice Paper Rolls with Shrimp
These rolls travel well to potlucks because they stay fresh when packed tightly in a container with a damp cloth. They require no reheating and hold their shape during transport.
The rolls offer a light texture from the rice paper and vermicelli, paired with tender shrimp and crisp vegetables. Fresh herbs give them a bright, clean taste that stands out among heavier dishes.


Equipment
- Large pot
- Mixing bowl
- Shallow dish
- Cutting board
Ingredients
- 8 rice paper wrappers
- 16 medium shrimp, cooked, peeled, and halved lengthwise
- 4 ounces rice vermicelli noodles
- 8 butter lettuce leaves
- 1/2 cup fresh mint leaves
- 1/2 cup fresh cilantro leaves
- 1 small cucumber, cut into thin matchsticks
- 1 carrot, cut into thin matchsticks
- 2 tablespoons fish sauce
- 2 tablespoons lime juice
- 1 tablespoon sugar
- 1 garlic clove, minced
- 1 small red chili, finely chopped (optional)
Instructions
- Cook the rice vermicelli noodles according to package directions, then drain and rinse under cold water. Set aside.
- Prepare the dipping sauce by stirring together the fish sauce, lime juice, sugar, minced garlic, and chopped chili in a small bowl until the sugar dissolves. Set the sauce aside for serving.
- Fill a large shallow dish with warm water. Dip one rice paper wrapper in the water for a few seconds until it softens, then lay it flat on a clean surface.
- Place two shrimp halves in a row across the center of the wrapper, followed by a lettuce leaf, a small portion of vermicelli, mint leaves, cilantro, cucumber matchsticks, and carrot matchsticks.
- Fold the sides of the wrapper inward, then roll tightly from the bottom to enclose the filling. Repeat with the remaining wrappers and filling.
- Arrange the finished rolls on a platter or pack them in a container for transport.
Notes
Cuisine: Vietnamese
Equipment: Large pot, Mixing bowl, Shallow dish, Cutting board
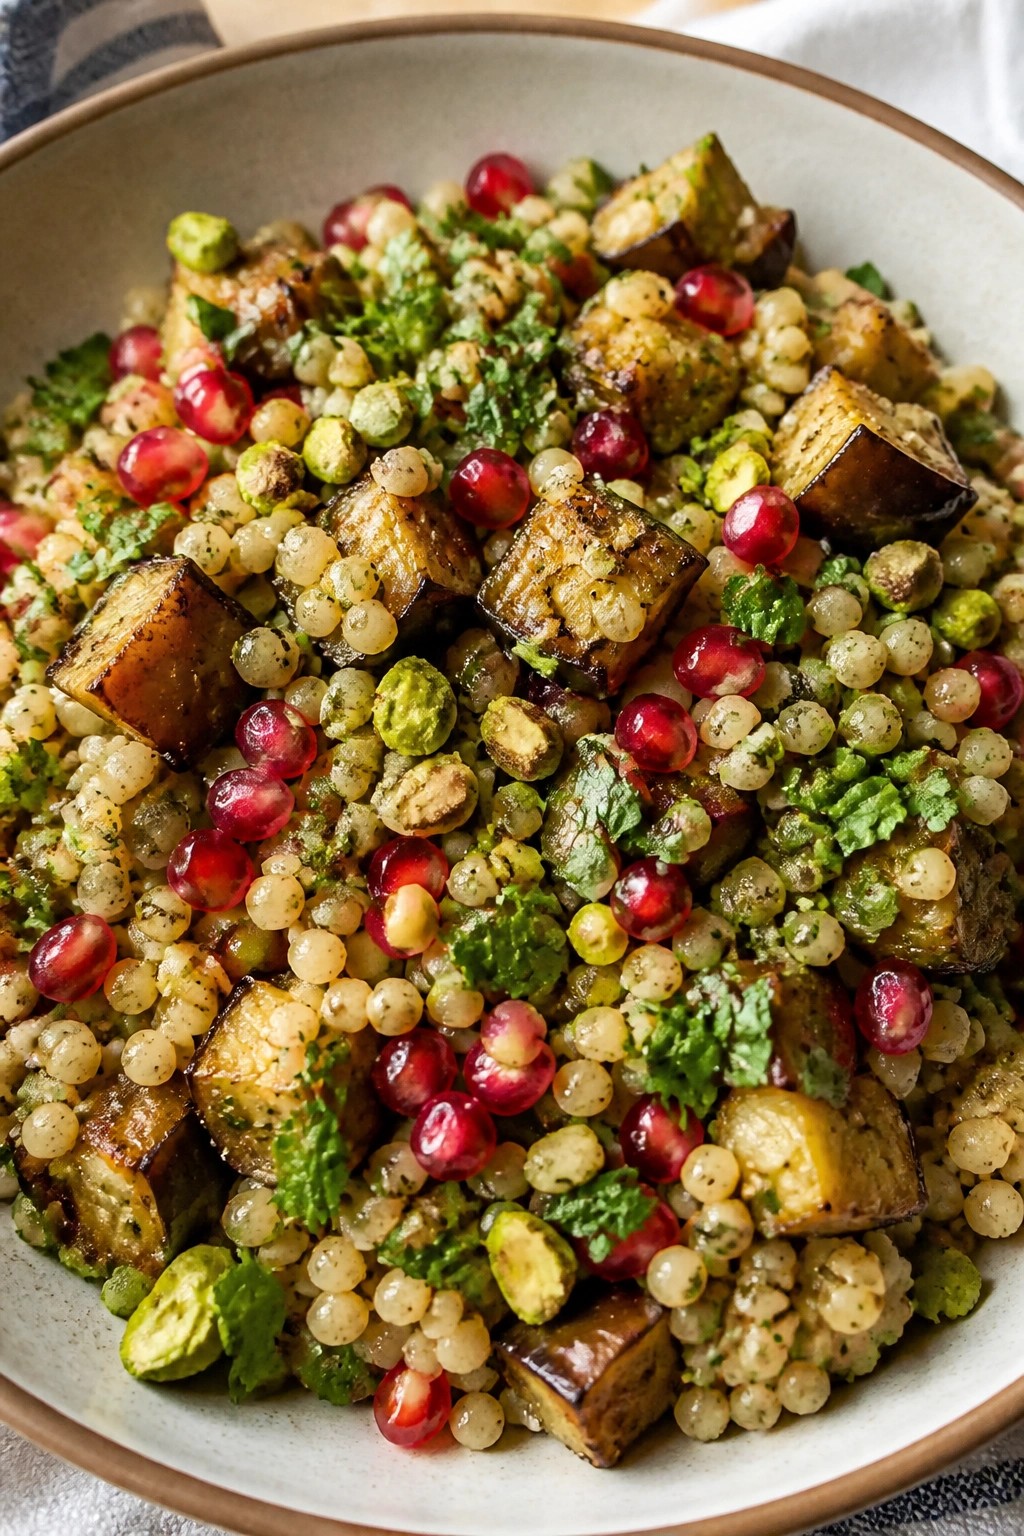
Middle Eastern Couscous with Roasted Eggplant and Pomegranate
This couscous dish combines tender roasted eggplant cubes with bright pomegranate seeds and fresh herbs. The warm spices and lemon dressing give it an earthy yet lively flavor that holds up well after travel.
It works nicely for potlucks because the components stay intact in one container and the colors remain vivid even after a few hours. Serve it at room temperature so the textures and flavors shine on the table.

Equipment
- Baking sheet
- Saucepan
- Large mixing bowl
Ingredients
- 1 cup pearl couscous
- 1 1/4 cups water
- 1 medium eggplant, cut into 1-inch cubes
- 3 tablespoons olive oil, divided
- 1 teaspoon ground cumin
- 1/2 teaspoon ground coriander
- 1/2 teaspoon salt
- 1/4 teaspoon black pepper
- 1/2 cup pomegranate seeds
- 1/4 cup fresh parsley, chopped
- 2 tablespoons fresh mint, chopped
- Juice of 1 lemon
- 1/4 cup toasted pistachios, chopped
Instructions
- Preheat the oven to 425 degrees. Toss the eggplant cubes with 2 tablespoons olive oil, cumin, coriander, salt, and pepper on a baking sheet. Roast for 20 to 25 minutes until the edges turn golden and the cubes are tender but still hold their shape.
- While the eggplant roasts, bring the water to a boil in a saucepan. Add the pearl couscous, reduce to a simmer, cover, and cook for 8 to 10 minutes until the liquid is absorbed. Fluff with a fork and let cool slightly.
- In a large bowl, whisk together the lemon juice and remaining 1 tablespoon olive oil. Add the cooked couscous and stir to coat evenly.
- Fold in the roasted eggplant, parsley, and mint. Top with pomegranate seeds and toasted pistachios just before serving.
Notes
Cuisine: Middle Eastern
Equipment: Baking sheet, Saucepan, Large mixing bowl
