


Potluck invites come up often and you need dishes that travel fine and stay good on a table.
These recipes focus on options that hold their texture and flavor even after some time at room temperature.
You will see a range of appetizers, salads, and mains that are straightforward to prep in advance.
Each one includes notes on what works best for a buffet setup.
They are the kind of reliable ideas you can actually use for your next event.
Tips for Dishes That Hold Up on a Buffet
A few practical choices will keep your food looking and tasting fresh during the event.
Pick sturdy recipes
Focus on items like bean salads, roasted vegetables, or baked casseroles. These hold their texture and flavor at room temperature for hours.
Transport with care
Use containers with tight lids and pack them in a sturdy box or basket. This prevents spills and keeps layers intact on the drive.
Hold garnishes until serving
Bring fresh herbs, nuts, or sauces separately in small jars. Add them right before the dish goes on the table so nothing wilts or softens early.
Label ingredients clearly
Write out the main components and any common allergens on a small card. Guests can serve themselves without questions or concerns.
Keep portions in mind
Cut or portion food into smaller pieces ahead of time. This makes it easier for people to serve themselves quickly on a crowded buffet line.
Mediterranean Chickpea and Feta Salad
This salad brings a bright mix of hearty chickpeas, briny olives, and creamy feta to any buffet table. It travels well and stays fresh for hours without wilting or getting soggy, which makes it a reliable choice for potlucks.
The flavors stay balanced with a simple lemon and herb dressing that soaks into the chickpeas over time. Each bite gives a mix of tender beans, crisp peppers, and salty cheese that holds its texture even after sitting out.
Equipment
- Large Mixing Bowl
- Measuring Spoons
Ingredients
- 2 (15-oz) cans chickpeas, drained and rinsed
- 1 red bell pepper, diced
- 1/2 red onion, thinly sliced
- 1 cup kalamata olives, pitted and halved
- 4 oz feta cheese, cubed
- 1/4 cup fresh parsley, chopped
- 3 tbsp olive oil
- 2 tbsp lemon juice
- 1 tsp dried oregano
- Salt and pepper to taste
Instructions
- Drain and rinse the chickpeas, then place them in a large mixing bowl.
- Add the diced red bell pepper, sliced red onion, halved olives, and cubed feta to the bowl.
- In a small cup, whisk together the olive oil, lemon juice, dried oregano, salt, and pepper.
- Pour the dressing over the salad and toss gently until everything is coated.
- Sprinkle the chopped parsley on top and give the salad one final light toss before serving.
Notes
Cuisine: Mediterranean
Equipment: Large Mixing Bowl, Measuring Spoons
Cheesy Baked Ziti Casserole
This cheesy baked ziti casserole works well for potlucks because it stays hot for a while and travels without losing its creamy layers. The pasta holds up under sauce and cheese, so it remains easy to serve from a buffet without turning soggy.
The finished dish has a tender bite from the ziti, pockets of ricotta, and a golden cheese topping that appeals to both kids and adults.
Equipment
- Large Pot
- Colander
- Mixing Bowl
- 9×9 Baking Dish
Ingredients
- 8 ounces dry ziti pasta
- 3 cups marinara sauce
- 1 cup ricotta cheese
- 2 cups shredded mozzarella cheese
- 1/2 cup grated Parmesan cheese
- 1 teaspoon Italian seasoning
- 1/2 teaspoon salt
- 1/4 teaspoon black pepper
Instructions
- Preheat the oven to 375 degrees and lightly grease a 9×9 baking dish.
- Bring a large pot of salted water to a boil and cook the ziti according to package directions until al dente. Drain the pasta in a colander and return it to the pot.
- Stir the marinara sauce, Italian seasoning, salt, and black pepper into the drained pasta until evenly coated.
- Add the ricotta cheese to the pot and mix until it is distributed through the ziti.
- Spread half the pasta mixture into the prepared baking dish. Sprinkle half the mozzarella and half the Parmesan over the top.
- Add the remaining pasta mixture, then finish with the rest of the mozzarella and Parmesan.
- Bake uncovered for 20 to 25 minutes until the cheese is melted and lightly browned on top. Let the casserole rest for 5 minutes before serving.
Notes
Cuisine: Italian
Equipment: Large Pot, Colander, Mixing Bowl, 9×9 Baking Dish
Honey-Soy Chicken Wings with Sesame
These wings bring a sweet and savory balance that works well for any potluck table. The honey-soy glaze sets into a sticky coating that stays on the wings even after sitting out, so they travel and hold up without getting soggy. Guests can grab them easily with one hand while they mingle.
The wings stay tender inside with a lightly crisp edge from baking. Sesame seeds add a gentle crunch and nutty note that pairs with the rich glaze. This version skips heavy sauces or delicate toppings that might not survive a buffet.
Equipment
- Baking sheet
- Large bowl
- Whisk
Ingredients
- 2 pounds chicken wings, split into drumettes and flats
- 1/4 cup soy sauce
- 1/4 cup honey
- 2 tablespoons sesame oil
- 3 cloves garlic, minced
- 1 tablespoon fresh ginger, grated
- 2 tablespoons sesame seeds
- 2 green onions, thinly sliced
Instructions
- Preheat the oven to 400 degrees F and line a baking sheet with parchment paper or foil.
- In a large bowl, whisk together the soy sauce, honey, sesame oil, minced garlic, and grated ginger until smooth.
- Add the chicken wings to the bowl and toss until every piece is coated in the mixture.
- Arrange the wings in a single layer on the prepared baking sheet.
- Bake for 35 to 40 minutes, turning the wings once halfway through, until the glaze is sticky and the wings are cooked through.
- Remove the wings from the oven and sprinkle them with sesame seeds while still hot.
- Scatter the sliced green onions over the top just before serving.
Notes
Cuisine: Asian
Equipment: Baking sheet, Large bowl, Whisk
Roasted Sweet Potato and Black Bean Salad
This salad brings together tender roasted sweet potatoes and hearty black beans in a simple mix that travels well. It works especially well for potlucks because the ingredients stay fresh at room temperature without wilting. The flavors lean smoky and bright with a bit of crunch from the peppers.
The texture stays balanced even after sitting out, with soft sweet potato cubes against firm beans and crisp vegetables. It offers a filling option that still feels light.
Equipment
- Baking sheet
- Large bowl
- Knife
Ingredients
- 2 large sweet potatoes, cut into 1-inch cubes
- 3 tablespoons olive oil, divided
- 1 teaspoon ground cumin
- 1/2 teaspoon chili powder
- 1/2 teaspoon salt
- 1/4 teaspoon black pepper
- 1 (15-ounce) can black beans, drained and rinsed
- 1 red bell pepper, diced
- 1/4 cup chopped red onion
- 1/4 cup chopped fresh cilantro
- Juice of 2 limes
Instructions
- Preheat the oven to 425 degrees. Toss the sweet potato cubes with 2 tablespoons olive oil, cumin, chili powder, salt, and black pepper on a baking sheet.
- Spread the sweet potatoes in a single layer and roast for 25 minutes, stirring once halfway through, until the edges turn golden and the centers soften.
- Let the roasted sweet potatoes cool for 10 minutes on the baking sheet.
- In a large bowl, combine the cooled sweet potatoes, black beans, red bell pepper, red onion, and cilantro.
- Drizzle the remaining 1 tablespoon olive oil and the lime juice over the mixture. Stir gently until everything is evenly coated.
Notes
Cuisine: Mexican
Equipment: Baking sheet, Large bowl, Knife
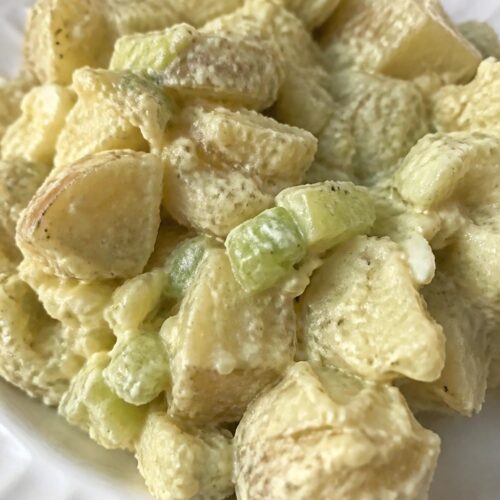
Classic Potato Salad with Celery and Mustard
This potato salad brings together creamy potatoes and crisp celery in a simple mustard dressing. It travels well and stays fresh on a buffet table, making it a smart pick for potlucks and gatherings.
The flavor is tangy and savory with just enough creaminess to balance the mustard. Celery adds crunch that holds up even after the salad sits for a while.

Equipment
- Large Pot
- Mixing Bowl
- Knife
Ingredients
- 2 pounds Yukon Gold potatoes
- 3 celery stalks, diced
- 1/2 cup mayonnaise
- 3 tablespoons Dijon mustard
- 1 tablespoon apple cider vinegar
- 1 teaspoon salt
- 1/2 teaspoon black pepper
Instructions
- Place the potatoes in a large pot and cover with cold water. Bring to a boil over medium-high heat and cook until the potatoes are tender when pierced with a fork, about 15 to 20 minutes.
- Drain the potatoes and let them cool until they can be handled safely. Cut them into bite-sized chunks.
- In a large mixing bowl, stir together the mayonnaise, Dijon mustard, apple cider vinegar, salt, and black pepper until smooth.
- Add the diced celery and the cooled potato chunks to the bowl. Gently fold everything together until the potatoes and celery are evenly coated.
Notes
Cuisine: American
Equipment: Large Pot, Mixing Bowl, Knife
Seven-Layer Taco Dip with Tortilla Chips
This layered dip brings bold taco flavors to any buffet table without needing heat or last-minute work. The beans and sour cream base stay firm, while the toppings add crunch and freshness that hold up well at room temperature.
It works best for potlucks because guests can scoop straight from the dish and the layers do not run or separate. The mix of creamy, tangy, and savory notes pairs naturally with crisp tortilla chips.


Equipment
- Mixing bowl
- Medium serving dish
- Spoon
Ingredients
- 1 can (16 oz) refried beans
- 1 packet taco seasoning
- 1 cup sour cream
- 1 cup guacamole
- 1 cup salsa
- 1 cup shredded cheddar cheese
- 1/2 cup diced tomatoes
- 1/4 cup sliced black olives
- 2 green onions, sliced
- Tortilla chips, for serving
Instructions
- Spread the refried beans evenly across the bottom of a medium serving dish.
- Stir the taco seasoning into the sour cream until fully blended. Spread this mixture over the beans.
- Spoon the guacamole in an even layer on top of the sour cream.
- Add the salsa as the next layer and smooth it gently with the back of a spoon.
- Sprinkle the shredded cheddar cheese over the salsa.
- Scatter the diced tomatoes, sliced black olives, and green onions on top.
- Serve with tortilla chips on the side for dipping.
Notes
Cuisine: Mexican
Equipment: Mixing bowl, Medium serving dish, Spoon
Farro Salad with Roasted Vegetables and Almonds
This farro salad combines chewy grains with sweet roasted vegetables and crunchy almonds. It holds up well at room temperature, making it a reliable choice for potlucks and buffets where food sits out for a while. The mix of nutty farro, caramelized vegetables, and bright dressing gives it a balanced savory flavor with good texture.
The dish works for both casual gatherings and more formal spreads. Roasted carrots and broccoli keep their shape, while almonds stay crisp even after a few hours. It travels easily and needs no reheating.


Equipment
- Baking sheet
- Large pot
- Mixing bowl
Ingredients
- 1 cup farro, rinsed
- 2 large carrots, peeled and cut into 1-inch pieces
- 1 head broccoli, cut into florets
- 1 red onion, sliced
- 3 tablespoons olive oil
- 1/2 cup sliced almonds
- 2 tablespoons balsamic vinegar
- 1/4 cup chopped fresh parsley
- Salt and black pepper to taste
Instructions
- Preheat the oven to 425 degrees. Spread the carrots, broccoli, and red onion on a baking sheet. Drizzle with 2 tablespoons olive oil and season with salt and pepper. Toss to coat, then roast for 25 minutes until the vegetables are tender and browned at the edges.
- While the vegetables roast, bring a large pot of salted water to a boil. Add the farro and cook for 20 minutes until tender but still chewy. Drain and rinse under cold water to cool.
- Toast the sliced almonds in a dry skillet over medium heat for 3 to 4 minutes, stirring often until golden. Set aside to cool.
- In a large bowl, combine the cooked farro, roasted vegetables, and toasted almonds. Drizzle with the remaining tablespoon of olive oil and the balsamic vinegar. Add the chopped parsley and toss gently. Season with more salt and pepper if needed.
Notes
Cuisine: Mediterranean
Equipment: Baking sheet, Large pot, Mixing bowl
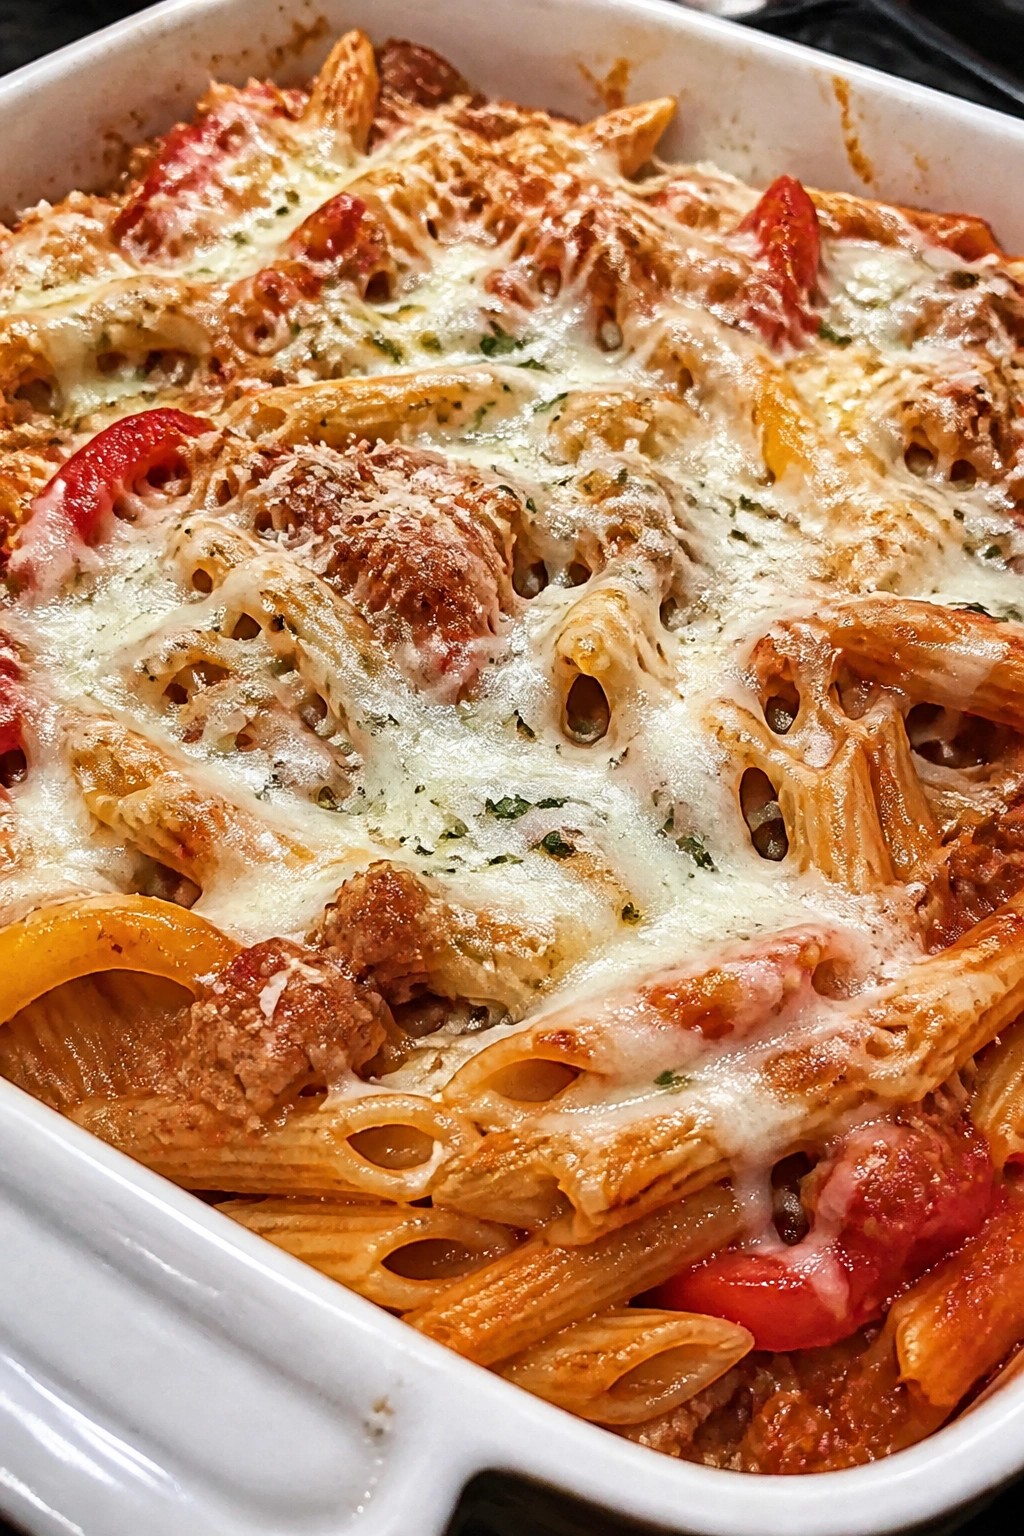
Italian Sausage and Pepper Penne Bake
This pasta bake brings together savory Italian sausage and sweet bell peppers in a hearty tomato sauce. It travels easily to potlucks and stays warm on a buffet without drying out or losing texture.
The dish offers a balanced mix of tender pasta, juicy sausage, and melted cheese. It works well for crowds because it can be assembled ahead and finished in the oven just before serving.

Equipment
- Large pot
- Large skillet
- 9×13 baking dish
Ingredients
- 8 oz penne pasta
- 1 lb Italian sausage, casings removed
- 2 bell peppers, sliced
- 1 onion, sliced
- 3 garlic cloves, minced
- 2 cups marinara sauce
- 1 cup shredded mozzarella cheese
- 1/2 cup grated Parmesan cheese
- 2 tbsp olive oil
- 1 tsp Italian seasoning
- Salt and black pepper to taste
Instructions
- Preheat the oven to 375 degrees. Cook the penne in a large pot of salted boiling water until al dente, then drain and set aside.
- Heat the olive oil in a large skillet over medium heat. Add the Italian sausage and cook until browned, breaking it into crumbles with a spoon.
- Add the sliced onion and bell peppers to the skillet. Cook for 5 minutes until the vegetables soften.
- Stir in the minced garlic and Italian seasoning. Cook for 1 minute more.
- Pour the marinara sauce into the skillet and season with salt and black pepper. Simmer for 3 minutes, then remove from heat.
- Combine the cooked penne with the sausage mixture in a large bowl. Stir in half the mozzarella and half the Parmesan.
- Transfer the mixture to a greased 9×13 baking dish. Sprinkle the remaining mozzarella and Parmesan evenly over the top.
- Bake for 20 minutes until the cheese is melted and lightly browned. Let it rest for 5 minutes before serving.
Notes
Cuisine: Italian
Equipment: Large pot, Large skillet, 9×13 baking dish
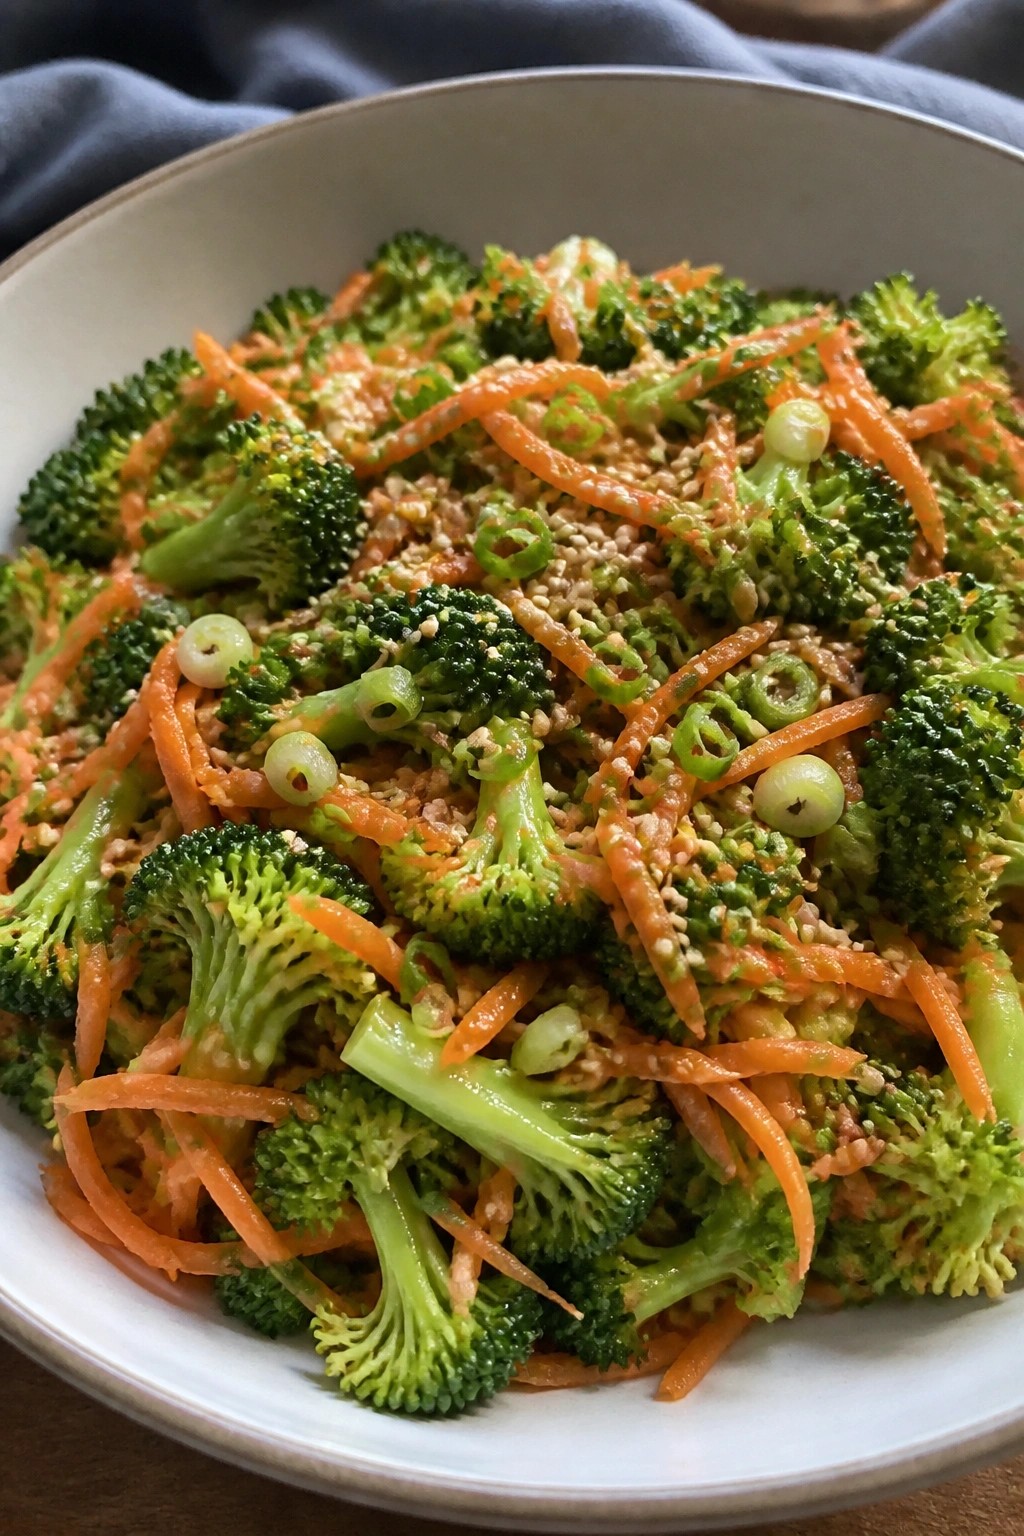
Asian Sesame Broccoli and Carrot Slaw
This slaw brings steady crunch to a buffet spread. Broccoli and carrots hold their texture well, so the dish stays fresh without wilting even after an hour or two at room temperature.
The sesame dressing gives it a light, savory taste with a hint of nuttiness. It pairs easily with grilled meats, rice dishes, or other sides without overpowering them.

Equipment
- Large Mixing Bowl
- Whisk
Ingredients
- 4 cups broccoli florets, thinly sliced
- 2 large carrots, shredded
- 2 tablespoons sesame oil
- 2 tablespoons rice vinegar
- 1 tablespoon soy sauce
- 1 teaspoon honey
- 1 clove garlic, minced
- 1 teaspoon grated fresh ginger
- 2 tablespoons toasted sesame seeds
- 2 green onions, sliced
Instructions
- Place the sliced broccoli florets and shredded carrots in a large mixing bowl.
- In a small bowl, whisk together the sesame oil, rice vinegar, soy sauce, honey, minced garlic, and grated ginger until smooth.
- Pour the dressing over the vegetables and toss until everything is evenly coated.
- Sprinkle the toasted sesame seeds and sliced green onions over the slaw and give it one final gentle toss before serving.
Notes
Cuisine: Asian
Equipment: Large Mixing Bowl, Whisk
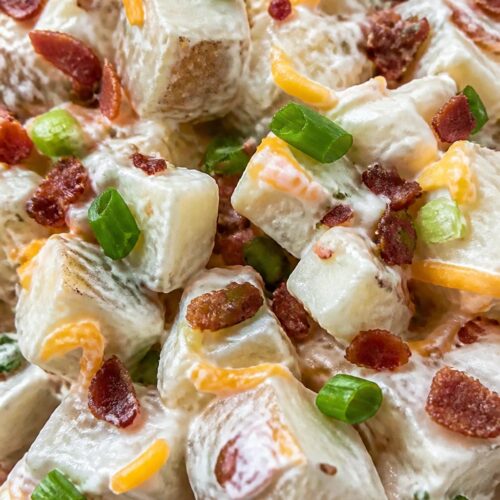
Loaded Baked Potato Salad with Bacon
This potato salad captures the flavors of a loaded baked potato in a make-ahead side that travels easily to gatherings. The cubed potatoes hold their shape well, so the dish stays sturdy on a buffet table without turning soggy.
It combines creamy dressing with smoky bacon and sharp cheese for a balanced bite that appeals to many tastes.

Equipment
- Baking sheet
- Skillet
- Mixing bowl
Ingredients
- 4 medium russet potatoes
- 6 slices bacon
- 1 cup shredded cheddar cheese
- ½ cup sour cream
- ¼ cup mayonnaise
- 2 green onions, sliced
- Salt and pepper to taste
Instructions
- Preheat the oven to 400°F. Prick the potatoes several times with a fork and place them directly on the oven rack. Bake for 45 to 60 minutes until tender when pierced with a knife. Let cool completely.
- While the potatoes bake, cook the bacon in a skillet over medium heat until crisp. Drain on paper towels and crumble into small pieces once cool.
- Cut the cooled potatoes into bite-sized cubes and place them in a large mixing bowl.
- Add the sour cream, mayonnaise, salt, and pepper to the potatoes. Stir gently until the potatoes are evenly coated.
- Fold in the crumbled bacon, shredded cheddar cheese, and sliced green onions. Mix just until combined.
Notes
Cuisine: American
Equipment: Baking sheet, Skillet, Mixing bowl
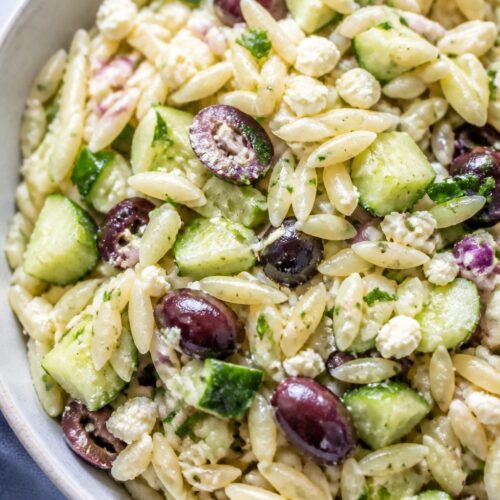
Greek Orzo Salad with Olives and Cucumbers
This orzo salad brings together tender pasta with crisp cucumbers and briny olives in a simple lemon dressing. It travels well and holds its texture even after sitting out on a buffet table for a few hours.
The flavors stay bright and balanced without getting soggy. It works as a reliable side that pairs with grilled meats or stands on its own for guests who want something light.

Equipment
- Large pot
- Colander
- Mixing bowl
Ingredients
- 8 oz orzo pasta
- 1 large cucumber, diced
- 1/2 cup kalamata olives, halved
- 4 oz feta cheese, crumbled
- 1/4 cup red onion, finely chopped
- 2 tablespoons olive oil
- Juice of 1 lemon
- 1 teaspoon dried oregano
- Salt and black pepper to taste
- 2 tablespoons fresh parsley, chopped
Instructions
- Bring a large pot of salted water to a boil and cook the orzo according to package directions until al dente. Drain in a colander and rinse under cold water to stop the cooking.
- Transfer the cooled orzo to a large mixing bowl. Add the diced cucumber, halved olives, and chopped red onion.
- Drizzle the olive oil and lemon juice over the mixture. Sprinkle in the dried oregano along with salt and black pepper.
- Stir everything gently until the ingredients are evenly coated. Fold in the crumbled feta cheese.
- Top with the chopped parsley just before serving.
Notes
Cuisine: Mediterranean
Equipment: Large pot, Colander, Mixing bowl
Slow-Cooked Baked Beans with Smoked Sausage
This dish brings together tender beans and slices of smoked sausage in a thick, savory-sweet sauce. It travels easily and stays satisfying even after sitting out for a while at a potluck.
The slow cooker does most of the work, letting the flavors deepen without much hands-on time. Guests can scoop it up on their own, making it a reliable choice for a buffet table.


Equipment
- Slow Cooker
- Large Skillet
Ingredients
- 1 pound smoked sausage, sliced into rounds
- 2 cans (15 ounces each) baked beans
- 1 medium onion, diced
- 3 tablespoons brown sugar
- 2 tablespoons molasses
- 1 tablespoon yellow mustard
- 1/2 teaspoon smoked paprika
- Salt and pepper to taste
Instructions
- Place a large skillet over medium heat and add the sliced smoked sausage with the diced onion. Cook until the sausage browns lightly and the onion softens.
- Transfer the sausage and onion to the slow cooker. Add the baked beans, brown sugar, molasses, yellow mustard, and smoked paprika.
- Stir everything together until the ingredients are evenly combined.
- Cover the slow cooker and cook on low for 4 to 6 hours, stirring once halfway through if possible.
- Taste and add salt and pepper as needed right before serving.
Notes
Cuisine: American
Equipment: Slow Cooker, Large Skillet
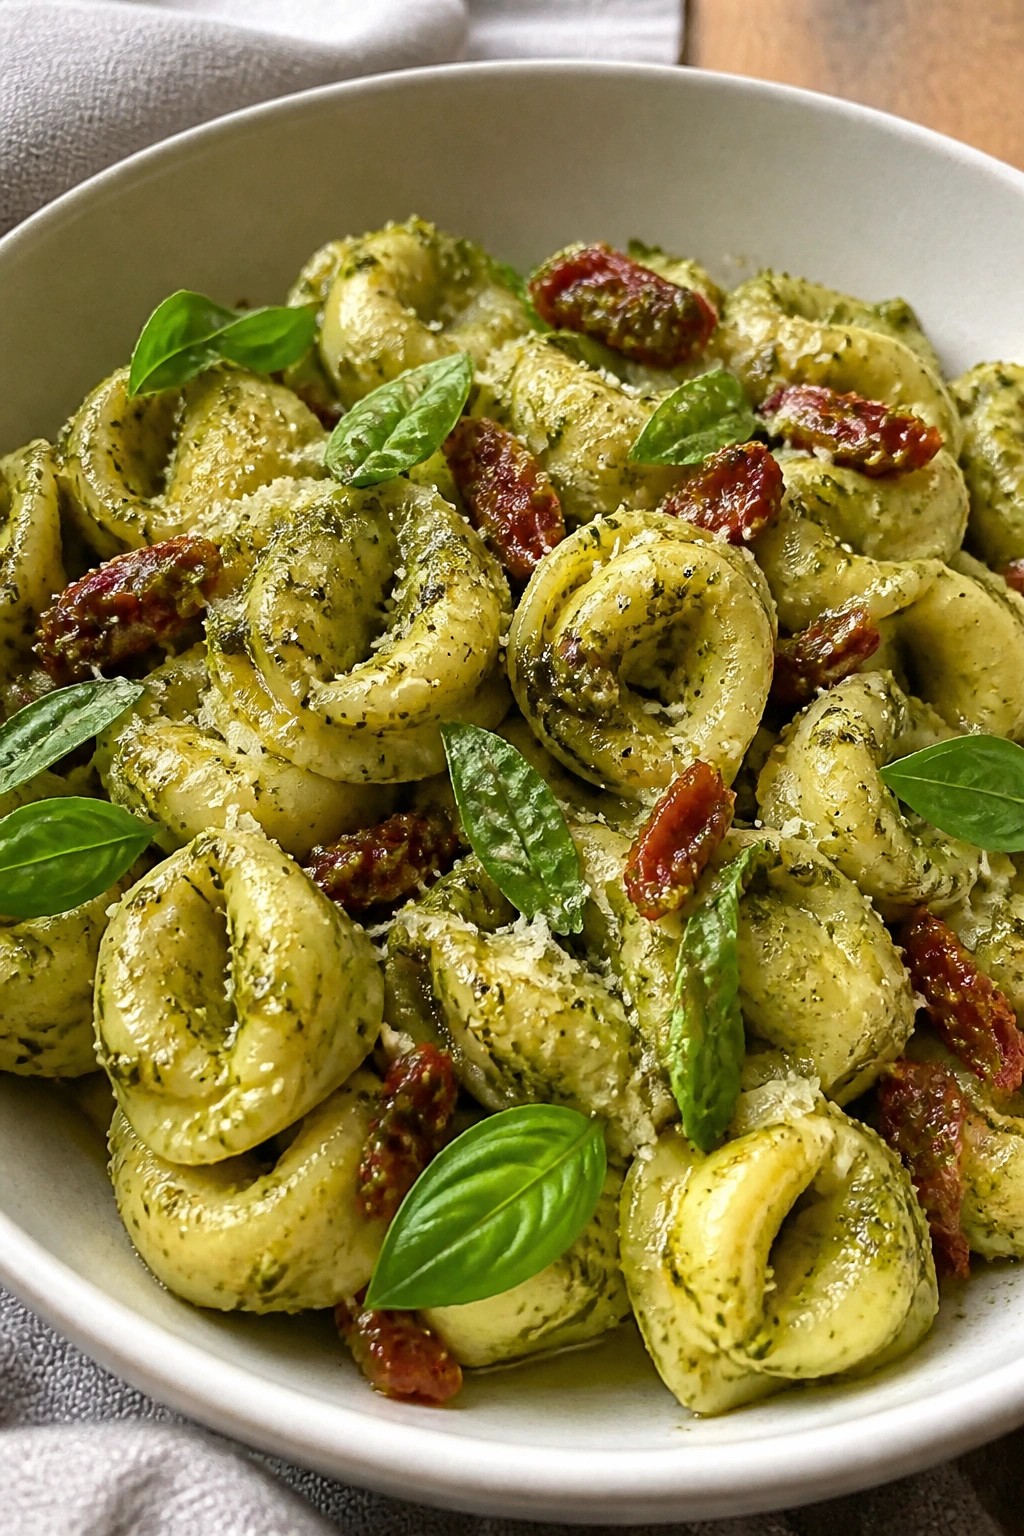
Pesto Tortellini Salad with Sun-Dried Tomatoes
This pasta salad travels well and stays fresh on a buffet table without needing constant attention. The cheese tortellini hold their shape after cooking, while the pesto coats everything in a bright, herby layer that pairs with the sweet-tangy sun-dried tomatoes.
It works for potlucks because it can be made ahead and served at room temperature. The texture stays pleasantly chewy rather than soggy, and the flavors hold up even after a few hours.

Equipment
- Large pot
- Colander
- Large mixing bowl
Ingredients
- 20 ounces cheese tortellini
- 1/2 cup prepared basil pesto
- 1/2 cup sun-dried tomatoes packed in oil, drained and chopped
- 1/4 cup grated Parmesan cheese
- 2 tablespoons olive oil
- Salt and black pepper to taste
- Fresh basil leaves for garnish
Instructions
- Bring a large pot of salted water to a boil. Add the tortellini and cook according to the package directions until tender.
- Drain the tortellini in a colander. Rinse briefly under cold water to stop the cooking and cool the pasta.
- Transfer the cooled tortellini to a large mixing bowl. Add the pesto and olive oil, then toss gently until the pasta is evenly coated.
- Stir in the chopped sun-dried tomatoes and grated Parmesan cheese. Season with salt and black pepper to taste.
- Transfer the salad to a serving bowl and top with fresh basil leaves before serving.
Notes
Cuisine: Italian
Equipment: Large pot, Colander, Large mixing bowl
