

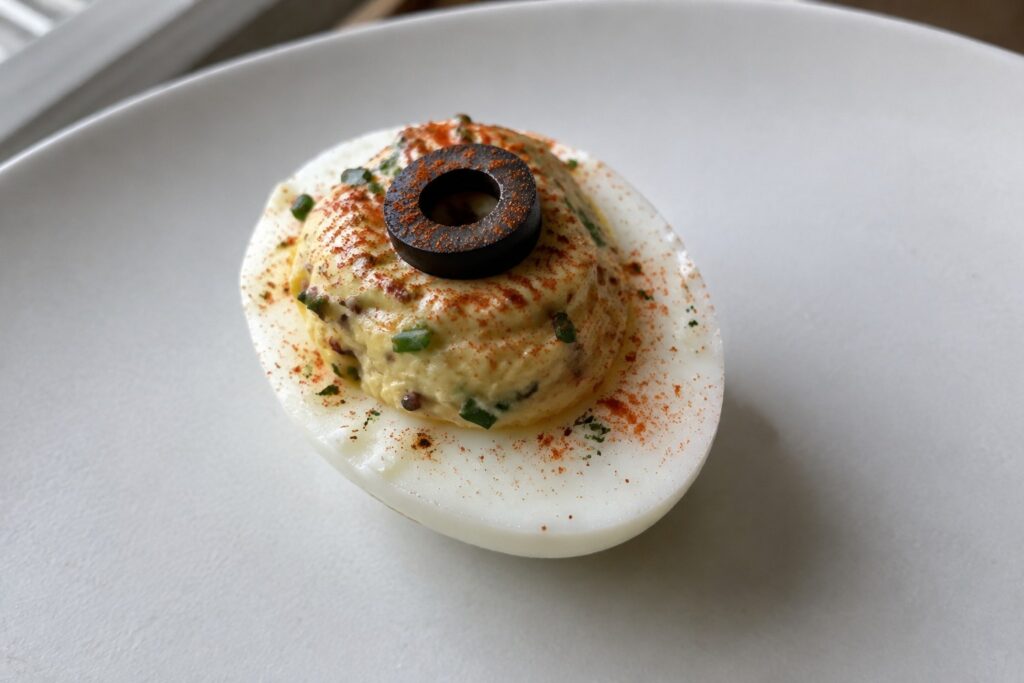
Halloween parties need appetizers that taste good to adults too. These recipes use simple ingredients and clear steps. You will find options with strong flavors that still feel easy to make. Some work for small groups while others scale up for bigger nights. Each one aims to look nice without extra work.
Helpful Tips Before You Start
A little planning keeps these appetizers flavorful and stress free for a party.
Choose Bold Ingredients
Use aged cheeses, smoked meats, or spicy elements like harissa to match adult tastes. Skip mild flavors that get lost in a spread.
Prep Components Ahead
Make dips, fillings, or doughs the day before so assembly takes minutes on the day of the event.
Mind the Textures
Pair creamy bases with crunchy toppings or crisp bread to keep bites interesting through multiple servings.
Garnish Simply
Add fresh herbs or a drizzle of good olive oil right before serving to brighten flavors without extra work.
Scale Portions Small
Offer two bite sizes so guests can sample several options without filling up too fast.
Spicy Chorizo and Manchego Stuffed Mushrooms
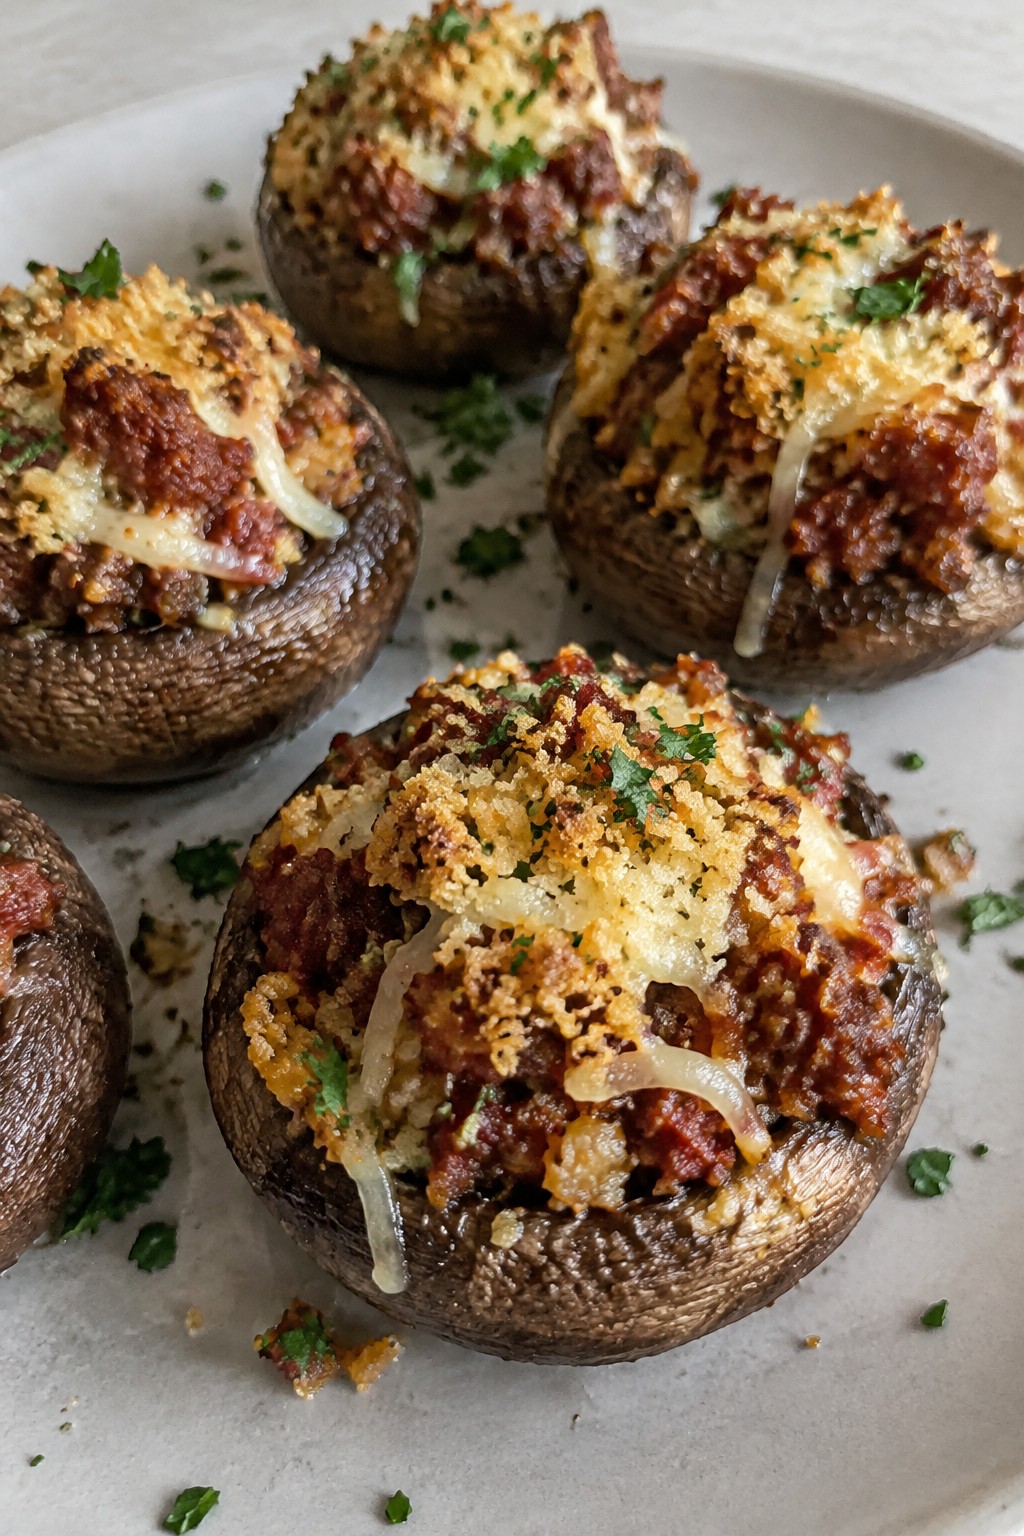
These mushrooms deliver a bold mix of spicy sausage and nutty cheese inside tender caps. They suit adult Halloween parties where guests want something savory rather than sweet or gimmicky.
The filling stays juicy while the top turns lightly crisp. Serve them warm as a starter that pairs well with drinks.

Equipment
- Baking Sheet
- Skillet
- Mixing Bowl
Ingredients
- 12 large cremini mushrooms, stems removed
- 8 ounces spicy chorizo, casing removed
- 1 cup shredded Manchego cheese, divided
- 1/4 cup panko breadcrumbs
- 2 garlic cloves, minced
- 2 tablespoons olive oil
- 1 tablespoon fresh parsley, chopped
- Salt and black pepper to taste
Instructions
- Preheat the oven to 375°F and line a baking sheet with parchment paper. Arrange the mushroom caps on the sheet with the open side up.
- Heat the olive oil in a skillet over medium heat. Add the chorizo and cook for 5 to 6 minutes, breaking it into small pieces until browned.
- Stir in the minced garlic and cook for 1 minute more. Remove the skillet from the heat.
- Mix in half the shredded Manchego, the panko breadcrumbs, parsley, salt, and pepper until evenly combined.
- Spoon the filling into each mushroom cap, pressing gently to pack it in. Sprinkle the remaining Manchego over the tops.
- Bake for 15 to 18 minutes until the cheese melts and the mushrooms soften.
Notes
Cuisine: Spanish
Equipment: Baking Sheet, Skillet, Mixing Bowl
Chipotle Lime Grilled Shrimp Skewers
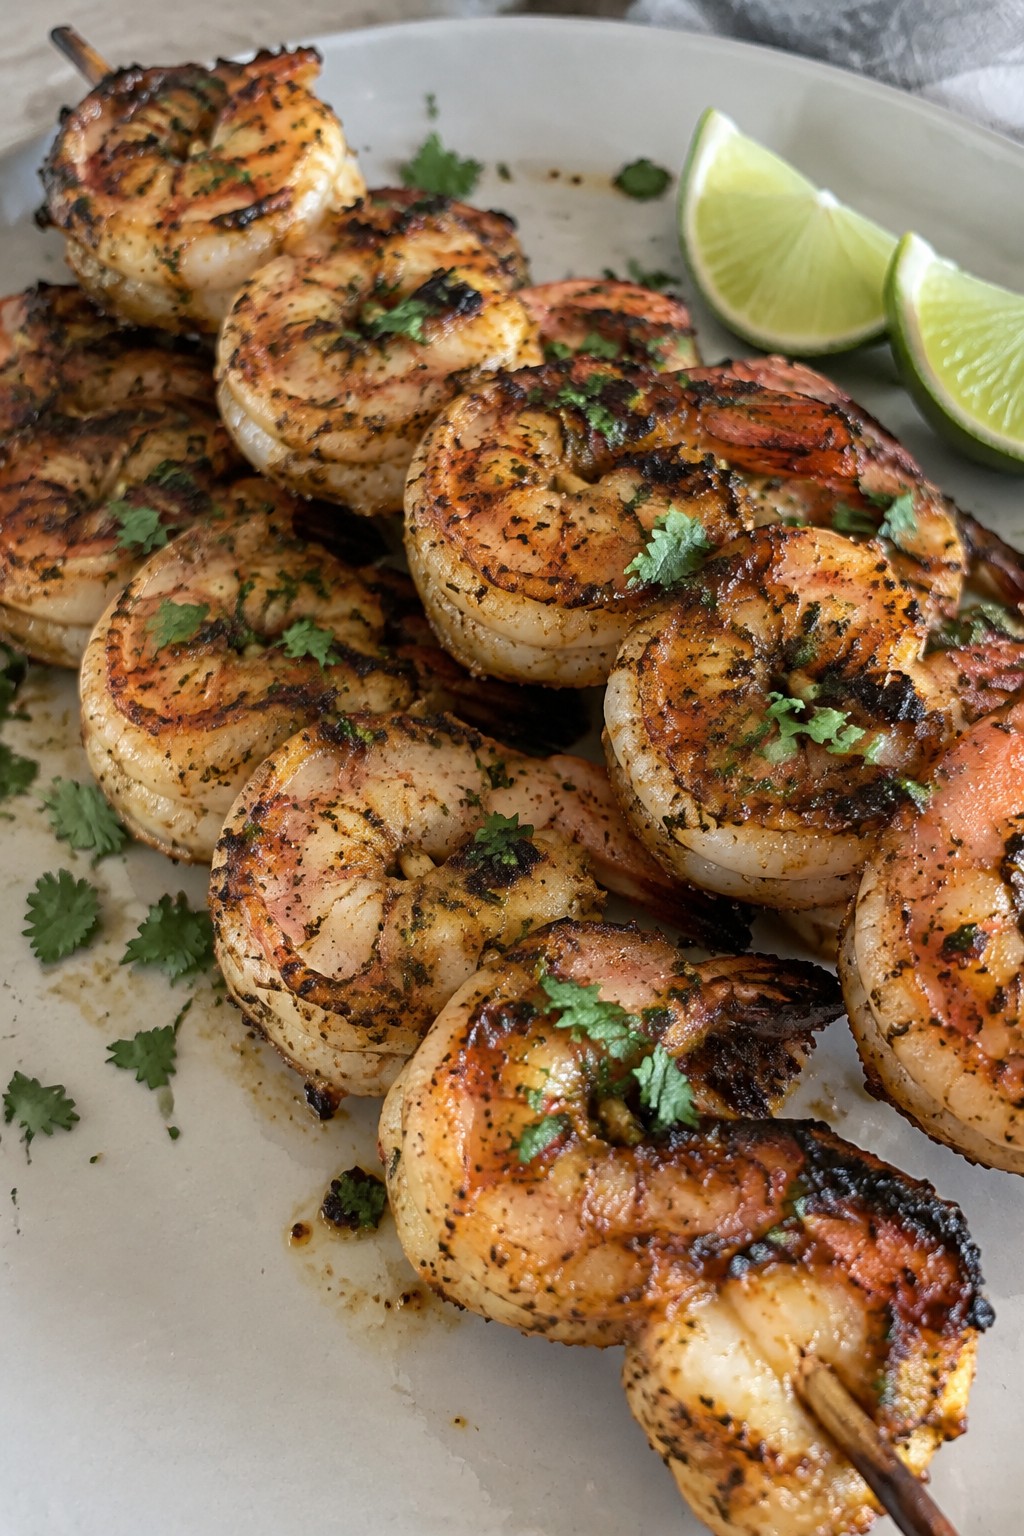
These skewers deliver smoky chipotle heat balanced with bright lime and garlic. They make a strong choice for adult Halloween parties where guests want something bold rather than bland finger food.
The dish works well as a starter before a main meal or as part of a spread with other flavorful bites. Shrimp stay tender on the grill while the marinade creates a charred, zesty crust.

Equipment
- Grill
- Mixing bowl
- Skewers
Ingredients
- 1 pound large shrimp, peeled and deveined
- 2 chipotle peppers in adobo sauce, finely chopped
- 2 limes, juiced and zested
- 2 tablespoons olive oil
- 2 cloves garlic, minced
- 1 teaspoon ground cumin
- 1/2 teaspoon salt
- 1/4 teaspoon black pepper
- 2 tablespoons fresh cilantro, chopped
Instructions
- In a mixing bowl combine the chopped chipotle peppers, lime juice and zest, olive oil, minced garlic, cumin, salt, and black pepper.
- Add the shrimp to the bowl and toss until every piece is coated. Let the mixture sit for 15 minutes at room temperature.
- Thread the shrimp onto skewers, leaving a small gap between each piece so heat can reach all sides.
- Heat a grill to medium-high. Place the skewers on the grates and cook for 2 to 3 minutes per side until the shrimp turn pink and slightly charred.
- Remove the skewers from the grill and sprinkle with chopped cilantro before serving.
Notes
Cuisine: Mexican
Equipment: Grill, Mixing bowl, Skewers
Smoked Salmon Crostini with Pickled Shallots
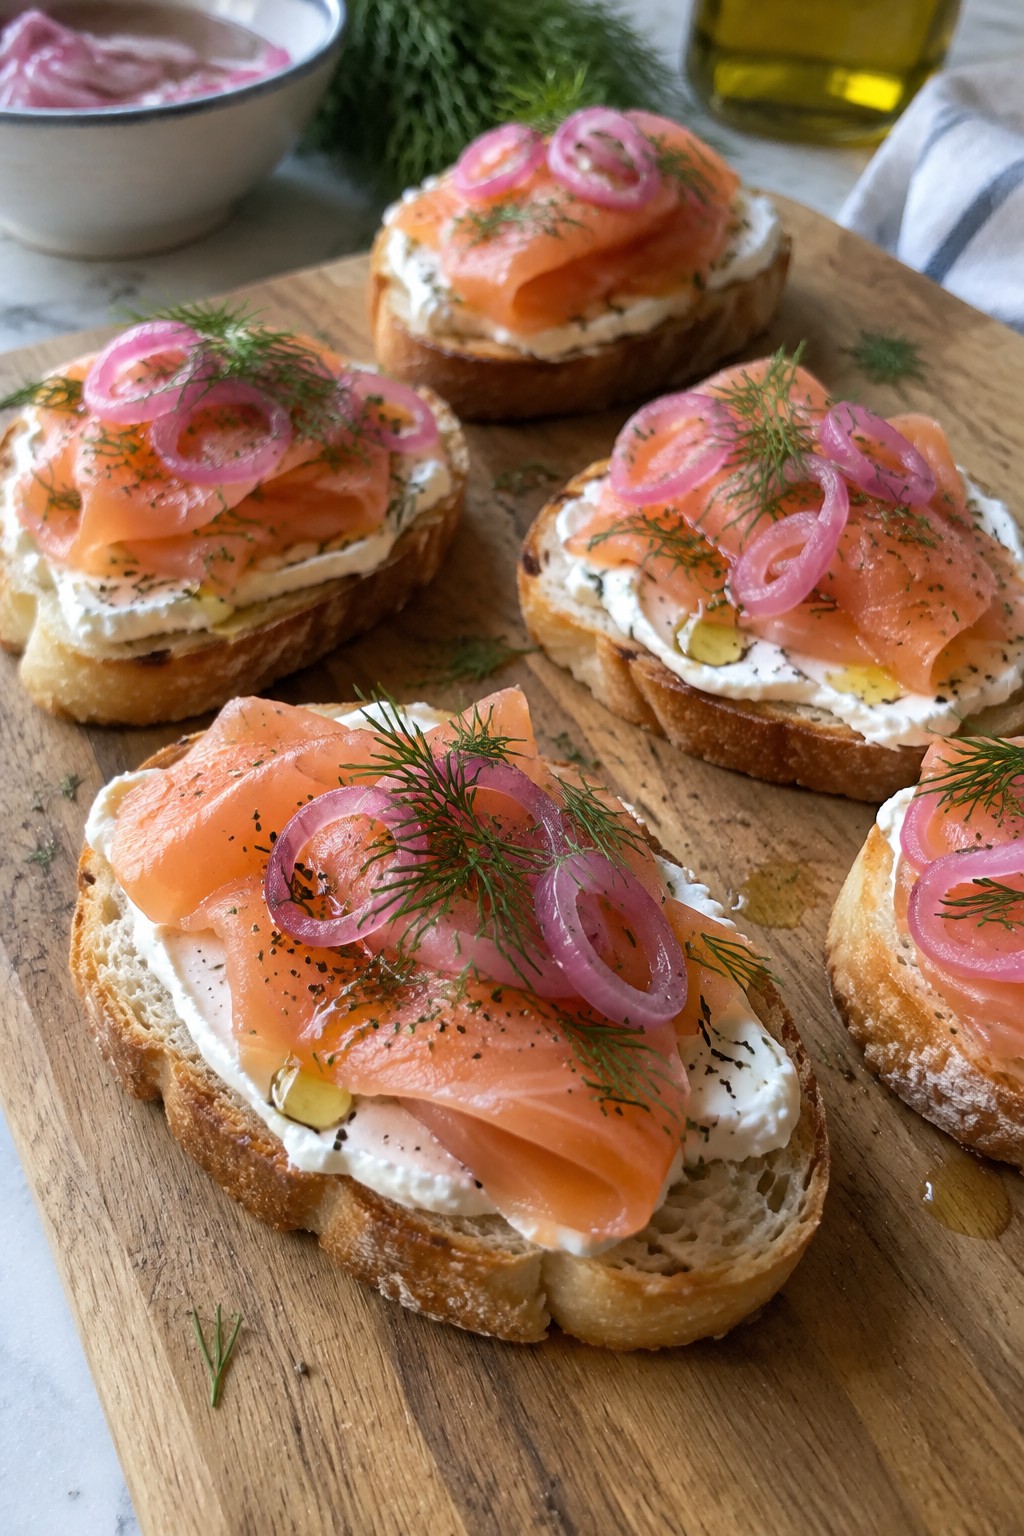
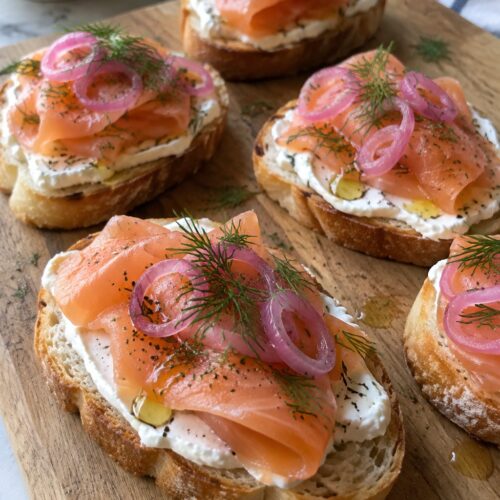
These crostini bring together smoky salmon and bright pickled shallots on crisp toast. The tangy shallots cut through the rich fish and creamy spread, giving each bite a balanced mix of flavors that feels grown-up without much effort. They work well at a Halloween gathering when you want something that looks put together but comes together quickly.
The texture stays interesting with the crunch of the bread against the soft salmon and the sharp bite of the shallots. Serve them as a starter while guests mingle or set them out on a platter with other savory bites.
Equipment
- Oven
- Baking Sheet
- Small Bowl
Ingredients
- 1 small baguette, cut into 12 slices
- 4 oz smoked salmon, thinly sliced
- 2 shallots, thinly sliced
- 1/2 cup white vinegar
- 1 tablespoon sugar
- 1 teaspoon salt
- 4 oz cream cheese, softened
- 2 tablespoons fresh dill, chopped
- 2 tablespoons olive oil
- Freshly ground black pepper
Instructions
- Preheat the oven to 400 degrees. Place the baguette slices on a baking sheet and brush both sides lightly with olive oil. Toast for 8 to 10 minutes until the edges turn golden and the centers stay crisp.
- While the bread toasts, combine the sliced shallots, white vinegar, sugar, and salt in a small bowl. Stir well and set aside for at least 10 minutes to pickle.
- Spread a thin layer of cream cheese over each cooled crostini. Lay a piece of smoked salmon on top of the cream cheese. Drain the pickled shallots and scatter a few slices over the salmon. Finish with a sprinkle of dill and a few grinds of black pepper.
Notes
Cuisine: American
Equipment: Oven, Baking Sheet, Small Bowl
Balsamic Fig and Goat Cheese Phyllo Cups
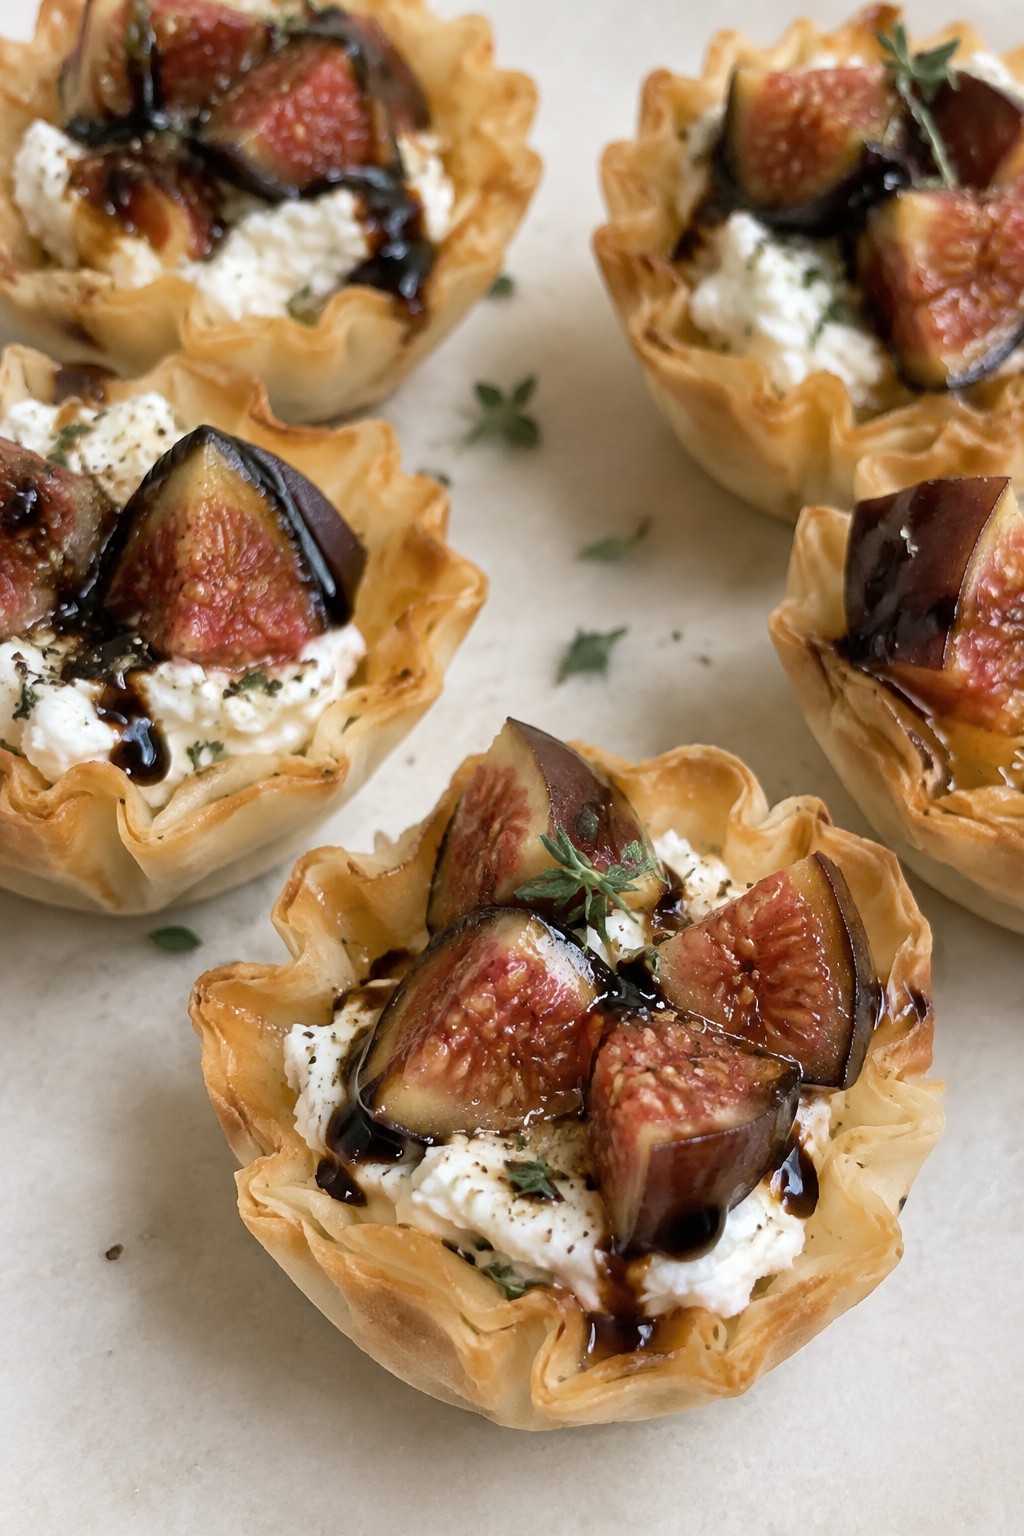
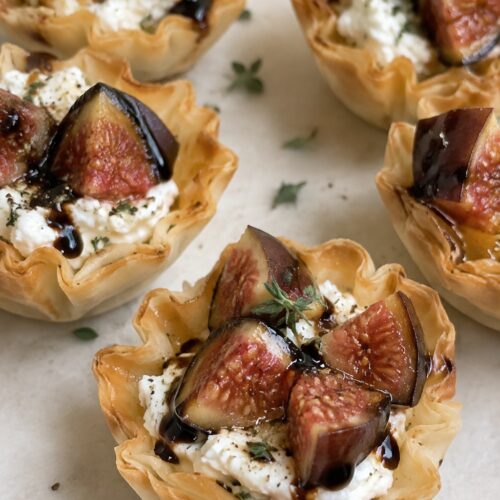
These phyllo cups deliver a sweet and savory bite that stands out at adult gatherings. The mix of tangy goat cheese, ripe figs, and rich balsamic gives each piece a layered flavor without being heavy. They fit well as a starter for Halloween parties where guests want something more interesting than basic snacks.
The crisp shells contrast nicely with the creamy filling and soft fruit. This combination keeps things light while still feeling special.
Equipment
- Baking sheet
- Mixing bowl
- Spoon
Ingredients
- 12 mini phyllo cups
- 4 ounces goat cheese
- 1 tablespoon honey
- 1 teaspoon fresh thyme leaves
- 3 fresh figs, diced
- 3 tablespoons balsamic glaze
- Freshly ground black pepper
Instructions
- Preheat the oven to 350°F and place the phyllo cups on a baking sheet.
- In a mixing bowl, combine the goat cheese, honey, and thyme leaves until smooth.
- Spoon the goat cheese mixture evenly into each phyllo cup.
- Top the filled cups with the diced figs and drizzle each one with balsamic glaze.
- Bake for 8 to 10 minutes until the cups are warmed and the cheese softens slightly.
- Remove from the oven and finish with a light grind of black pepper before serving.
Notes
Cuisine: Mediterranean
Equipment: Baking sheet, Mixing bowl, Spoon
Korean Gochujang Chicken Wingettes
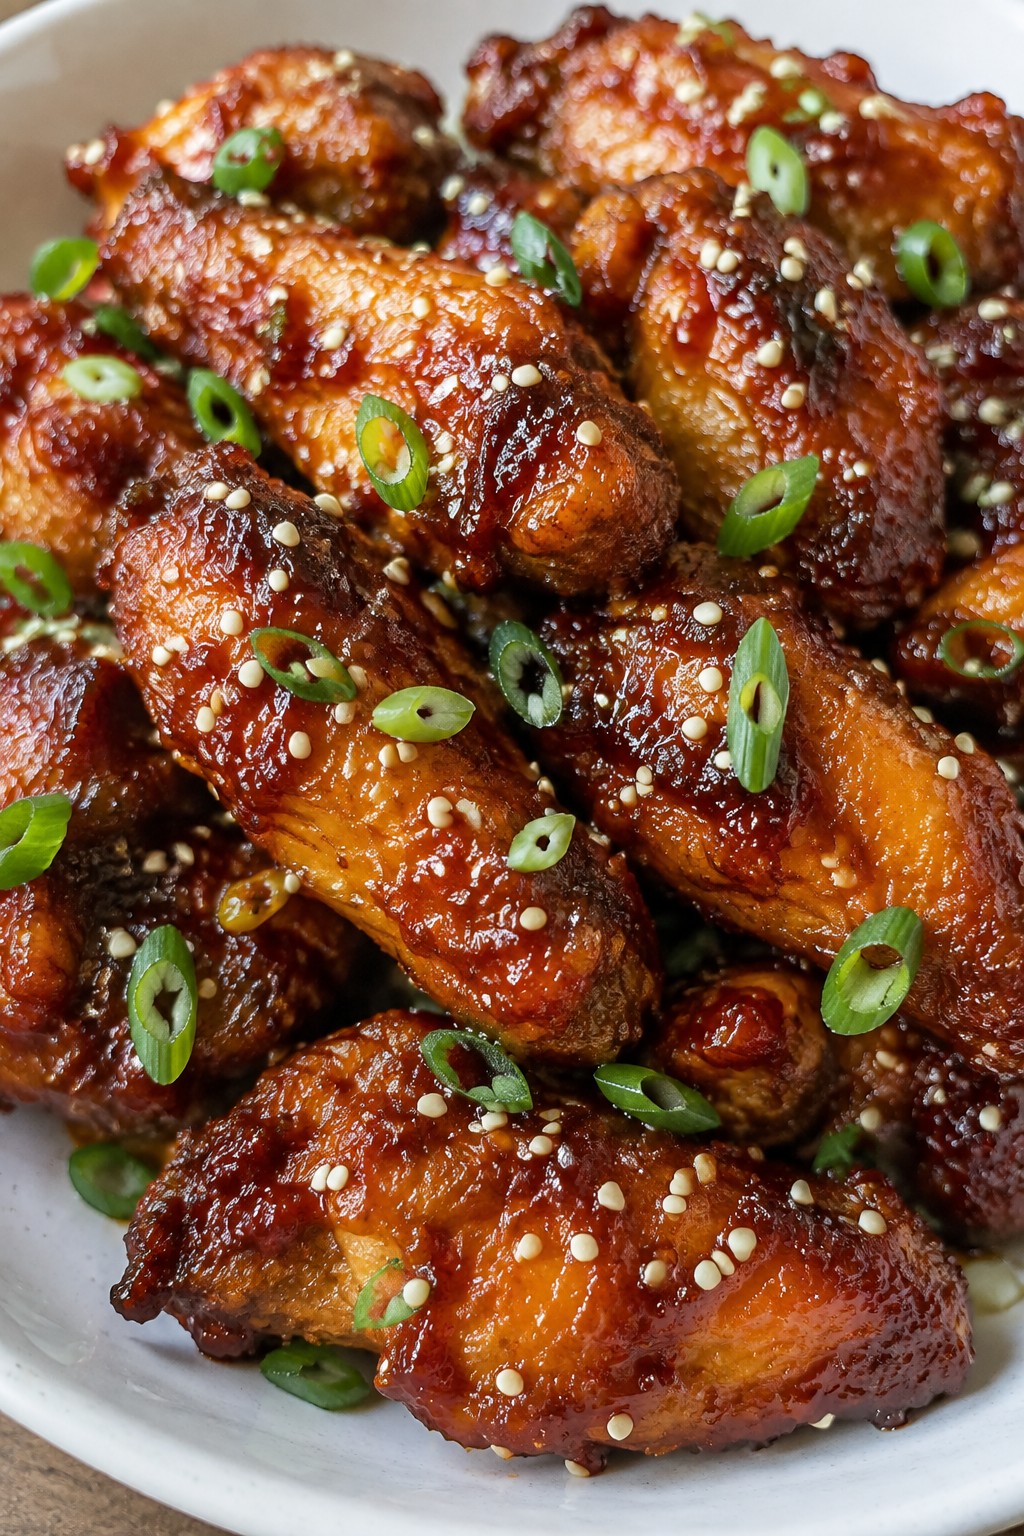
These wings bring bold Korean heat to a Halloween spread. The gochujang sauce gives them a sticky, spicy-sweet coating that adults tend to enjoy more than mild party snacks. They work well for casual gatherings where guests want something with real flavor instead of typical finger food.
The texture stays crisp on the outside while the meat stays juicy. The sauce clings nicely without making the wings soggy if you bake them right. They pair easily with cold drinks and hold up during a longer party.

Equipment
- Baking Sheet
- Mixing Bowl
- Tongs
Ingredients
- 2 pounds chicken wingettes
- 3 tablespoons gochujang
- 2 tablespoons soy sauce
- 2 tablespoons honey
- 3 cloves garlic, minced
- 1 tablespoon grated fresh ginger
- 1 tablespoon sesame oil
- 1 teaspoon rice vinegar
- 1 tablespoon sesame seeds
- 2 green onions, sliced
Instructions
- Preheat the oven to 425 degrees and line a baking sheet with parchment paper.
- In a large bowl, combine the gochujang, soy sauce, honey, minced garlic, grated ginger, sesame oil, and rice vinegar. Stir until smooth.
- Add the chicken wingettes to the bowl and toss until each piece is evenly coated.
- Arrange the wings in a single layer on the prepared baking sheet.
- Bake for 25 minutes, then flip each wing with tongs and bake for another 20 minutes until the edges turn crisp and browned.
- Remove from the oven and sprinkle with sesame seeds and sliced green onions before serving.
Notes
Cuisine: Korean
Equipment: Baking Sheet, Mixing Bowl, Tongs
Roasted Beet and Whipped Feta Dip with Crostini
This dip combines sweet roasted beets with tangy whipped feta for a bold, earthy flavor that stands out at any gathering. The deep color makes it a natural fit for Halloween spreads, while the creamy texture and crisp crostini keep it interesting for guests who want something beyond basic snacks. It works well as a starter before a heavier meal or as part of a small plates table.


Equipment
- Baking sheet
- Food processor
- Oven
Ingredients
- 2 medium beets, trimmed
- 1 tablespoon olive oil
- 8 ounces feta cheese
- 2 tablespoons olive oil
- 1 garlic clove, peeled
- 1 teaspoon lemon juice
- 1 baguette, sliced into 12 pieces
- Salt and black pepper
- 1 teaspoon fresh thyme leaves
Instructions
- Preheat the oven to 400 degrees. Place the beets on a baking sheet, drizzle with 1 tablespoon olive oil, and season with salt and pepper. Roast for 35 to 40 minutes until tender when pierced with a knife. Let cool slightly, then peel off the skins.
- Add the feta cheese, 2 tablespoons olive oil, garlic clove, and lemon juice to a food processor. Blend until smooth and creamy, scraping down the sides as needed.
- Cut the roasted beets into chunks and add them to the food processor. Pulse until the beets are fully incorporated and the dip turns a uniform pink color. Taste and add salt or pepper if needed.
- Arrange the baguette slices on the same baking sheet and toast in the oven for 8 to 10 minutes until golden and crisp.
- Transfer the dip to a serving bowl, sprinkle with fresh thyme leaves, and serve with the toasted crostini.
Notes
Cuisine: Mediterranean
Equipment: Baking sheet, Food processor, Oven
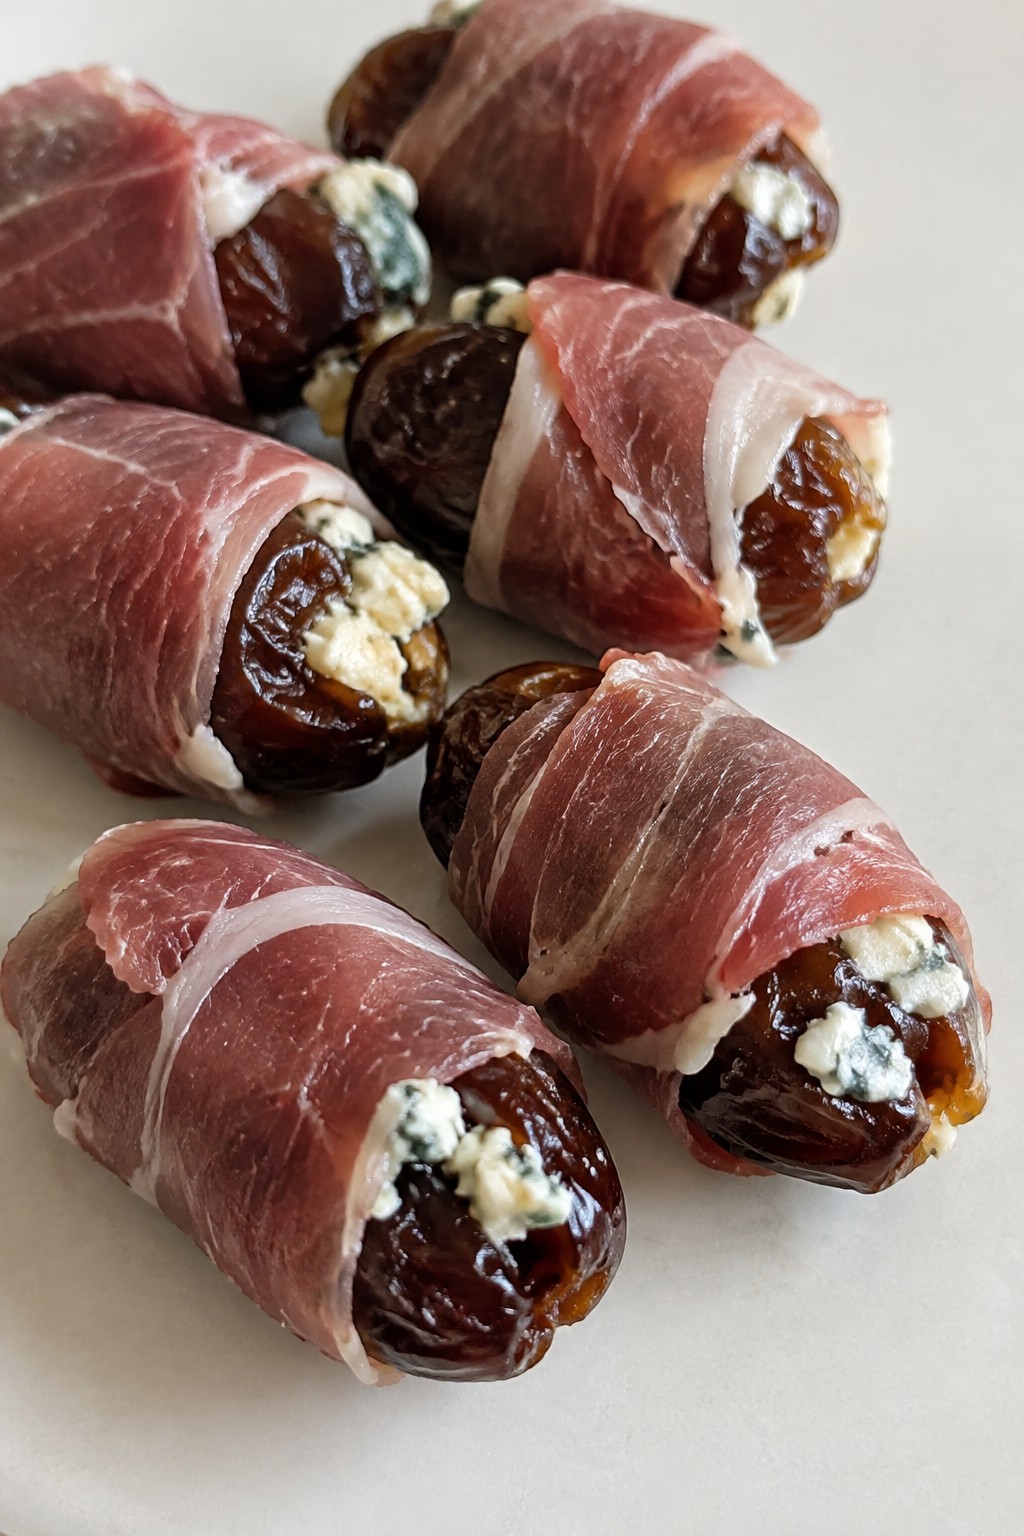
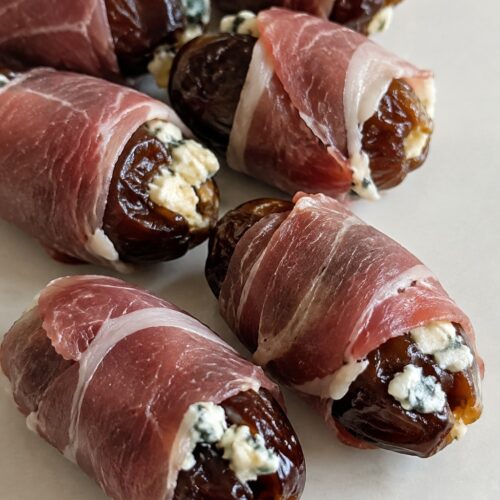
Prosciutto-Wrapped Dates with Blue Cheese
This combination brings sweet dates, salty prosciutto, and tangy blue cheese together in one small bite. It suits adult Halloween parties where guests want something savory and a bit unexpected.
The finished pieces offer a soft, chewy center wrapped in a crisp layer, with bold flavor that stands out on a shared table.
Equipment
- Baking Sheet
- Oven
- Parchment Paper
Ingredients
- 12 Medjool dates, pitted
- 4 ounces blue cheese, crumbled
- 6 ounces prosciutto, thinly sliced into 12 pieces
Instructions
- Heat the oven to 375 degrees and line a baking sheet with parchment paper.
- Open each date and fill the center with about a teaspoon of blue cheese.
- Wrap one slice of prosciutto around each stuffed date, then place the wrapped dates seam side down on the baking sheet.
- Bake for 10 to 12 minutes until the prosciutto firms and turns lightly golden.
- Remove from the oven and let the dates rest for a few minutes before serving.
Notes
Cuisine: Italian
Equipment: Baking Sheet, Oven, Parchment Paper
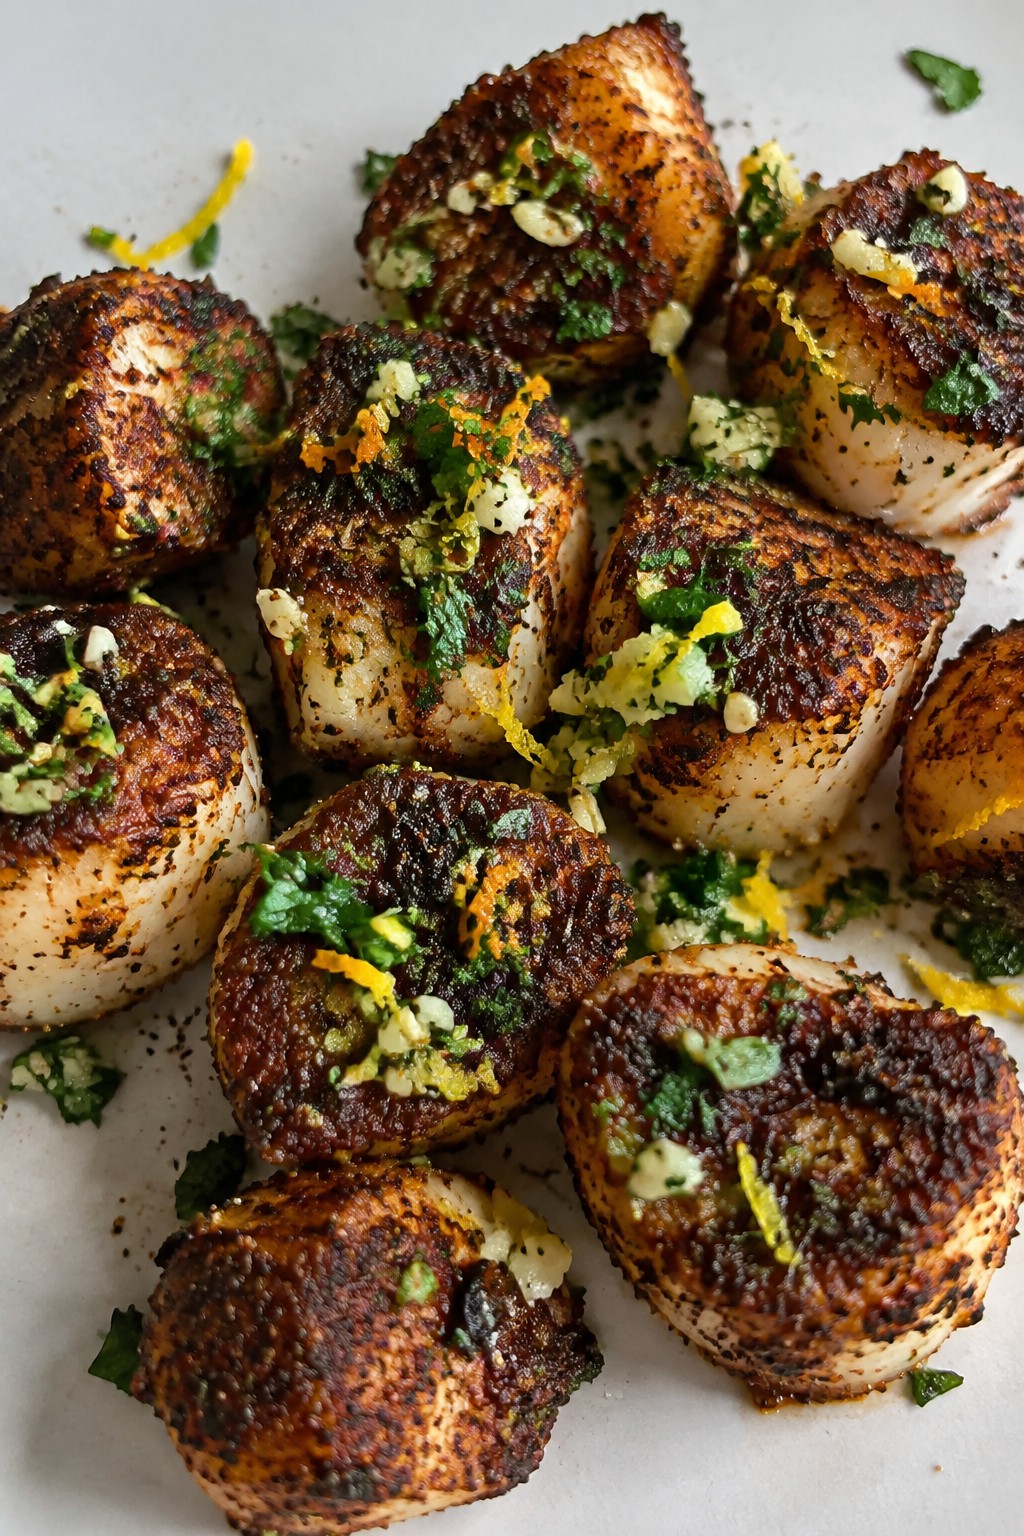
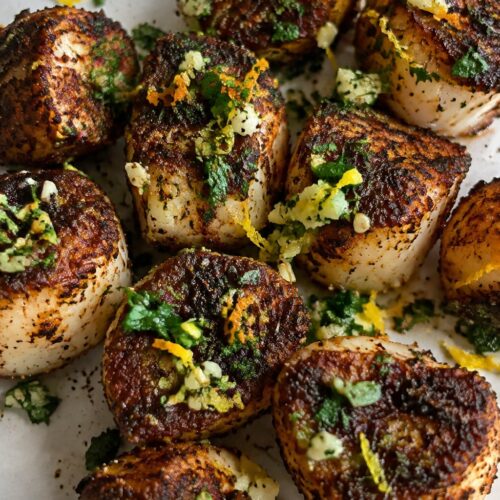
Blackened Scallop Bites with Citrus Gremolata
These blackened scallop bites stand out at adult Halloween gatherings. The spice crust adds heat while the scallops stay tender inside. A citrus gremolata brings fresh zest that balances the bold seasoning without overpowering it.
Serve them warm as finger food during cocktail hour or as a starter before a bigger meal. The combination of smoky char and bright herbs makes them feel special yet simple to prepare at home.
Equipment
- Cast Iron Skillet
- Mixing Bowl
- Zester
Ingredients
- 1 pound sea scallops, patted dry and cut into bite-sized pieces
- 2 tablespoons olive oil
- 2 teaspoons paprika
- 1 teaspoon garlic powder
- 1 teaspoon onion powder
- 1/2 teaspoon cayenne pepper
- 1/2 teaspoon dried thyme
- 1/2 teaspoon salt
- 1/4 teaspoon black pepper
- 1/4 cup fresh parsley, finely chopped
- 2 cloves garlic, minced
- Zest of 1 lemon
- Zest of 1 orange
- 1 tablespoon olive oil
Instructions
- Mix the paprika, garlic powder, onion powder, cayenne pepper, dried thyme, salt, and black pepper in a small bowl to create the blackening seasoning.
- Toss the scallop pieces with 1 tablespoon of olive oil, then coat them evenly with the seasoning mix.
- Heat the remaining 1 tablespoon of olive oil in a cast iron skillet over medium-high heat until it shimmers.
- Add the seasoned scallops in a single layer and cook for 1 to 2 minutes per side until a dark crust forms and the centers turn opaque.
- Remove the scallops from the skillet and set them aside on a plate.
- In a separate bowl, combine the parsley, minced garlic, lemon zest, orange zest, and 1 tablespoon olive oil to make the gremolata.
- Spoon the gremolata over the warm scallop bites just before serving.
Notes
Cuisine: American
Equipment: Cast Iron Skillet, Mixing Bowl, Zester
Truffle Parmesan Arancini with Marinara
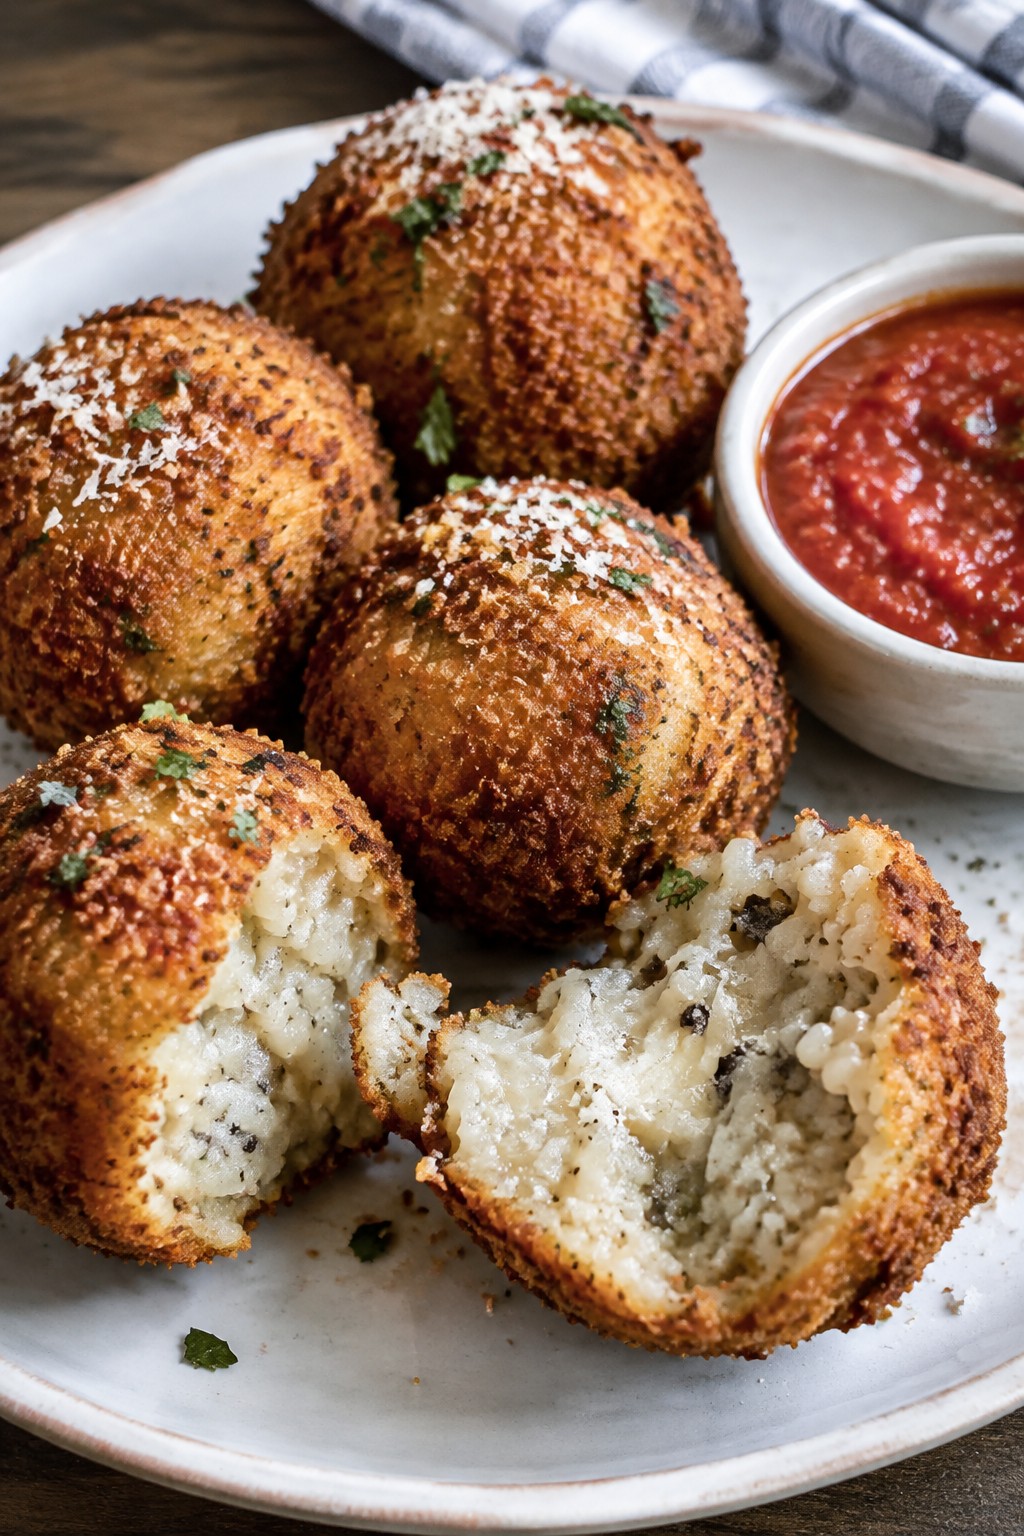
These arancini bring a grown-up twist to a classic Italian snack. The truffle oil and aged Parmesan give the rice balls a rich, earthy flavor that stands out at any gathering. They work well as a starter for Halloween dinner parties or casual adult get-togethers where guests want something more interesting than basic finger food.
The finished bites have a crisp golden crust and a creamy center that pairs nicely with warm marinara for dipping. The combination feels special without requiring advanced skills.
Equipment
- Large saucepan
- Mixing bowls
- Deep skillet
Ingredients
- 1 cup Arborio rice
- 4 cups chicken broth
- 1 small onion, finely chopped
- 2 tablespoons unsalted butter
- 1/2 cup grated Parmesan cheese
- 2 tablespoons truffle oil
- 2 large eggs
- 1 cup Italian breadcrumbs
- Vegetable oil for frying
- 1 1/2 cups marinara sauce
- Salt and black pepper
Instructions
- Cook the Arborio rice with the chicken broth, onion, and butter in a large saucepan until the rice is tender and creamy. Season with salt and pepper, then let the risotto cool to room temperature.
- Stir the grated Parmesan and truffle oil into the cooled rice until evenly combined. Beat the eggs in one bowl and place the breadcrumbs in another. Shape the rice mixture into 8 balls, dip each in egg, then roll in breadcrumbs to coat.
- Heat vegetable oil in a deep skillet to 350°F. Fry the arancini in batches until golden brown on all sides, about 3 to 4 minutes per batch. Drain on paper towels.
- Warm the marinara sauce in a small saucepan. Serve the hot arancini with the sauce on the side for dipping.
Notes
Cuisine: Italian
Equipment: Large saucepan, Mixing bowls, Deep skillet
Harissa Roasted Cauliflower Skewers with Tahini
These skewers deliver roasted cauliflower with a spicy harissa coating that turns tender inside with crisp edges. The tahini drizzle adds a cool, nutty contrast that keeps each bite balanced. They fit well at adult Halloween gatherings where guests want something flavorful without being heavy.
The recipe stays simple yet stands out with its mix of heat and creaminess. It works as a make-ahead option that still feels fresh when served.


Equipment
- Baking sheet
- Mixing bowl
- Whisk
- Wooden skewers
Ingredients
- 1 large head cauliflower, cut into bite-sized florets
- 3 tablespoons harissa paste
- 2 tablespoons olive oil
- ½ teaspoon salt
- ¼ teaspoon black pepper
- 8 wooden skewers, soaked in water for 20 minutes
- ¼ cup tahini
- 2 tablespoons fresh lemon juice
- 3 tablespoons water
- 2 tablespoons chopped fresh parsley
- 1 tablespoon sesame seeds
Instructions
- Preheat the oven to 425°F and line a baking sheet with parchment paper.
- In a large bowl, toss the cauliflower florets with harissa paste, olive oil, salt, and black pepper until evenly coated.
- Thread the coated florets onto the soaked wooden skewers, leaving a small space between pieces for even roasting.
- Arrange the skewers on the prepared baking sheet in a single layer.
- Roast for 25 minutes, flipping the skewers halfway through, until the cauliflower is tender and the edges start to brown.
- While the skewers roast, whisk together tahini, lemon juice, and water in a small bowl until smooth and pourable.
- Remove the skewers from the oven and drizzle with the tahini sauce.
- Sprinkle with chopped parsley and sesame seeds before serving.
Notes
Cuisine: Mediterranean
Equipment: Baking sheet, Mixing bowl, Whisk, Wooden skewers
Mini Beef Empanadas with Chimichurri
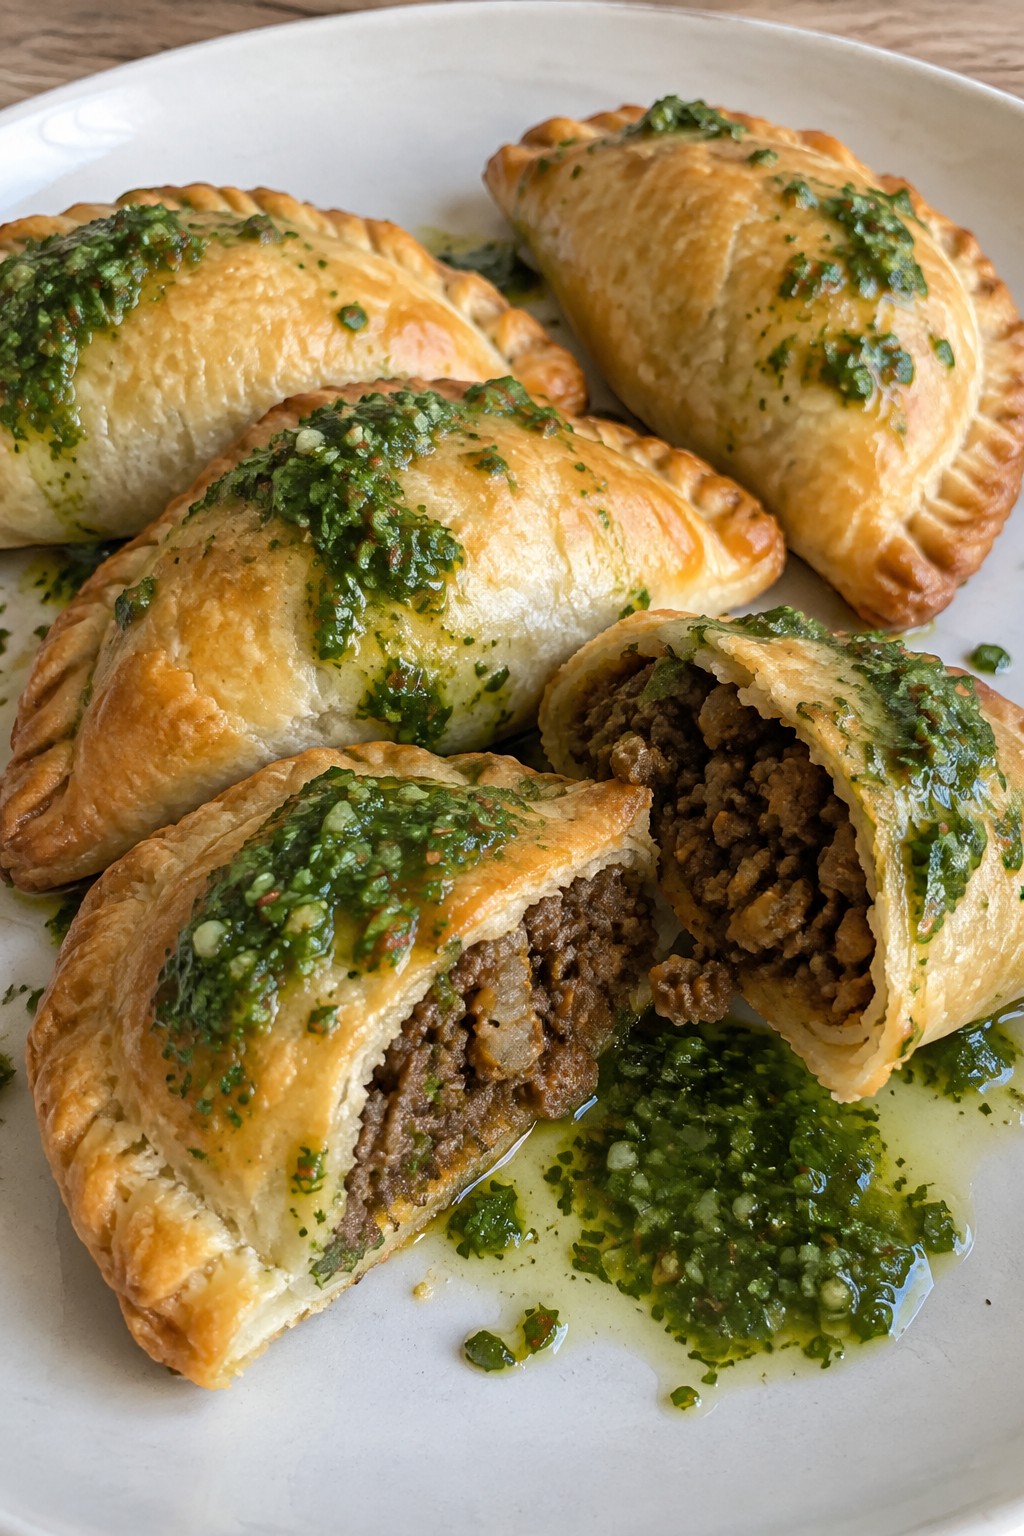
These mini beef empanadas deliver a savory bite that stands out at adult gatherings. Spiced ground beef fills flaky pastry, and a fresh chimichurri adds bright herbs and a touch of heat. The result is a handheld appetizer with balanced flavor and texture.
They suit Halloween parties where guests want something more interesting than basic snacks. The crispy edges and juicy filling make them easy to enjoy while mingling, and the sauce keeps each bite lively.
Equipment
- Skillet
- Baking Sheet
- Mixing Bowl
Ingredients
- 12 store-bought empanada wrappers
- 8 oz ground beef
- 1/2 onion, finely chopped
- 4 cloves garlic, minced (divided)
- 1 teaspoon ground cumin
- 1 teaspoon smoked paprika
- 1/4 teaspoon chili powder
- Salt and black pepper to taste
- 1 cup fresh parsley, chopped
- 1/4 cup olive oil
- 2 tablespoons red wine vinegar
- 1/2 teaspoon red pepper flakes
- 1 egg, beaten
Instructions
- Preheat the oven to 400°F and line a baking sheet with parchment paper. Heat a skillet over medium heat and cook the onion with 2 cloves of minced garlic until softened.
- Add the ground beef, cumin, smoked paprika, chili powder, salt, and pepper. Cook until the beef is browned and no longer pink, then remove from heat and let cool slightly.
- Place a spoonful of the beef mixture in the center of each empanada wrapper. Fold the wrapper over and crimp the edges to seal. Brush the tops with the beaten egg.
- Arrange the empanadas on the baking sheet and bake for 15 to 18 minutes until golden and crisp.
- While the empanadas bake, combine the parsley, remaining 2 cloves of minced garlic, olive oil, red wine vinegar, and red pepper flakes in a bowl. Stir well and set aside.
- Serve the warm empanadas with the chimichurri on the side for dipping.
Notes
Cuisine: Argentine
Equipment: Skillet, Baking Sheet, Mixing Bowl
Crispy Brussels Sprouts with Bacon and Maple
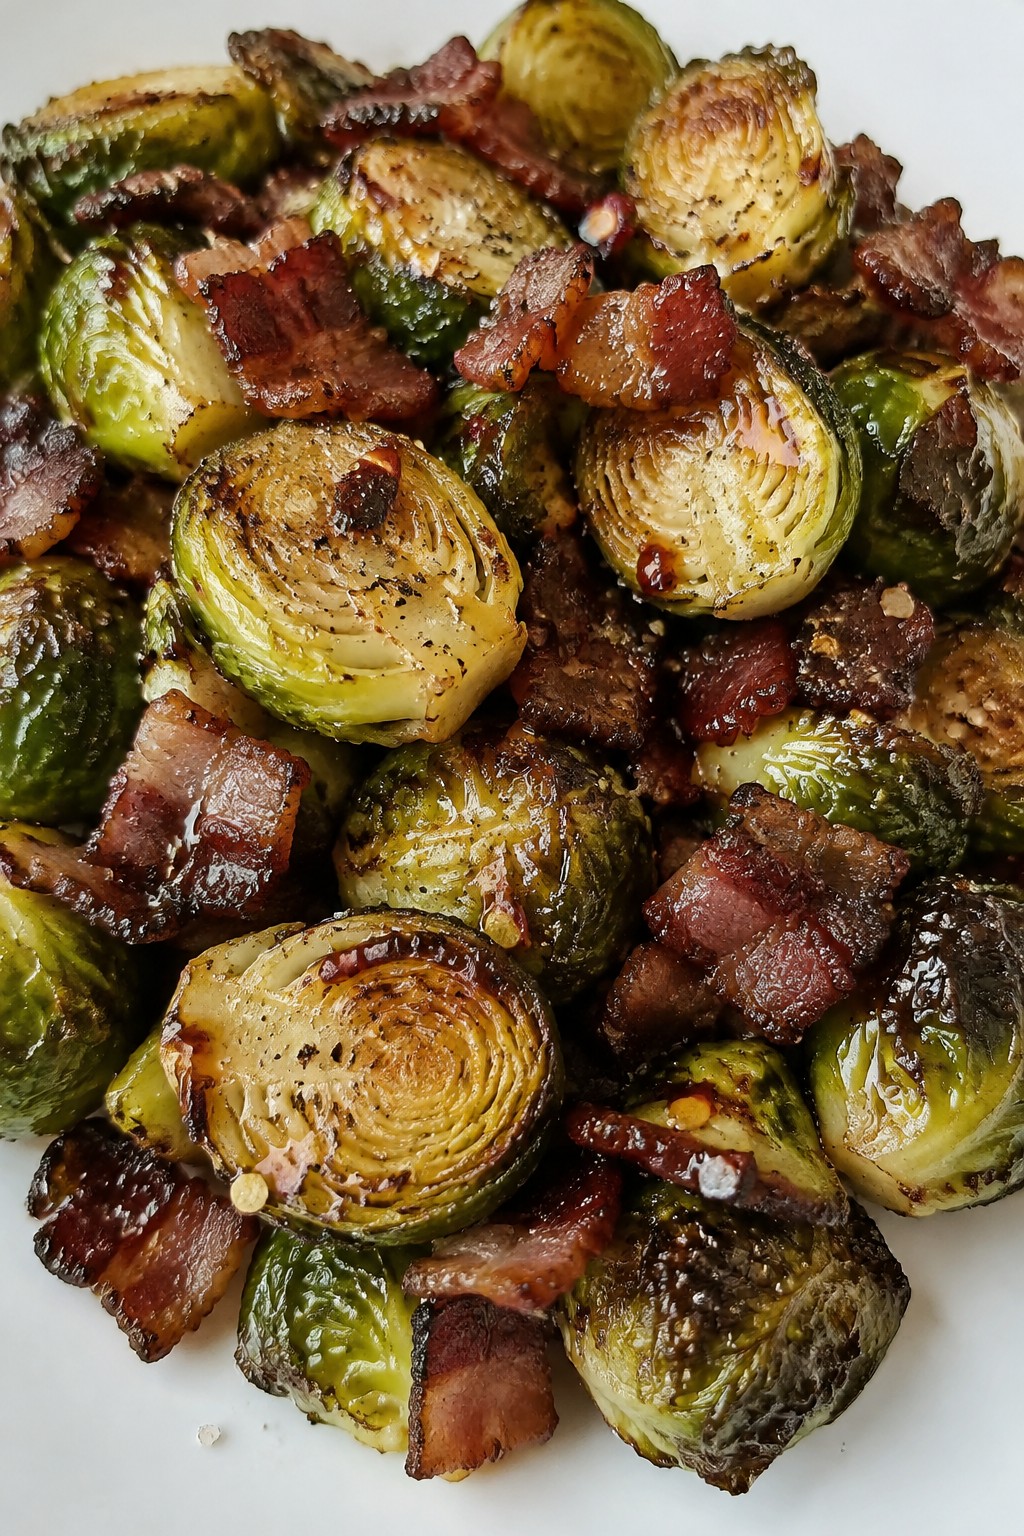
This recipe brings together roasted Brussels sprouts, smoky bacon, and a maple drizzle for a warm bite that stands out at any fall gathering. The contrast of crisp edges and tender centers with salty and sweet notes makes it a solid choice for adult Halloween parties where guests want something more than basic snacks.
It works well as a shared platter when people are mingling. The flavors stay balanced without being too heavy, and the dish holds up if it sits out for a short while.
Equipment
- Baking sheet
- Mixing bowl
- Oven
Ingredients
- 1 pound Brussels sprouts, trimmed and halved
- 6 slices bacon, diced
- 2 tablespoons olive oil
- 3 tablespoons pure maple syrup
- 1/2 teaspoon salt
- 1/4 teaspoon black pepper
- 1/4 teaspoon chili flakes
Instructions
- Preheat the oven to 425 degrees F. Line a baking sheet with parchment paper.
- Place the halved Brussels sprouts in a mixing bowl. Add the olive oil, salt, black pepper, and chili flakes. Toss until the sprouts are evenly coated.
- Spread the Brussels sprouts in a single layer on the prepared baking sheet. Scatter the diced bacon over and around them.
- Roast for 20 to 25 minutes, stirring once halfway through, until the sprouts are browned and crisp at the edges and the bacon is cooked.
- Remove the pan from the oven. Drizzle the maple syrup over the hot sprouts and bacon. Toss gently to coat.
Notes
Cuisine: American
Equipment: Baking sheet, Mixing bowl, Oven
Grilled Halloumi with Hot Honey and Pistachios
This appetizer brings together salty, squeaky halloumi with a sweet and spicy honey drizzle and crunchy pistachios. It works well for adult Halloween gatherings because it feels a bit different from typical party snacks while still being easy to eat with a toothpick or small plate.
The finished dish has a warm, melty center, crisp edges from the grill, and a nice contrast between the heat of the honey and the nutty topping. It comes together quickly once the pan is hot.


Equipment
- Grill pan
- Tongs
- Small bowl
Ingredients
- 8 ounces halloumi cheese, sliced into ½-inch thick pieces
- 2 tablespoons olive oil
- ¼ cup hot honey
- ¼ cup shelled pistachios, roughly chopped
Instructions
- Pat the halloumi slices dry with a paper towel and brush both sides lightly with olive oil.
- Heat a grill pan or skillet over medium-high heat until very hot.
- Place the halloumi slices in the pan and cook for 2 to 3 minutes per side until golden brown with clear grill marks.
- Transfer the grilled halloumi to a serving plate.
- Drizzle the hot honey evenly over the slices.
- Sprinkle the chopped pistachios on top and serve right away.
Notes
Cuisine: Mediterranean
Equipment: Grill pan, Tongs, Small bowl
Smoked Duck Breast Canapés with Cherry Mostarda
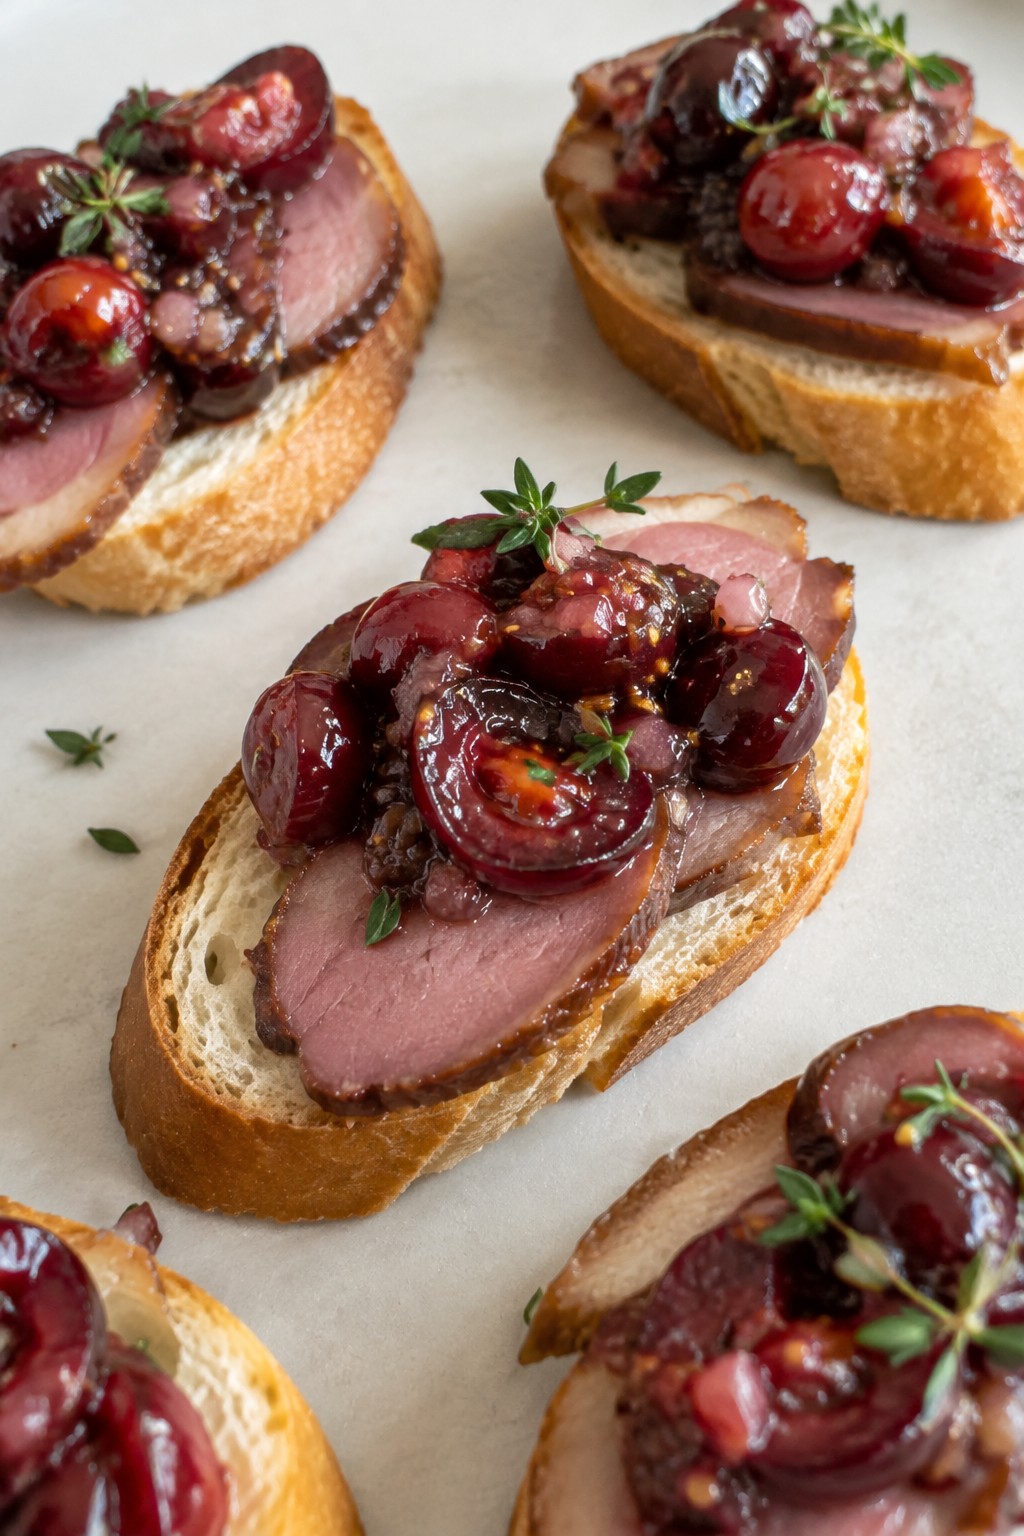
This canapé pairs tender slices of smoked duck with a sweet-tangy cherry mostarda that cuts through the richness. The result is a balanced bite with smoky, savory, and bright notes that feels special without much fuss. It works well for Halloween gatherings when guests want something flavorful yet easy to eat by hand.
The crisp bread base holds up to the juicy topping, while the mostarda adds a glossy finish and gentle heat from the mustard. It suits adult palates looking for depth rather than heavy or fried options.

Equipment
- Baking Sheet
- Small Saucepan
- Sharp Knife
Ingredients
- 8 ounces smoked duck breast
- 1 baguette, cut into 12 slices
- 1 cup fresh cherries, pitted and halved
- 1 shallot, finely chopped
- 1/4 cup granulated sugar
- 2 tablespoons red wine vinegar
- 2 tablespoons Dijon mustard
- Fresh thyme leaves, for garnish
Instructions
- Preheat the oven to 375°F. Arrange the baguette slices on a baking sheet and toast for 8 to 10 minutes until lightly golden and crisp.
- While the bread toasts, place the shallot, cherries, sugar, and red wine vinegar in a small saucepan. Bring to a simmer over medium heat and cook for 6 to 8 minutes until the cherries soften and the liquid thickens slightly.
- Remove the saucepan from the heat and stir in the Dijon mustard until fully combined. Set the mostarda aside to cool for a few minutes.
- Slice the smoked duck breast thinly against the grain into 12 pieces.
- Top each toasted baguette slice with one piece of duck, then add a small spoonful of cherry mostarda. Finish with a few fresh thyme leaves.
Notes
Cuisine: French
Equipment: Baking Sheet, Small Saucepan, Sharp Knife
Caramelized Onion and Gruyère Tartlets
These tartlets pair slow-cooked onions with nutty Gruyère inside a flaky pastry shell. They offer a savory option that stands out at adult gatherings where guests want something more than basic finger food.
The onions turn soft and sweet while the cheese melts into a creamy layer on top. This combination works well as a starter for Halloween parties or any evening when you want bites that feel a little special without much fuss.


Equipment
- Large Skillet
- Baking Sheet
- Knife
Ingredients
- 1 sheet puff pastry, thawed
- 4 large yellow onions, thinly sliced
- 3 tablespoons unsalted butter
- 1 tablespoon olive oil
- 1 teaspoon fresh thyme leaves
- 1 cup shredded Gruyère cheese
- 1 egg, beaten
- Salt and black pepper to taste
Instructions
- Heat the butter and olive oil in a large skillet over medium heat until the butter melts.
- Add the sliced onions and a pinch of salt. Cook, stirring often, for 25 to 30 minutes until the onions turn deep golden and soft.
- Stir in the thyme leaves and black pepper. Remove the skillet from the heat and let the onion mixture cool for 5 minutes.
- Heat the oven to 400°F and line a baking sheet with parchment paper.
- Roll out the puff pastry sheet on a lightly floured surface and cut it into 12 small rounds or squares.
- Place the pastry pieces on the baking sheet. Spoon a small amount of the caramelized onions onto each piece, leaving a border around the edges.
- Top each tartlet with a sprinkle of Gruyère cheese. Brush the exposed pastry edges with the beaten egg.
- Bake for 15 to 18 minutes until the pastry is golden and the cheese has melted and bubbled.
Notes
Cuisine: French
Equipment: Large Skillet, Baking Sheet, Knife
