

Planning a kids Halloween party often means finding food that looks fun without taking too much time.
These ideas focus on simple recipes that use basic ingredients and clear steps.
Most can be made ahead so you are not rushed on the day.
You will find options for snacks, treats, and a few savory bites that children usually like.
Pick the ones that fit your party size and what you already have on hand.
Helpful Tips Before You Start
These tips will help the food stay fun and easy for young guests.
Involve the Kids Early
Let them pick shapes with cookie cutters or add simple toppings. This builds excitement and keeps them engaged.
Ask About Allergies First
Check with parents for common issues like nuts or dairy before shopping. Prepare one or two backup options that fit most needs.
Choose Bite Sized Portions
Small pieces work better for little hands and reduce mess at the table. Aim for items that need no utensils.
Prep Components Ahead
Make doughs, fillings, or cut vegetables the day before. Save assembly for the morning of the party.
Stick to Mild Flavors
Skip very spicy or sour items that might not appeal to all ages. Focus on sweet and savory options most kids already enjoy.
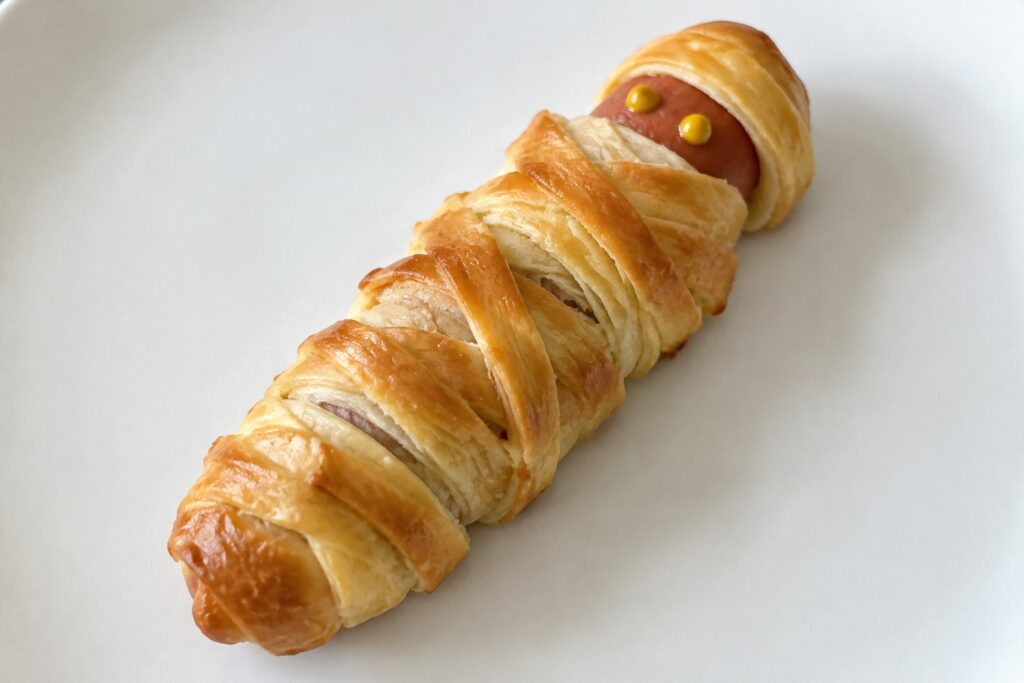
Mummy Hot Dogs in Crescent Rolls
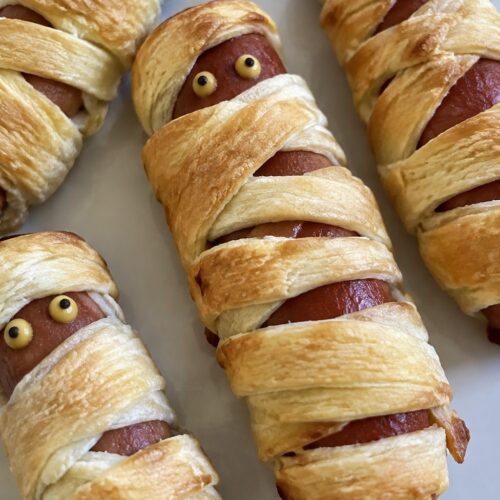
These mummy hot dogs wrapped in crescent rolls bring a simple Halloween touch to kids parties. The wrapped shape makes them easy to pick up, and they pair well with other finger foods on the table.
The flaky dough bakes up light and golden around the hot dog, giving a crisp outside and juicy bite inside. They suit casual gatherings where you need something quick that still feels themed.

Equipment
- Baking sheet
- Parchment paper
- Knife
Ingredients
- 4 all-beef hot dogs
- 1 can (8 oz) refrigerated crescent roll dough
- 1 teaspoon yellow mustard
Instructions
- Preheat the oven to 375 degrees F and line a baking sheet with parchment paper.
- Unroll the crescent roll dough on a clean surface and cut it into thin strips about half an inch wide.
- Wrap the strips around each hot dog in an overlapping pattern, leaving a small section near one end uncovered for the face.
- Set the wrapped hot dogs on the baking sheet and bake for 12 to 15 minutes until the dough turns golden brown.
- Remove from the oven and let cool for a few minutes. Dab small dots of mustard on the uncovered section of each hot dog to form eyes.
Notes
Cuisine: American
Equipment: Baking sheet, Parchment paper, Knife
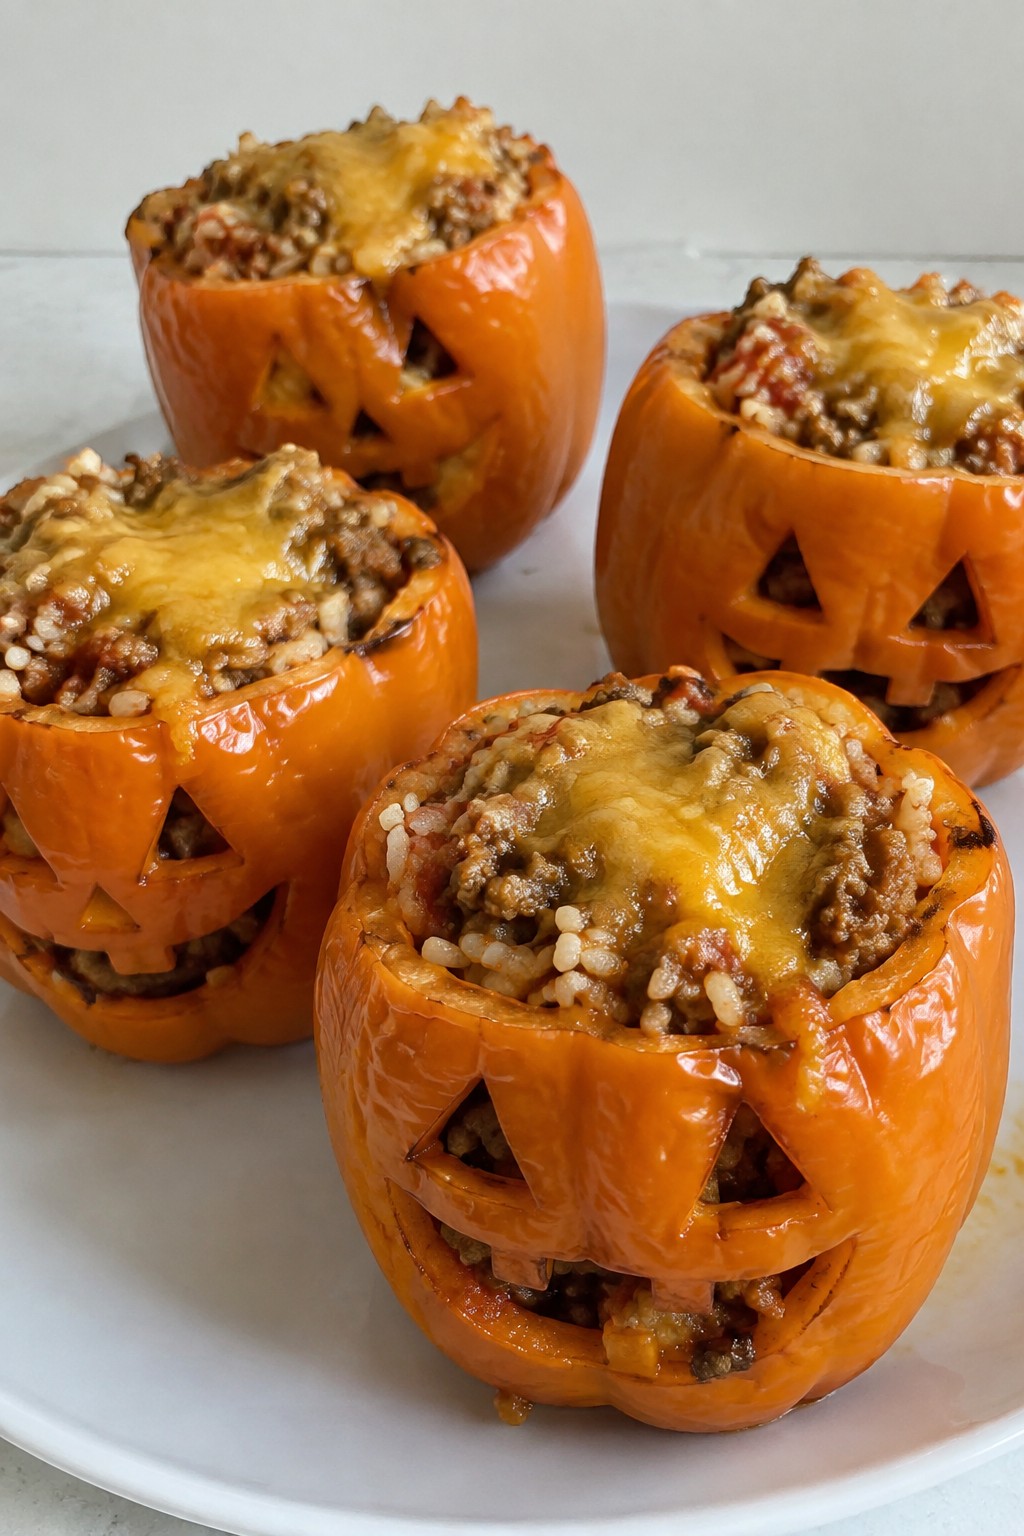
Jack-o’-Lantern Stuffed Bell Peppers
These stuffed peppers bring a playful Halloween touch to kids’ parties. Orange bell peppers get carved with simple faces before filling, turning dinner into a festive activity that still tastes like a cozy meal. The mix of ground turkey, rice, and cheese stays mild and familiar so children enjoy it without hesitation.
This recipe works well as a main dish at an afternoon party or early dinner. The peppers soften just enough during baking while the filling stays hearty with a light tomato flavor and melted cheese throughout.

Equipment
- Baking dish
- Large skillet
- Knife
Ingredients
- 4 large orange bell peppers
- 1 pound ground turkey
- 1 small onion, diced
- 2 cloves garlic, minced
- 1 cup cooked white rice
- 1 cup shredded cheddar cheese
- 1/2 cup tomato sauce
- 1 teaspoon salt
- 1/2 teaspoon black pepper
Instructions
- Preheat the oven to 375 degrees. Cut the tops off each bell pepper and set them aside. Use a small knife to carve simple jack-o’-lantern faces into the sides of the peppers. Remove the seeds and membranes from inside.
- Place a large skillet over medium heat. Add the ground turkey, diced onion, and minced garlic. Cook until the turkey is browned and the onion softens, breaking up the meat as it cooks.
- Stir in the cooked white rice, tomato sauce, salt, and black pepper. Cook for 2 minutes until everything is heated through. Remove the skillet from the heat and mix in half of the shredded cheddar cheese.
- Stand the carved peppers upright in a baking dish. Spoon the turkey mixture evenly into each pepper. Place the reserved tops back on if desired.
- Bake for 25 minutes. Remove the dish from the oven, sprinkle the remaining cheese over the tops of the peppers, and return to the oven for 5 more minutes until the cheese melts.
Notes
Cuisine: American
Equipment: Baking dish, Large skillet, Knife
Ghostly Banana Pops with White Chocolate
These banana pops give kids a fun way to enjoy fruit at a Halloween party. The white chocolate coating turns each banana into a simple ghost shape that feels playful without much effort. They offer a cool, creamy bite with a sweet shell that holds up well on a party table.
The recipe works best when you need a quick treat that travels easily and appeals to younger guests. The flavor stays mild and familiar, with the banana’s natural sweetness balanced by the smooth white chocolate.


Equipment
- Baking Sheet
- Parchment Paper
- Microwave-Safe Bowl
- Popsicle Sticks
Ingredients
- 4 medium bananas
- 8 ounces white chocolate chips
- 4 popsicle sticks
- 2 tablespoons mini chocolate chips
Instructions
- Peel the bananas and insert one popsicle stick into the cut end of each banana, pushing it about halfway up.
- Line a baking sheet with parchment paper and set it aside.
- Place the white chocolate chips in a microwave-safe bowl and heat in 30-second bursts, stirring after each burst, until fully melted and smooth.
- Dip each banana into the melted white chocolate, turning to coat all sides and leaving a small section near the stick uncovered.
- Place the coated bananas on the prepared baking sheet.
- Immediately press two mini chocolate chips into the white chocolate on each banana to form eyes.
Notes
Cuisine: American
Equipment: Baking Sheet, Parchment Paper, Microwave-Safe Bowl, Popsicle Sticks
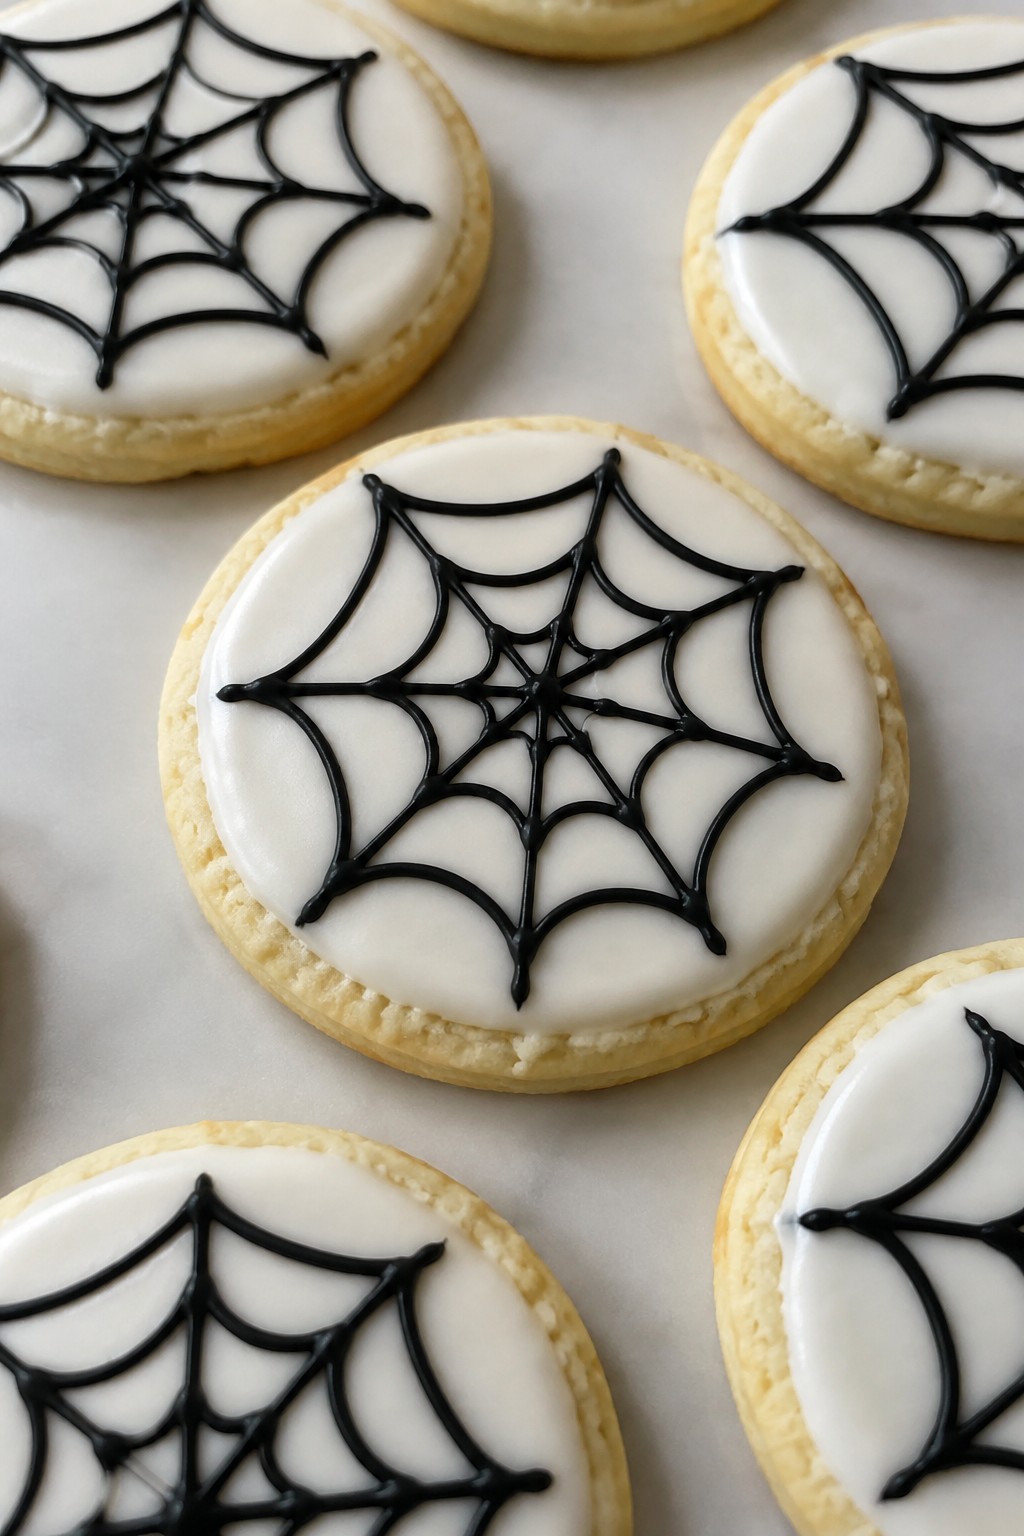
Spiderweb Sugar Cookies with Icing
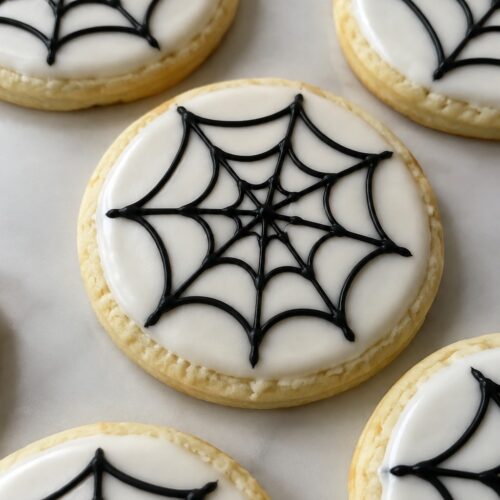
These spiderweb sugar cookies add a playful touch to any kids’ Halloween party spread. The round shape and simple icing design make them easy for little hands to grab. Each bite gives a buttery crunch that softens under sweet vanilla icing.
They suit make-ahead prep for busy party days. The cookies stay crisp while the icing sets firm enough for stacking or travel. The flavor stays mild and crowd-pleasing without strong spices.
Equipment
- Mixing Bowl
- Baking Sheet
- Wire Rack
- Piping Bag
Ingredients
- 1 cup all-purpose flour
- 1/2 cup unsalted butter, softened
- 1/4 cup granulated sugar
- 1 large egg yolk
- 1 teaspoon vanilla extract
- 1 1/2 cups powdered sugar
- 3 tablespoons milk
- Black gel food coloring
Instructions
- Heat the oven to 350 degrees and line a baking sheet with parchment paper.
- Beat the softened butter and granulated sugar in a bowl until light and creamy.
- Mix in the egg yolk and vanilla extract until fully combined.
- Stir in the flour until a soft dough forms.
- Roll the dough to 1/4-inch thickness on a lightly floured surface and cut into 3-inch circles.
- Place the circles on the baking sheet and bake for 10 to 12 minutes until the edges turn lightly golden.
- Cool the cookies completely on a wire rack.
- Stir the powdered sugar and milk together in a bowl until smooth to create the base icing.
- Spread a thin layer of white icing over each cooled cookie and let it set for a few minutes.
- Place 2 tablespoons of the remaining icing in a small bowl and stir in black gel food coloring until dark.
- Pipe thin black lines in a web pattern over the white icing on each cookie.
Notes
Cuisine: American
Equipment: Mixing Bowl, Baking Sheet, Wire Rack, Piping Bag
Monster Mash Guacamole Cups
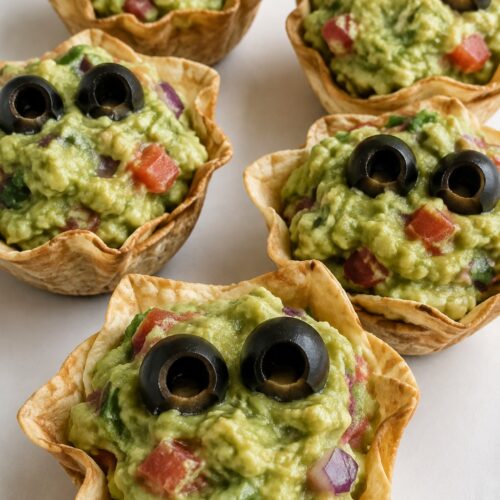
These Monster Mash Guacamole Cups turn classic guacamole into a playful Halloween snack that kids can grab and eat at parties. The creamy texture pairs with mild flavors that appeal to young guests while the green mash gives it a fun monster look. They work well as a make-ahead option that holds up during a busy event.

Equipment
- Mixing Bowl
- Fork
- Knife
- Cutting Board
Ingredients
- 4 ripe avocados
- 2 tablespoons lime juice
- 1/2 teaspoon salt
- 1/4 cup diced tomatoes
- 2 tablespoons finely chopped red onion
- 8 black olives, halved
Instructions
- Cut the avocados in half, remove the pits, and scoop the flesh into a mixing bowl.
- Add the lime juice and salt to the bowl, then mash the avocados with a fork until mostly smooth with a few small chunks remaining.
- Stir the diced tomatoes and red onion into the mashed avocado mixture until evenly combined.
- Spoon the guacamole into four small serving cups, filling each about three-quarters full.
- Top each cup with two halved black olives arranged as eyes to create the monster faces.
Notes
Cuisine: American
Equipment: Mixing Bowl, Fork, Knife, Cutting Board
Witch’s Broomstick Pretzel Snacks
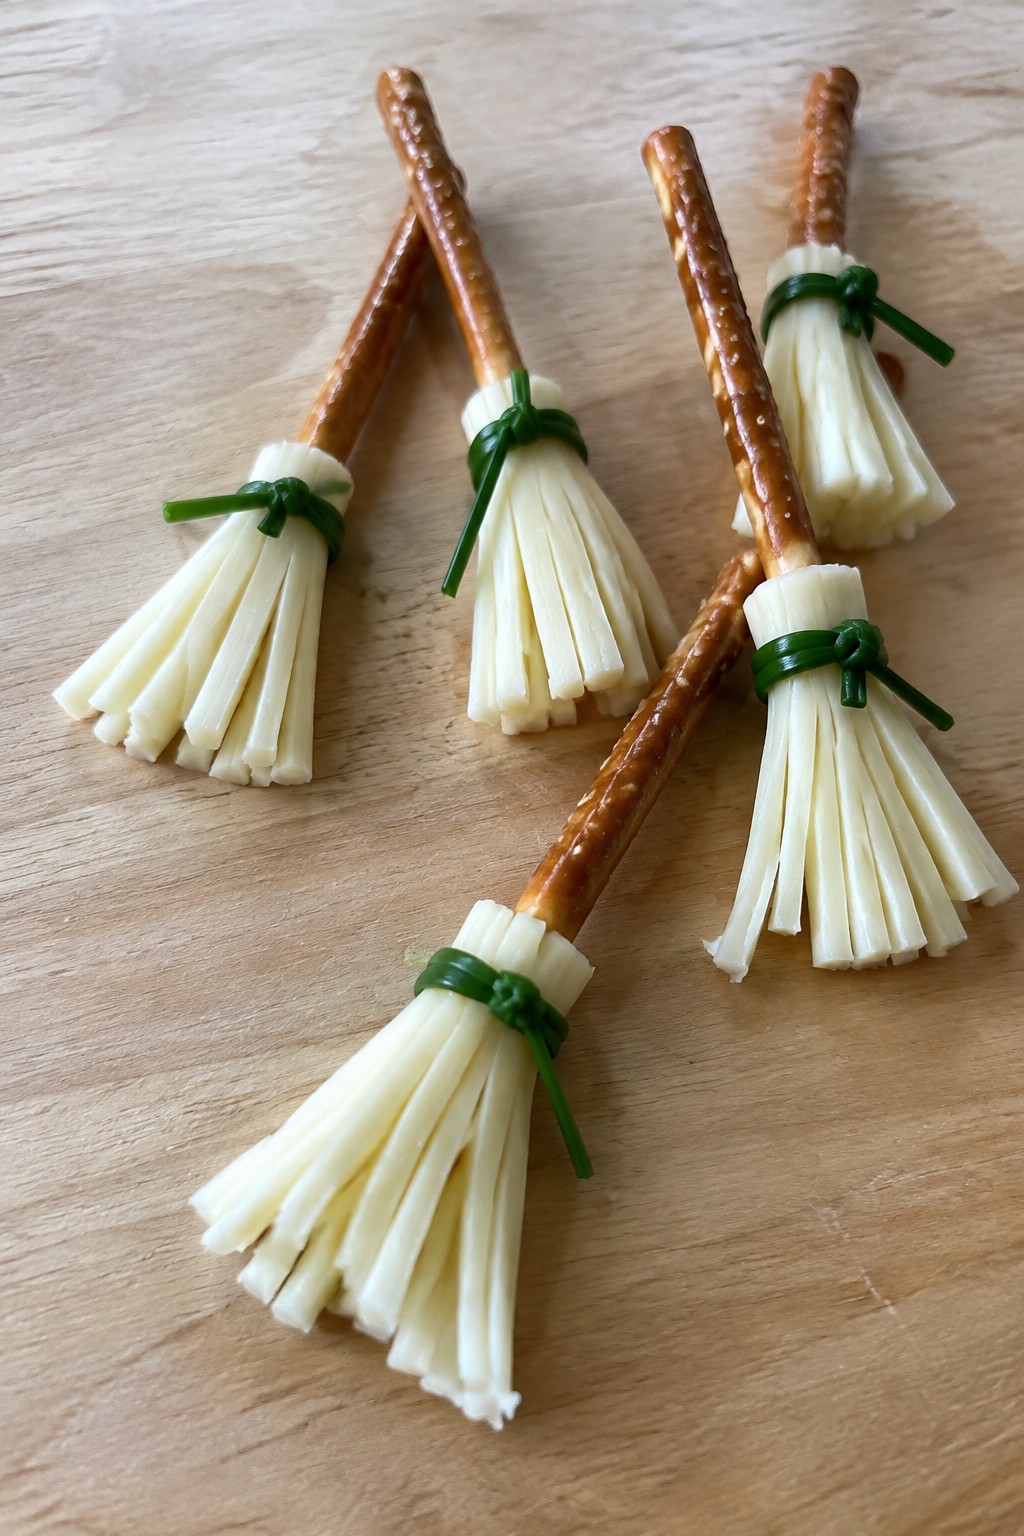
These snacks turn simple ingredients into playful broomsticks that fit right into a kids’ Halloween party spread. They require no baking and come together quickly, making them a practical choice when you need something fun without much fuss. The result is a crunchy pretzel base paired with mild, chewy cheese and a fresh herb tie.
They work well as a savory bite alongside sweeter treats on the table. Kids enjoy the broom shape, and the combination stays light enough that it does not overpower other party food.

Equipment
- Cutting board
- Sharp knife
Ingredients
- 12 pretzel rods
- 4 mozzarella string cheese sticks
- 12 fresh chives
Instructions
- Lay each string cheese stick on a cutting board and slice it lengthwise into thin strips, stopping about half an inch from one end so the strips stay attached at the top.
- Push the uncut end of each string cheese stick onto one end of a pretzel rod to form the broom head.
- Wrap one chive around the base of the cheese strips where they meet the pretzel and tie it gently to secure the shape.
- Repeat with the remaining ingredients until all twelve broomsticks are assembled.
- Arrange the finished broomsticks on a serving plate.
Notes
Cuisine: American
Equipment: Cutting board, Sharp knife
Pumpkin Patch Brownie Bites
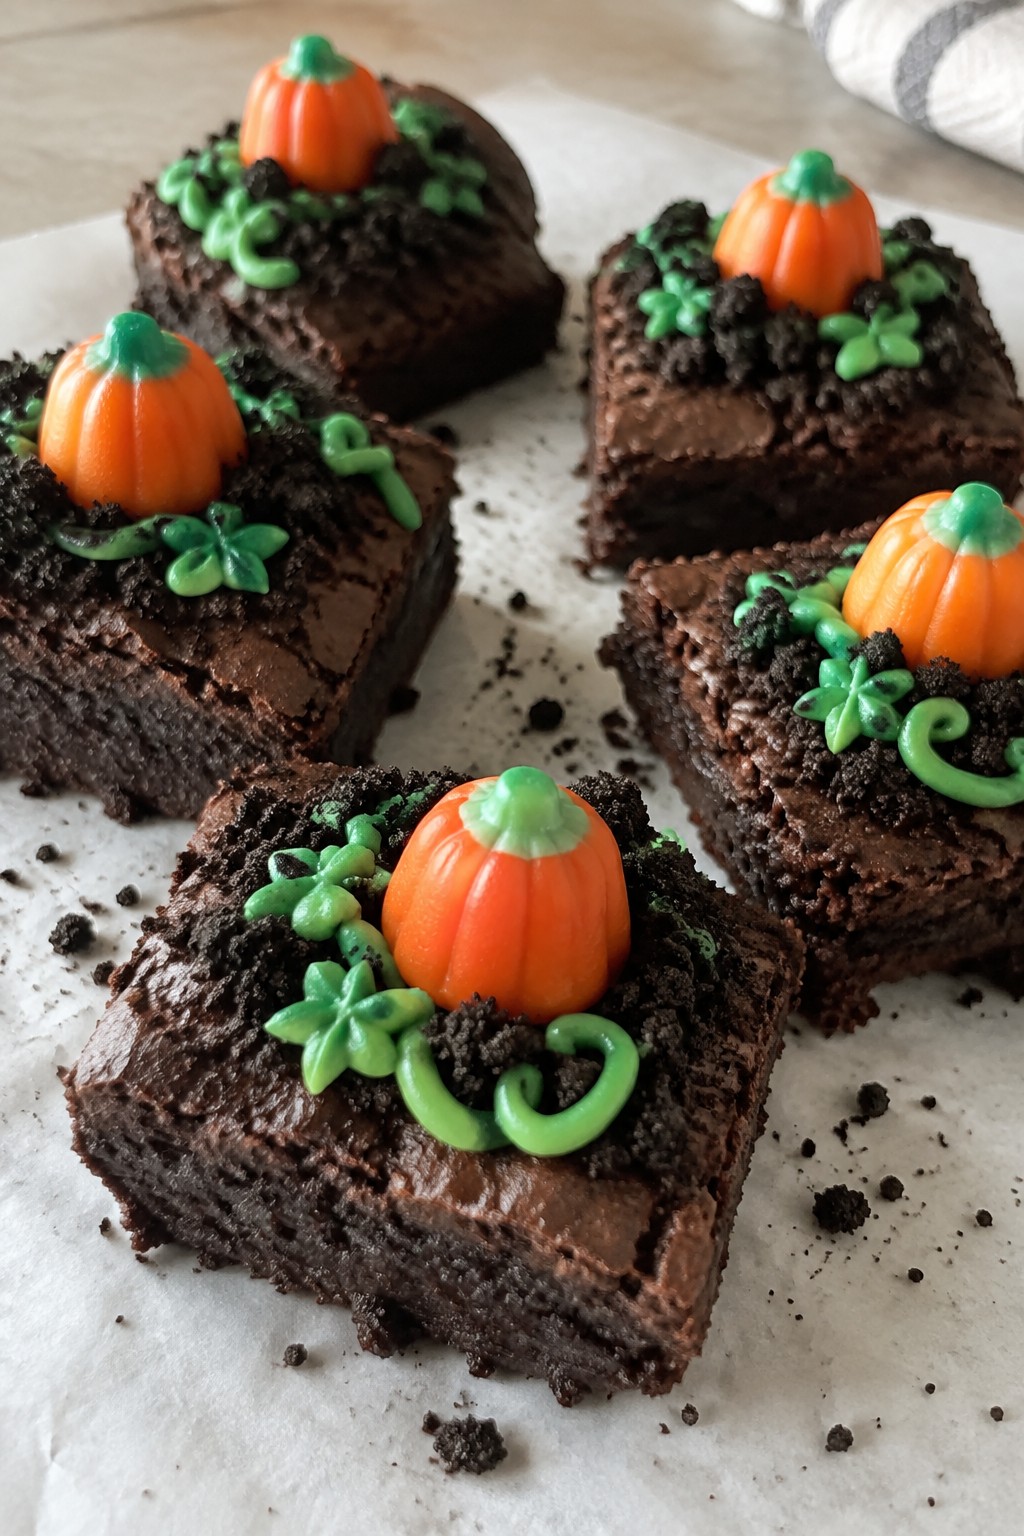
These brownie bites turn a simple chocolate treat into a playful Halloween scene. Kids enjoy spotting the little candy pumpkins sitting on top like they are growing in a patch, which makes them a hit at parties.
The base stays fudgy and rich while the cookie crumbs add a light crunch that mimics garden soil. The green frosting ties everything together without overpowering the chocolate flavor.

Equipment
- Mixing bowl
- Mini muffin pan
- Oven
Ingredients
- 1 (18 oz) box brownie mix
- 2 large eggs
- 1/4 cup vegetable oil
- 2 tablespoons water
- 1 cup chocolate cookie crumbs
- 1/2 cup green frosting
- 12 small candy pumpkins
Instructions
- Preheat the oven to 350°F and grease a mini muffin pan. In a mixing bowl, combine the brownie mix, eggs, vegetable oil, and water until smooth.
- Spoon the batter into the prepared mini muffin cups, filling each about two-thirds full. Bake for 12 to 15 minutes until a toothpick comes out with a few moist crumbs.
- Let the brownie bites cool completely in the pan before removing them. This keeps them from crumbling when you add toppings.
- Spread a thin layer of green frosting on top of each cooled bite. Sprinkle chocolate cookie crumbs over the frosting to create the soil effect.
- Press one candy pumpkin gently into the center of each frosted and crumb-topped bite.
Notes
Cuisine: American
Equipment: Mixing bowl, Mini muffin pan, Oven
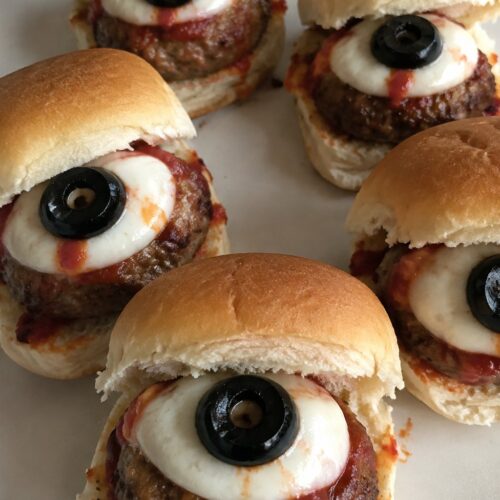
Creepy Eyeball Meatball Sliders
These sliders turn plain meatballs into fun eyeball shapes that catch kids attention at Halloween parties. They fit well for small gatherings where children want something savory they can hold easily.
The meatballs come out tender with mild seasoning, while the cheese softens and the olive adds a slight brininess. Soft buns and a bit of sauce keep the bites balanced without strong flavors that might put off young eaters.

Equipment
- Mixing bowl
- Baking sheet
- Small skillet
Ingredients
- 1 pound ground beef
- 1/2 cup breadcrumbs
- 1 large egg
- 1 teaspoon garlic powder
- 1/2 teaspoon salt
- 1/4 teaspoon black pepper
- 1 cup marinara sauce
- 8 ounces fresh mozzarella, cut into 8 rounds
- 8 pitted black olives, halved
- 8 slider buns
Instructions
- Preheat the oven to 400 degrees F. Line a baking sheet with parchment paper.
- In a mixing bowl, combine the ground beef, breadcrumbs, egg, garlic powder, salt, and black pepper. Mix until the ingredients are evenly distributed.
- Form the mixture into 8 meatballs of equal size and place them on the prepared baking sheet.
- Bake the meatballs for 18 minutes until they are cooked through.
- While the meatballs bake, warm the marinara sauce in a small skillet over low heat.
- Remove the meatballs from the oven. Place one mozzarella round on each meatball and return the sheet to the oven for 2 minutes until the cheese softens.
- Press one olive half, cut side down, into the center of each mozzarella round to form the eyeball.
- Spread a spoonful of marinara sauce on the bottom half of each slider bun. Set one meatball on the sauce and add the top bun.
Notes
Cuisine: American
Equipment: Mixing bowl, Baking sheet, Small skillet
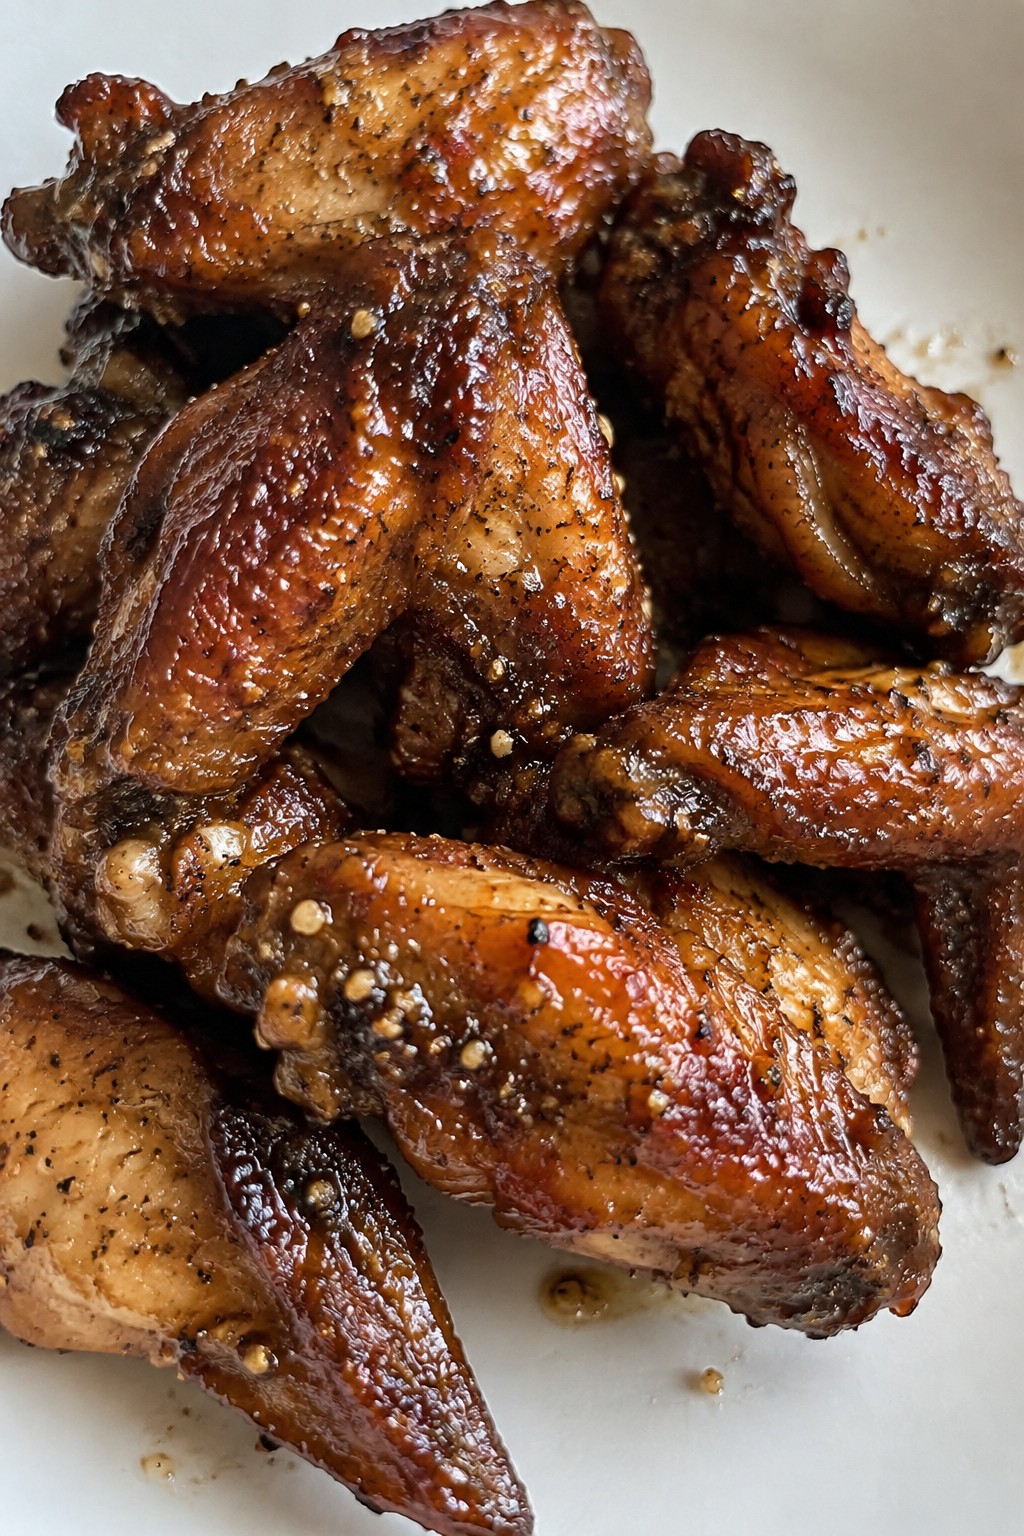
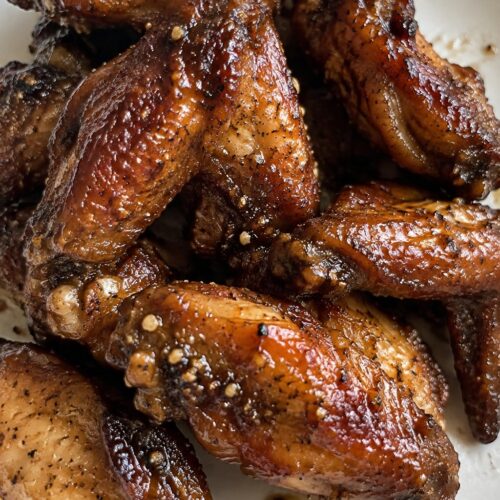
Bat Wing Chicken Wings with Honey Glaze
These chicken wings take on a playful Halloween look with a dark, sticky honey glaze that kids enjoy at parties. The sweet coating balances the savory seasoning, making them a hit with younger guests who prefer milder flavors.
The finished wings come out crispy with a glossy finish that holds up well on a buffet table. They pair nicely with simple sides and keep the focus on fun rather than heat.
Equipment
- Baking Sheet
- Mixing Bowl
- Tongs
Ingredients
- 2 pounds chicken wings
- 1/4 cup honey
- 2 tablespoons soy sauce
- 1 tablespoon olive oil
- 1 teaspoon garlic powder
- 1/2 teaspoon salt
- 1/2 teaspoon black pepper
Instructions
- Preheat the oven to 400 degrees F and line a baking sheet with parchment paper.
- Place the chicken wings in a large bowl and toss them with the olive oil, garlic powder, salt, and black pepper until evenly coated.
- Spread the wings in a single layer on the prepared baking sheet. Bake for 40 minutes, turning once halfway through, until the skin is golden and crisp.
- While the wings bake, stir together the honey and soy sauce in a small bowl to make the glaze.
- Remove the wings from the oven and transfer them to a clean large bowl. Pour the honey glaze over the wings and toss gently until each wing is coated.
- Return the wings to the baking sheet and bake for 5 more minutes to set the glaze. Serve warm.
Notes
Cuisine: American
Equipment: Baking Sheet, Mixing Bowl, Tongs
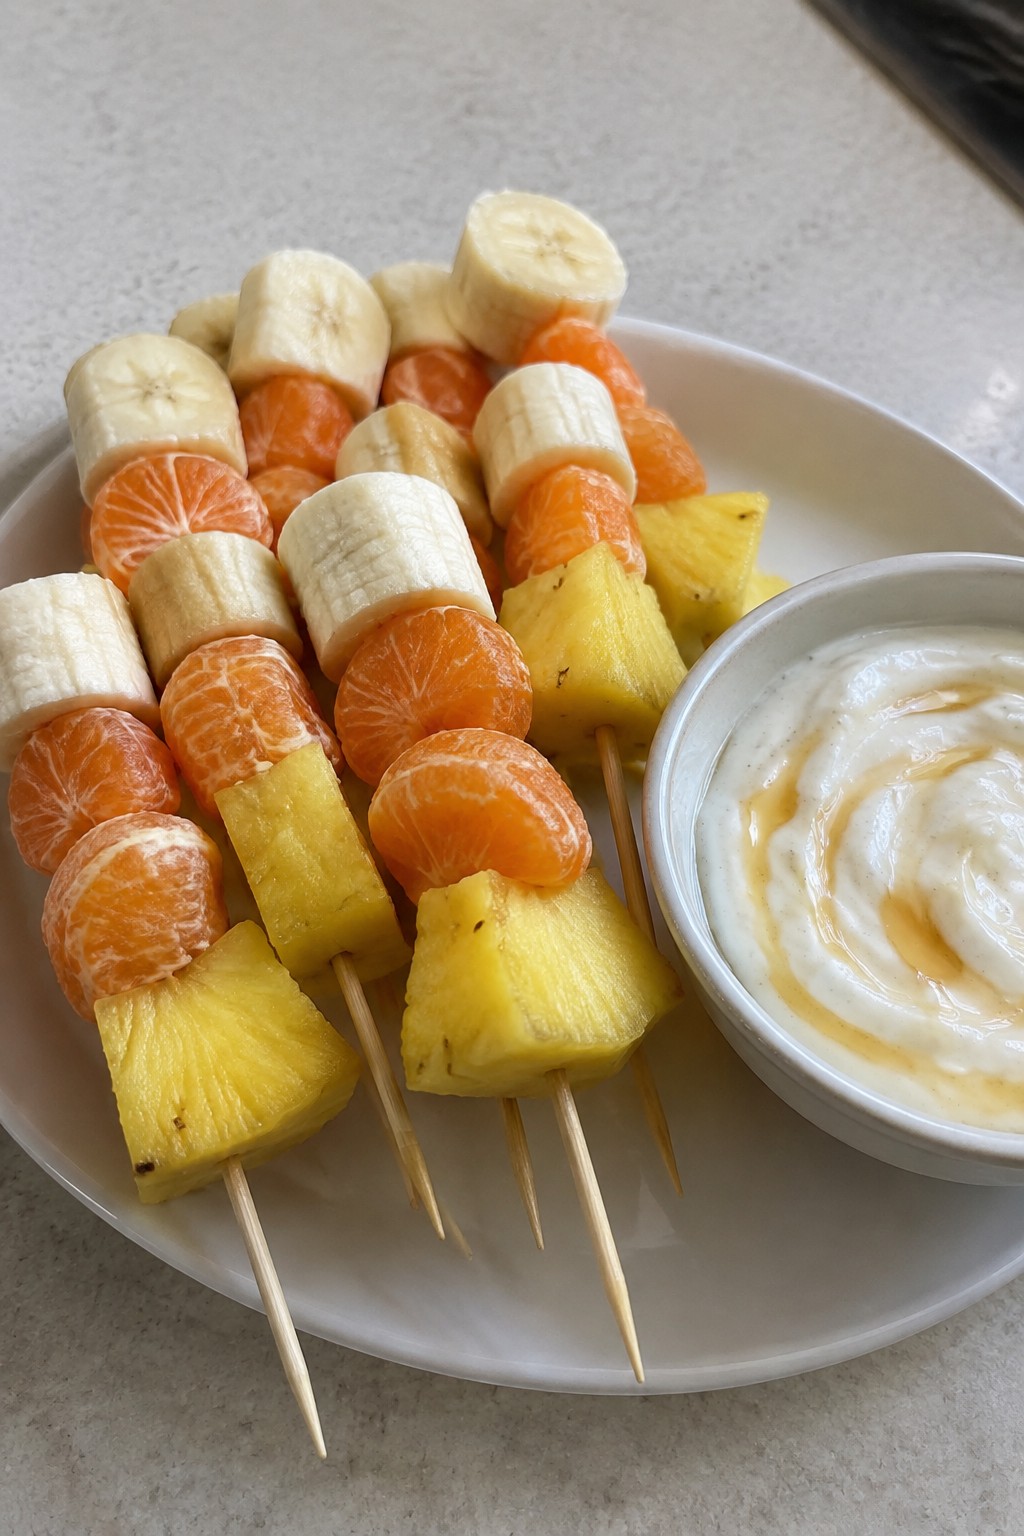
Candy Corn Fruit Skewers with Yogurt Dip
These skewers bring a bright, candy corn look to a kids’ party table without relying on actual candy. Fresh fruit provides natural sweetness and color that appeals to children while keeping the snack light and refreshing.
The creamy yogurt dip adds a cool, smooth contrast to the juicy pieces. It is simple to prepare ahead and lets kids dip their own skewers during the event.

Equipment
- Wooden skewers
- Mixing bowl
- Knife
Ingredients
- 2 cups fresh pineapple chunks
- 4 clementines, peeled and separated into segments
- 2 large bananas, cut into thick slices
- 1 cup plain Greek yogurt
- 2 tablespoons honey
- 1 teaspoon vanilla extract
- 8 wooden skewers
Instructions
- Place the Greek yogurt in a mixing bowl. Add the honey and vanilla extract, then stir until the mixture is smooth and evenly combined.
- Thread the skewers in this order: one pineapple chunk, one clementine segment, and one banana slice. Repeat the pattern once more on each skewer to create the candy corn color sequence.
- Arrange the finished skewers on a serving plate with the yogurt dip in a small bowl nearby so children can dip as they eat.
Notes
Cuisine: American
Equipment: Wooden skewers, Mixing bowl, Knife
Frankenstein Green Smoothie Popsicles
These popsicles hide spinach in a sweet blend that kids enjoy without noticing the greens. The bright green color fits the Frankenstein theme and makes them stand out at a kids’ party table. They offer a cool, creamy bite with banana and pineapple notes that balance the mild spinach taste.
This recipe serves 4 people.


Equipment
- Blender
- Popsicle molds
Ingredients
- 2 cups baby spinach
- 2 ripe bananas, peeled
- 1 cup vanilla Greek yogurt
- 1 cup milk
- 1/2 cup pineapple chunks
- 2 tablespoons honey
- 2 tablespoons mini chocolate chips
Instructions
- Add the baby spinach, bananas, vanilla Greek yogurt, milk, pineapple chunks, and honey to a blender.
- Blend on high speed until the mixture is completely smooth and no spinach pieces remain.
- Pour the blended mixture evenly into four popsicle molds.
- Insert a popsicle stick into each mold.
- Freeze for at least four hours until the popsicles are fully solid.
- Remove the popsicles from the molds and press mini chocolate chips into the top of each one to create a simple face.
Notes
Cuisine: American
Equipment: Blender, Popsicle molds
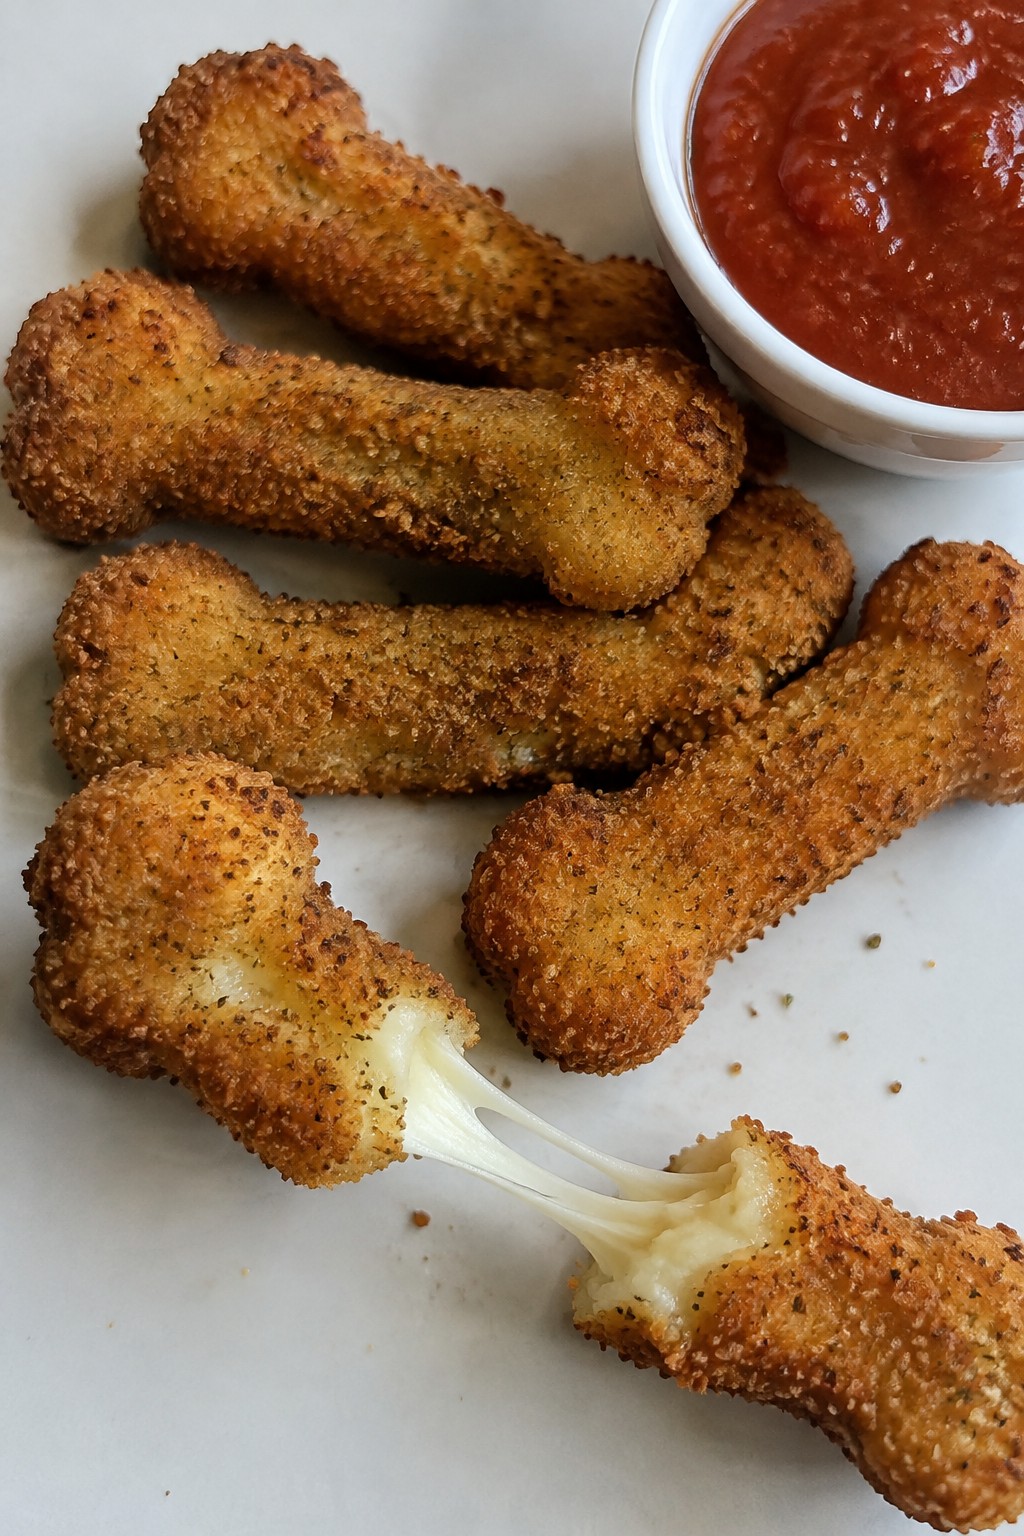
Skeleton Bone Cheese Sticks with Marinara
These cheese sticks give kids a simple spooky snack that fits right into a Halloween party spread. The long white sticks resemble bones, and the warm marinara adds a fun contrast that still tastes familiar. They come together quickly and hold up well on a buffet table without much fuss.
The breading turns crisp in the oven while the cheese stays soft inside. Kids enjoy the crunch followed by the stretchy cheese and tangy sauce.

Equipment
- Baking sheet
- 3 shallow bowls
- Oven
Ingredients
- 8 mozzarella string cheese sticks
- 1/2 cup all-purpose flour
- 2 large eggs, beaten
- 1 cup Italian seasoned breadcrumbs
- 1 teaspoon garlic powder
- Cooking spray
- 2 cups marinara sauce, warmed
Instructions
- Preheat the oven to 400 degrees and line a baking sheet with parchment paper.
- Place the flour in one shallow bowl, the beaten eggs in a second bowl, and mix the breadcrumbs with garlic powder in a third bowl.
- Coat each string cheese stick first in flour, then in egg, then in the breadcrumb mixture, pressing gently so the crumbs stick.
- Arrange the coated sticks on the prepared baking sheet and lightly spray the tops with cooking spray.
- Bake for 8 to 10 minutes until the coating turns golden and the cheese just begins to soften.
- Serve the sticks warm with the warmed marinara sauce on the side for dipping.
Notes
Cuisine: American
Equipment: Baking sheet, 3 shallow bowls, Oven
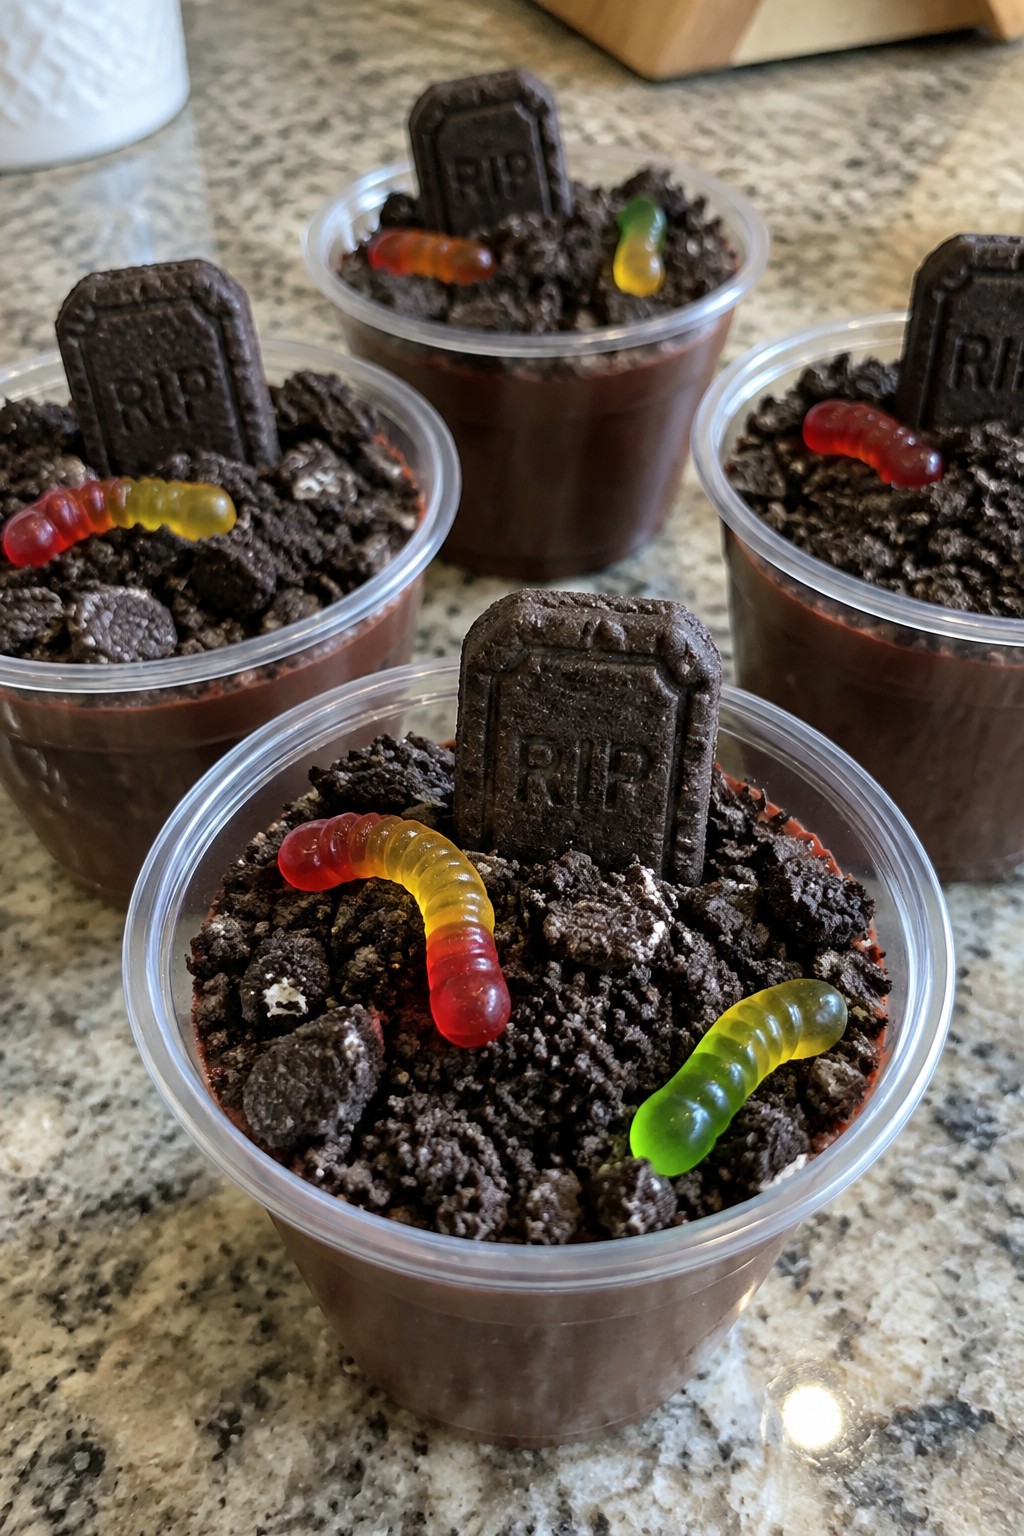
Haunted Graveyard Chocolate Pudding Cups
These pudding cups give kids a fun way to enjoy chocolate at a Halloween party. They work well for small gatherings since each serving comes in its own cup and needs no plates or forks. The creamy chocolate base pairs with a crunchy cookie topping that feels like fresh dirt over a graveyard.
The texture stays smooth under the cookie layer while the rectangular cookies stand up like simple headstones. A few gummy worms add a playful touch that children notice right away.

Equipment
- Mixing Bowl
- Whisk
- Serving Cups
- Rolling Pin
Ingredients
- 1 box (3.9 oz) instant chocolate pudding mix
- 2 cups cold milk
- 12 chocolate sandwich cookies
- 4 rectangular cookies
- Black writing gel
- 8 gummy worms
Instructions
- Pour the pudding mix and cold milk into a mixing bowl. Whisk for two minutes until the mixture thickens.
- Place the chocolate sandwich cookies in a zip-top bag and crush them with a rolling pin until they form fine crumbs.
- Spoon the pudding into four clear cups, filling each one almost to the top.
- Sprinkle the cookie crumbs evenly over the pudding in each cup to create the dirt layer.
- Use the black writing gel to write “RIP” on each rectangular cookie. Stand one cookie upright in the crumbs of each cup.
- Tuck two gummy worms into the crumbs on top of each cup so part of the worm shows.
Notes
Cuisine: American
Equipment: Mixing Bowl, Whisk, Serving Cups, Rolling Pin
