

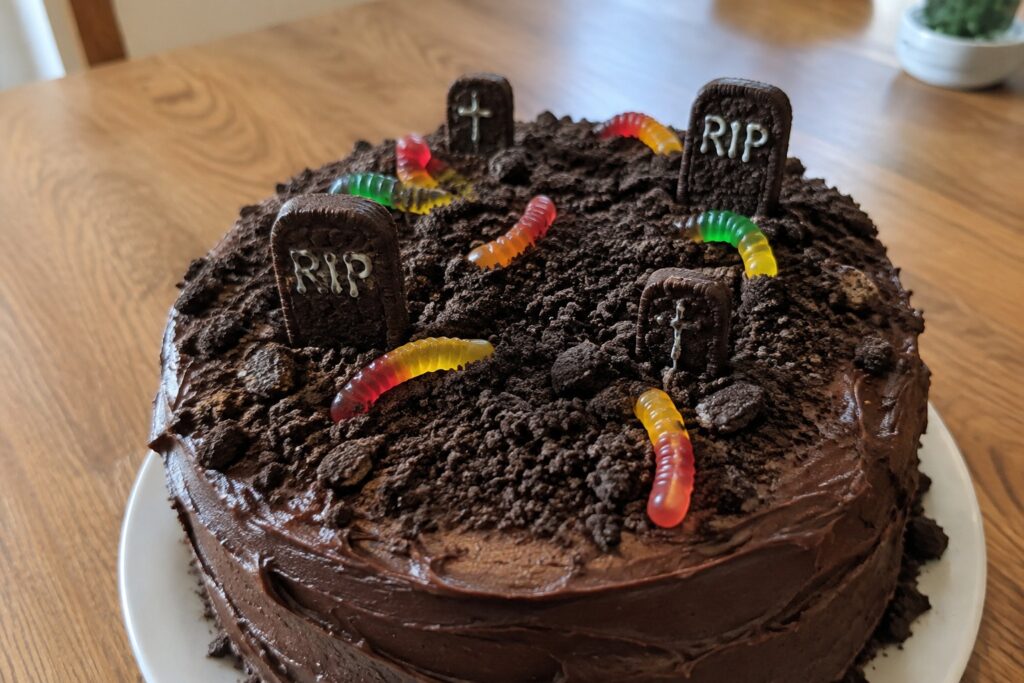
Halloween potlucks need desserts that are easy to transport and share with a group. These recipes use ingredients you can find at most stores and steps that fit into a busy day. You will see treats that hold up well on a table and appeal to both kids and adults. Many can be made ahead so you are not rushed the morning of the event. Look through the list and choose one that matches what you have on hand.
Helpful Tips Before You Start
These tips help your Halloween desserts travel well and serve easily at a potluck.
Choose sturdy recipes
Pick items like bars, cookies, or cupcakes that stack or pack without damage. Avoid soft frostings or whipped cream that can melt or smear in transit.
Make single servings
Cut or portion desserts into individual pieces before leaving home. Guests at potlucks prefer grab-and-go options over items that need slicing on site.
Prep in advance
Bake bases or dough the day before and finish assembly the morning of the event. This keeps your kitchen clear and reduces last-minute stress.
Add simple Halloween details
Use candy eyes, colored sprinkles, or a quick orange glaze to give desserts a festive look. Skip complex decorations that take extra time or do not hold up well.
Pack serving supplies
Bring a small sign with the recipe name plus any common allergens. Include plates, napkins, or a serving utensil if the recipe requires them.
Pumpkin Cheesecake Bars with Gingersnap Crust
These bars combine a crunchy gingersnap crust with a smooth pumpkin cheesecake filling. They work well for Halloween potlucks because they hold their shape during transport and slice neatly into portable pieces.
The flavor leans warm and spiced from the gingersnaps and pumpkin seasonings. The texture stays creamy inside with a firm, slightly crisp base that holds up after chilling.


Equipment
- Mixing Bowl
- 8-inch Square Pan
- Electric Mixer
- Oven
Ingredients
- 1 cup gingersnap cookie crumbs
- 3 tbsp unsalted butter, melted
- 8 oz cream cheese, softened
- 1/2 cup pumpkin puree
- 1/4 cup granulated sugar
- 1 large egg
- 1 tsp vanilla extract
- 1 tsp ground cinnamon
- 1/2 tsp ground nutmeg
- 1/4 tsp ground ginger
Instructions
- Preheat the oven to 350°F and line an 8-inch square pan with parchment paper. Stir the gingersnap cookie crumbs with the melted butter until evenly moistened, then press the mixture firmly into the bottom of the pan to form the crust.
- In a mixing bowl, beat the softened cream cheese until smooth. Add the pumpkin puree, granulated sugar, egg, vanilla extract, cinnamon, nutmeg, and ginger. Mix until the filling is fully combined and free of lumps.
- Pour the pumpkin cheesecake mixture over the prepared crust and spread it into an even layer. Bake for 25 to 30 minutes until the edges look set and the center still has a slight jiggle.
- Remove the pan from the oven and let the bars cool at room temperature for 30 minutes. Transfer to the refrigerator and chill for at least 2 hours before slicing into four squares.
Notes
Cuisine: American
Equipment: Mixing Bowl, 8-inch Square Pan, Electric Mixer, Oven
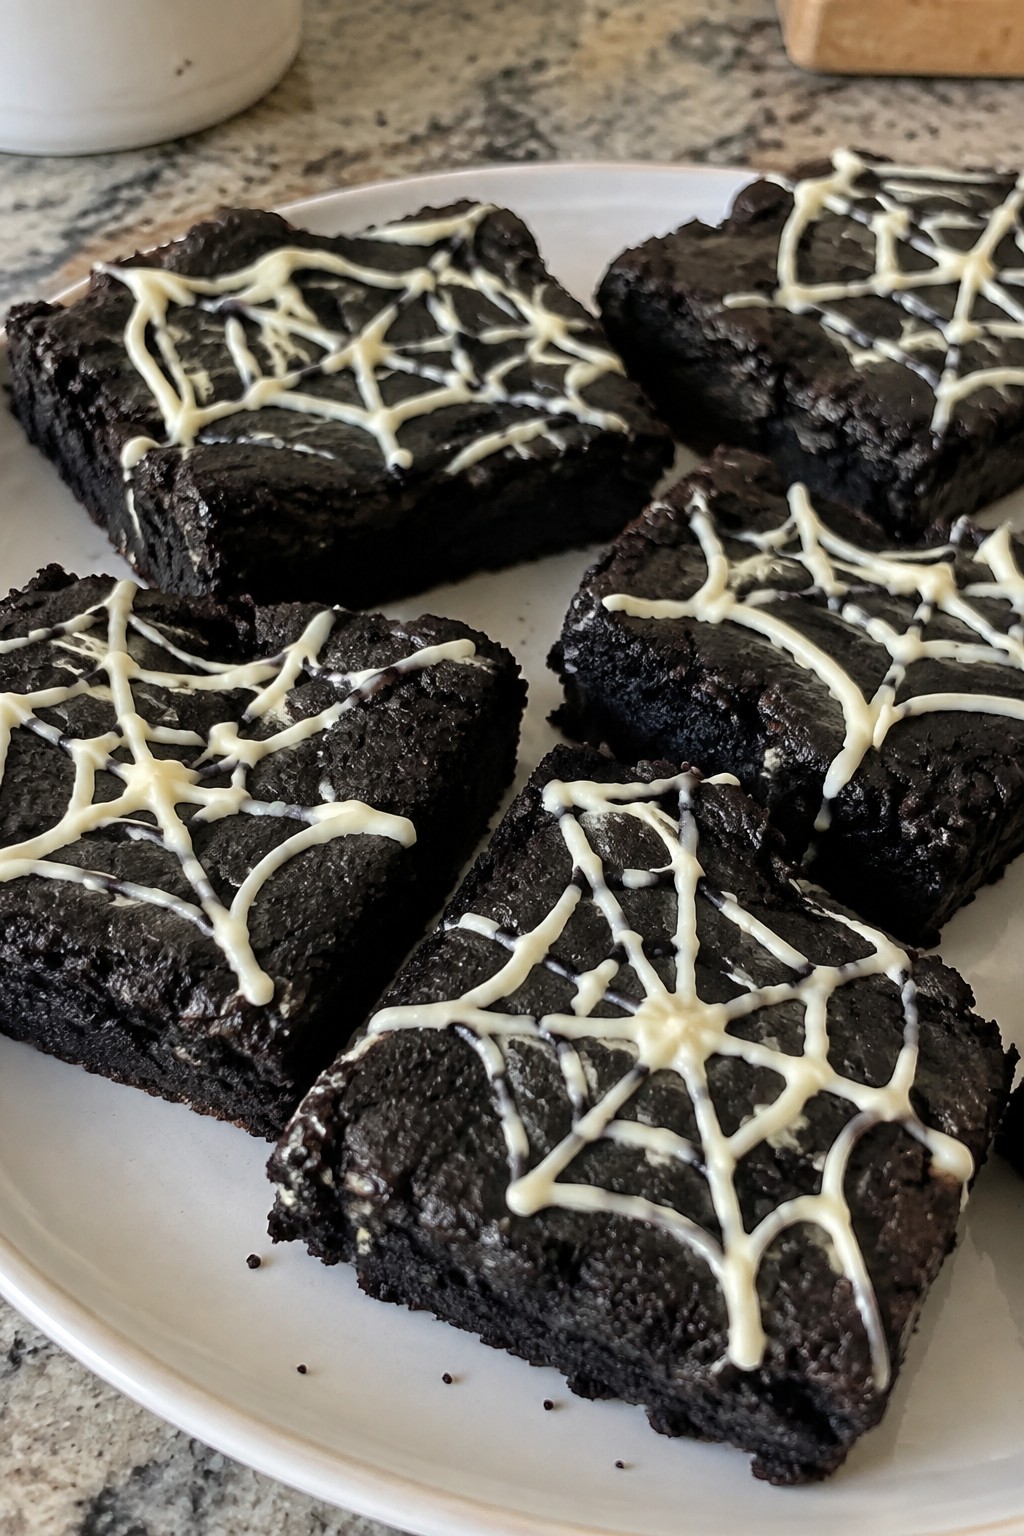
Black Cocoa Spiderweb Brownies
These brownies stand out at a Halloween potluck with their deep black color and simple white spiderweb design on top. They bring a fudgy texture and rich chocolate taste that appeals to anyone who likes dark cocoa without extra sweetness. The recipe works well for a small gathering since it makes just enough to share.

Equipment
- Mixing Bowl
- 8×8 Baking Pan
- Piping Bag
Ingredients
- 1/2 cup unsalted butter
- 1 cup granulated sugar
- 2 large eggs
- 1 teaspoon vanilla extract
- 1/2 cup black cocoa powder
- 1/2 cup all-purpose flour
- 1/4 teaspoon salt
- 1/3 cup white chocolate chips
Instructions
- Preheat the oven to 350 degrees F and line an 8×8 inch pan with parchment paper.
- Melt the butter in a microwave safe bowl, then stir in the sugar until smooth.
- Add the eggs and vanilla extract, and mix until fully combined.
- Stir in the black cocoa powder, flour, and salt until no dry streaks remain.
- Spread the batter evenly in the prepared pan and bake for 22 minutes.
- Let the brownies cool completely in the pan.
- Melt the white chocolate chips in a small bowl until smooth, then transfer to a piping bag or zip top bag with one corner snipped.
- Pipe the melted white chocolate in four concentric circles on top of the cooled brownies, then drag a toothpick from the center outward to form a web pattern on each section.
Notes
Cuisine: American
Equipment: Mixing Bowl, 8×8 Baking Pan, Piping Bag
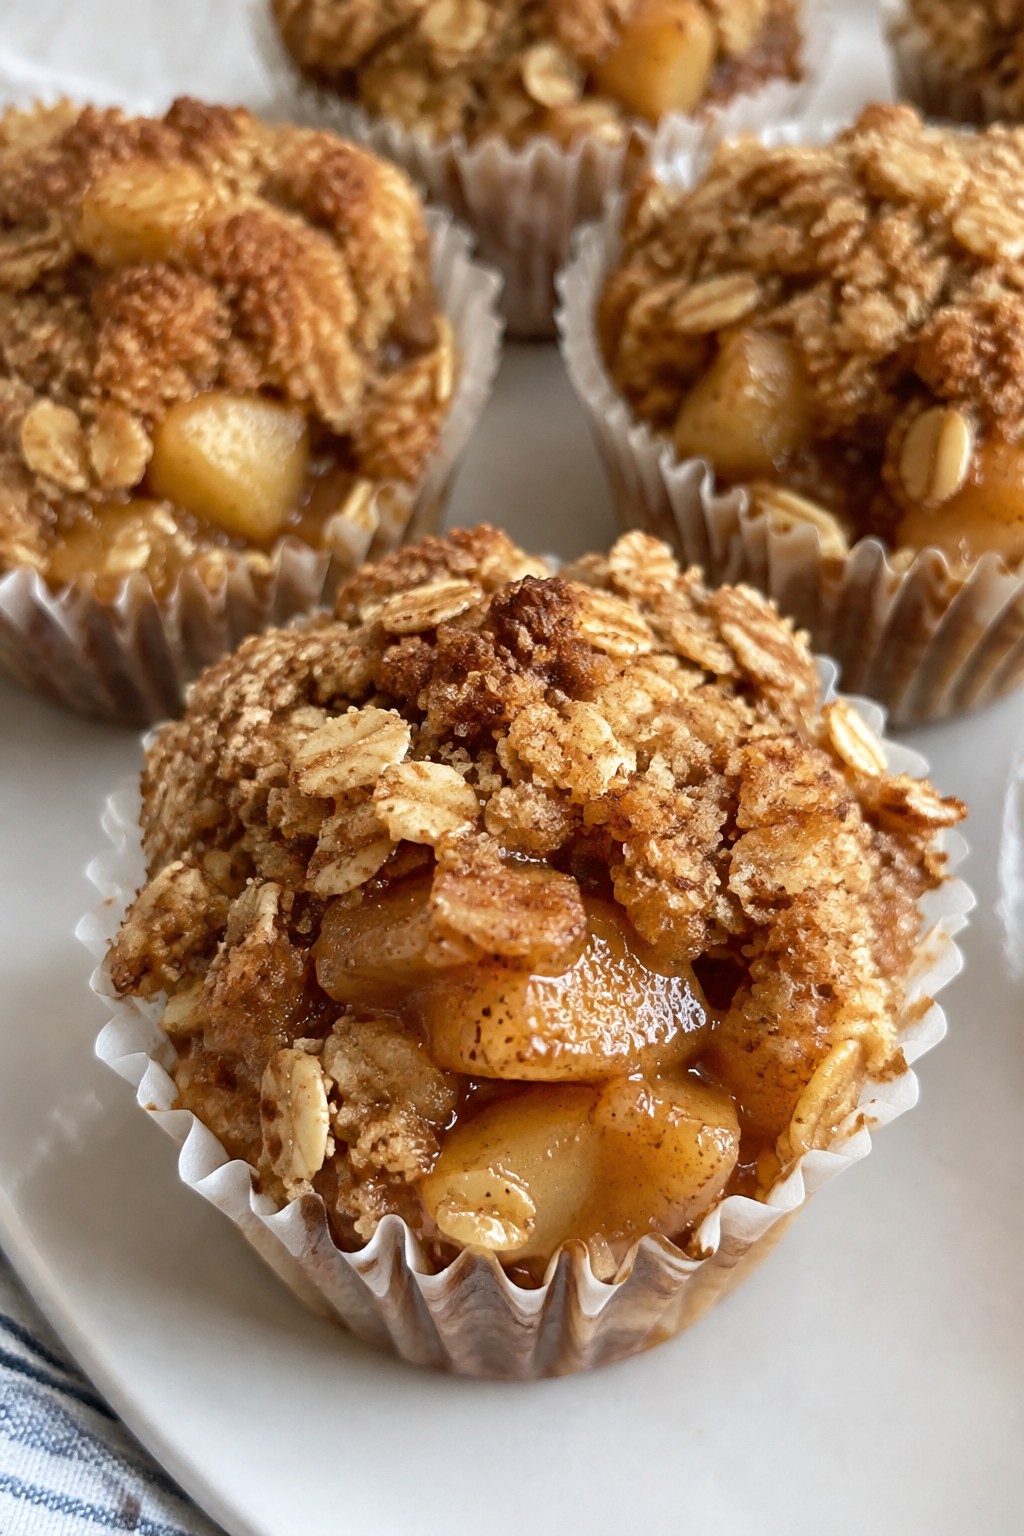
Caramel Apple Crumble Cups
These Caramel Apple Crumble Cups pack tender cinnamon apples and rich caramel into individual portions topped with a crunchy oat crumble. They travel well to potlucks and give guests a neat handheld dessert that still feels like a warm fall treat.
The contrast of soft baked apples against the crisp topping and sticky caramel creates a balanced bite without needing extra plates or forks.

Equipment
- Ramekins
- Mixing Bowls
- Baking Sheet
Ingredients
- 4 medium apples, peeled, cored, and diced
- 1/2 cup caramel sauce
- 3/4 cup rolled oats
- 1/2 cup all-purpose flour
- 1/4 cup brown sugar
- 1/4 cup unsalted butter, melted
- 1 teaspoon ground cinnamon
- 1/4 teaspoon salt
Instructions
- Preheat the oven to 375°F and lightly grease four ramekins or oven-safe cups.
- In a bowl, toss the diced apples with 1/4 cup of the caramel sauce, cinnamon, and salt until evenly coated.
- Divide the apple mixture among the four prepared cups, pressing it down lightly.
- In a separate bowl, stir together the oats, flour, brown sugar, and melted butter until the mixture forms clumps.
- Spoon the crumble evenly over the apples in each cup.
- Bake for 25 to 30 minutes until the topping is golden and the apples are soft.
- Remove from the oven and drizzle the remaining 1/4 cup caramel sauce over the warm cups before serving.
Notes
Cuisine: American
Equipment: Ramekins, Mixing Bowls, Baking Sheet
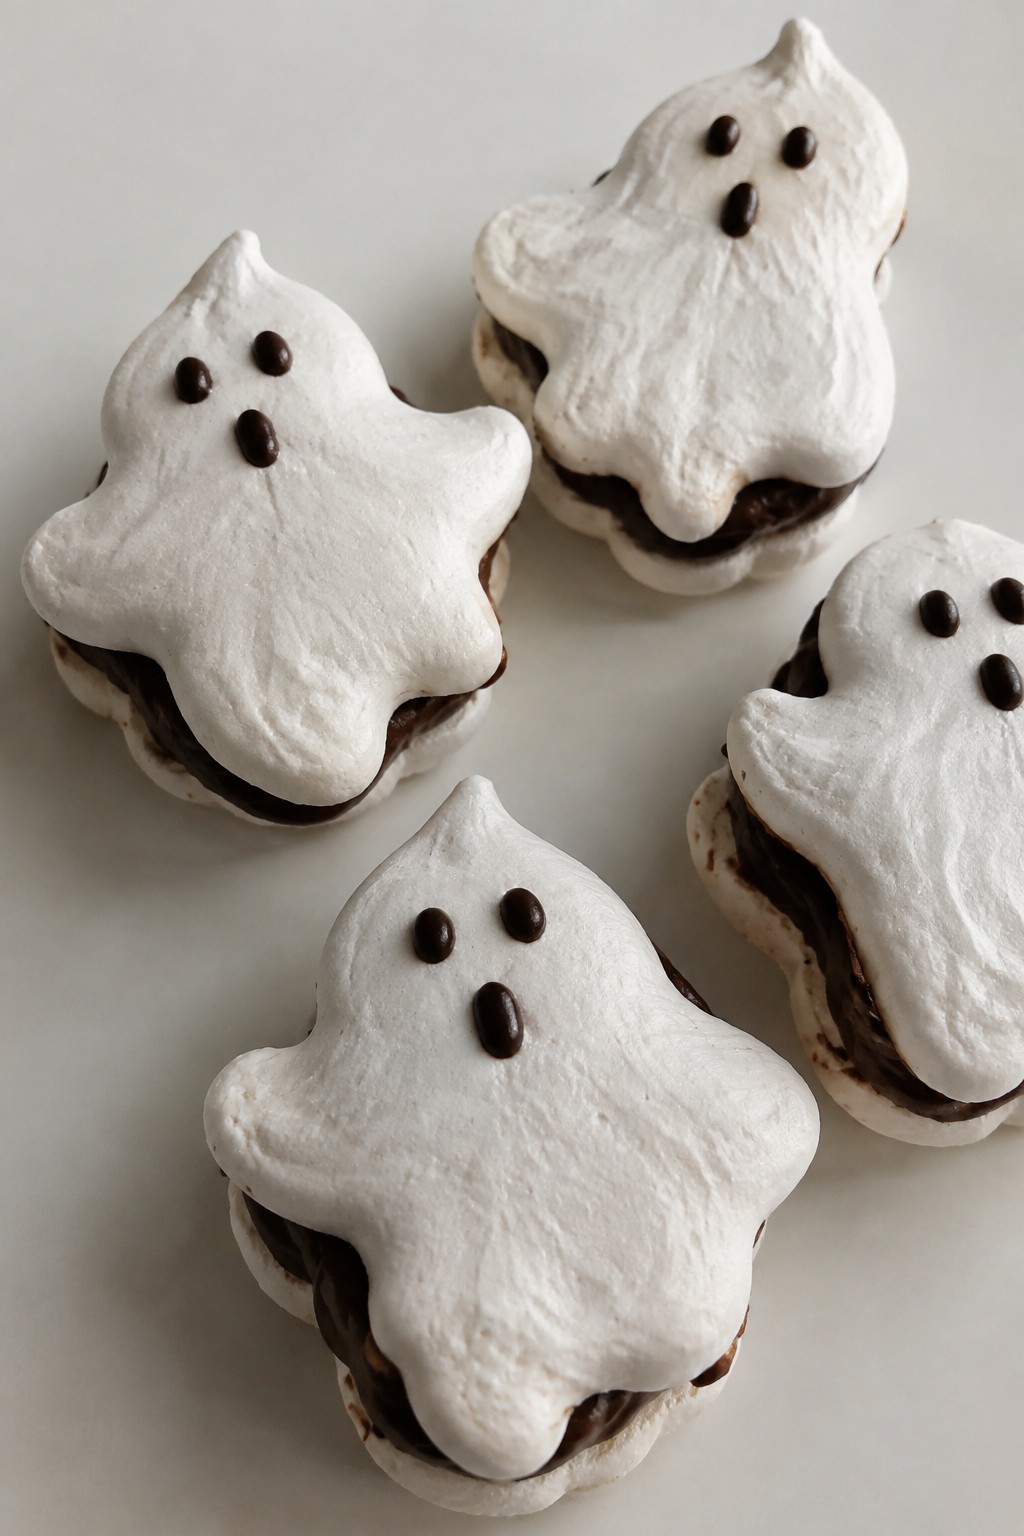
Ghost Meringue Cookie Sandwiches
These Ghost Meringue Cookie Sandwiches bring a light and airy treat to any Halloween potluck. The crisp meringue shells hold a smooth chocolate center that balances the sweetness without overwhelming it. They travel well and hold their shape on a dessert table.
The recipe creates four sandwiches with simple pantry staples. The ghost shapes add a fun visual touch that fits the season while keeping the focus on easy preparation.

Equipment
- Mixing Bowl
- Electric Mixer
- Piping Bag
- Baking Sheet
- Oven
Ingredients
- 2 large egg whites
- 1/2 cup granulated sugar
- 1/4 teaspoon cream of tartar
- 1 teaspoon vanilla extract
- 1/2 cup dark chocolate chips
- 1 tablespoon heavy cream
Instructions
- Preheat the oven to 200 degrees F and line a baking sheet with parchment paper.
- Place the egg whites in a clean mixing bowl and add the cream of tartar. Beat on medium speed until soft peaks form.
- Gradually add the sugar while beating on high speed until stiff, glossy peaks develop. Mix in the vanilla extract.
- Transfer the meringue to a piping bag fitted with a round tip. Pipe eight ghost shapes onto the prepared baking sheet, leaving space between each one.
- Bake for 90 minutes, then turn off the oven and leave the meringues inside to cool completely without opening the door.
- Combine the dark chocolate chips and heavy cream in a small bowl. Microwave in 20-second bursts, stirring between each, until smooth.
- Spread or pipe a thin layer of the chocolate mixture onto the flat side of four cooled meringue ghosts. Top each with a second ghost to form a sandwich.
Notes
Cuisine: American
Equipment: Mixing Bowl, Electric Mixer, Piping Bag, Baking Sheet, Oven
Blood Orange Olive Oil Loaf Cake
This loaf cake combines the rich, fruity notes of olive oil with the bright tang of blood oranges. The result is a moist, tender crumb with a subtle citrus aroma that stands out on a potluck dessert table. Its deep red-orange tones also give it a natural Halloween feel without any extra decorations.
The cake travels easily and holds up well at room temperature, so it is a practical choice when you need to bring something sweet to a group gathering. It offers a lighter alternative to chocolate-heavy desserts while still feeling special.


Equipment
- Mixing Bowl
- Loaf Pan
- Whisk
- Oven
Ingredients
- 1 cup all-purpose flour
- 1/2 cup granulated sugar
- 2 large eggs
- 1/3 cup olive oil
- Zest and juice of 2 blood oranges
- 1 teaspoon baking powder
- 1/4 teaspoon salt
Instructions
- Preheat the oven to 350°F and lightly grease a small loaf pan.
- In a mixing bowl, whisk together the flour, baking powder, and salt until evenly combined.
- In a separate bowl, whisk the eggs and sugar until smooth, then slowly add the olive oil while continuing to whisk.
- Stir in the blood orange zest and juice until the wet mixture is fully blended.
- Pour the wet ingredients into the dry ingredients and fold gently until no dry streaks remain.
- Transfer the batter to the prepared loaf pan and smooth the top.
- Bake for 40 to 45 minutes, or until a toothpick inserted in the center comes out clean.
- Let the cake cool in the pan for 10 minutes before turning it out onto a wire rack to cool completely.
Notes
Cuisine: Italian
Equipment: Mixing Bowl, Loaf Pan, Whisk, Oven
Monster Marshmallow Cereal Treats
These treats bring a fun Halloween twist to classic cereal bars. The bright green color and candy eyes give them a playful monster look that stands out at any potluck. They are quick to make and travel well in a single layer.
The texture stays chewy in the center with crisp edges from the cereal. Sweet marshmallow flavor comes through without being too heavy, making them easy to enjoy alongside other desserts.


Equipment
- Saucepan
- Mixing Bowl
- Baking Pan
Ingredients
- 3 tablespoons unsalted butter
- 4 cups mini marshmallows
- 6 cups crispy rice cereal
- 1 teaspoon green food coloring
- 2 tablespoons candy monster eyes
Instructions
- Line an 8×8 inch pan with parchment paper and set it aside.
- Melt the butter in a large saucepan over medium heat.
- Add the mini marshmallows and stir until fully melted and smooth.
- Remove the pan from heat and stir in the green food coloring until the mixture is evenly colored.
- Pour in the crispy rice cereal and stir quickly until all the cereal is coated.
- Press the mixture firmly into the prepared pan using a spatula or wax paper.
- While the treats are still warm, press the candy monster eyes evenly across the top.
- Let the treats cool completely at room temperature before cutting into squares.
Notes
Cuisine: American
Equipment: Saucepan, Mixing Bowl, Baking Pan
Chocolate Peanut Butter Acorn Truffles
These truffles bring a playful fall twist to any Halloween spread. The creamy peanut butter centers pair with a smooth chocolate shell, and the pretzel stems give each piece a realistic acorn look that guests notice right away. They travel well to potlucks and hold their shape without refrigeration for a few hours.
They work best when you want a no-bake dessert that still feels special. The texture stays soft inside with a crisp chocolate outside, and the salt from the pretzel balances the sweetness.


Equipment
- Mixing Bowl
- Baking Sheet
- Microwave
Ingredients
- 1/2 cup creamy peanut butter
- 1/4 cup powdered sugar
- 1/2 teaspoon vanilla extract
- 1 cup milk chocolate chips
- 12 small pretzel sticks
Instructions
- Stir the peanut butter, powdered sugar, and vanilla extract together in a bowl until the mixture forms a smooth, thick dough.
- Scoop out teaspoon-sized portions and roll them between your palms into small oval shapes that resemble acorns. Place them on a parchment-lined baking sheet.
- Chill the shaped pieces in the refrigerator for 20 minutes so they firm up.
- Melt the chocolate chips in the microwave in 20-second bursts, stirring between each until smooth.
- Dip each chilled peanut butter piece into the melted chocolate, leaving the top third exposed. Immediately press one pretzel stick into the top of each truffle to act as the stem.
- Return the finished truffles to the baking sheet and chill again for 15 minutes until the chocolate sets.
Notes
Cuisine: American
Equipment: Mixing Bowl, Baking Sheet, Microwave
Layered Candy Corn Parfait Cups
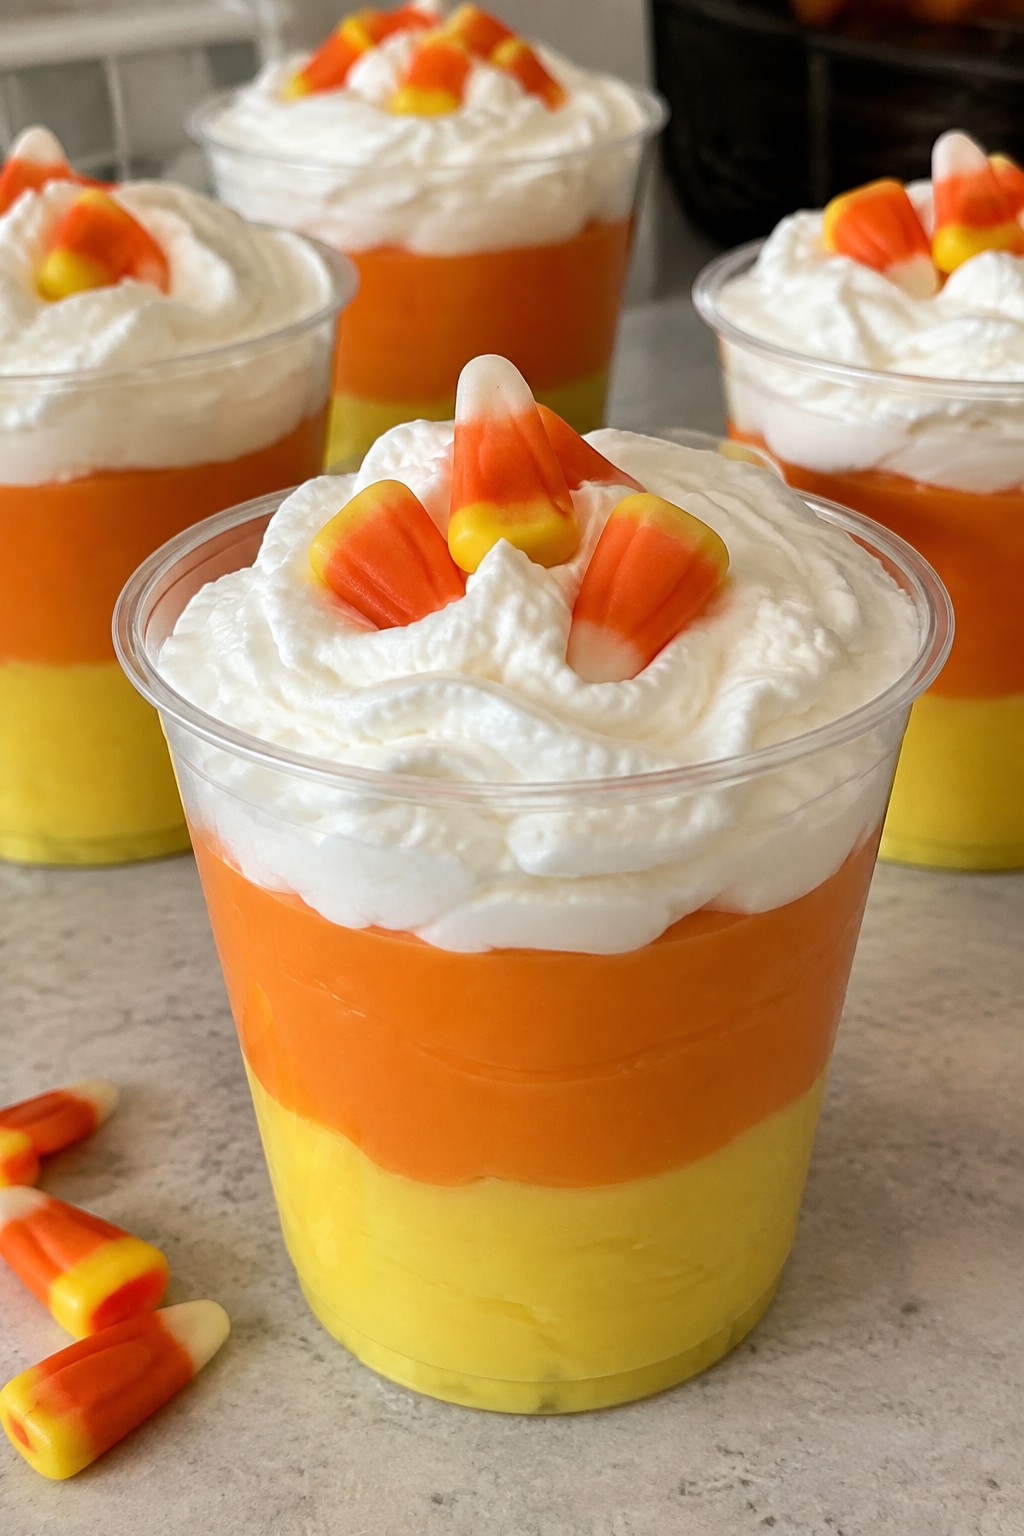
These cups bring a fun visual twist to any Halloween spread. The layers copy the classic candy corn colors while keeping the texture light and creamy. They travel well to potlucks and require no oven time.
They work best when you want something sweet but not heavy. Each bite gives smooth pudding with a bit of fluff from the whipped topping and a chewy candy corn finish on top.

Equipment
- Mixing bowls
- Whisk
- 4 clear cups
Ingredients
- 1 (3.4 oz) box instant vanilla pudding mix
- 2 cups cold milk
- Yellow food coloring
- Orange food coloring
- 1 cup whipped topping, divided
- Candy corn for garnish
Instructions
- Whisk the pudding mix and cold milk in a bowl until smooth. Let it sit for five minutes to thicken.
- Divide the thickened pudding into two smaller bowls. Add a few drops of yellow food coloring to one bowl and stir until the color is even. Add orange food coloring to the second bowl and stir until even.
- Spoon the yellow pudding into the bottom of four clear cups, using about one-third of the mixture per cup.
- Add a layer of the orange pudding on top of the yellow layer in each cup.
- Top each cup with a spoonful of whipped topping. Add a few pieces of candy corn on the whipped topping for garnish.
Notes
Cuisine: American
Equipment: Mixing bowls, Whisk, 4 clear cups
Spiced Pear and Walnut Hand Pies
These hand pies pack warm spices and tender fruit into a flaky crust that travels well to Halloween potluck tables. The combination of sweet pears and toasted walnuts gives each bite a mix of soft filling and crunch, making them easy to grab without plates or forks.
They suit fall gatherings because the flavors feel seasonal yet simple enough for everyday baking. The portable size also means guests can enjoy one while mingling.


Equipment
- Baking sheet
- Mixing bowl
- Pastry brush
Ingredients
- 2 ripe pears, peeled and diced
- ½ cup chopped walnuts
- ¼ cup brown sugar
- 1 tsp ground cinnamon
- ¼ tsp ground nutmeg
- 1 tbsp lemon juice
- 2 sheets refrigerated pie dough
- 1 egg, beaten
- 2 tbsp granulated sugar
Instructions
- Preheat the oven to 375°F and line a baking sheet with parchment paper.
- In a mixing bowl, combine the diced pears, chopped walnuts, brown sugar, cinnamon, nutmeg, and lemon juice until the fruit is evenly coated.
- Unroll the pie dough sheets on a lightly floured surface and cut out eight 4-inch circles using a round cutter or glass.
- Spoon about 2 tablespoons of the pear filling onto the center of four circles, leaving a small border around the edge.
- Top each filled circle with a second dough circle, press the edges together with a fork to seal, and cut two small slits in the top of each pie.
- Brush the tops with the beaten egg and sprinkle evenly with granulated sugar.
- Place the hand pies on the prepared baking sheet and bake for 20 to 25 minutes until the crust is golden brown.
- Remove from the oven and let cool on the sheet for 5 minutes before transferring to a wire rack.
Notes
Cuisine: American
Equipment: Baking sheet, Mixing bowl, Pastry brush
Witch Finger Shortbread Cookies
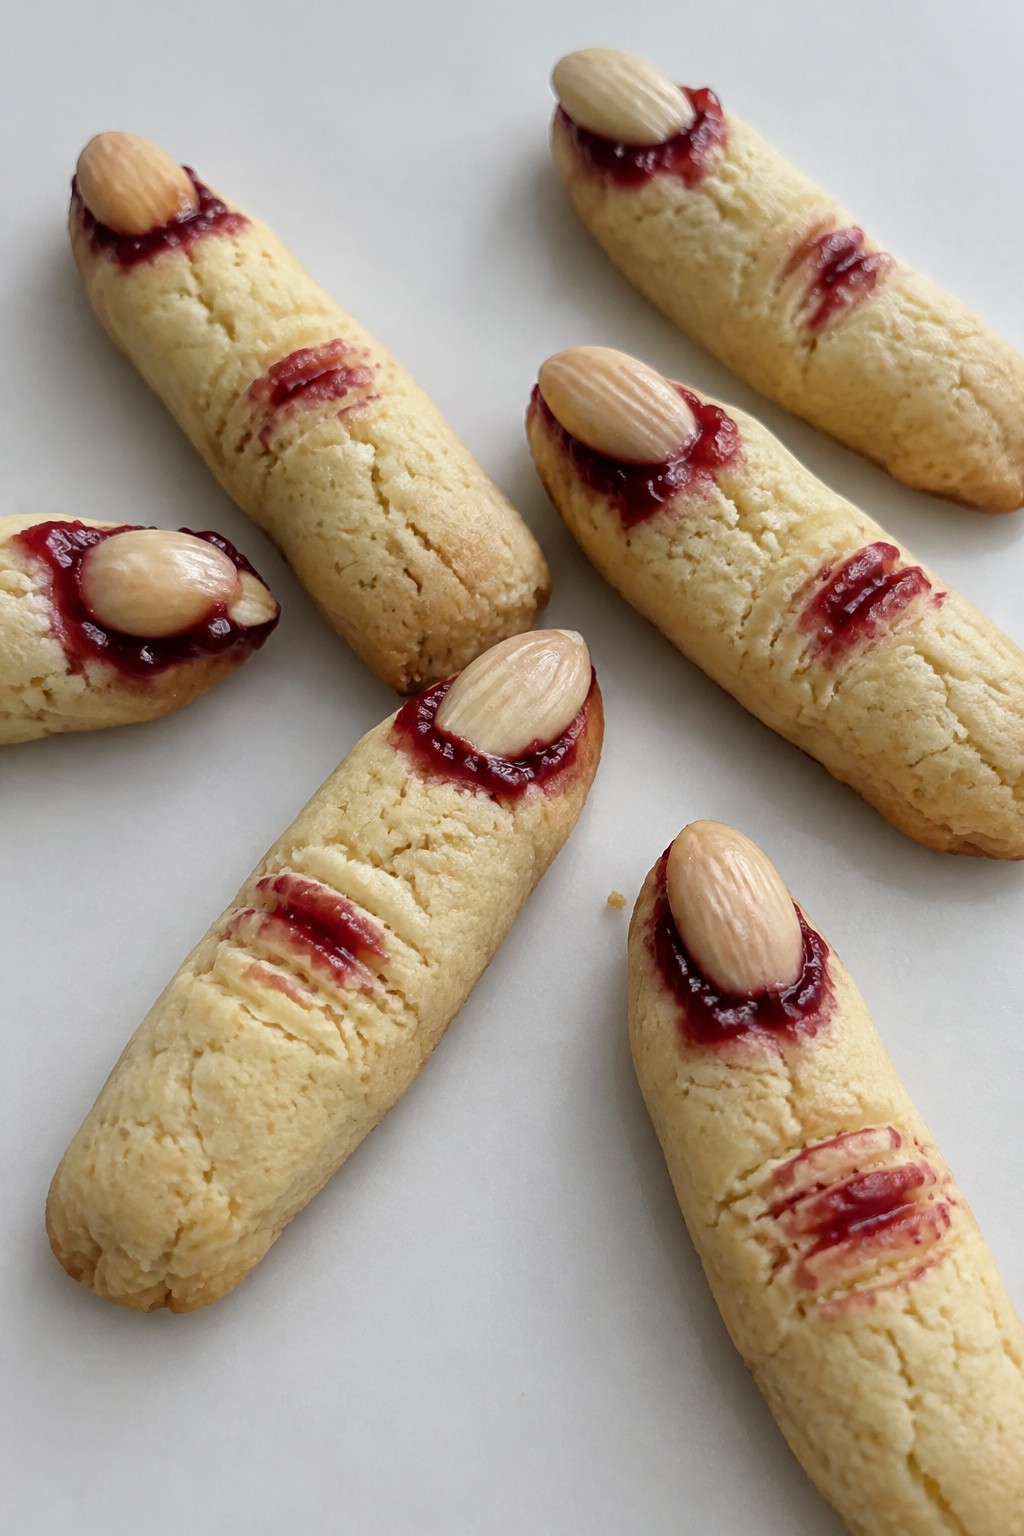
These witch finger shortbread cookies bring a fun Halloween touch to any potluck dessert table. Their buttery crumbly texture pairs with a mild vanilla flavor that appeals to both kids and adults. They work especially well for gatherings where guests want something sweet but not overly rich.

Equipment
- Mixing bowl
- baking sheet
- parchment paper
Ingredients
- 1/2 cup unsalted butter, softened
- 1/4 cup powdered sugar
- 1 teaspoon vanilla extract
- 1 cup all-purpose flour
- 1/4 teaspoon salt
- 8 whole blanched almonds
- 2 tablespoons raspberry jam
Instructions
- Preheat the oven to 325 degrees and line a baking sheet with parchment paper.
- In a mixing bowl, cream the softened butter and powdered sugar until smooth.
- Stir in the vanilla extract until fully combined.
- Add the flour and salt to the bowl and mix until a soft dough forms.
- Divide the dough into 8 equal pieces and roll each into a finger shape about 3 inches long.
- Press one almond into the end of each finger to form a nail.
- Use a knife to make light indentations across the middle of each finger for knuckles.
- Place the shaped fingers on the baking sheet and bake for 18 to 20 minutes until the edges turn lightly golden.
- Remove from the oven and let cool for 5 minutes.
- Dab a small amount of raspberry jam at the base of each finger to create the appearance of a cut end.
Notes
Cuisine: American
Equipment: Mixing bowl, baking sheet, parchment paper
No-Bake Pumpkin Mousse Tartlets
These tartlets deliver a creamy pumpkin filling with warm spices inside a crisp graham crust. They suit Halloween potlucks because they need no oven and hold up well when made ahead.
The texture stays light from whipped cream folded into the mousse, while the crust adds a buttery crunch. Each bite balances sweet pumpkin with cinnamon and nutmeg.


Equipment
- Mixing bowls
- Electric mixer
- Tartlet pans
- Refrigerator
Ingredients
- 1 1/2 cups graham cracker crumbs
- 6 tablespoons unsalted butter, melted
- 3 tablespoons granulated sugar
- 8 ounces cream cheese, softened
- 1 cup pumpkin puree
- 1/2 cup brown sugar
- 1 teaspoon vanilla extract
- 1 teaspoon ground cinnamon
- 1/2 teaspoon ground nutmeg
- 1 cup heavy cream
- Whipped cream for topping
- Extra ground cinnamon for garnish
Instructions
- Stir the graham cracker crumbs, melted butter, and granulated sugar in a bowl until the crumbs hold together when pressed.
- Divide the mixture among four small tartlet pans or a muffin tin and press firmly into the bottoms and sides. Place in the refrigerator to firm while you prepare the filling.
- Beat the cream cheese, pumpkin puree, brown sugar, vanilla extract, cinnamon, and nutmeg in a large bowl until smooth.
- In a separate bowl, whip the heavy cream until stiff peaks form.
- Fold the whipped cream into the pumpkin mixture until no streaks remain.
- Spoon the mousse into the chilled crusts and smooth the tops.
- Refrigerate the tartlets for at least two hours until set.
- Top each tartlet with a dollop of whipped cream and a light dusting of cinnamon before serving.
Notes
Cuisine: American
Equipment: Mixing bowls, Electric mixer, Tartlet pans, Refrigerator
