


Many people at Halloween parties want savory snacks to balance out all the sweets.
This list shares 15 practical ideas that use everyday ingredients and simple steps.
Most recipes can be made ahead so you spend less time in the kitchen during the party.
They work well for both kids and adults without needing special tools or skills.
You will find options that keep guests satisfied until the main food is ready.
Helpful Tips Before You Start
These tips will help your savory Halloween snacks hold up well at a party.
Prep Components Ahead
Make sauces, fillings, or doughs the day before so assembly stays quick on party day.
Choose Sturdy Bases
Use crackers, bread slices, or vegetable sticks that can support toppings without getting soggy.
Add Protein or Cheese
Include items like sausage, beans, or cheese to make each snack more satisfying for guests who want seconds.
Keep Hot Items Warm
Use a slow cooker or warming tray for any baked or fried snacks so they stay ready to serve throughout the event.
Spooky Sausage Mummy Puffs
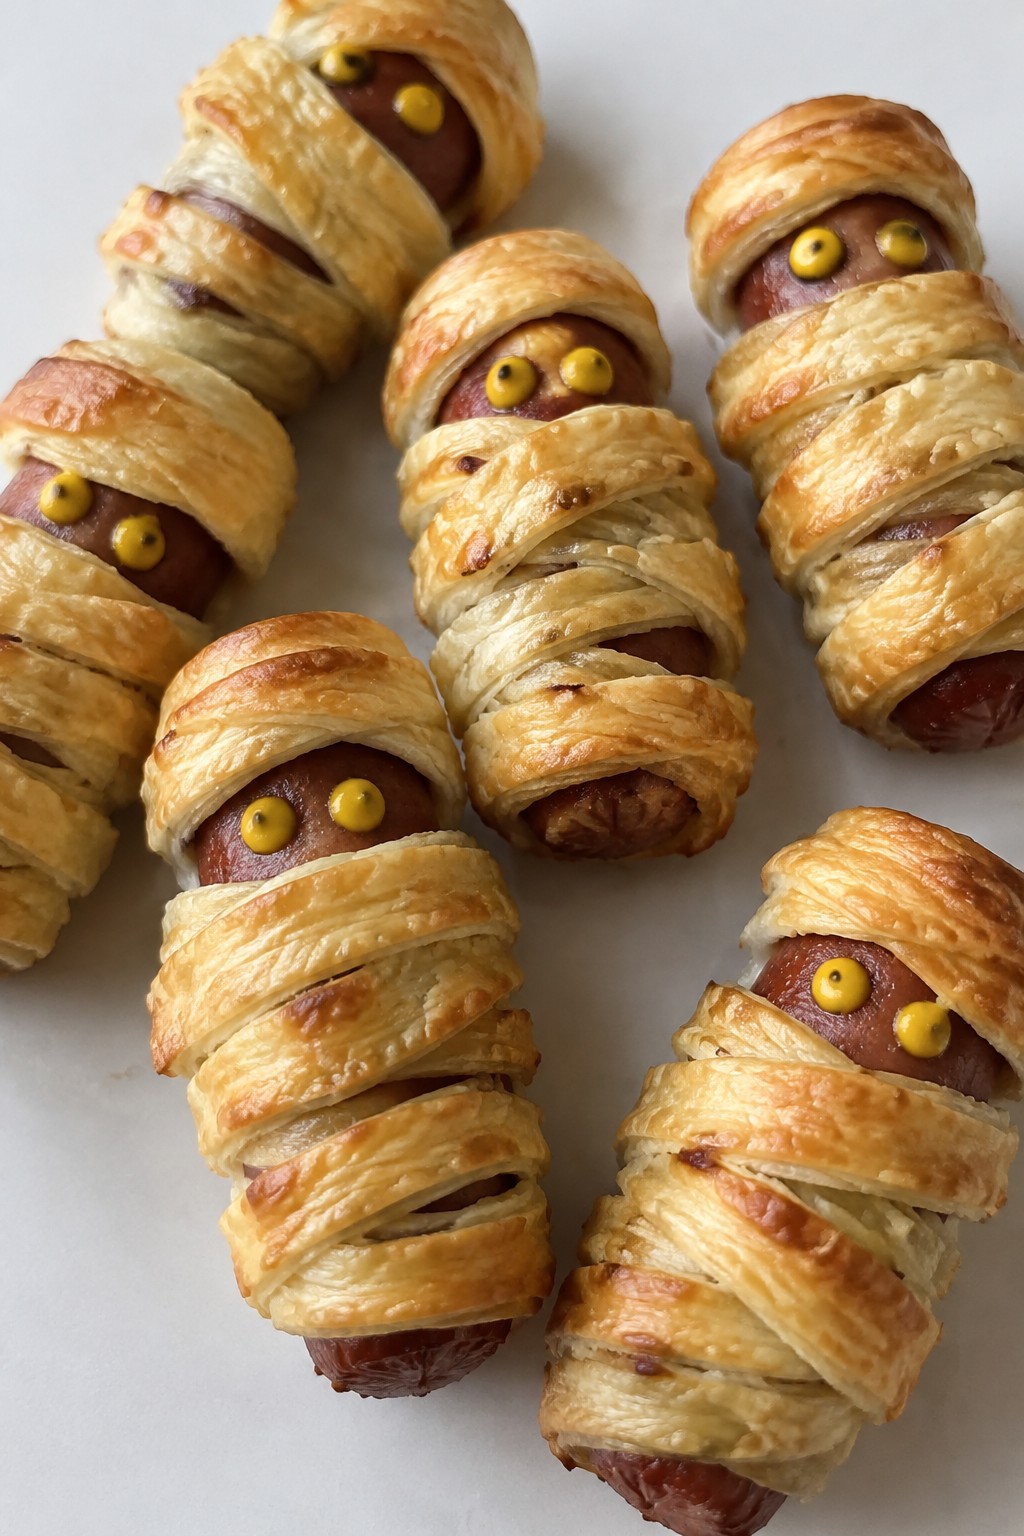
These sausage mummy puffs give guests a warm, handheld snack that feels fun without being too sweet. The flaky pastry wraps around savory sausages, making them a good choice for a Halloween spread when people want something more filling than chips. They come out golden and crisp on the outside with juicy centers.
The simple mustard eyes add a light tang that pairs well with the rich sausage. Serve them straight from the oven while the pastry stays light and the filling stays hot.
Equipment
- Baking sheet
- Oven
- Pastry brush
- Knife
Ingredients
- 8 mini sausages
- 1 sheet puff pastry, thawed
- 1 large egg
- 2 tablespoons yellow mustard
Instructions
- Preheat the oven to 400°F and line a baking sheet with parchment paper.
- Unroll the puff pastry sheet on a lightly floured surface and cut it into thin strips about 1/2 inch wide.
- Wrap each mini sausage with pastry strips, leaving small gaps so the sausage shows through like mummy bandages. Place the wrapped sausages on the baking sheet.
- Beat the egg in a small bowl and brush it lightly over the pastry on each sausage.
- Bake for 15 to 18 minutes until the pastry turns golden brown and puffed.
- Let the mummies cool for 2 minutes, then use a small spoon or toothpick to dot yellow mustard on each one for eyes.
Notes
Cuisine: American
Equipment: Baking sheet, Oven, Pastry brush, Knife
Blackened Chicken Skull Nachos
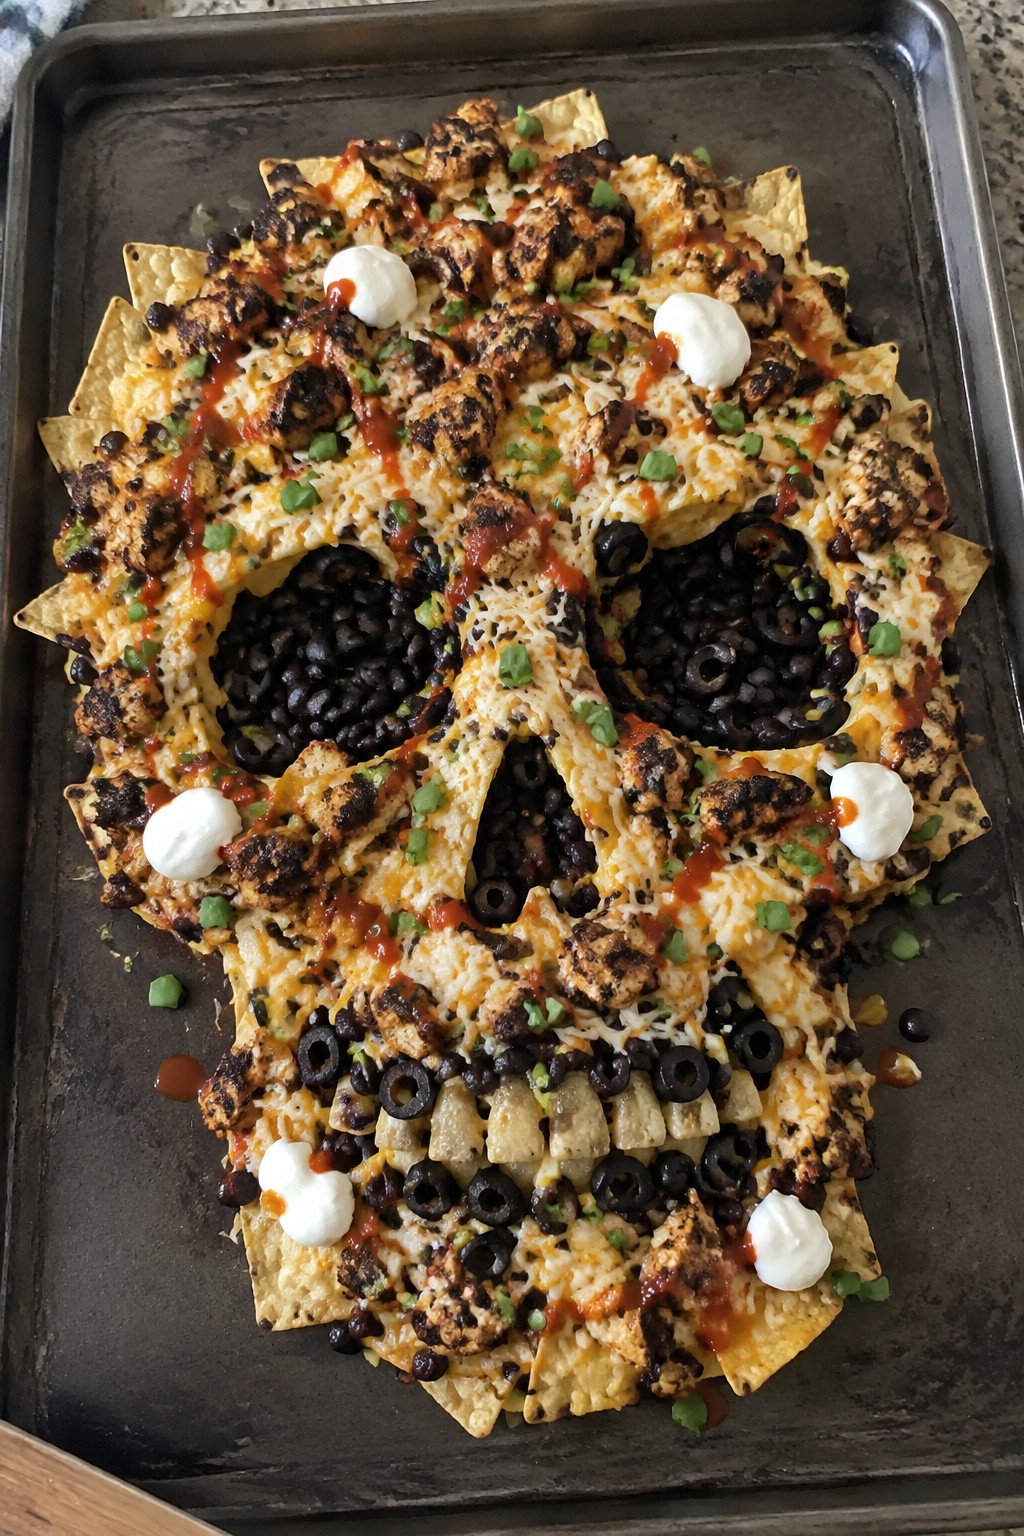
These nachos turn a classic party snack into a savory Halloween option with blackened chicken that brings smoky heat and plenty of protein. They work well for guests who want something filling rather than sweet, and the bold flavors stand up next to other snacks on the table.
The dish combines crispy chips, melted cheese, and spiced chicken with black beans and olives for contrast in texture and color. Arranging the toppings into a skull shape on the tray gives it a festive look without extra tools.
Equipment
- Large skillet
- Baking sheet
Ingredients
- 1 lb boneless skinless chicken breasts
- 2 tbsp blackening seasoning
- 1 tbsp olive oil
- 12 oz bag tortilla chips
- 2 cups shredded Mexican blend cheese
- 1 cup canned black beans, rinsed and drained
- 1/2 cup sliced black olives
- 1/4 cup chopped green onions
- Sour cream, for serving
- Hot sauce, for serving
Instructions
- Pat the chicken dry and rub it evenly with the blackening seasoning on all sides.
- Heat the olive oil in a large skillet over medium-high heat. Add the chicken and cook for 6 to 7 minutes per side until the outside is dark and the internal temperature reaches 165°F.
- Remove the chicken from the skillet and let it rest for 5 minutes before slicing it into thin strips.
- Preheat the oven to 400°F. Spread the tortilla chips in a single layer on a baking sheet, shaping them loosely into a skull outline with a wider top and narrower jaw area.
- Sprinkle half the cheese over the chips, then add the sliced chicken, black beans, and black olives.
- Top with the remaining cheese and bake for 8 to 10 minutes until the cheese is fully melted and bubbly.
- Remove from the oven, scatter the green onions over the top, and serve right away with sour cream and hot sauce on the side.
Notes
Cuisine: American
Equipment: Large skillet, Baking sheet
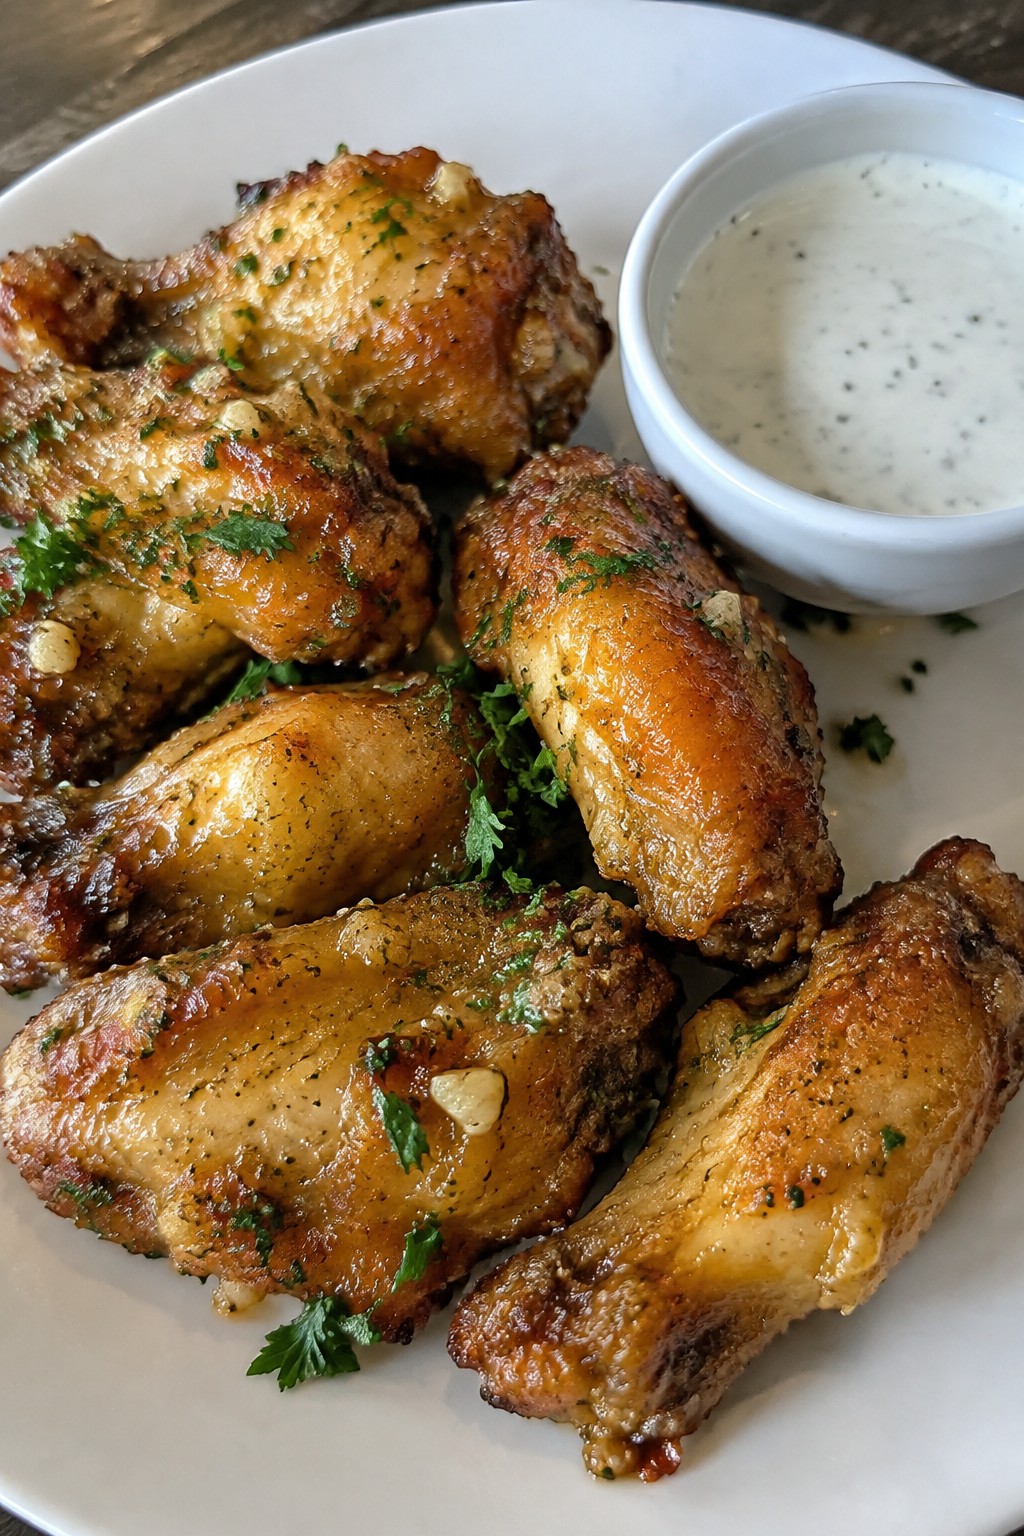
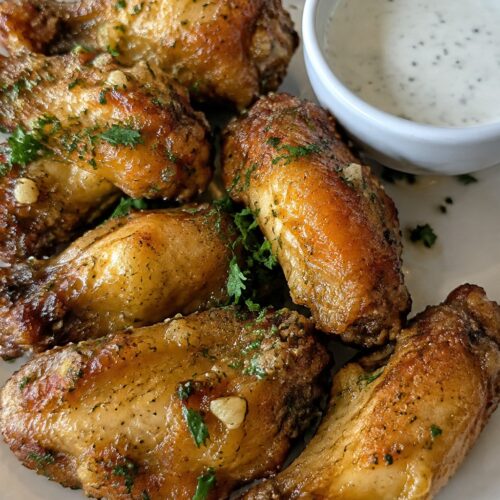
Garlic Butter Bat Wings with Ranch
These garlic butter bat wings make a solid choice for a Halloween party when guests want a savory snack that feels more substantial. They work especially well as a main bite on the table alongside lighter options. The wings come out crispy with juicy meat, coated in a simple garlic butter sauce that adds rich flavor without overpowering. Cool ranch on the side keeps each bite balanced.
Equipment
- Baking sheet
- Large bowl
- Small saucepan
Ingredients
- 2 pounds chicken wings
- 2 tablespoons olive oil
- 1 teaspoon salt
- 1/2 teaspoon black pepper
- 4 tablespoons unsalted butter
- 3 cloves garlic, minced
- 1 tablespoon chopped fresh parsley
- 1 cup ranch dressing
Instructions
- Preheat the oven to 400 degrees F and line a baking sheet with parchment paper.
- Place the chicken wings in a large bowl and toss them with olive oil, salt, and black pepper until evenly coated.
- Spread the wings in a single layer on the prepared baking sheet. Bake for 40 minutes, flipping them halfway through, until the skin is golden and crisp.
- While the wings bake, melt the butter in a small saucepan over low heat. Stir in the minced garlic and cook for 1 minute until fragrant. Remove from heat and mix in the chopped parsley.
- Transfer the baked wings to a clean large bowl. Pour the garlic butter over them and toss until fully coated.
- Serve the wings hot with ranch dressing on the side for dipping.
Notes
Cuisine: American
Equipment: Baking sheet, Large bowl, Small saucepan
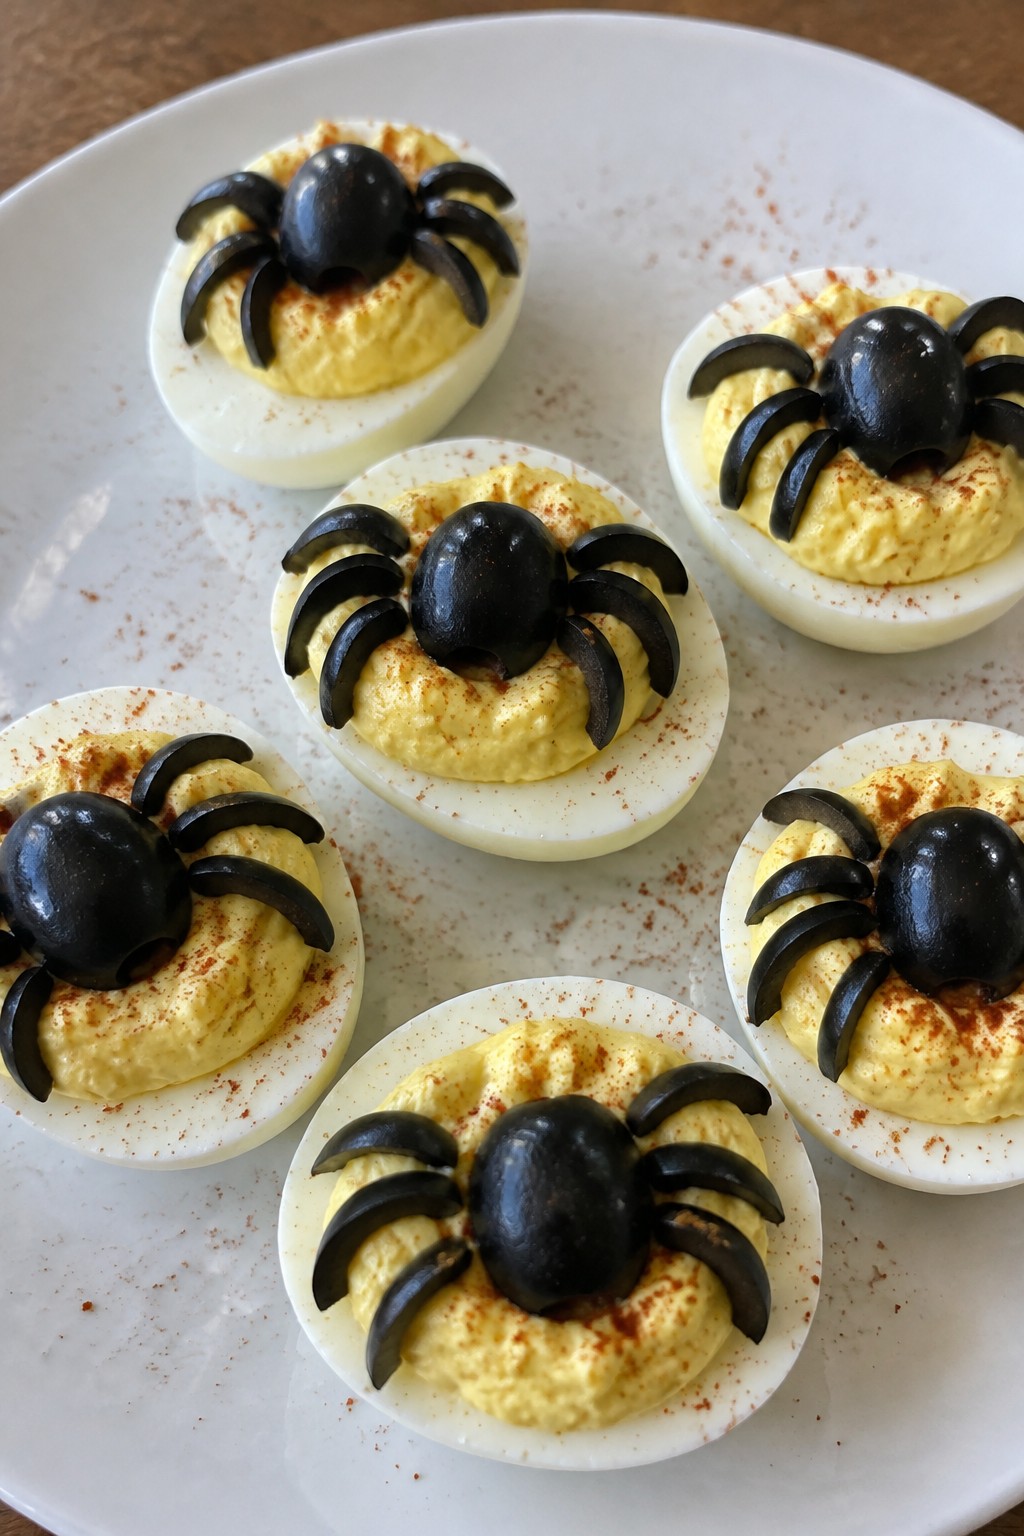
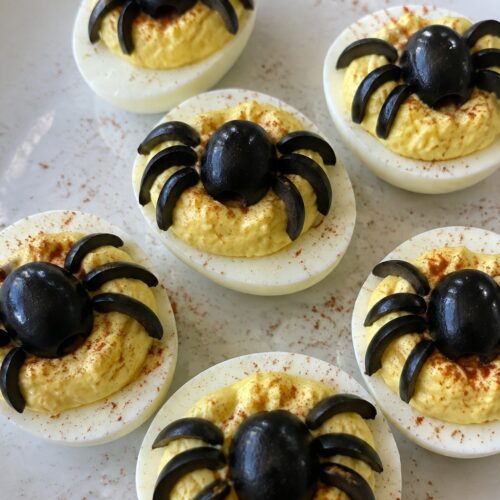
Olive Spider Deviled Eggs
These deviled eggs add a playful touch to any Halloween spread. The creamy filling pairs with briny olive spiders that sit on top of each half. Guests appreciate the familiar flavors with a seasonal detail that feels festive without extra effort.
This snack works well for parties where people want something savory to balance sweets. The texture stays smooth from the yolk mixture, while the olives bring a slight chew and salty bite.
Equipment
- Large pot
- Mixing bowl
- Knife
Ingredients
- 6 large eggs
- 1/4 cup mayonnaise
- 1 teaspoon Dijon mustard
- 1/2 teaspoon salt
- 1/4 teaspoon black pepper
- 1/2 teaspoon paprika
- 18 pitted black olives
Instructions
- Place the eggs in a large pot and cover them with water. Bring the water to a boil over medium-high heat, then reduce to a simmer and cook for 10 minutes.
- Drain the eggs and transfer them to a bowl of ice water. Let them cool for 5 minutes before peeling.
- Slice each egg in half lengthwise and scoop the yolks into a mixing bowl. Mash the yolks with a fork until smooth.
- Add the mayonnaise, Dijon mustard, salt, black pepper, and paprika to the yolks. Stir until the mixture is creamy and well combined.
- Spoon or pipe the filling back into the egg white halves.
- Cut 6 olives in half lengthwise to form the spider bodies. Slice the remaining 12 olives into thin strips to create the legs. Place one olive half on each filled egg and arrange 8 strips around it to look like legs.
Notes
Cuisine: American
Equipment: Large pot, Mixing bowl, Knife
Mini Monster Meatball Sliders
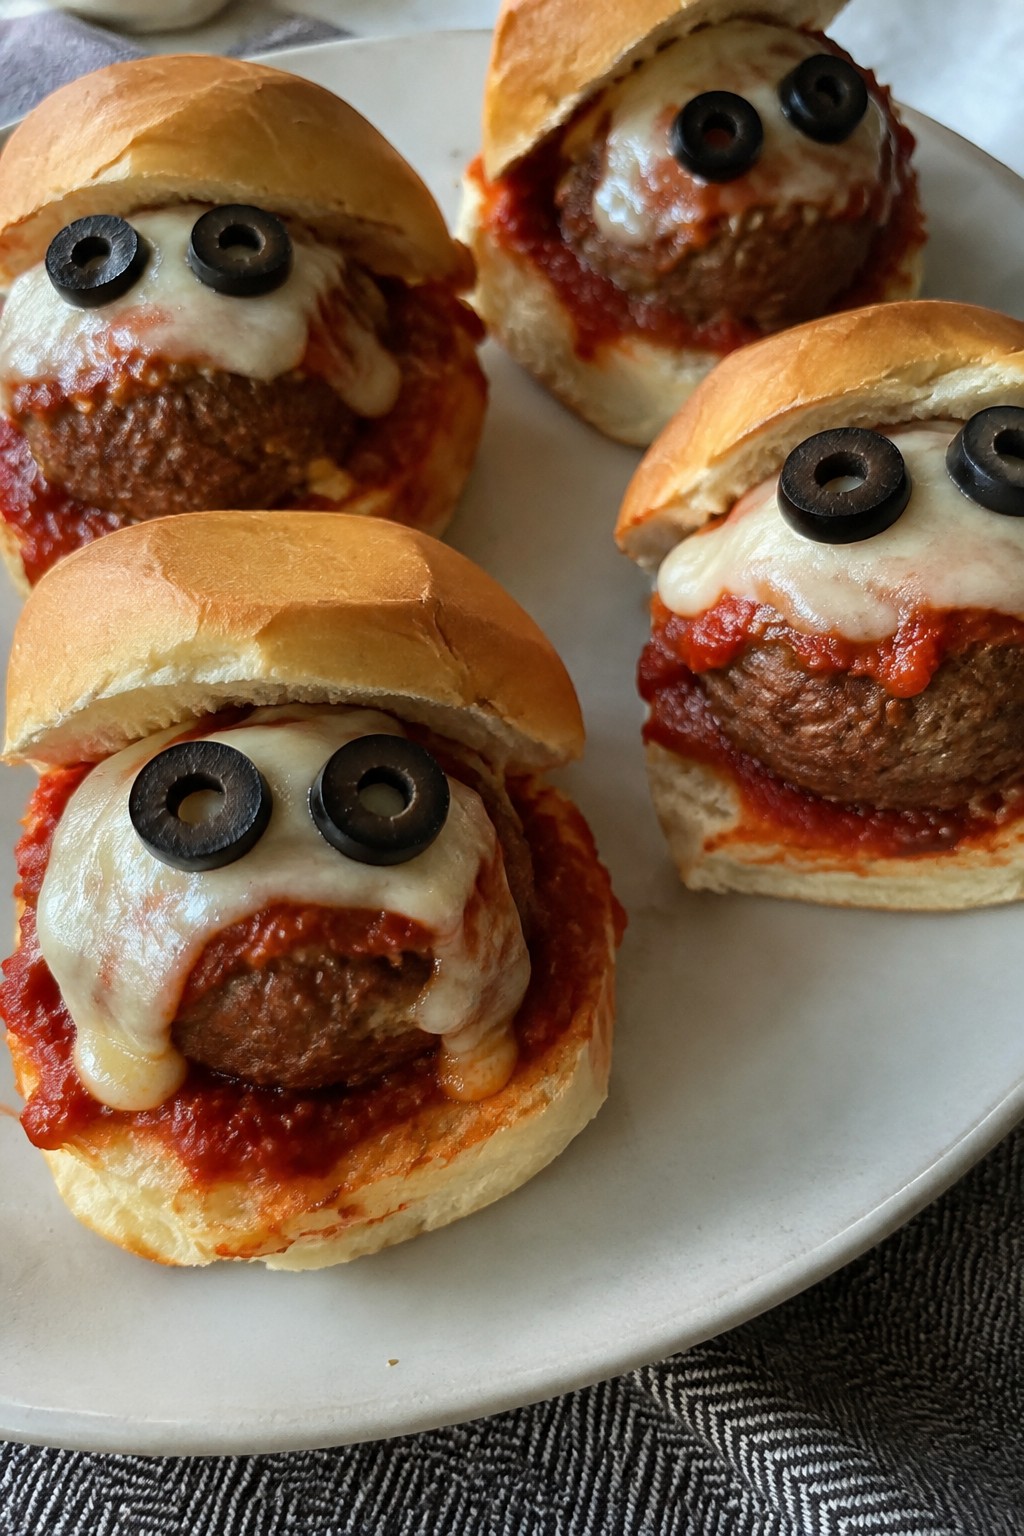
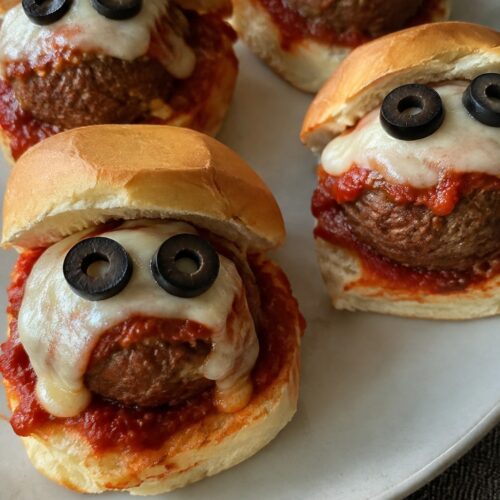
These sliders turn classic meatballs into a playful Halloween snack with olive eyes that give each one a monster face. They work well for parties where guests want something hearty instead of sweets. The beef stays juicy inside soft buns while the marinara adds familiar savory flavor.
Equipment
- Mixing bowl
- Large skillet
- Small saucepan
Ingredients
- 1 pound ground beef
- 1/2 cup breadcrumbs
- 1 large egg
- 2 teaspoons Italian seasoning
- 1/2 teaspoon salt
- 1/4 teaspoon black pepper
- 1 cup marinara sauce
- 8 mini slider buns
- 8 slices mozzarella cheese
- 16 pitted black olives
Instructions
- Combine the ground beef, breadcrumbs, egg, Italian seasoning, salt, and black pepper in a mixing bowl. Form the mixture into 8 small meatballs of equal size.
- Heat a large skillet over medium heat and cook the meatballs, turning them often until browned on all sides and cooked through.
- Warm the marinara sauce in a small saucepan while the meatballs finish cooking.
- Place one cooked meatball on the bottom half of each slider bun. Spoon marinara sauce over each meatball.
- Lay one slice of mozzarella cheese on top of the sauce and add two black olives to create eyes. Place the top bun over the cheese.
- Return the assembled sliders to the skillet for one minute with the lid on to melt the cheese slightly.
Notes
Cuisine: American
Equipment: Mixing bowl, Large skillet, Small saucepan
Crispy Fried Pickle Eyeballs
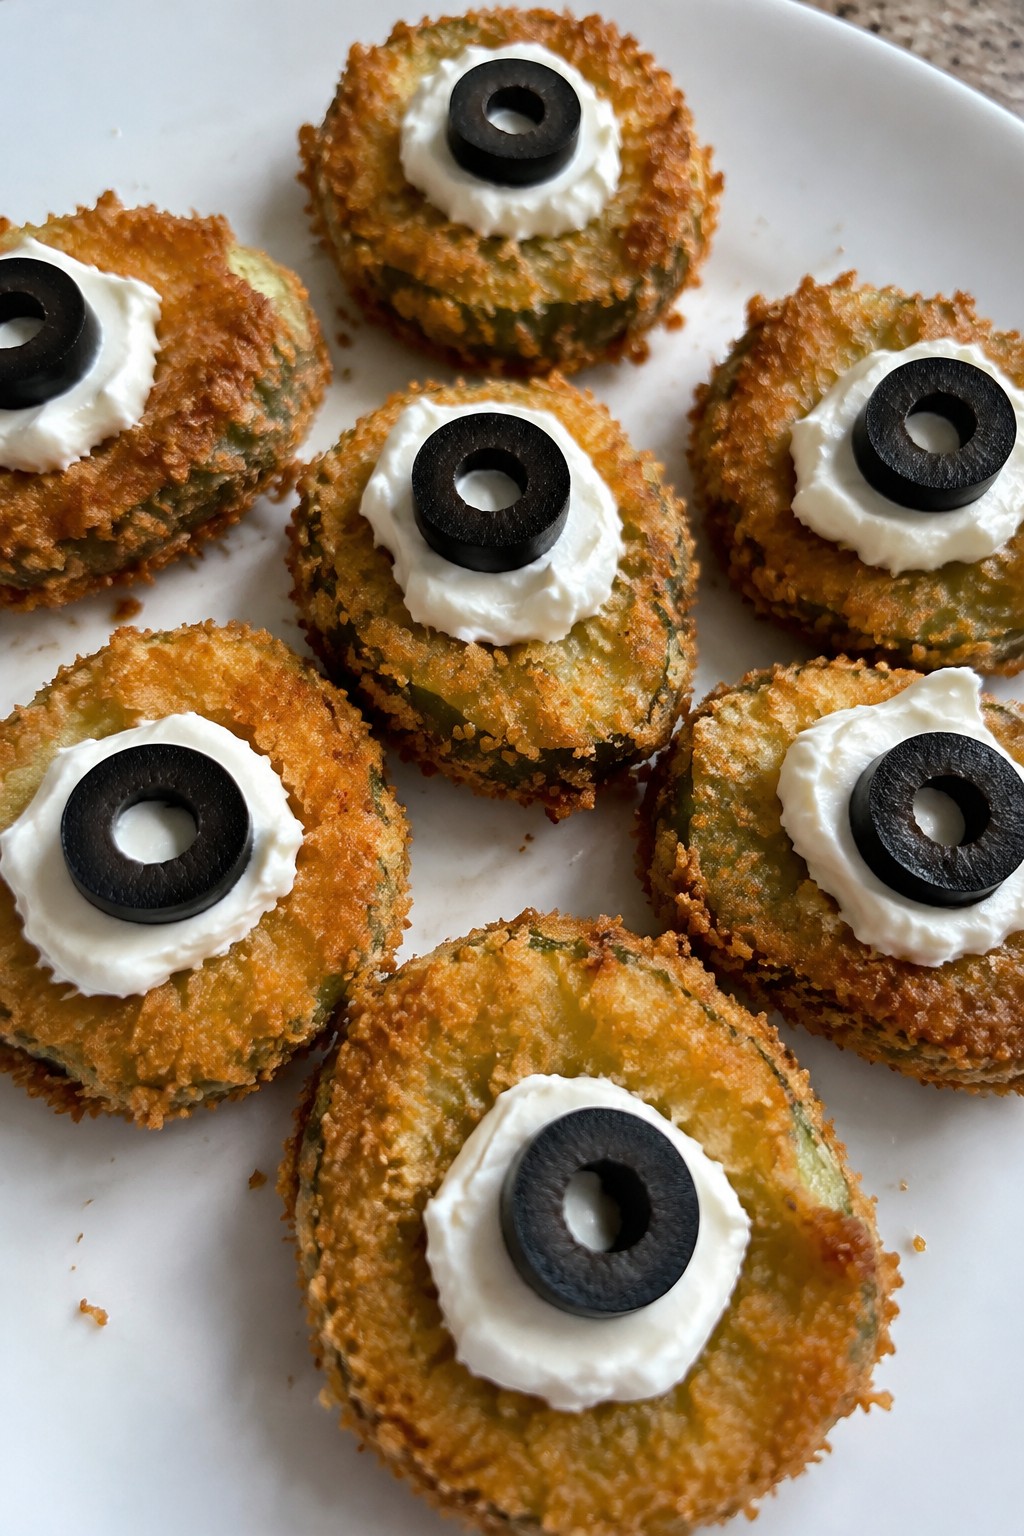
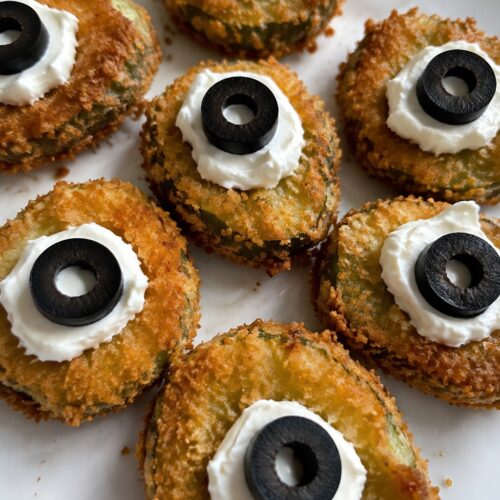
These crispy fried pickle eyeballs turn a classic bar snack into a savory Halloween bite. The crunchy panko coating contrasts with the sharp, juicy pickle inside, while simple toppings turn each piece into a quick eyeball shape that fits right in with other party foods.
They work well when guests want something salty and handheld instead of sweets. The recipe keeps prep straightforward and uses ingredients most kitchens already have on hand.
Equipment
- Large skillet
- Mixing bowls
- Slotted spoon
Ingredients
- 16 thick dill pickle slices
- 1 cup all-purpose flour
- 1 teaspoon salt
- 1/2 teaspoon black pepper
- 1 cup buttermilk
- 1 1/2 cups panko breadcrumbs
- Vegetable oil, for frying
- 1/4 cup cream cheese, softened
- 8 pitted black olives, sliced into rounds
Instructions
- Set up three shallow bowls. Place the flour, salt, and black pepper in the first bowl. Pour the buttermilk into the second bowl. Add the panko breadcrumbs to the third bowl.
- Heat about two inches of vegetable oil in a large skillet over medium-high heat until it reaches 350 degrees.
- Working one slice at a time, dip each pickle into the buttermilk, then the flour mixture, back into the buttermilk, and finally into the panko. Press lightly so the crumbs stick.
- Fry the coated pickles in batches for two to three minutes per side until golden and crisp. Remove with a slotted spoon and drain on paper towels.
- Let the fried pickles cool for one minute. Add a small dab of cream cheese to the center of each slice, then press an olive round on top to finish the eyeball look.
Notes
Cuisine: American
Equipment: Large skillet, Mixing bowls, Slotted spoon
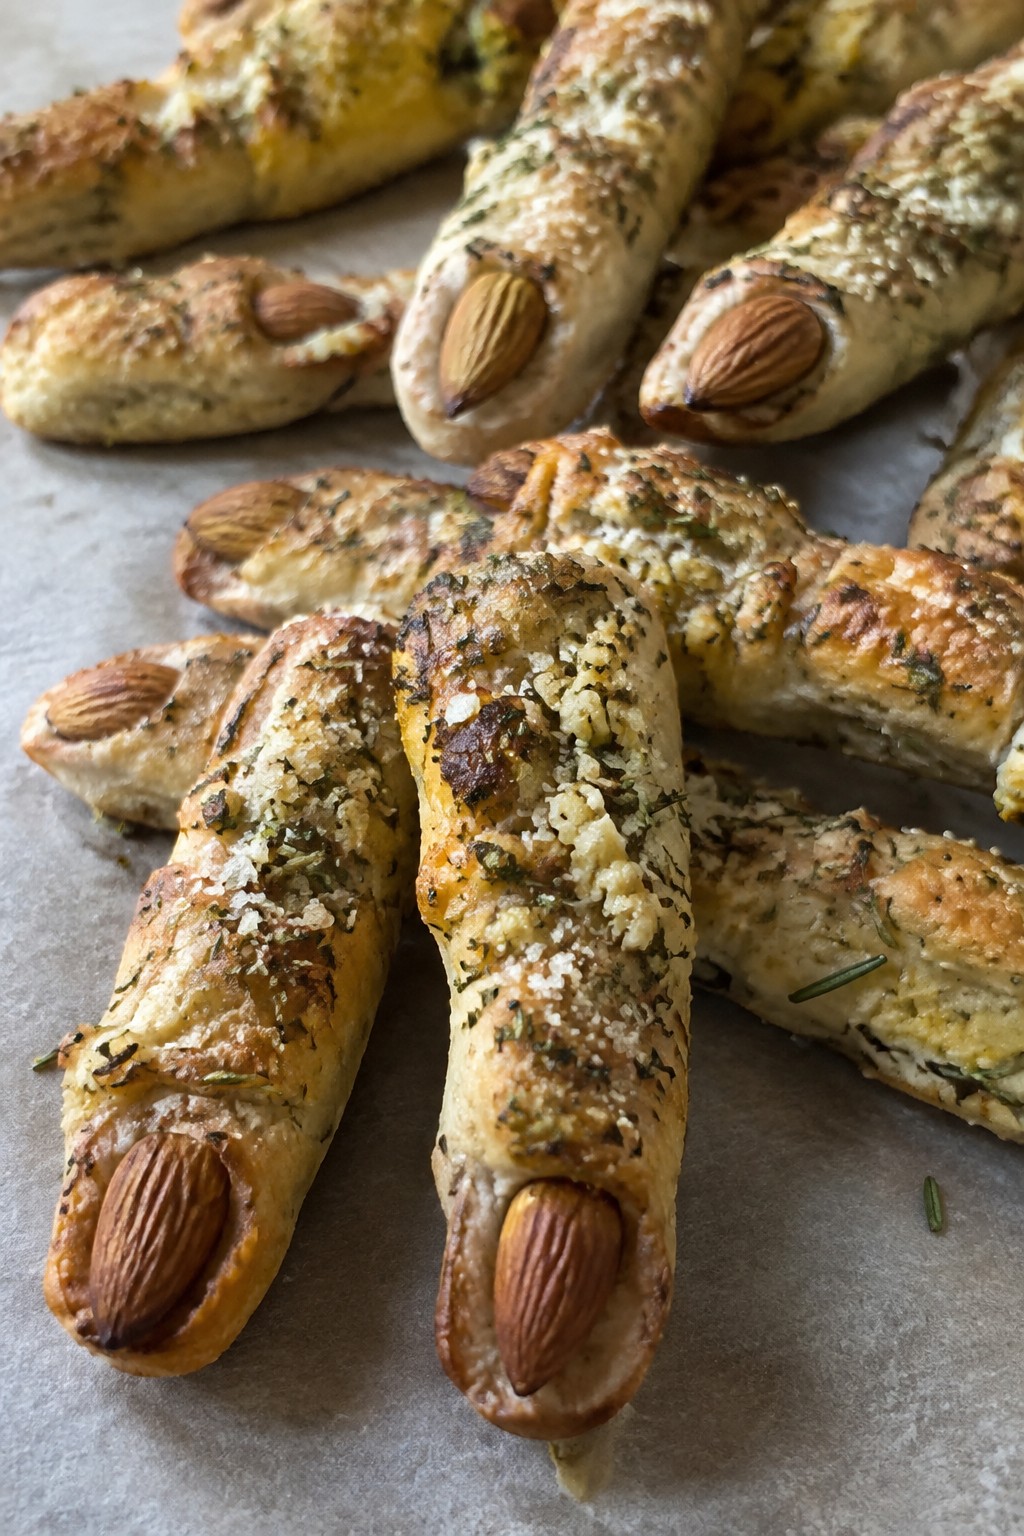
Herb-Crusted Witch Finger Breadsticks
These breadsticks bring a savory bite to any Halloween spread. Shaped like witch fingers and coated in a mix of herbs and cheese, they pair well with dips or stand on their own as a party snack. The crust turns crisp in the oven while the inside stays soft.
The flavor comes from rosemary, thyme, and garlic that cling to the dough. A single almond at the tip gives each piece its finger shape without extra work.
Equipment
- Baking Sheet
- Mixing Bowl
- Pastry Brush
Ingredients
- 1 pound pizza dough
- 2 tablespoons olive oil
- 1 tablespoon chopped fresh rosemary
- 1 tablespoon chopped fresh thyme
- 2 cloves garlic, minced
- 1/4 cup grated Parmesan cheese
- 12 whole almonds
- 1 teaspoon coarse salt
Instructions
- Heat the oven to 400 degrees and line a baking sheet with parchment paper.
- Divide the pizza dough into 12 equal pieces on a lightly floured surface.
- Roll each piece into a thin 6-inch log and press a slight indentation in the middle to form a knuckle.
- Place the logs on the baking sheet and press one almond into the tip of each log to create a fingernail.
- Stir the olive oil, rosemary, thyme, and garlic together in a small bowl.
- Brush the herb oil over each breadstick.
- Sprinkle the Parmesan cheese and coarse salt evenly over the tops.
- Bake for 12 to 15 minutes until the breadsticks turn golden at the edges.
Notes
Cuisine: American
Equipment: Baking Sheet, Mixing Bowl, Pastry Brush
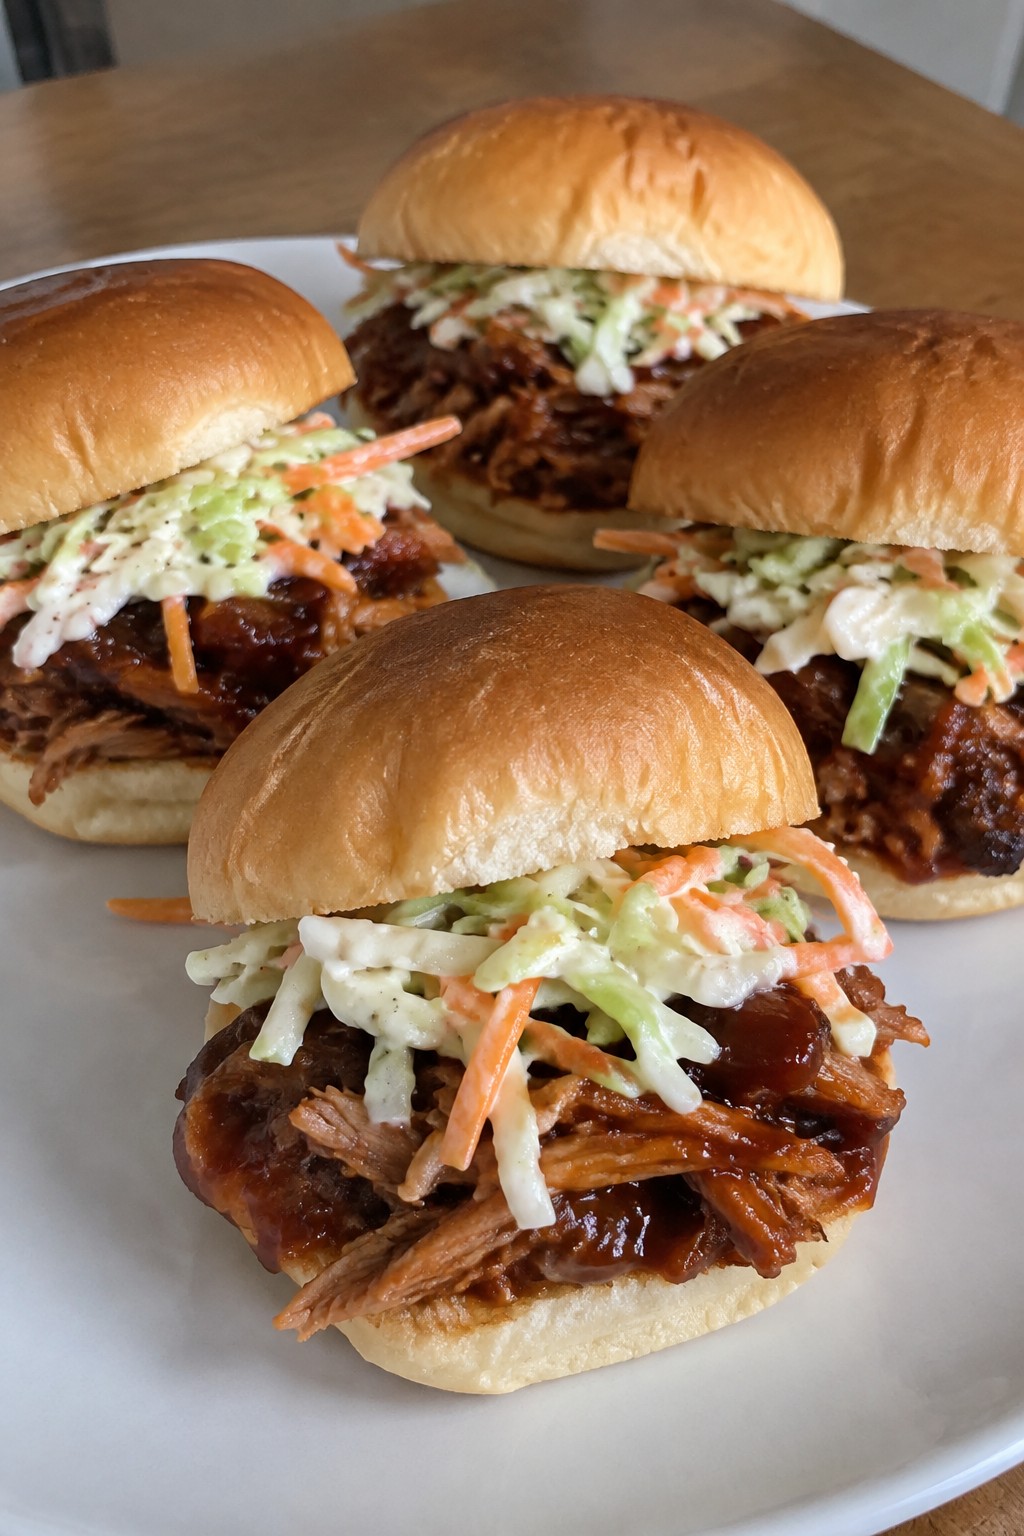
Smoky BBQ Pulled Pork Sliders with Slaw
These sliders deliver tender pulled pork coated in smoky BBQ sauce, topped with a crisp cabbage slaw that adds freshness and crunch. They make a solid choice for a Halloween party spread when guests want something savory and filling rather than light bites. The combination of sweet-tangy sauce, spiced meat, and cool slaw creates balanced flavor in each small sandwich.
Equipment
- Slow Cooker
- Mixing Bowl
- Skillet
Ingredients
- 1 lb boneless pork shoulder
- ¾ cup smoky BBQ sauce
- 1 tsp smoked paprika
- 8 slider buns
- 2 cups shredded green cabbage
- 1 large carrot, grated
- ¼ cup mayonnaise
- 1 tbsp apple cider vinegar
- ½ tsp sugar
- Salt and pepper
Instructions
- Rub the pork shoulder with smoked paprika, salt, and pepper. Place it in a slow cooker and pour ½ cup of the BBQ sauce over the top.
- Cook on low for 6 to 8 hours until the pork shreds easily with two forks. Shred the meat directly in the slow cooker and stir in the remaining ¼ cup of BBQ sauce.
- In a mixing bowl, combine the shredded cabbage, grated carrot, mayonnaise, apple cider vinegar, sugar, salt, and pepper. Stir until the slaw is evenly coated.
- Split the slider buns and lightly toast them in a skillet over medium heat if desired. Spoon pulled pork onto the bottom halves and add a generous spoonful of slaw on top. Close with the bun tops and serve right away.
Notes
Cuisine: American
Equipment: Slow Cooker, Mixing Bowl, Skillet
Caprese Ghost Skewers
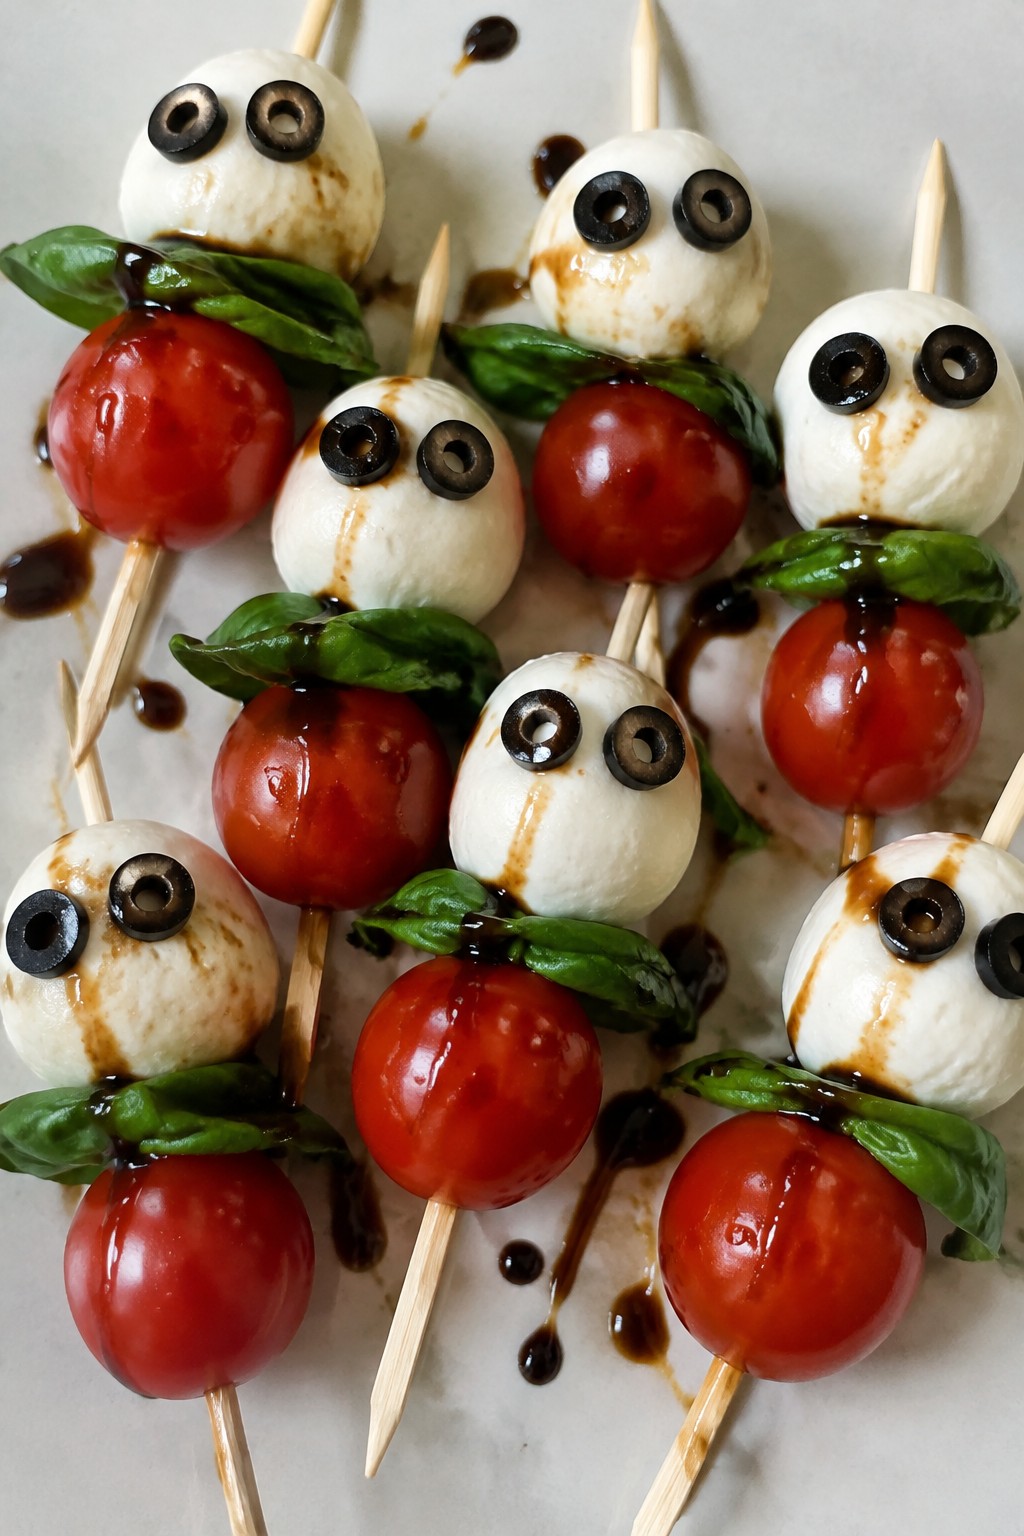
These Caprese Ghost Skewers turn a simple salad into a fun Halloween snack. The mozzarella balls become ghosts with olive eyes, giving a light spooky touch that fits right in with other savory party bites.
The flavors stay true to classic Caprese with juicy tomatoes, creamy cheese, and fresh basil. A drizzle of balsamic glaze adds just enough tang without overpowering the ingredients.
Equipment
- Wooden skewers
- Knife
- Serving platter
Ingredients
- 12 cherry tomatoes
- 12 bocconcini mozzarella balls
- 24 thin slices black olives
- 12 fresh basil leaves
- 12 wooden skewers
- 3 tablespoons balsamic glaze
Instructions
- Set each mozzarella ball on a clean surface and press two black olive slices onto the front to form eyes for the ghost faces.
- Slide one cherry tomato onto a wooden skewer, followed by one basil leaf and one prepared mozzarella ghost.
- Repeat with the remaining ingredients until all 12 skewers are assembled.
- Arrange the skewers on a serving platter and drizzle the balsamic glaze lightly over the tops just before guests arrive.
Notes
Cuisine: Italian
Equipment: Wooden skewers, Knife, Serving platter
Jalapeño Popper Mummies
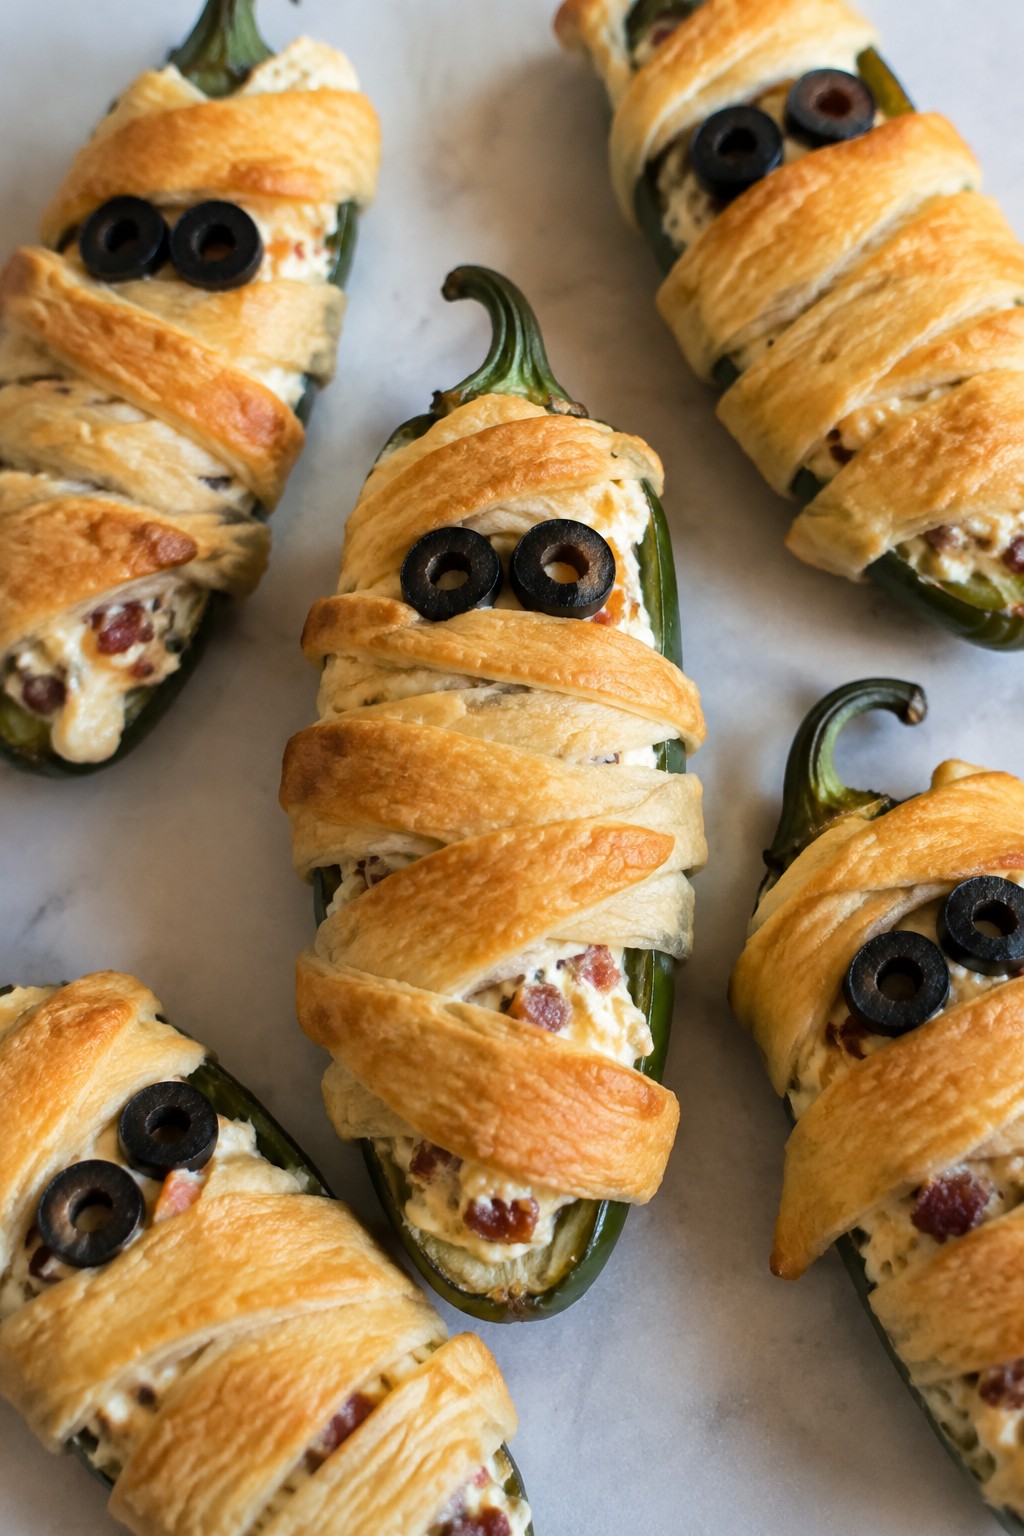
These Jalapeño Popper Mummies turn a familiar appetizer into a fun Halloween snack. Each pepper gets filled with a creamy cheese mixture that includes bacon for extra savoriness, then wrapped in dough strips to create a mummy look. They fit well at parties where guests want something warm and handheld.
The finished poppers offer a balance of spicy heat, rich filling, and flaky crust. They pair nicely with simple dips and hold up well on a buffet table.
Equipment
- Baking sheet
- Mixing bowl
- Knife
Ingredients
- 8 large jalapeño peppers
- 4 ounces cream cheese, softened
- 1/2 cup shredded cheddar cheese
- 2 tablespoons cooked bacon, crumbled
- 1/2 teaspoon garlic powder
- 1 tube refrigerated crescent roll dough
- 8 black olive slices
Instructions
- Preheat the oven to 375 degrees and line a baking sheet with parchment paper.
- Slice each jalapeño lengthwise, remove the seeds and membranes, and set the halves aside.
- In a mixing bowl, combine the cream cheese, cheddar cheese, crumbled bacon, and garlic powder until evenly mixed.
- Spoon the cheese mixture into each jalapeño half and press gently to fill.
- Unroll the crescent dough and cut it into thin strips. Wrap the strips around each stuffed jalapeño, leaving small gaps for the mummy effect.
- Place two olive slices on each wrapped jalapeño to form eyes.
- Arrange the mummies on the baking sheet and bake for 15 to 18 minutes until the dough turns golden brown.
Notes
Cuisine: American
Equipment: Baking sheet, Mixing bowl, Knife
Black Sesame Spider Rolls
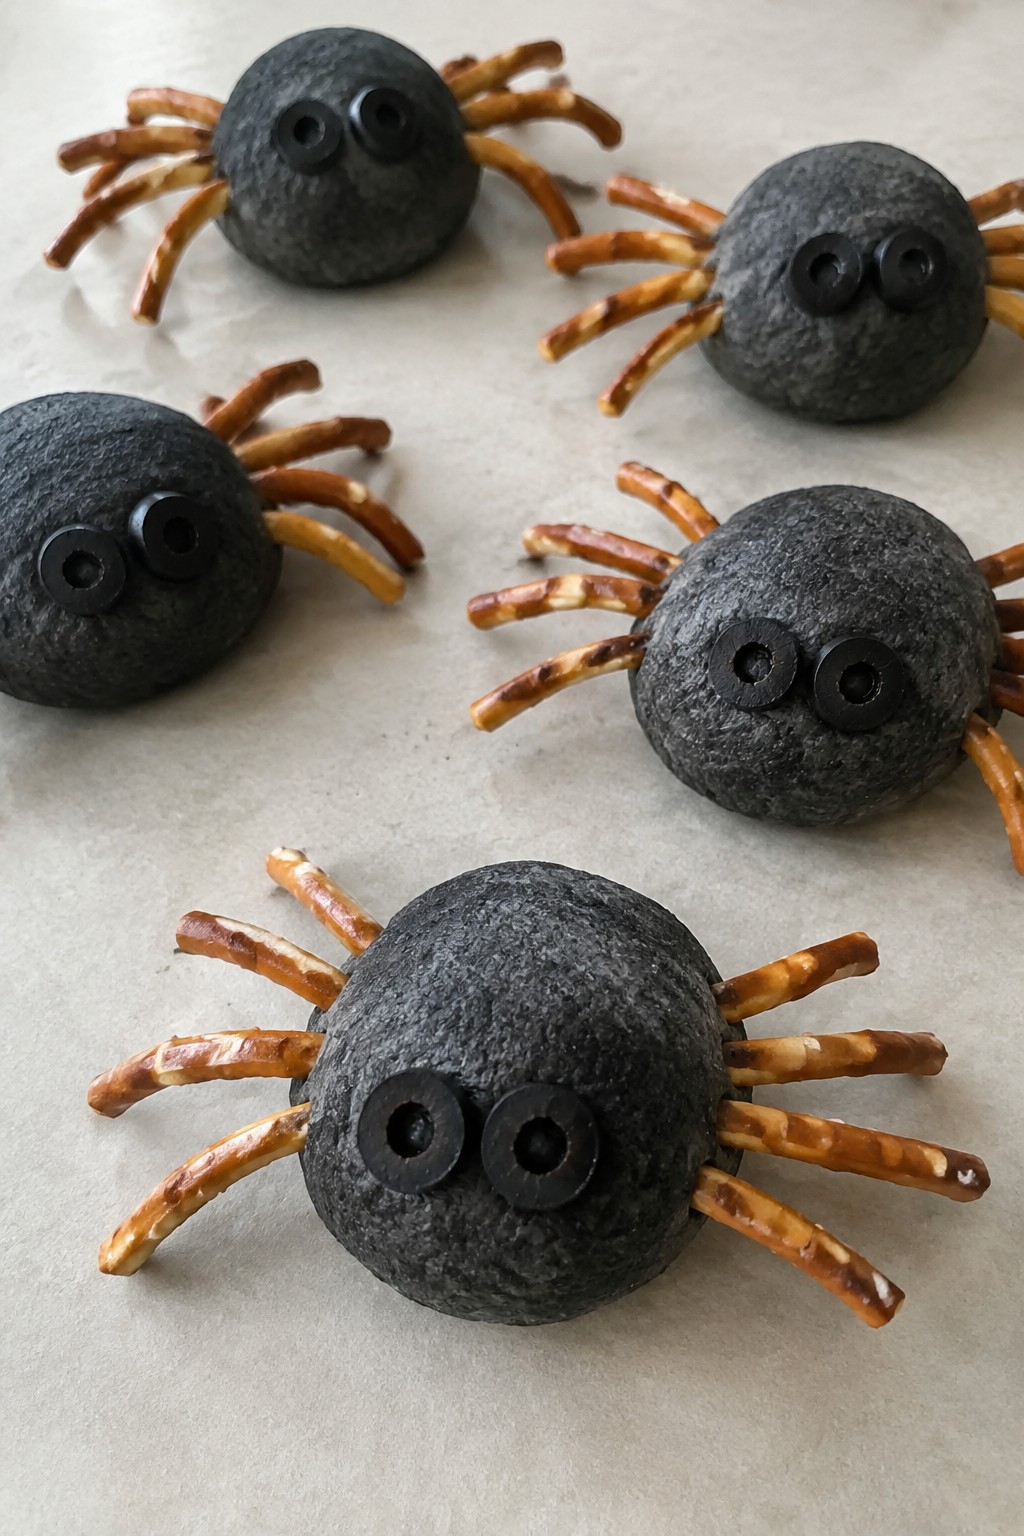
These rolls bring a fun spider shape to your Halloween spread while staying fully savory. The black sesame paste gives the dough a deep color and mild nutty taste that pairs well with party dips or soups. They work best as a make-ahead snack that guests can grab without needing utensils.
The soft interior and slightly crisp crust come from a simple yeast dough. Pretzel sticks form the legs and sliced olives act as eyes, keeping everything edible and themed without extra fuss.
Equipment
- Mixing bowl
- Baking sheet
Ingredients
- 3 cups all-purpose flour
- 1 packet (2 1/4 tsp) instant yeast
- 1 cup warm water
- 1/4 cup black sesame paste
- 2 tablespoons olive oil
- 1 teaspoon salt
- 1 tablespoon sugar
- 16 pretzel sticks
- 8 black olives, sliced
Instructions
- Stir the warm water, yeast, and sugar together in a large bowl until the yeast dissolves. Let it sit for 5 minutes until small bubbles form.
- Add the black sesame paste, olive oil, and salt to the yeast mixture. Stir until the paste is mostly combined.
- Mix in the flour one cup at a time until a soft dough forms. Turn the dough onto a lightly floured surface and knead for 8 minutes until smooth.
- Place the dough back in the bowl, cover it, and let it rise for 1 hour until doubled in size.
- Divide the dough into 8 equal pieces. Shape each piece into a small oval body.
- Press 2 pretzel sticks into each side of the oval to create 4 legs per roll. Add 2 olive slices on top of each body for eyes.
- Place the shaped rolls on a baking sheet lined with parchment paper. Cover and let them rise again for 20 minutes.
- Bake at 375°F for 18 to 20 minutes until the rolls are firm and lightly browned on the bottom.
Notes
Cuisine: American
Equipment: Mixing bowl, Baking sheet
Caramelized Onion and Gruyère Tartlets
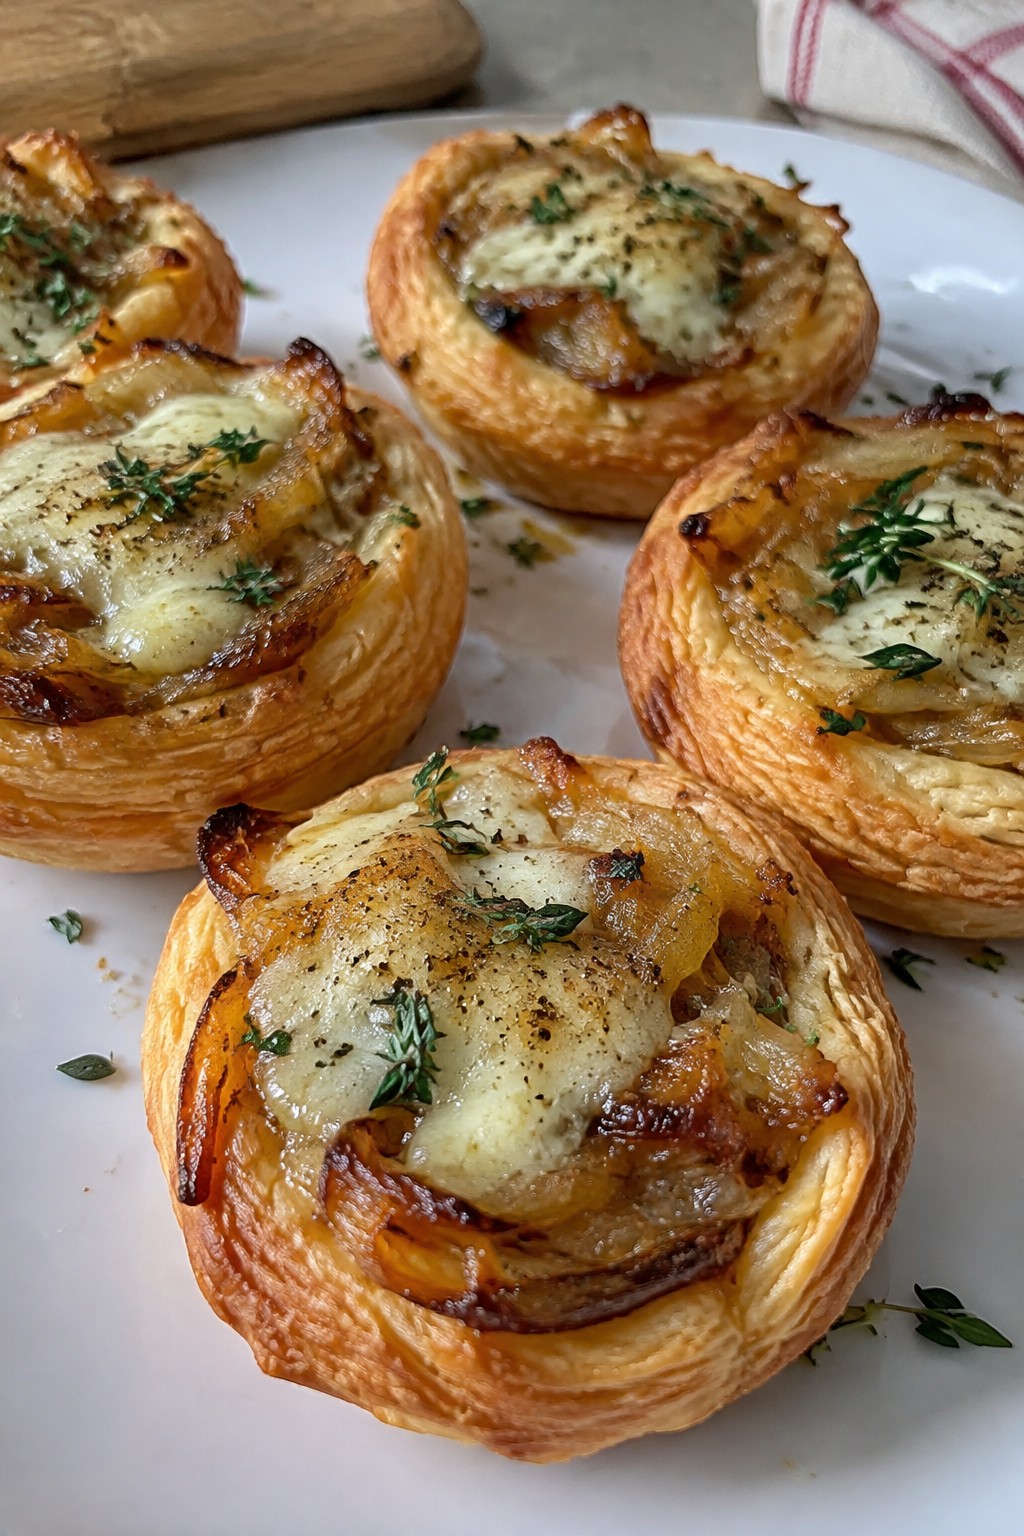
These tartlets offer a savory bite with sweet caramelized onions and nutty Gruyère cheese on a flaky pastry base. They fit well at Halloween parties where guests want something warm and substantial to balance sweeter treats. The contrast of soft onions and crisp crust makes them easy to enjoy while standing and chatting.
The recipe keeps things simple with everyday ingredients and straightforward steps. It delivers a balanced savory flavor that feels elevated but stays approachable for home cooks.
Equipment
- Large skillet
- Baking sheet
- Rolling pin
Ingredients
- 1 sheet puff pastry, thawed
- 2 large yellow onions, thinly sliced
- 2 tablespoons butter
- 1 tablespoon olive oil
- 1 teaspoon sugar
- 1/2 teaspoon salt
- 1 cup shredded Gruyère cheese
- 1 teaspoon fresh thyme leaves
- Freshly ground black pepper to taste
Instructions
- Heat the butter and olive oil in a large skillet over medium heat. Add the sliced onions, sugar, and salt, then cook for 20 to 25 minutes, stirring often, until the onions turn golden and soft.
- Remove the skillet from the heat and stir in the thyme leaves and a few grinds of black pepper. Let the onion mixture cool slightly.
- Heat the oven to 400°F and line a baking sheet with parchment paper. Roll out the puff pastry on a lightly floured surface and cut it into 8 small squares or rounds.
- Place the pastry pieces on the baking sheet. Spoon the caramelized onions evenly over each piece, then top with the shredded Gruyère cheese.
- Bake for 15 to 18 minutes until the pastry is golden and the cheese has melted. Serve warm.
Notes
Cuisine: French
Equipment: Large skillet, Baking sheet, Rolling pin
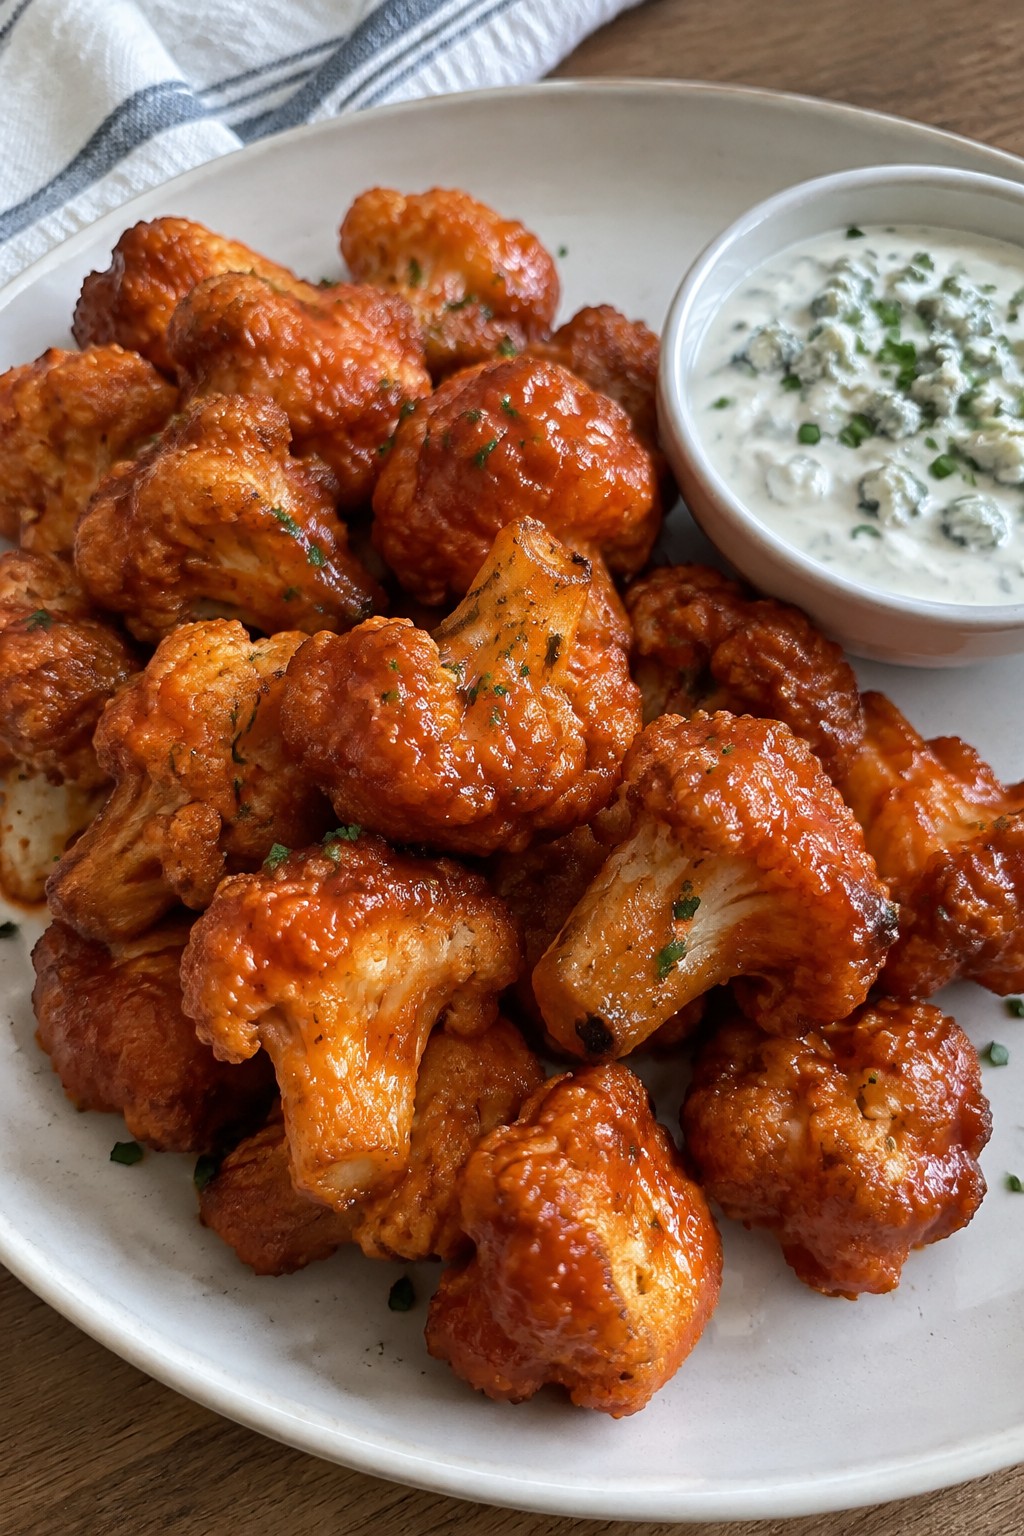
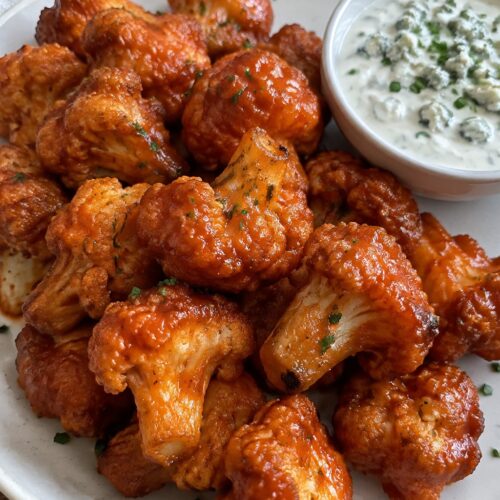
Buffalo Cauliflower Bites with Blue Cheese Dip
These bites give guests a spicy, crispy option that stands out from typical party fare. They suit Halloween gatherings where people want hearty snacks instead of sweets. The cauliflower turns tender inside a light crust, while the sauce adds bold heat.
The blue cheese dip cools everything down with its creamy tang. This combination keeps the plate balanced and satisfying for a crowd.
Equipment
- Baking sheet
- Mixing bowls
- Whisk
Ingredients
- 1 large head cauliflower, cut into bite-sized florets
- ¾ cup all-purpose flour
- ¾ cup water
- 1 teaspoon garlic powder
- ½ teaspoon salt
- ½ cup buffalo hot sauce
- 2 tablespoons unsalted butter, melted
- ½ cup crumbled blue cheese
- ¼ cup mayonnaise
- ¼ cup sour cream
- 1 tablespoon lemon juice
- 1 tablespoon chopped chives
Instructions
- Preheat the oven to 425°F and line a baking sheet with parchment paper.
- In a large bowl, whisk together the flour, water, garlic powder, and salt until smooth. Add the cauliflower florets and toss until fully coated.
- Spread the coated florets in a single layer on the baking sheet. Bake for 20 minutes, flipping once halfway through.
- While the cauliflower bakes, stir the buffalo hot sauce and melted butter together in a small bowl.
- Remove the cauliflower from the oven and drizzle the sauce mixture over the florets. Toss gently to coat, then return to the oven for 10 more minutes.
- In a separate bowl, mix the blue cheese, mayonnaise, sour cream, and lemon juice until combined.
- Sprinkle the chives over the finished bites and serve with the blue cheese dip on the side.
Notes
Cuisine: American
Equipment: Baking sheet, Mixing bowls, Whisk
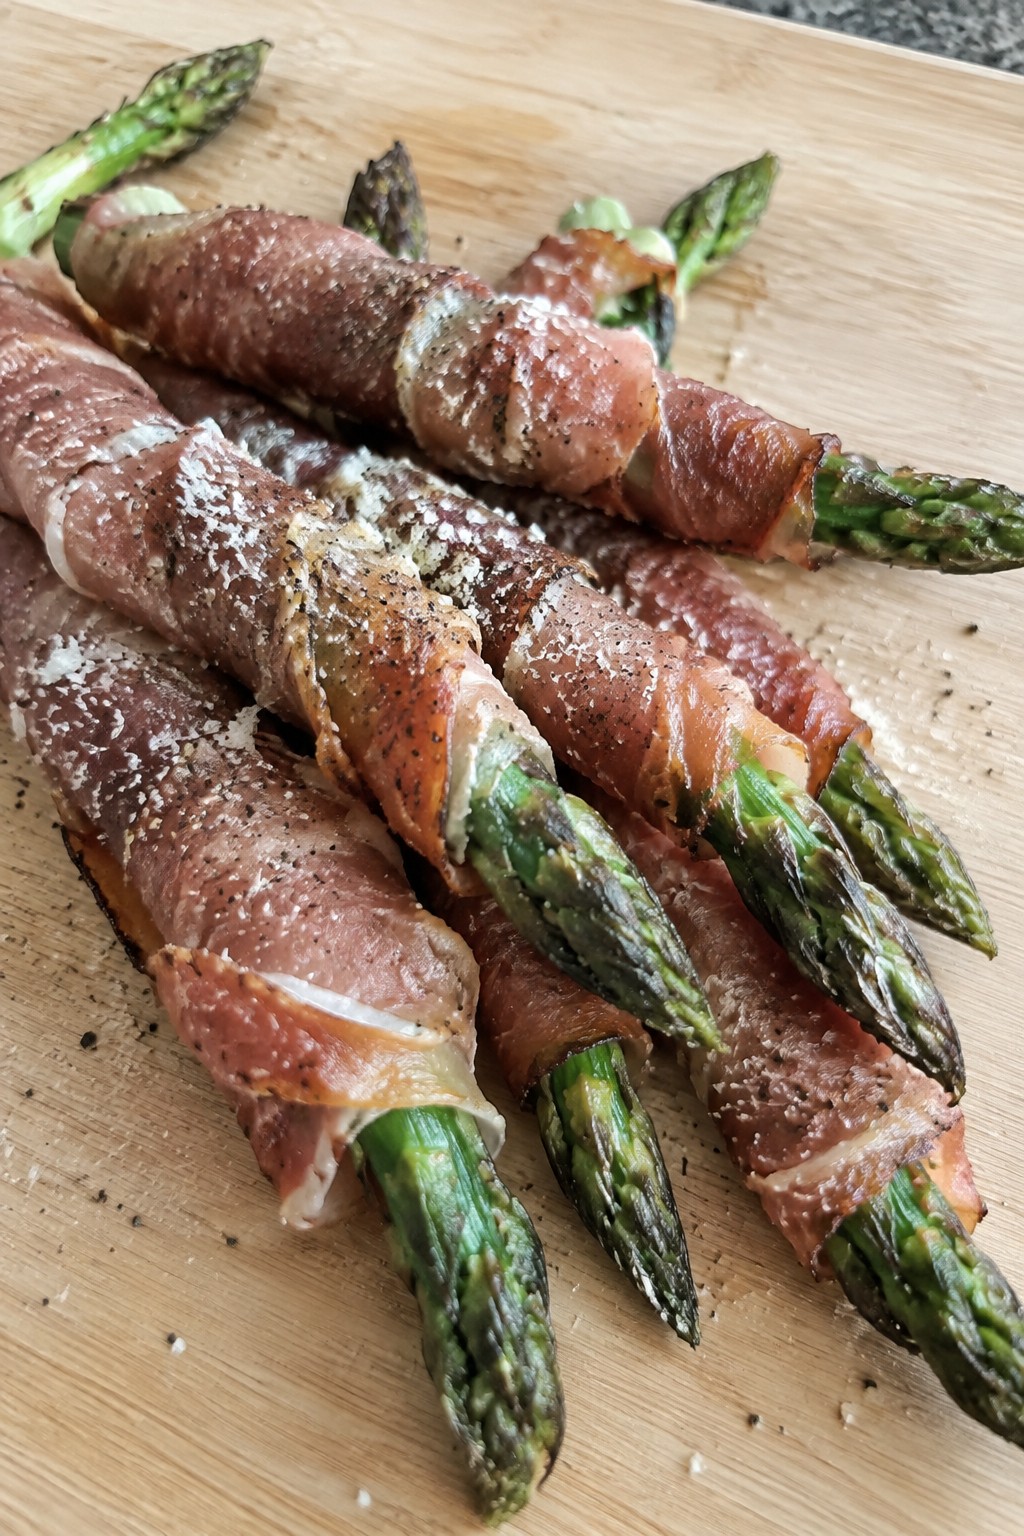
Prosciutto-Wrapped Asparagus Spears
These Prosciutto-Wrapped Asparagus Spears bring a savory, handheld option to Halloween parties. Guests who want something more than basic snacks appreciate the salty prosciutto paired with tender asparagus. The result gives a crisp exterior and a soft center that holds up well on a buffet table.
This recipe works for both casual and dressed-up gatherings. It stays simple to prepare yet feels intentional next to heavier party foods.

Equipment
- Baking sheet
- Mixing bowl
- Oven
Ingredients
- 12 asparagus spears, trimmed
- 6 slices prosciutto, halved lengthwise
- 2 tablespoons olive oil
- 1/2 teaspoon black pepper
- 1/4 cup grated Parmesan cheese
Instructions
- Preheat the oven to 400 degrees F and line a baking sheet with parchment paper.
- Place the trimmed asparagus spears in a mixing bowl and drizzle with the olive oil. Sprinkle with the black pepper and toss until evenly coated.
- Take one asparagus spear and wrap it with one half slice of prosciutto, starting at the base and spiraling upward. Repeat with the remaining spears.
- Arrange the wrapped spears in a single layer on the prepared baking sheet.
- Bake for 10 to 12 minutes until the prosciutto is slightly crisp and the asparagus is tender.
- Remove from the oven and immediately sprinkle the grated Parmesan cheese over the warm spears before serving.
Notes
Cuisine: Italian
Equipment: Baking sheet, Mixing bowl, Oven
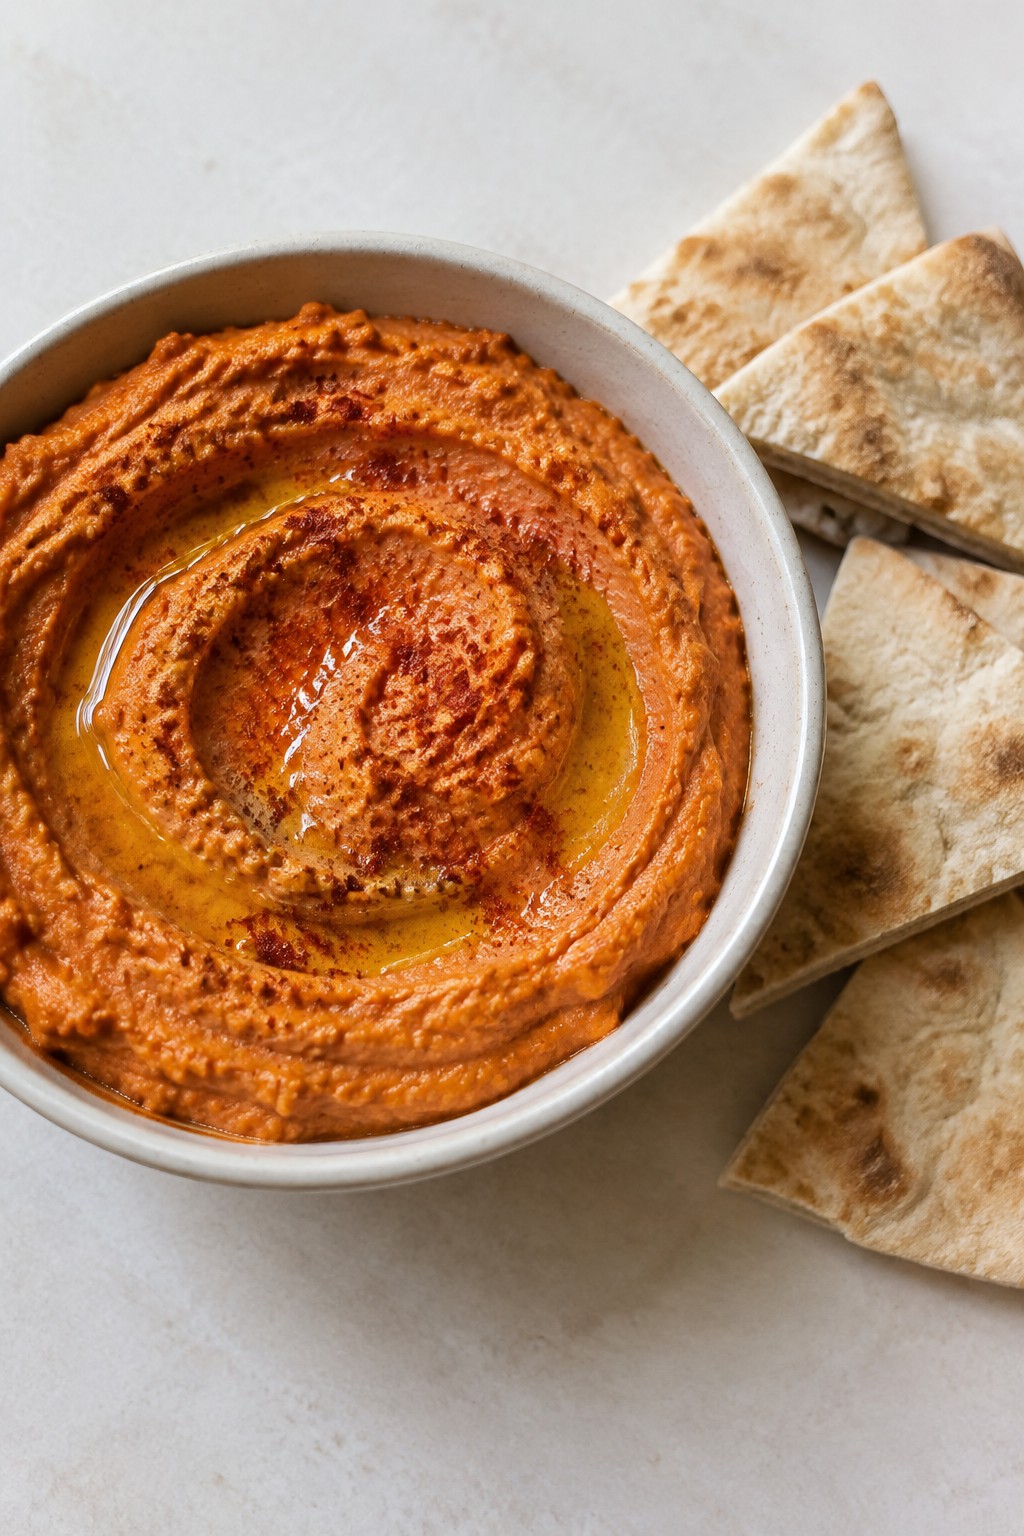
Roasted Red Pepper Hummus with Pita Triangles
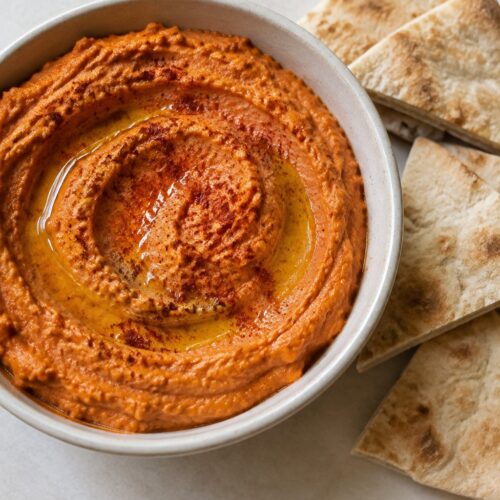
This roasted red pepper hummus offers a smoky and slightly sweet dip that stands out on a party table. The smooth texture comes from blending chickpeas with jarred peppers, while the pita triangles add a sturdy crunch for scooping.
It suits a Halloween spread because the orange-red color fits the season and the savory profile keeps guests satisfied alongside other snacks.
Equipment
- Food processor
- Knife
- Serving bowl
Ingredients
- 1 (15-ounce) can chickpeas, drained and rinsed
- 1/2 cup jarred roasted red peppers, drained
- 2 tablespoons tahini
- 1 garlic clove
- 2 tablespoons olive oil, plus more for drizzling
- Juice of 1 lemon
- 1/2 teaspoon salt
- 4 pita breads
- 1/2 teaspoon paprika
Instructions
- Place the chickpeas, roasted red peppers, tahini, garlic, olive oil, lemon juice, and salt in a food processor. Blend until the mixture turns smooth and creamy.
- Cut each pita bread into eight triangles using a sharp knife.
- Spoon the hummus into a serving bowl. Drizzle with a little extra olive oil and sprinkle the paprika over the top.
- Arrange the pita triangles around the bowl or on a separate plate for dipping.
Notes
Cuisine: Mediterranean
Equipment: Food processor, Knife, Serving bowl
