


Halloween parties often call for food that looks fun without being too complicated. This list shares 15 recipes that work well for guests who want something themed but still tasty. Each one uses basic ingredients and steps you can follow with what you likely have at home. You can choose a mix of sweet and savory options to fit your menu. These ideas should help you put together a spread without extra stress.
Helpful Tips Before You Start
A few practical steps will help your Halloween recipes look scary without extra stress on party day.
Test one recipe first
Pick one new dish and make a small batch ahead of time. This shows how the colors and textures hold up.
Stock basic decorating tools
Keep piping bags, small squeeze bottles, and gel food coloring on hand. These make it easy to add veins, drips, or mold effects.
Prep components in advance
Cook sauces, shape dough, or mix fillings the day before. Assemble and finish the scary details right before guests arrive.
Label anything unusual
Note ingredients that guests might not expect, especially if you use items like black sesame or activated charcoal. This avoids surprises at the table.
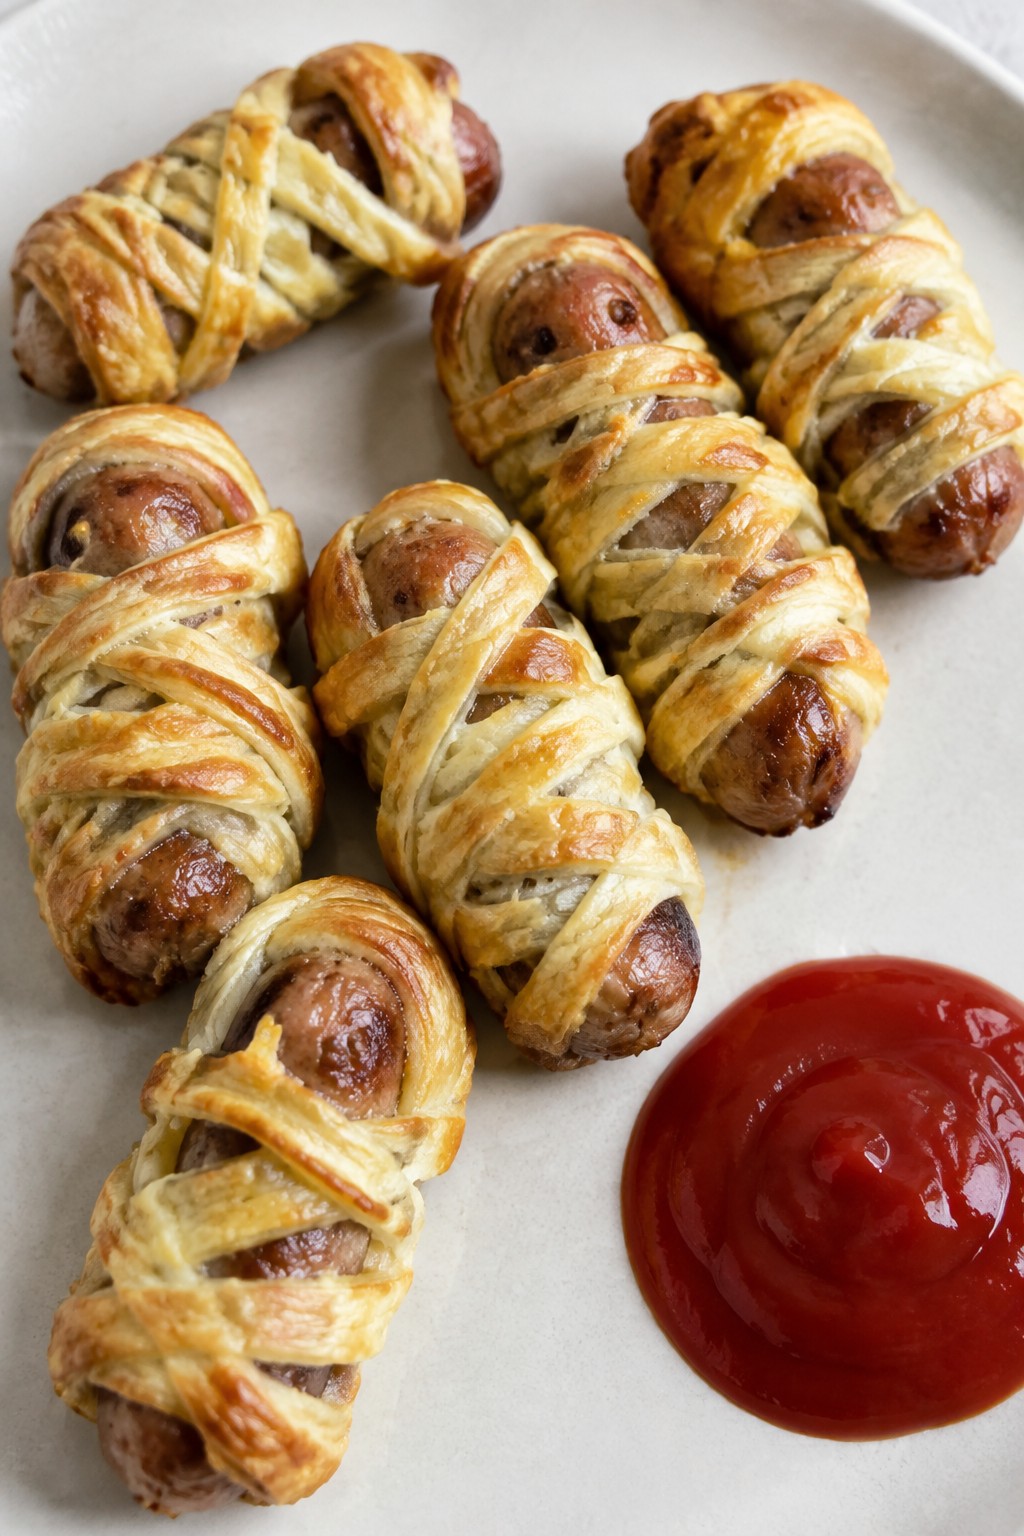
Mummy-Wrapped Sausage Rolls with Ketchup Blood
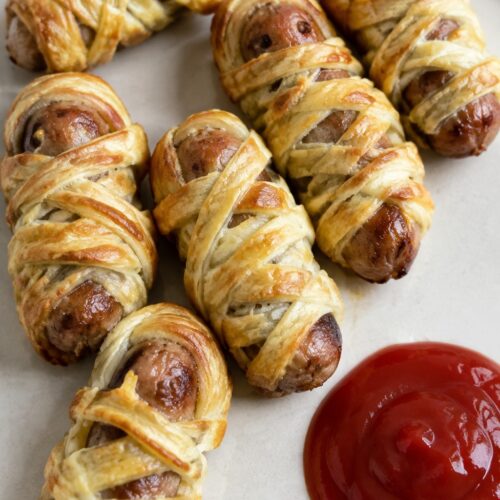
These sausage rolls get wrapped in strips of pastry to look like little mummies. They make a fun finger food for Halloween parties and work well as a quick savory bite before the main spread.
The pastry bakes up flaky while the sausages stay juicy inside. Ketchup on the side adds a simple red dip that fits the theme without extra steps.
Equipment
- Baking sheet
- Oven
- Pastry brush
- Knife
Ingredients
- 8 pork sausages
- 1 sheet ready-rolled puff pastry
- 1 large egg
- 1/2 cup ketchup
Instructions
- Preheat the oven to 400°F and line a baking sheet with parchment paper.
- Unroll the puff pastry sheet on a lightly floured surface. Cut it into thin strips about half an inch wide.
- Wrap each sausage with several pastry strips, leaving small gaps so the sausage shows through like mummy bandages. Place the wrapped sausages on the baking sheet.
- Beat the egg in a small bowl and brush it lightly over the pastry on each sausage.
- Bake for 20 to 25 minutes until the pastry turns golden and the sausages are cooked through.
- Serve the rolls warm with the ketchup on the side for dipping.
Notes
Cuisine: American
Equipment: Baking sheet, Oven, Pastry brush, Knife
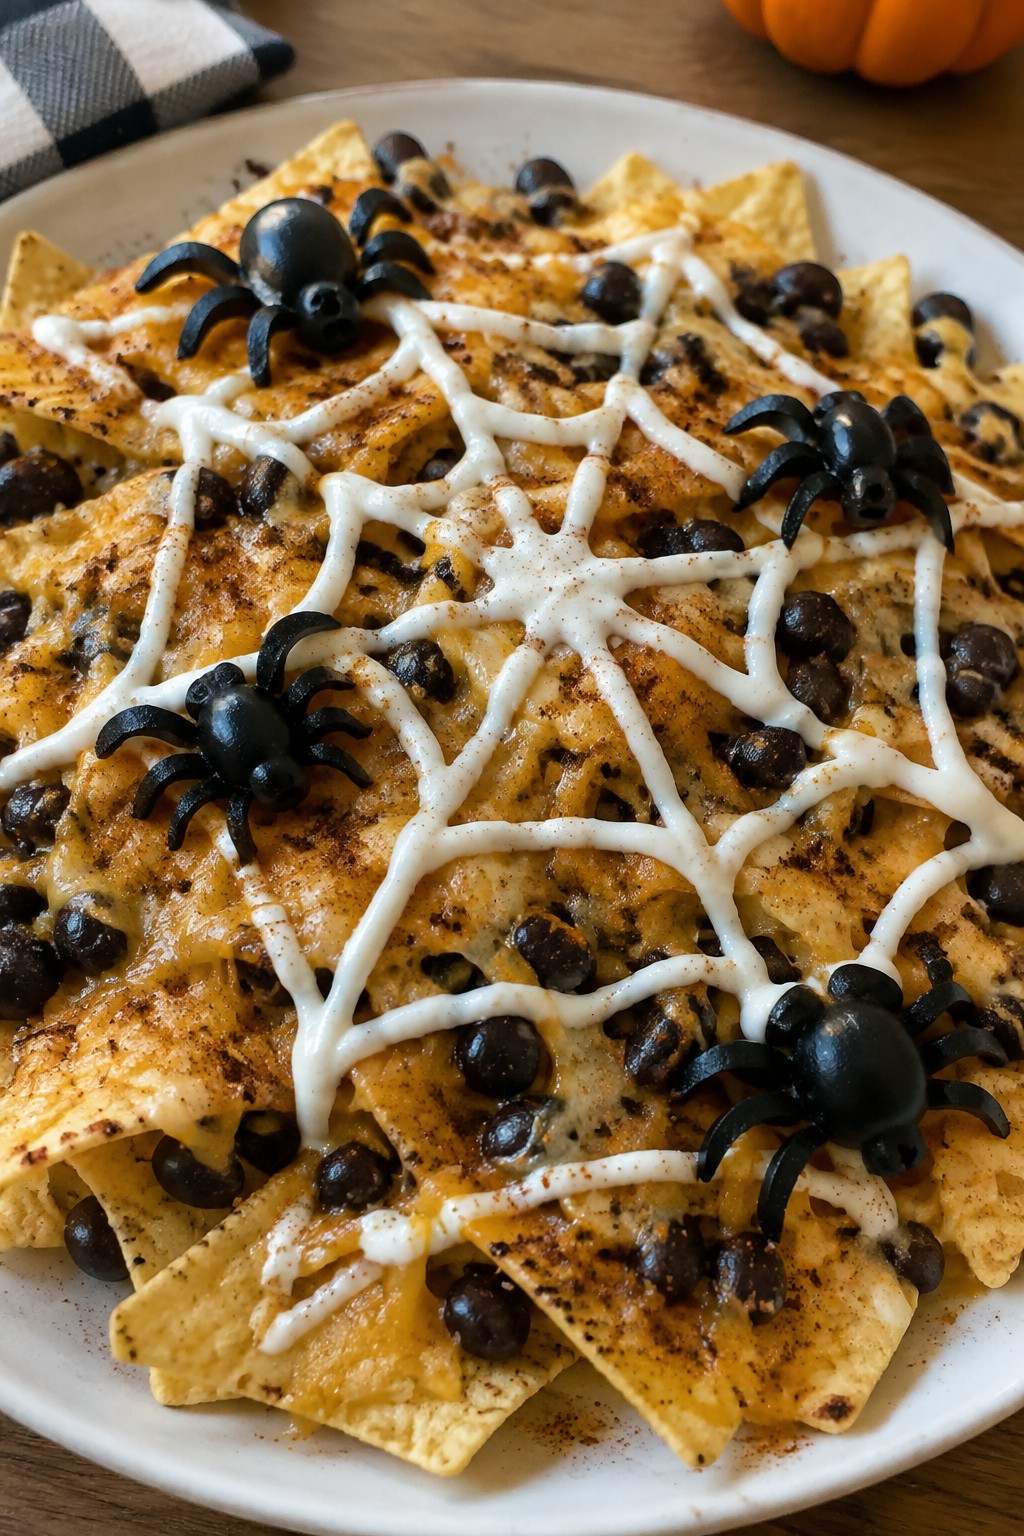
Spiderweb Black Bean Nachos with Olive Spiders
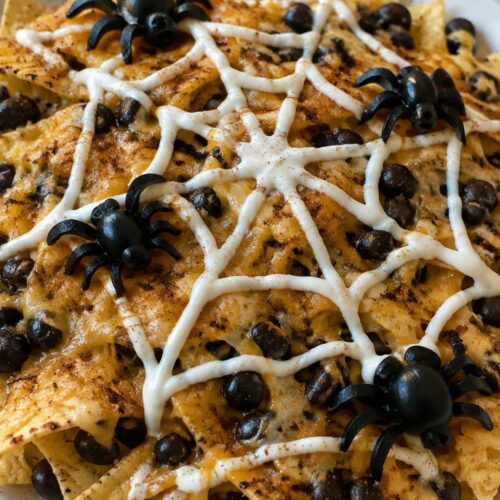
These nachos bring a simple Halloween touch to a classic party snack. Black beans and melted cheese sit on crisp tortilla chips, while a sour cream spiderweb adds the spooky detail and olive spiders perch on top. The result works well for game nights or casual gatherings where guests want something savory and easy to share.
The dish stays crunchy at the base with creamy and slightly spicy layers on top. It feels festive without extra effort once the web and spiders are in place.
Equipment
- Baking sheet
- Skillet
- Mixing bowl
- Zip-top bag
Ingredients
- 12 ounces tortilla chips
- 2 cups shredded cheddar cheese
- 1 (15-ounce) can black beans, drained and rinsed
- 1 teaspoon chili powder
- 1/2 teaspoon ground cumin
- 1/2 cup sour cream
- 2 tablespoons milk
- 12 whole black olives
Instructions
- Preheat the oven to 375 degrees. Spread the tortilla chips in a single layer on a large baking sheet.
- In a skillet over medium heat, warm the black beans with the chili powder and cumin for 3 minutes until heated through. Spoon the beans evenly over the chips.
- Sprinkle the shredded cheddar cheese over the beans and chips. Bake for 8 to 10 minutes until the cheese melts and bubbles.
- While the nachos bake, stir the sour cream and milk together in a small bowl until smooth. Transfer the mixture to a zip-top bag and snip off one corner.
- Remove the nachos from the oven. Pipe the sour cream in concentric circles on top of the cheese, then drag a toothpick from the center outward to form a web pattern.
- Slice 4 olives in half for the spider bodies. Cut the remaining olives into thin strips for legs. Place one half-olive body on the web and arrange 8 strips as legs around it. Repeat with the rest of the olives.
Notes
Cuisine: Mexican
Equipment: Baking sheet, Skillet, Mixing bowl, Zip-top bag
Graveyard Taco Dip with Tombstone Chips
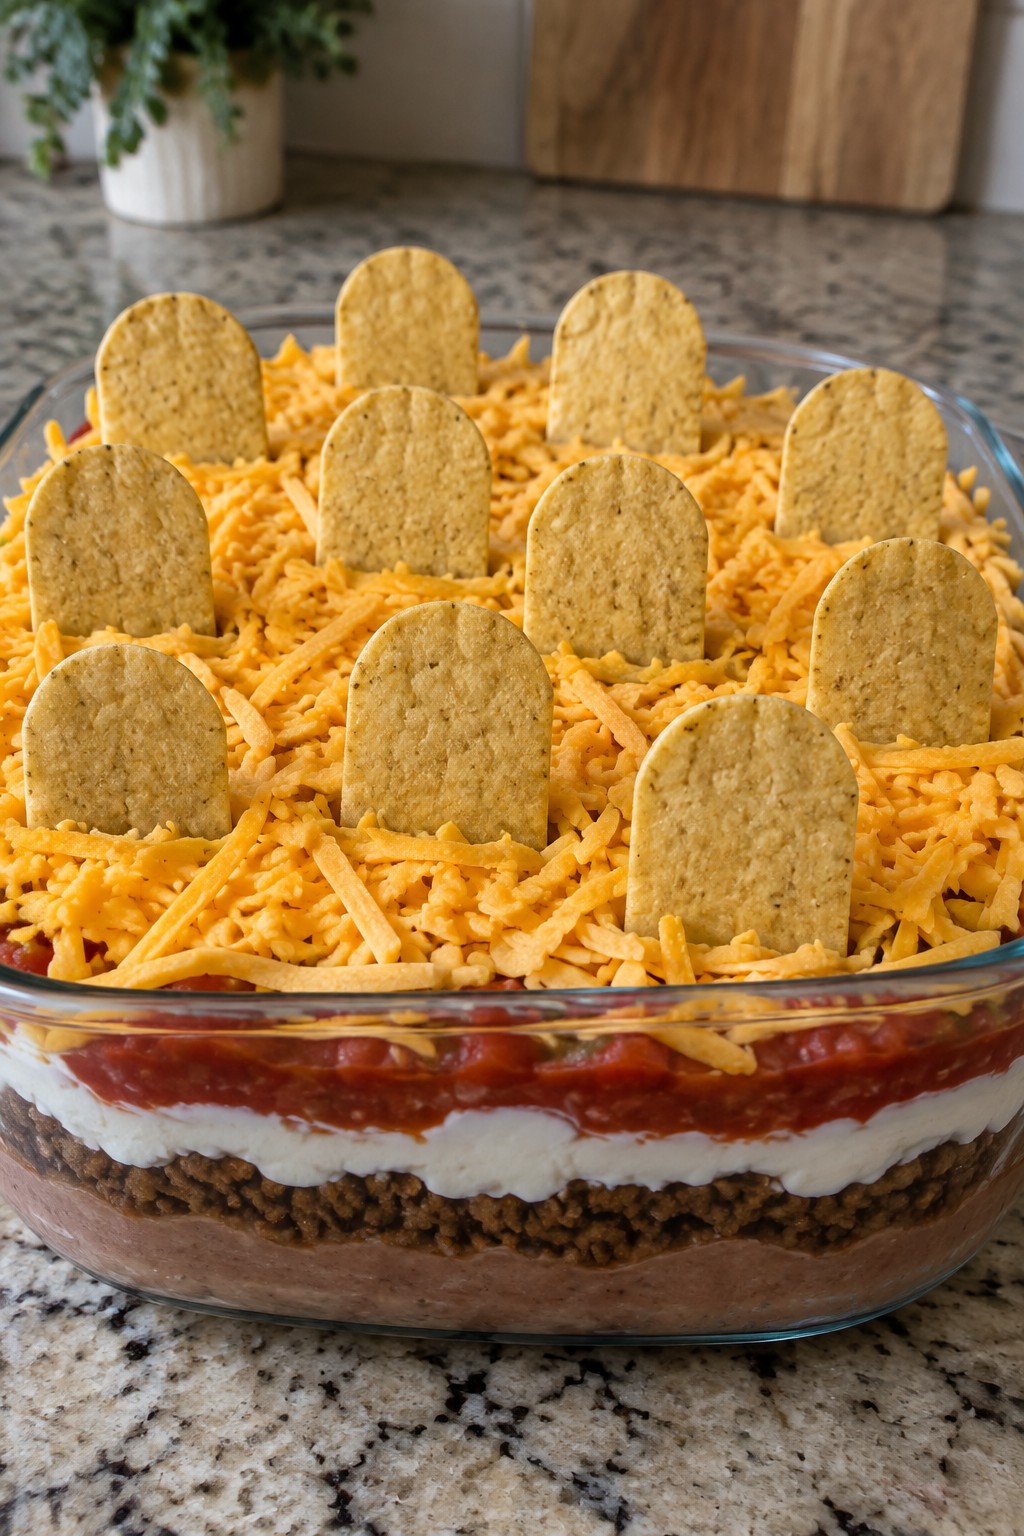
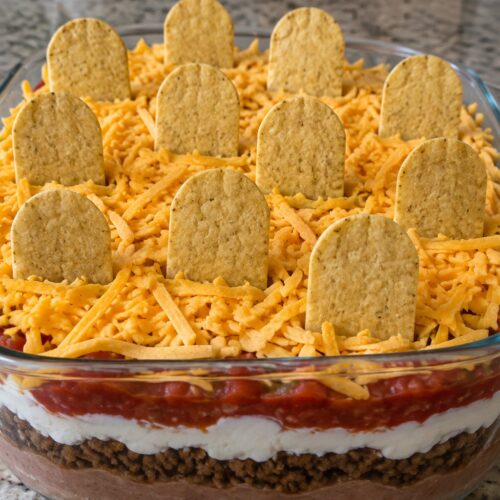
This layered taco dip turns a classic party favorite into a fun Halloween centerpiece. It works well for potlucks or small gatherings where guests want something savory to scoop while they mingle. The base stays creamy and spiced, while the chips add crunch on top.
The presentation uses tortilla chips stood upright like tombstones, so the dip looks like a tiny graveyard without extra decorations.
Equipment
- Skillet
- Baking dish
- Mixing bowl
Ingredients
- 1 can (16 oz) refried beans
- 1 lb ground beef
- 1 packet taco seasoning
- 1 cup sour cream
- 1 cup salsa
- 2 cups shredded cheddar cheese
- 12 large tortilla chips
Instructions
- Brown the ground beef in a skillet over medium heat. Drain any excess fat, then stir in the taco seasoning and 1/4 cup water. Simmer for 5 minutes until the meat thickens.
- Spread the refried beans evenly across the bottom of a medium baking dish. Spoon the seasoned beef over the beans in an even layer.
- Mix the sour cream and salsa together in a bowl, then spread this mixture over the beef layer. Sprinkle the shredded cheddar cheese on top.
- Bake at 350°F for 15 minutes until the cheese melts and the edges bubble. Remove from the oven and let it cool for 5 minutes.
- While the dip bakes, select 8 of the tortilla chips and stand them upright in the cheese layer to form tombstones. Use the remaining chips for scooping.
Notes
Cuisine: Mexican
Equipment: Skillet, Baking dish, Mixing bowl
Brain-Shaped Meatloaf with Cranberry Blood Sauce
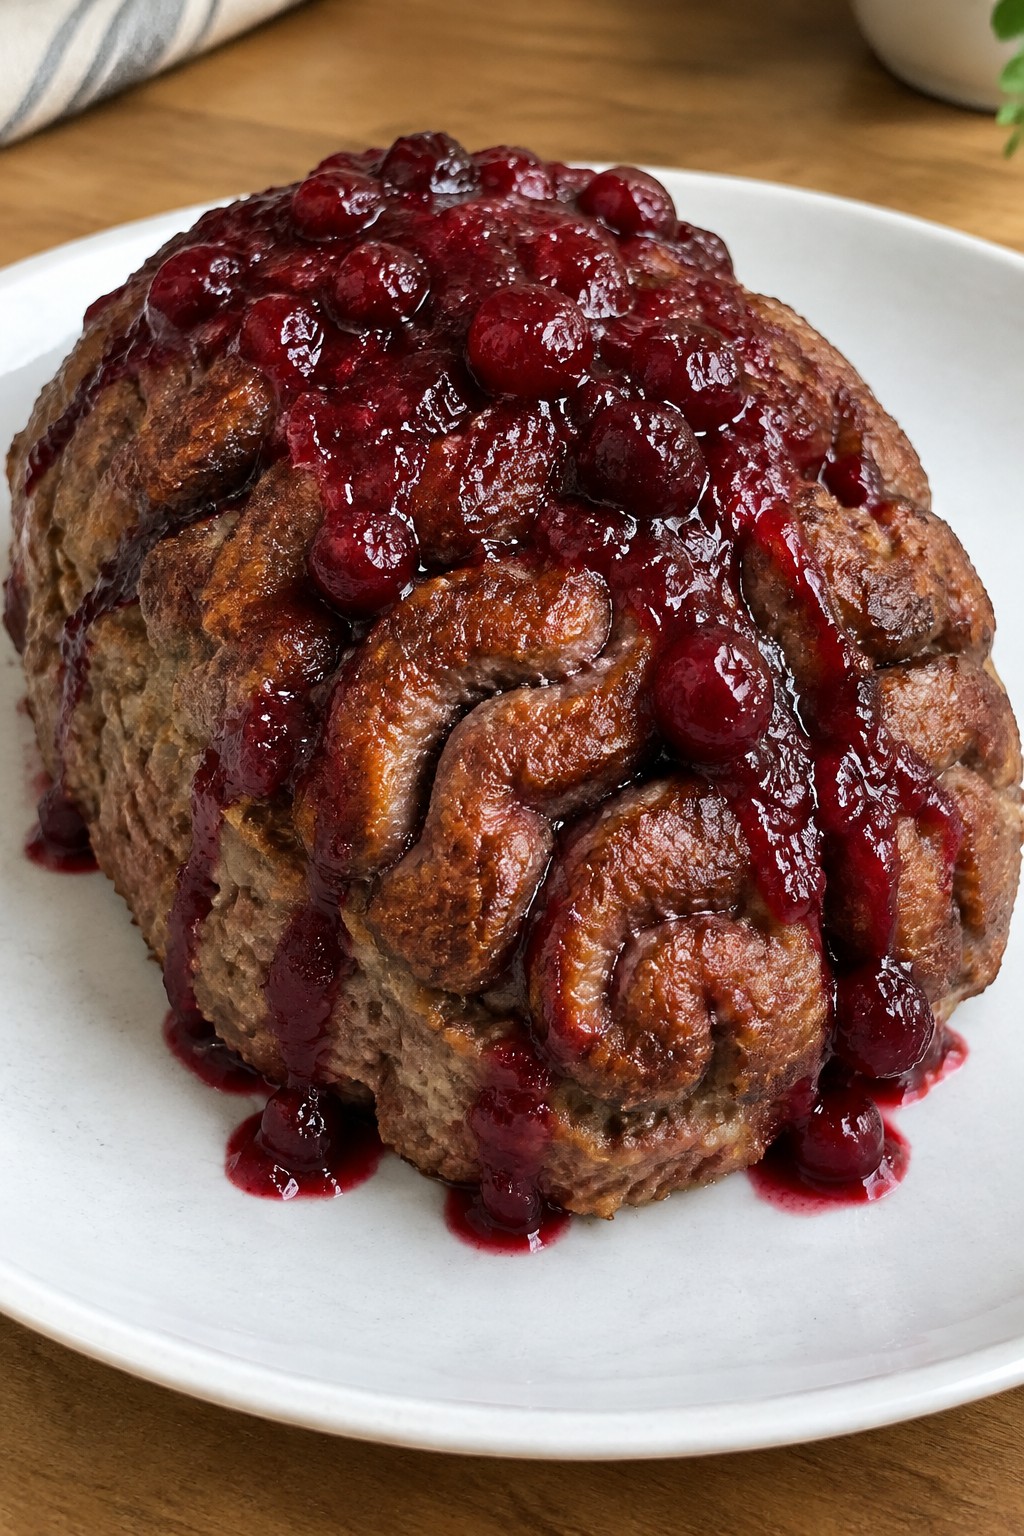
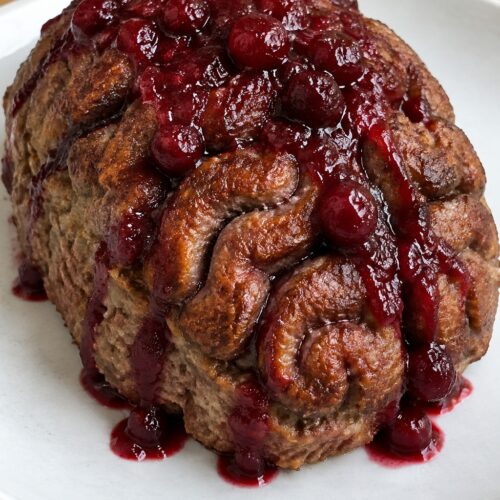
This meatloaf brings a fun visual twist to a classic family dinner. It works well for Halloween gatherings where guests want something hearty but themed. The meatloaf stays moist inside with a lightly crisp outer layer, while the cranberry sauce adds a sweet-tart contrast that pairs nicely with the savory beef.
Equipment
- Mixing bowl
- Baking sheet
- Small saucepan
Ingredients
- 1.5 pounds ground beef
- 1 cup panko breadcrumbs
- 1 large egg
- 1/2 cup milk
- 1 small onion, finely diced
- 2 garlic cloves, minced
- 2 tablespoons Worcestershire sauce
- 1/2 cup ketchup
- 1 can (14 oz) whole berry cranberry sauce
- Salt and black pepper to taste
Instructions
- Preheat the oven to 375°F and line a baking sheet with parchment paper.
- In a large bowl, combine the ground beef, panko breadcrumbs, egg, milk, diced onion, minced garlic, Worcestershire sauce, ketchup, and a pinch of salt and pepper. Mix gently with your hands until just combined.
- Transfer the mixture to the baking sheet and shape it into an oval loaf about 8 inches long. Use a butter knife or your fingers to press shallow ridges across the top to create a brain-like pattern.
- Bake for 45 to 50 minutes until the internal temperature reaches 160°F.
- While the meatloaf bakes, pour the cranberry sauce into a small saucepan and warm it over low heat, stirring until smooth.
- Remove the meatloaf from the oven and let it rest for 5 minutes. Slice or serve whole and drizzle the warm cranberry sauce over the top so it runs down like blood.
Notes
Cuisine: American
Equipment: Mixing bowl, Baking sheet, Small saucepan
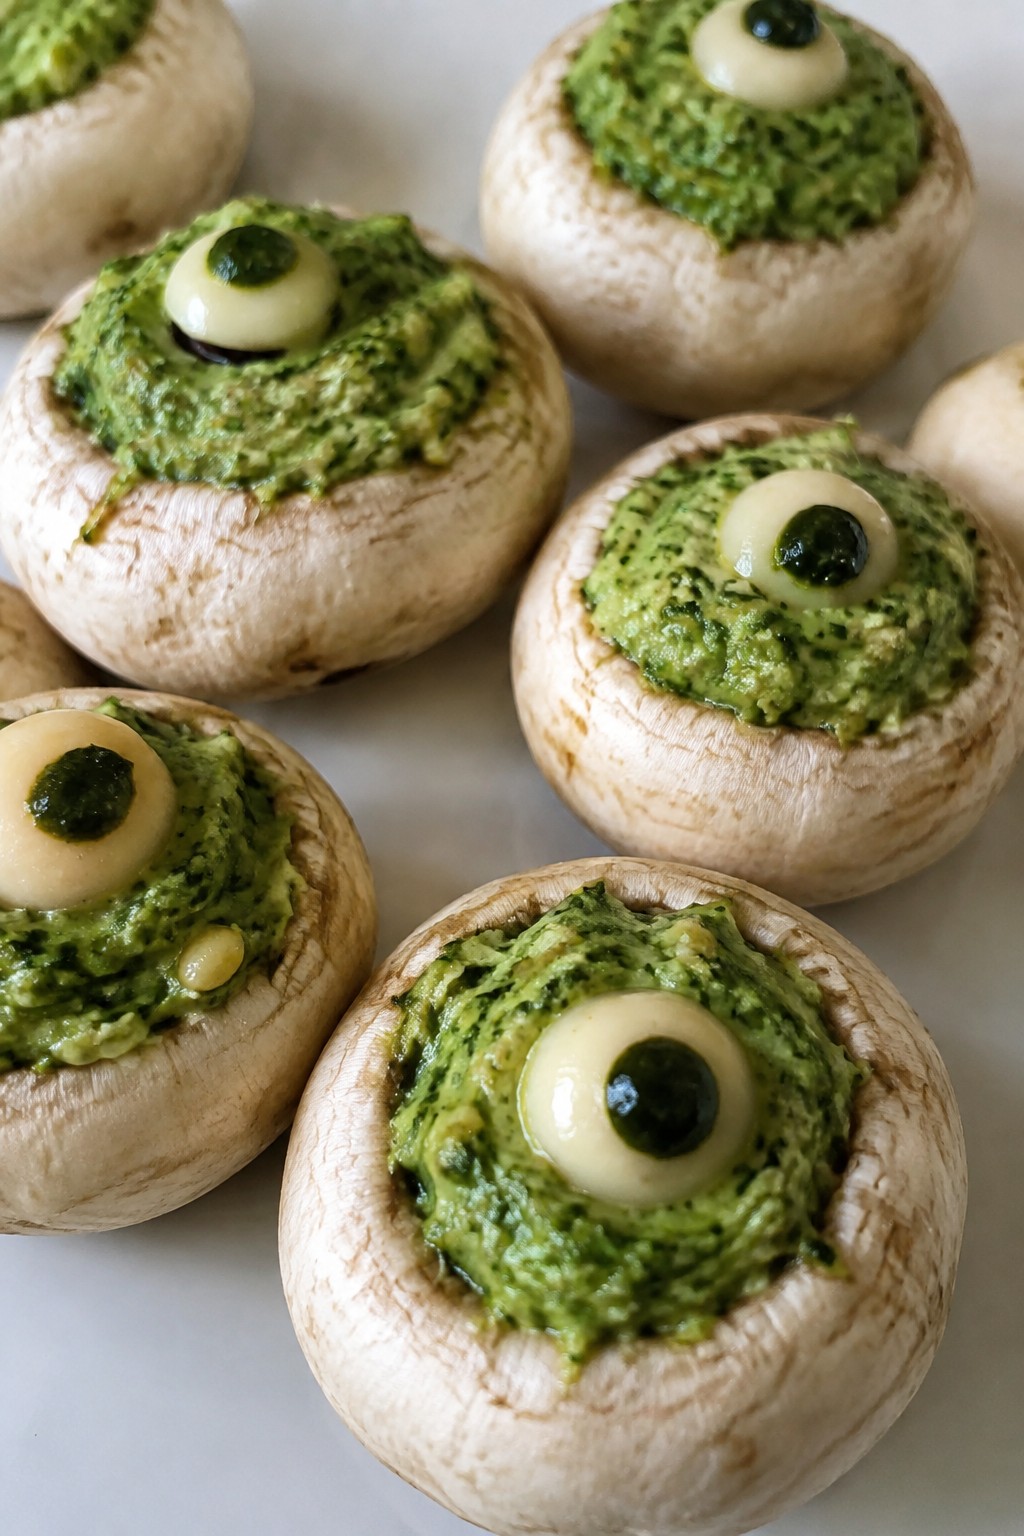
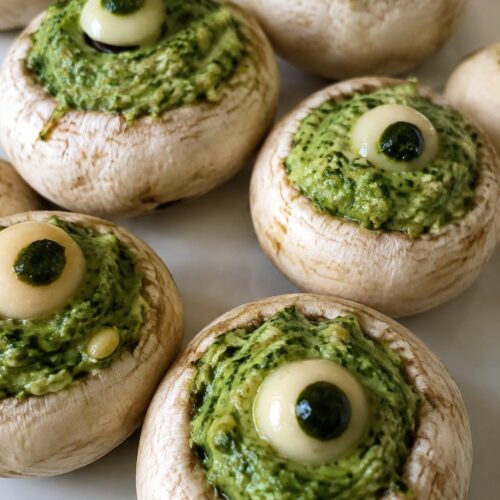
Ghostly Stuffed Mushroom Caps with Pesto Filling
These mushroom caps stand out at a Halloween party with their pale tops and bright green centers. They make a simple yet striking addition to a table of spooky snacks and work well when you need something that holds up during a long gathering.
The flavor combines fresh herbs with a creamy base for a light bite that still feels satisfying. The texture stays tender on the outside with a soft, spreadable filling inside.
Equipment
- Baking sheet
- Food processor
- Mixing bowl
- Oven
Ingredients
- 12 large white button mushrooms, stems removed
- 2 cups fresh basil leaves
- 1/4 cup pine nuts
- 2 garlic cloves
- 1/2 cup grated Parmesan cheese
- 1/3 cup olive oil
- 4 ounces cream cheese, softened
- 1/2 teaspoon salt
- 1/4 teaspoon black pepper
Instructions
- Preheat the oven to 375 degrees and line a baking sheet with parchment paper.
- Place the basil, pine nuts, garlic, Parmesan, olive oil, salt, and black pepper in a food processor. Pulse until the mixture forms a coarse paste.
- Transfer the pesto to a mixing bowl and stir in the cream cheese until fully combined.
- Spoon the filling evenly into each mushroom cap and set them on the prepared baking sheet.
- Bake for 18 to 20 minutes until the mushrooms soften and the filling looks set.
Notes
Cuisine: Italian
Equipment: Baking sheet, Food processor, Mixing bowl, Oven
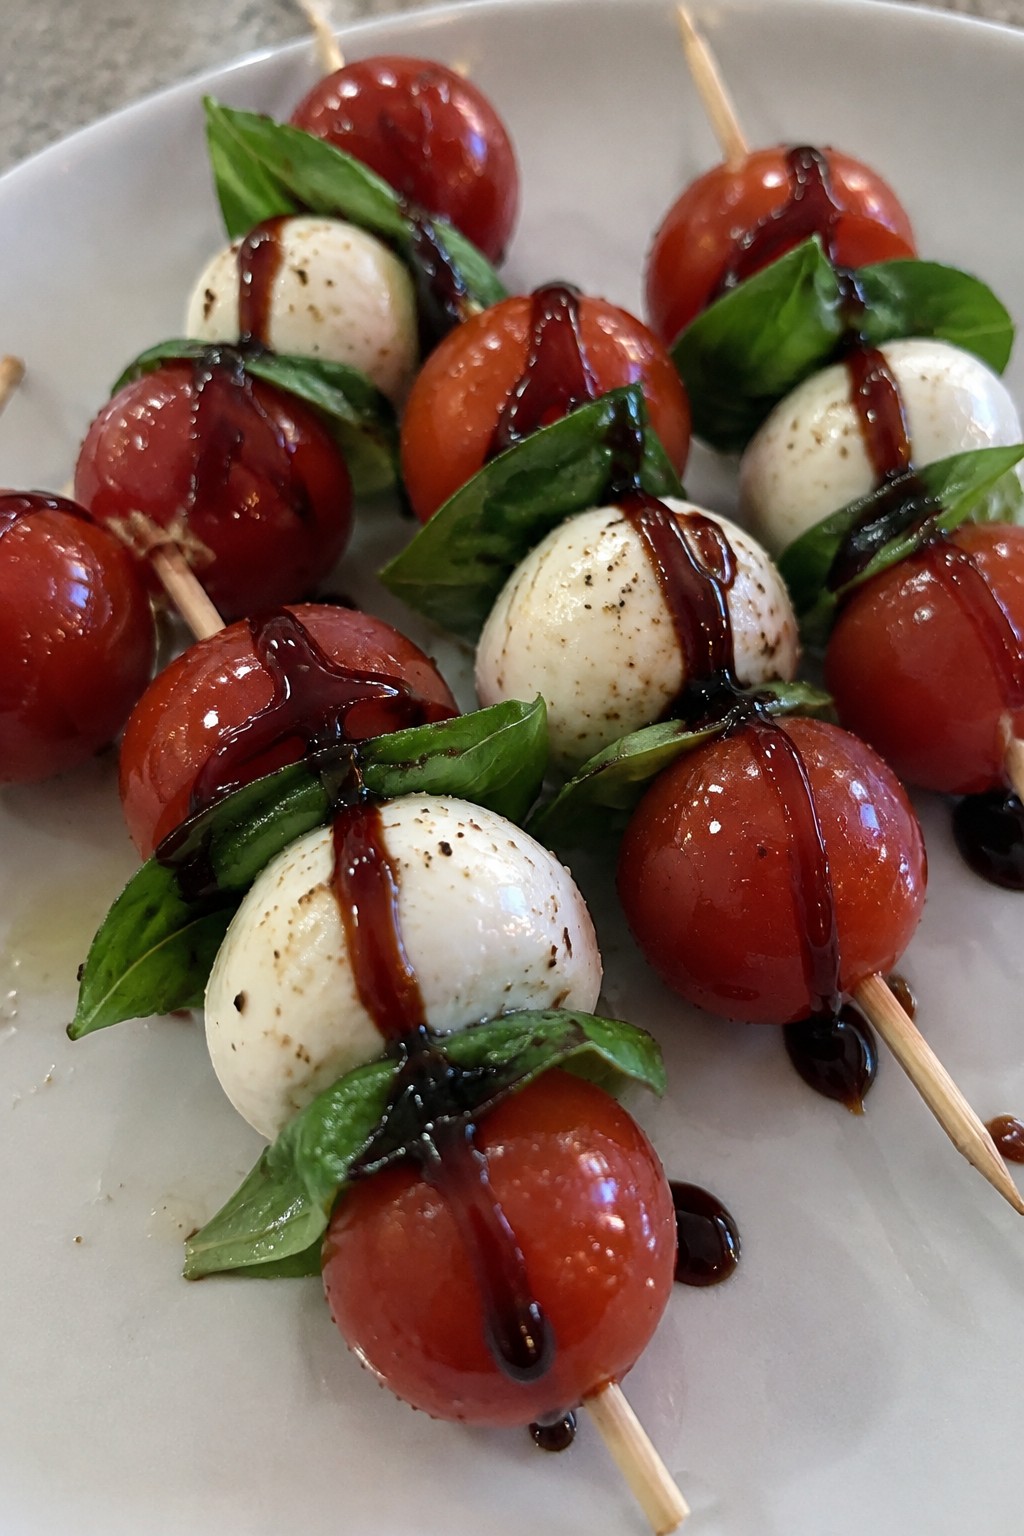
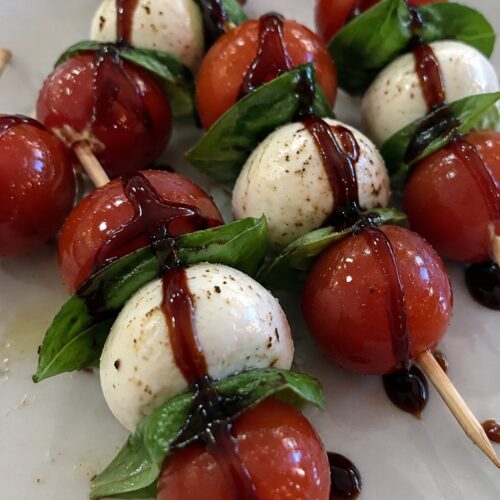
Vampire Bite Caprese Skewers with Balsamic Drizzle
These skewers turn a simple Caprese salad into a party bite that fits right into a Halloween spread. They work well when you need an easy finger food that still feels fresh amid heavier dishes. The tomatoes and mozzarella stay juicy while the balsamic adds a sharp tang that balances the mild cheese.
The texture comes from the soft mozzarella against the crisp tomato skins and tender basil. A light drizzle of balsamic at the end gives each skewer a dark red finish without extra steps.
Equipment
- Wooden skewers
- Small bowl
Ingredients
- 20 cherry tomatoes
- 20 bocconcini mozzarella balls
- 20 fresh basil leaves
- 1/4 cup balsamic vinegar
- 2 tablespoons olive oil
- 1/2 teaspoon salt
- 1/4 teaspoon black pepper
- 10 wooden skewers
Instructions
- Thread one cherry tomato onto a skewer followed by a mozzarella ball and a basil leaf. Repeat the pattern once more so each skewer holds two of each item.
- Place the finished skewers on a serving plate. Mix the balsamic vinegar with the olive oil in a small bowl. Add the salt and black pepper to the mixture and stir well.
- Drizzle the balsamic mixture evenly over the skewers just before serving so the liquid coats the tomatoes and mozzarella.
Notes
Cuisine: Italian
Equipment: Wooden skewers, Small bowl
Witch Finger Breadsticks with Garlic Cheese Dip
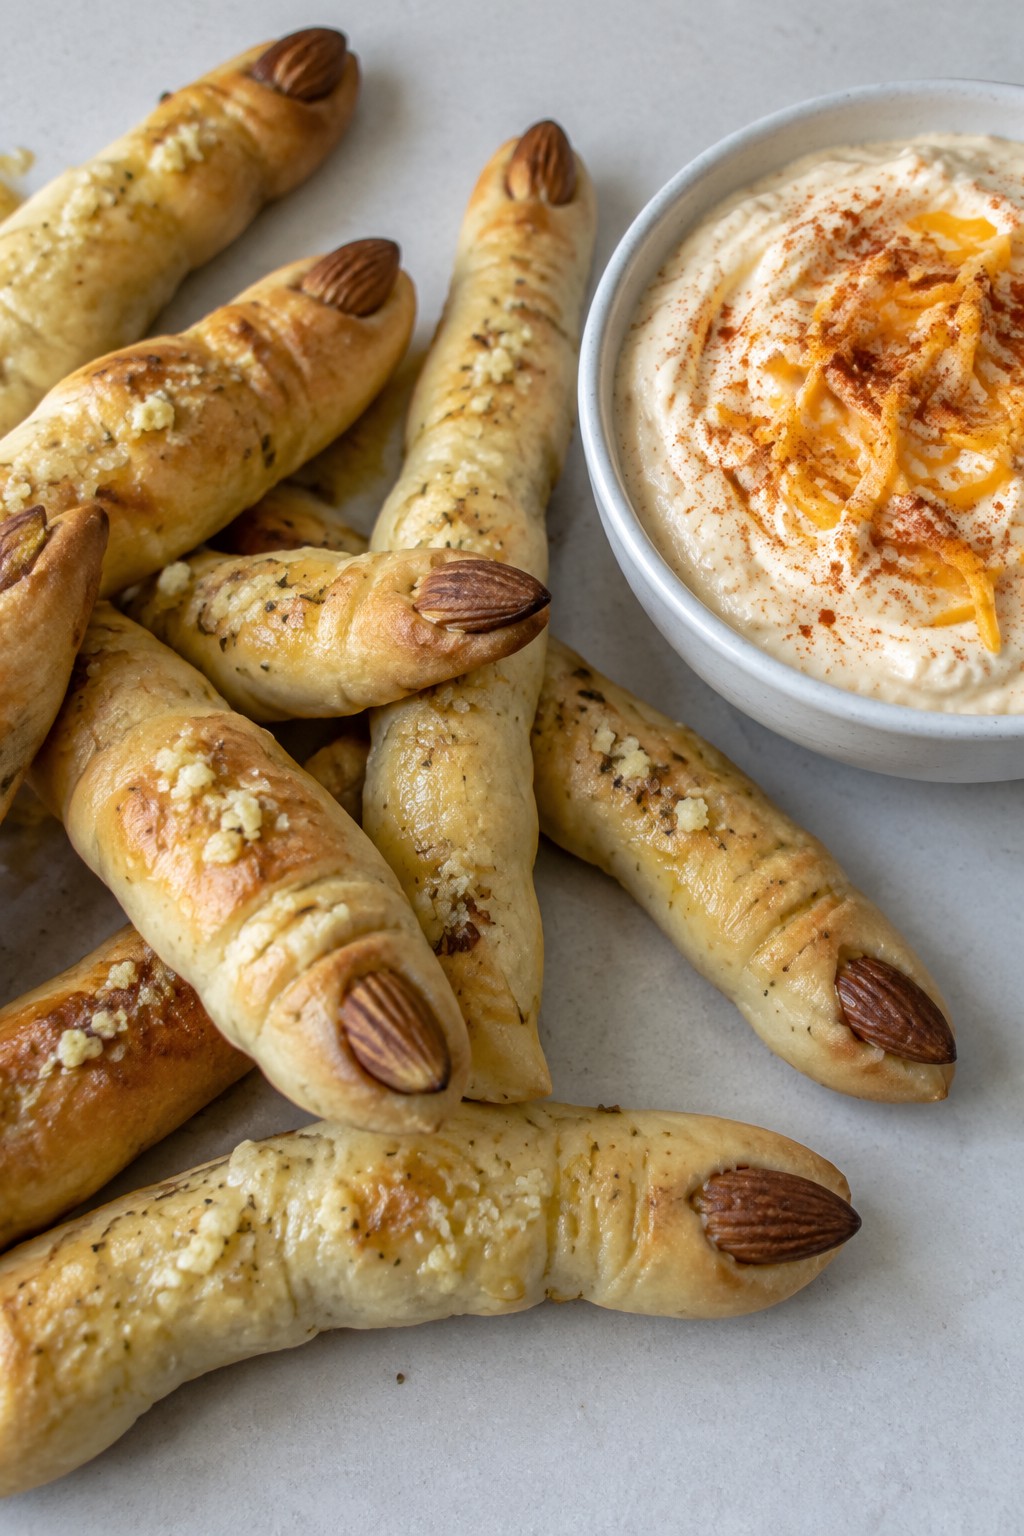
These breadsticks bring a playful creepy touch to any Halloween spread. Shaped like fingers with almond nails, they pair well with a warm garlic cheese dip for dipping and sharing at parties. The breadsticks come out crisp on the outside and soft inside, while the dip adds a rich, savory contrast.
The recipe uses simple pantry items and store-bought dough for quick assembly. It works as a make-ahead snack that guests can grab while mingling.

Equipment
- Baking sheet
- Mixing bowl
- Oven
Ingredients
- 1 pound pizza dough
- 3 tablespoons olive oil, divided
- 3 garlic cloves, minced
- 1 teaspoon salt
- 20 whole almonds
- 8 ounces cream cheese, softened
- 1 cup shredded cheddar cheese
- 1/4 cup milk
- 1 teaspoon paprika
Instructions
- Preheat the oven to 400 degrees and line a baking sheet with parchment paper. Divide the pizza dough into 20 equal pieces and roll each into a thin finger shape about 4 inches long.
- Use a knife to score small knuckle lines on each dough finger. Press one almond into the tip of each finger to form a nail.
- Mix 2 tablespoons olive oil with 2 minced garlic cloves and the salt. Brush this mixture over all the shaped fingers.
- Place the fingers on the baking sheet and bake for 12 to 15 minutes until golden brown.
- While the breadsticks bake, combine the cream cheese, cheddar cheese, remaining minced garlic clove, milk, paprika, and remaining 1 tablespoon olive oil in a bowl. Stir until smooth.
- Transfer the dip to a small microwave-safe bowl and heat for 30 seconds, then stir again until fully melted and warm.
- Serve the baked witch fingers alongside the warm dip.
Notes
Cuisine: American
Equipment: Baking sheet, Mixing bowl, Oven
Zombie Brain Guacamole Served in a Cauldron
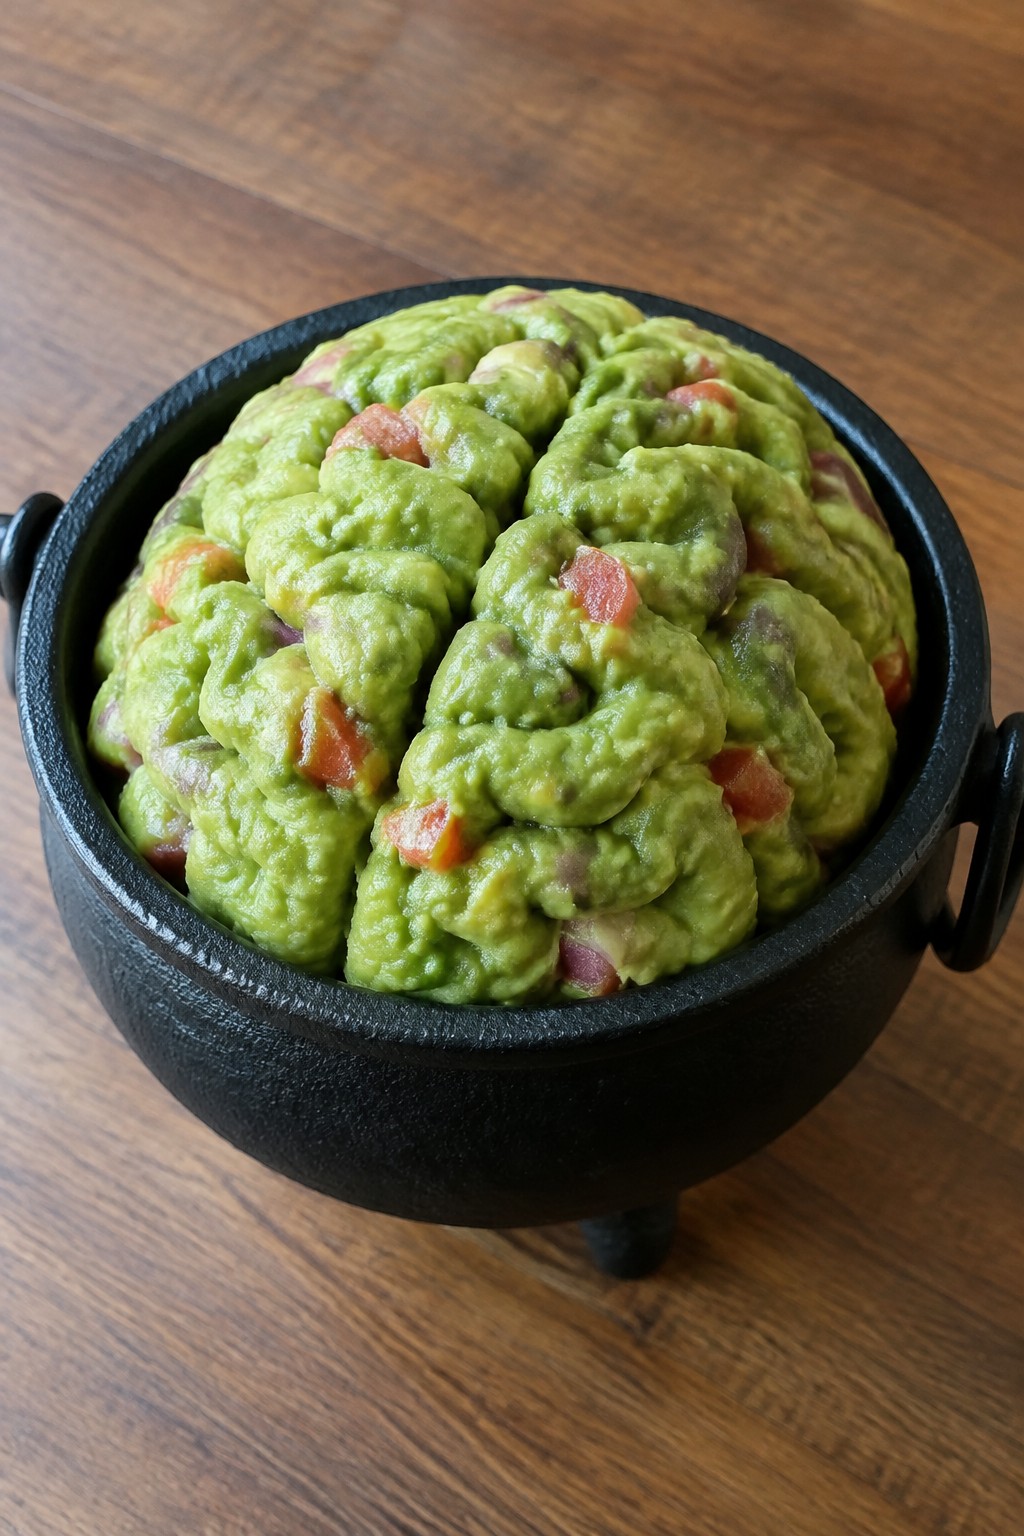
This guacamole gets shaped with ridges to look like a brain before it goes into a small black cauldron. It works well at Halloween parties as a shareable dip that still tastes fresh and simple.
The texture stays chunky from the avocado and onion. Lime and salt keep the flavor bright while the red onion and tomato add small pops of color that fit the theme.
Equipment
- Mixing Bowl
- Fork
- Spoon
Ingredients
- 4 ripe avocados, peeled and pitted
- Juice of 2 limes
- 1 teaspoon salt
- 1/2 red onion, finely diced
- 1 tomato, diced
- 1/4 cup fresh cilantro, chopped
- 1 jalapeno, seeded and minced
Instructions
- Place the avocados in a mixing bowl and mash them with a fork until mostly smooth but still chunky in spots.
- Stir in the lime juice and salt until evenly combined.
- Add the red onion, tomato, cilantro, and jalapeno. Fold gently so the pieces stay visible.
- Use the back of a spoon to press shallow ridges across the surface so it resembles brain folds.
- Spoon the mixture into a small black cauldron or dark serving bowl. Serve right away with chips.
Notes
Cuisine: Mexican
Equipment: Mixing Bowl, Fork, Spoon
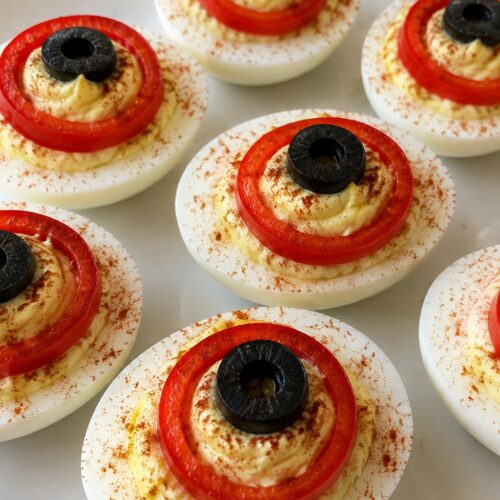
Bloody Eyeball Deviled Eggs with Red Pepper Rings
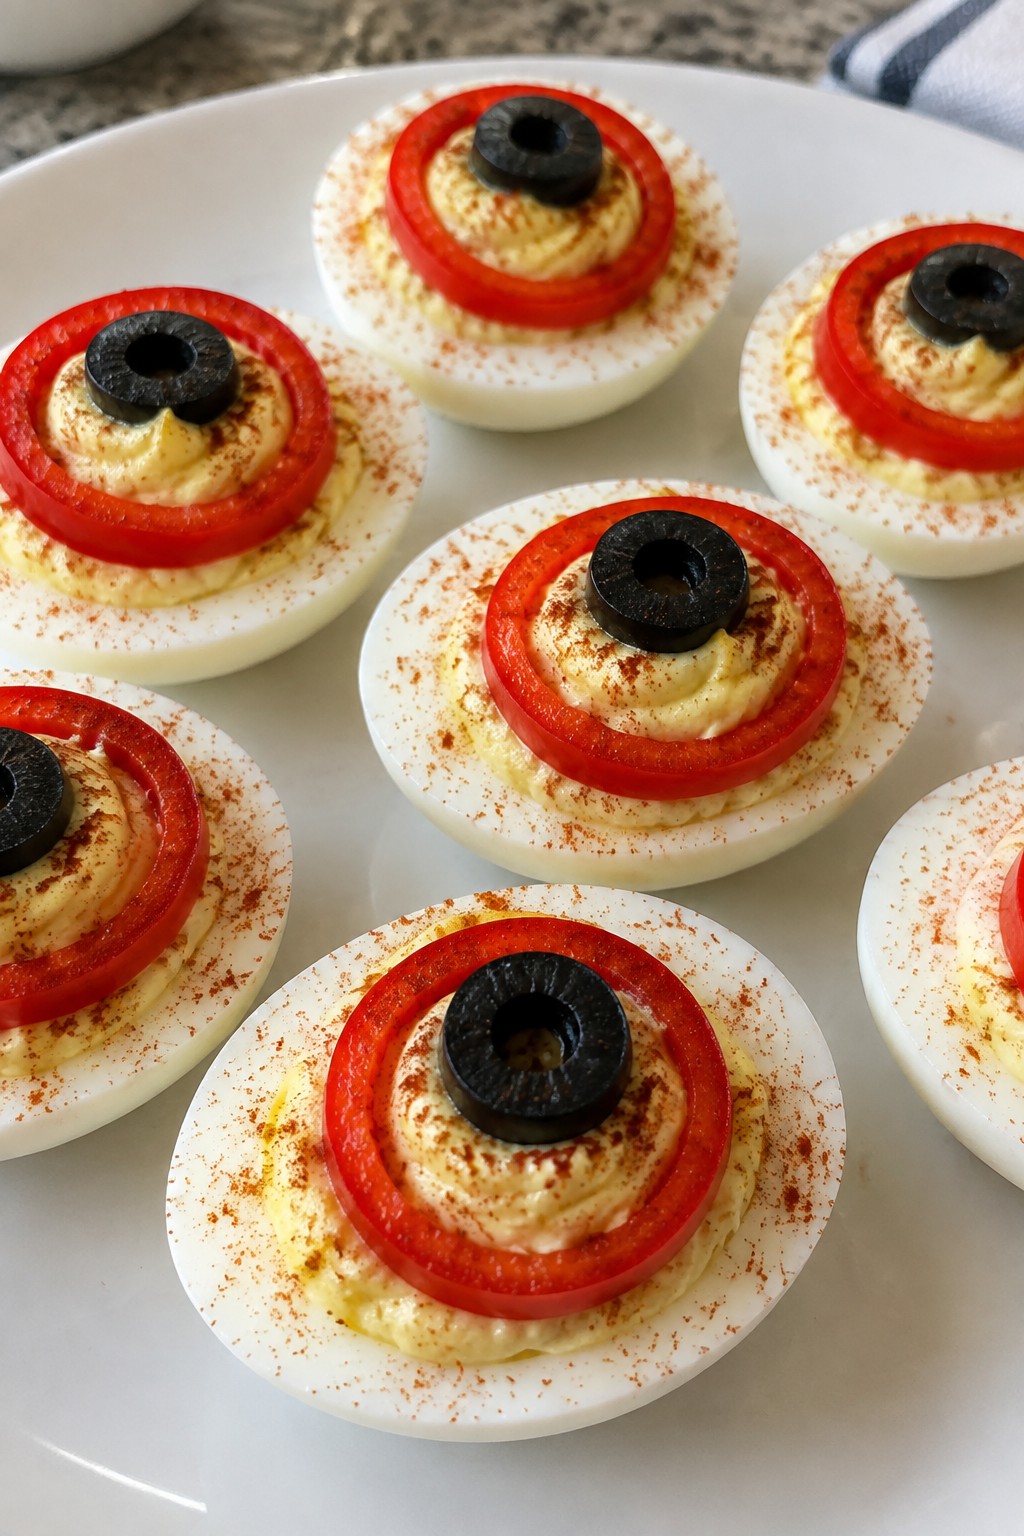
These deviled eggs turn a classic appetizer into a fun Halloween snack. Red bell pepper rings form the outer edge of each eyeball while olive halves sit in the center as pupils. The filling stays creamy with a light tang that balances the crisp pepper.
Serve them at a party table where guests can grab a few at once. They hold up well on a platter and give a spooky touch without needing fancy tools.
Equipment
- Large pot
- Mixing bowl
- Knife
Ingredients
- 6 large eggs
- 1/4 cup mayonnaise
- 1 tablespoon Dijon mustard
- 1 teaspoon white vinegar
- 1/4 teaspoon salt
- 1/4 teaspoon black pepper
- 1 red bell pepper, cut into 12 rings
- 12 black olives, halved crosswise
- 1 teaspoon smoked paprika
Instructions
- Place the eggs in a large pot and cover with cold water. Bring the water to a boil over medium-high heat, then remove the pot from the heat and let the eggs sit for 12 minutes.
- Drain the eggs and run them under cold water until they are cool enough to handle. Peel the shells and slice each egg in half lengthwise.
- Scoop the yolks into a mixing bowl. Add the mayonnaise, Dijon mustard, white vinegar, salt, black pepper, and smoked paprika. Mash everything together until the mixture is smooth.
- Spoon or pipe the yolk mixture back into the egg white halves. Place one red bell pepper ring on top of each filled egg. Set one olive half in the center of each pepper ring to form the pupil.
Notes
Cuisine: American
Equipment: Large pot, Mixing bowl, Knife
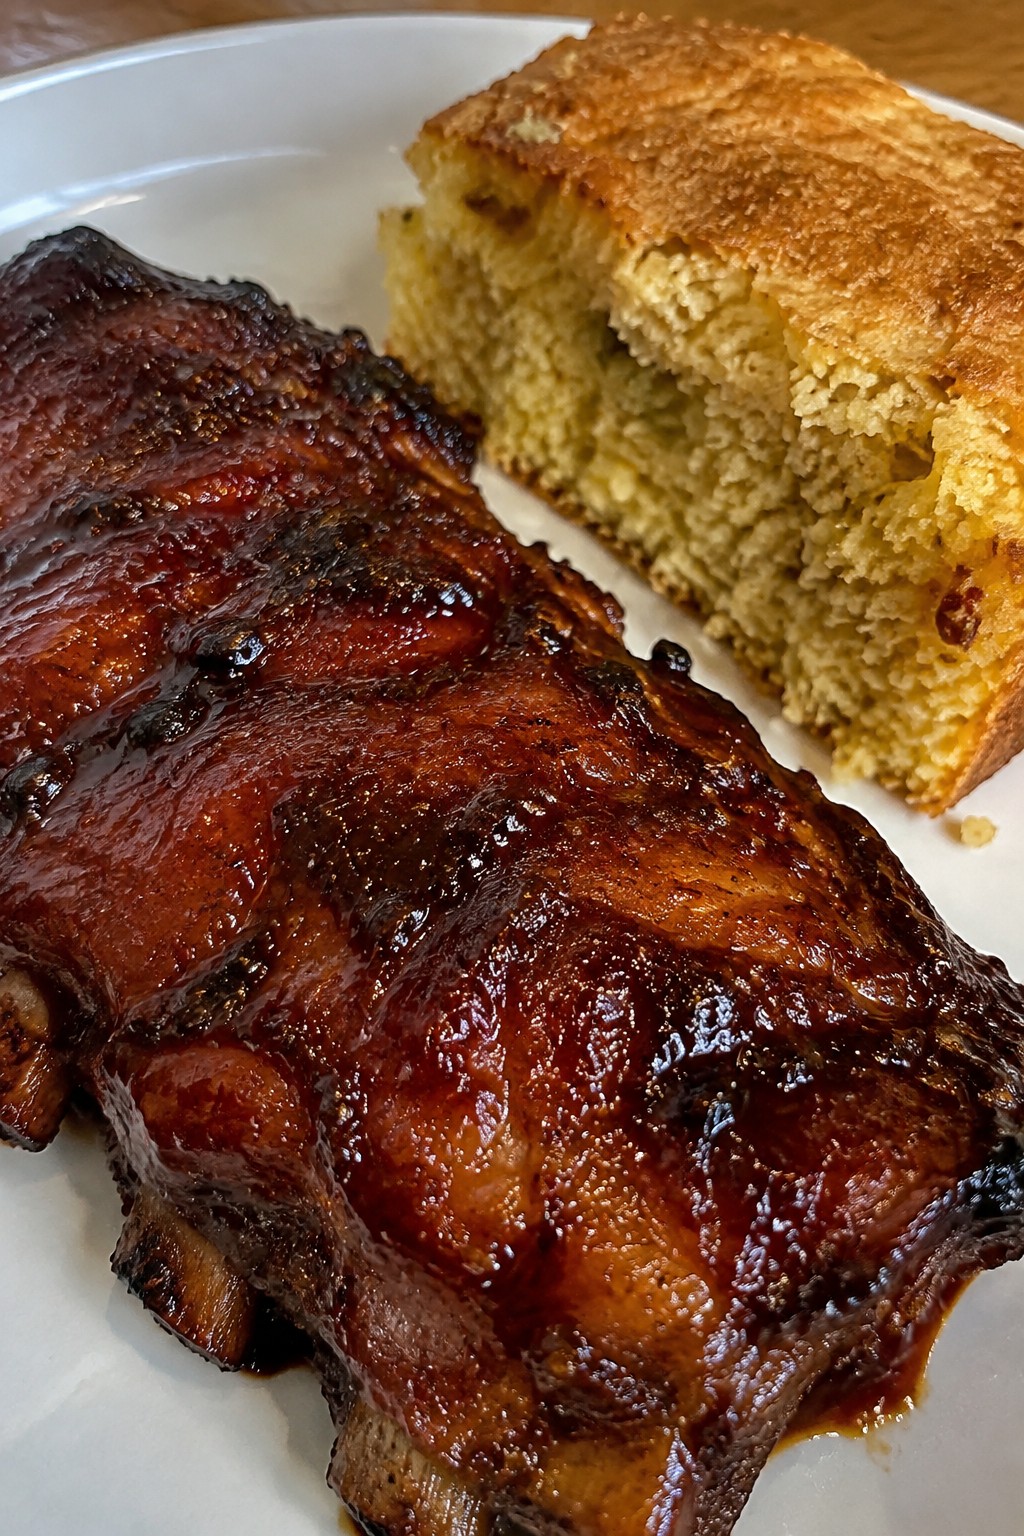
Skeleton BBQ Ribs with Bone Marrow Cornbread
This recipe brings a bold smoky flavor to Halloween gatherings. The ribs come out tender with a sticky barbecue coating while the cornbread turns rich and savory from the bone marrow. It works well for parties where guests want something hearty yet striking on the table.
The dish balances sweet barbecue notes with the deep taste of roasted marrow in the cornbread. Guests who enjoy meaty mains will find it satisfying without extra fuss.
Equipment
- Baking sheet
- Mixing bowl
- Oven
Ingredients
- 4 lbs pork baby back ribs
- 1 1/2 cups BBQ sauce
- 1 cup yellow cornmeal
- 1 cup all-purpose flour
- 4 oz bone marrow
- 1 cup buttermilk
- 2 large eggs
- 1/4 cup honey
- 2 tsp baking powder
- 1 tsp salt
- 2 tbsp melted butter
Instructions
- Preheat the oven to 300 degrees. Pat the ribs dry and season both sides with salt. Place them on a baking sheet and cover tightly with foil. Bake for 2 hours until the meat is tender.
- Remove the ribs from the oven and brush them generously with BBQ sauce. Return to the oven uncovered for 20 minutes to set the glaze.
- While the ribs finish, scoop the bone marrow into a bowl and mash it until smooth. In a large mixing bowl combine the cornmeal, flour, baking powder, and salt.
- In a separate bowl whisk the buttermilk, eggs, honey, and melted butter. Stir in the mashed bone marrow until fully blended.
- Pour the wet mixture into the dry ingredients and stir just until combined. Spread the batter into a greased 8-inch square pan.
- Bake the cornbread at 400 degrees for 20 minutes until the top is golden and a toothpick comes out clean. Let it cool slightly before slicing.
- Cut the ribs into individual portions and serve alongside squares of the cornbread.
Notes
Cuisine: American
Equipment: Baking sheet, Mixing bowl, Oven
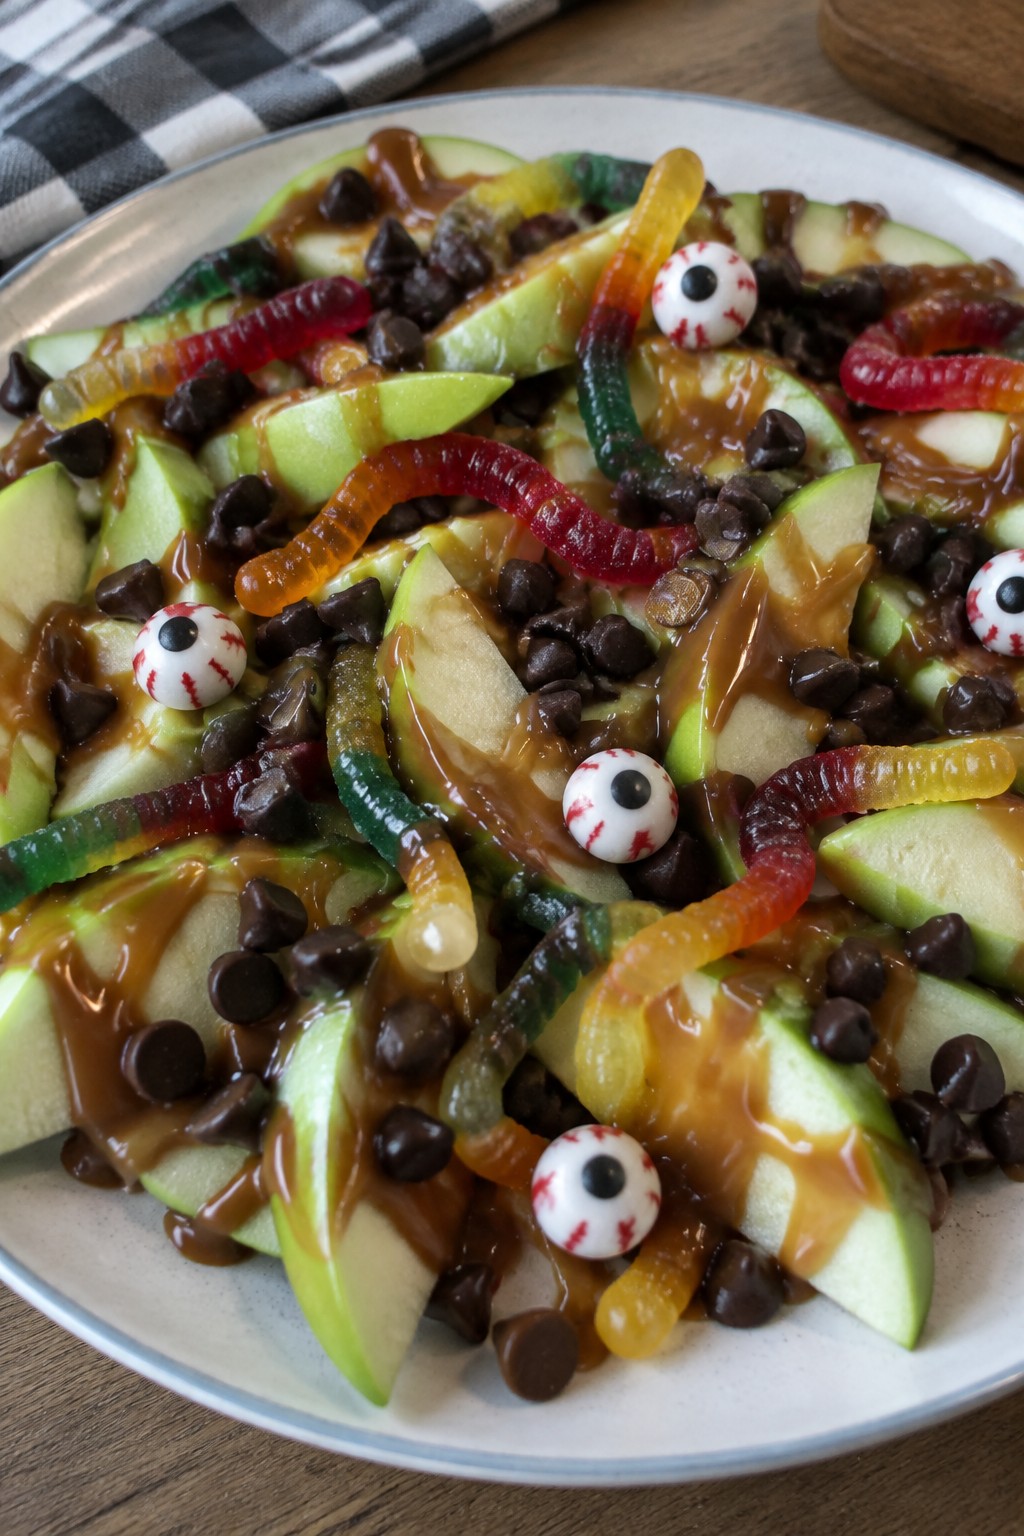
Creepy Crawler Caramel Apple Nachos
These caramel apple nachos turn a classic fall treat into a shareable party snack. Sliced apples get topped with warm caramel and chocolate, then finished with gummy worms that give the dish its creepy crawler look. It works well for Halloween gatherings where guests want something sweet but easy to pick up.
The flavor balances tart apple with rich caramel and smooth chocolate. The gummy worms add a chewy texture that stands out against the crisp fruit. Serve it right after assembling so the toppings stay fresh.

Equipment
- Microwave
- Microwave-safe bowls
- Cutting board
- Knife
- Serving platter
Ingredients
- 4 large Granny Smith apples
- 1/2 cup caramel sauce
- 1/3 cup chocolate chips
- 20 gummy worms
- 2 tablespoons candy eyeballs
Instructions
- Core the apples and cut them into thin wedges. Arrange the wedges in a single layer on a large serving platter.
- Warm the caramel sauce in a microwave-safe bowl for 20 seconds until it is pourable. Drizzle it evenly over the apple slices.
- Place the chocolate chips in a microwave-safe bowl and heat in 20-second bursts, stirring between each, until fully melted. Drizzle the melted chocolate over the apples and caramel.
- Scatter the gummy worms across the top so they look like they are crawling over the nachos. Add the candy eyeballs in small clusters for decoration.
Notes
Cuisine: American
Equipment: Microwave, Microwave-safe bowls, Cutting board, Knife, Serving platter
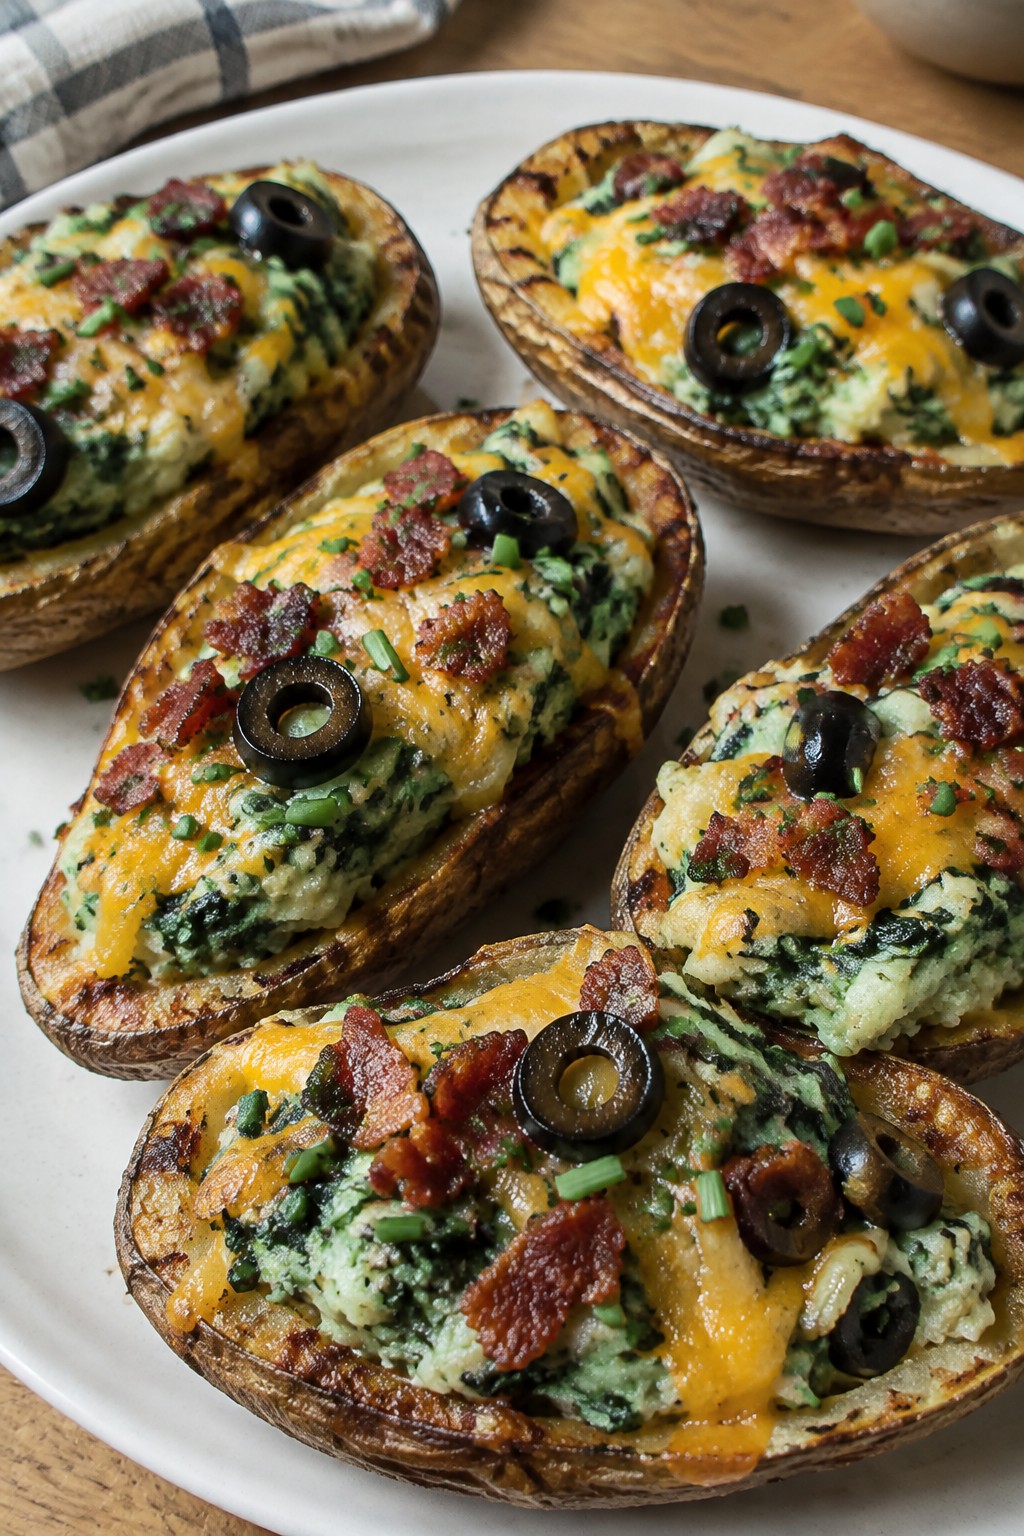
Monster Mash Loaded Potato Skins
These potato skins turn a classic party snack into something fun for Halloween. The filling gets mashed with spinach for a green tint that fits the monster theme, while the crispy skins and cheesy topping keep everything familiar and satisfying. They work well as a shared appetizer at a gathering where guests want something hearty but still playful.
They deliver a mix of creamy mashed potato inside and crisp edges outside, with salty bacon and sharp cheese in every bite. The olive slices on top add a quick visual detail that ties into the spooky setting without extra work.

Equipment
- Baking sheet
- Mixing bowl
- Oven
Ingredients
- 4 large russet potatoes
- 2 tablespoons olive oil
- 1/2 teaspoon salt
- 1 cup fresh spinach, finely chopped
- 1 cup shredded cheddar cheese
- 1/2 cup sour cream
- 4 slices bacon, cooked and crumbled
- 2 tablespoons chopped chives
- 8 black olives, sliced
Instructions
- Heat the oven to 400 degrees. Rub the potatoes with olive oil and salt, then place them on a baking sheet. Bake for 45 minutes until the skins are crisp and the centers are soft.
- Let the potatoes cool for 10 minutes. Cut each one in half lengthwise and scoop out most of the flesh into a mixing bowl, leaving a thin layer inside the skins.
- Mash the scooped potato with the chopped spinach, sour cream, and half the cheddar cheese until the mixture turns light green and smooth.
- Spoon the mashed filling back into the potato skins. Top each one with the remaining cheddar cheese and the crumbled bacon.
- Return the filled skins to the oven for 10 minutes until the cheese melts and bubbles.
- Remove from the oven and sprinkle with chives. Place two olive slices on each skin to form eyes before serving.
Notes
Cuisine: American
Equipment: Baking sheet, Mixing bowl, Oven
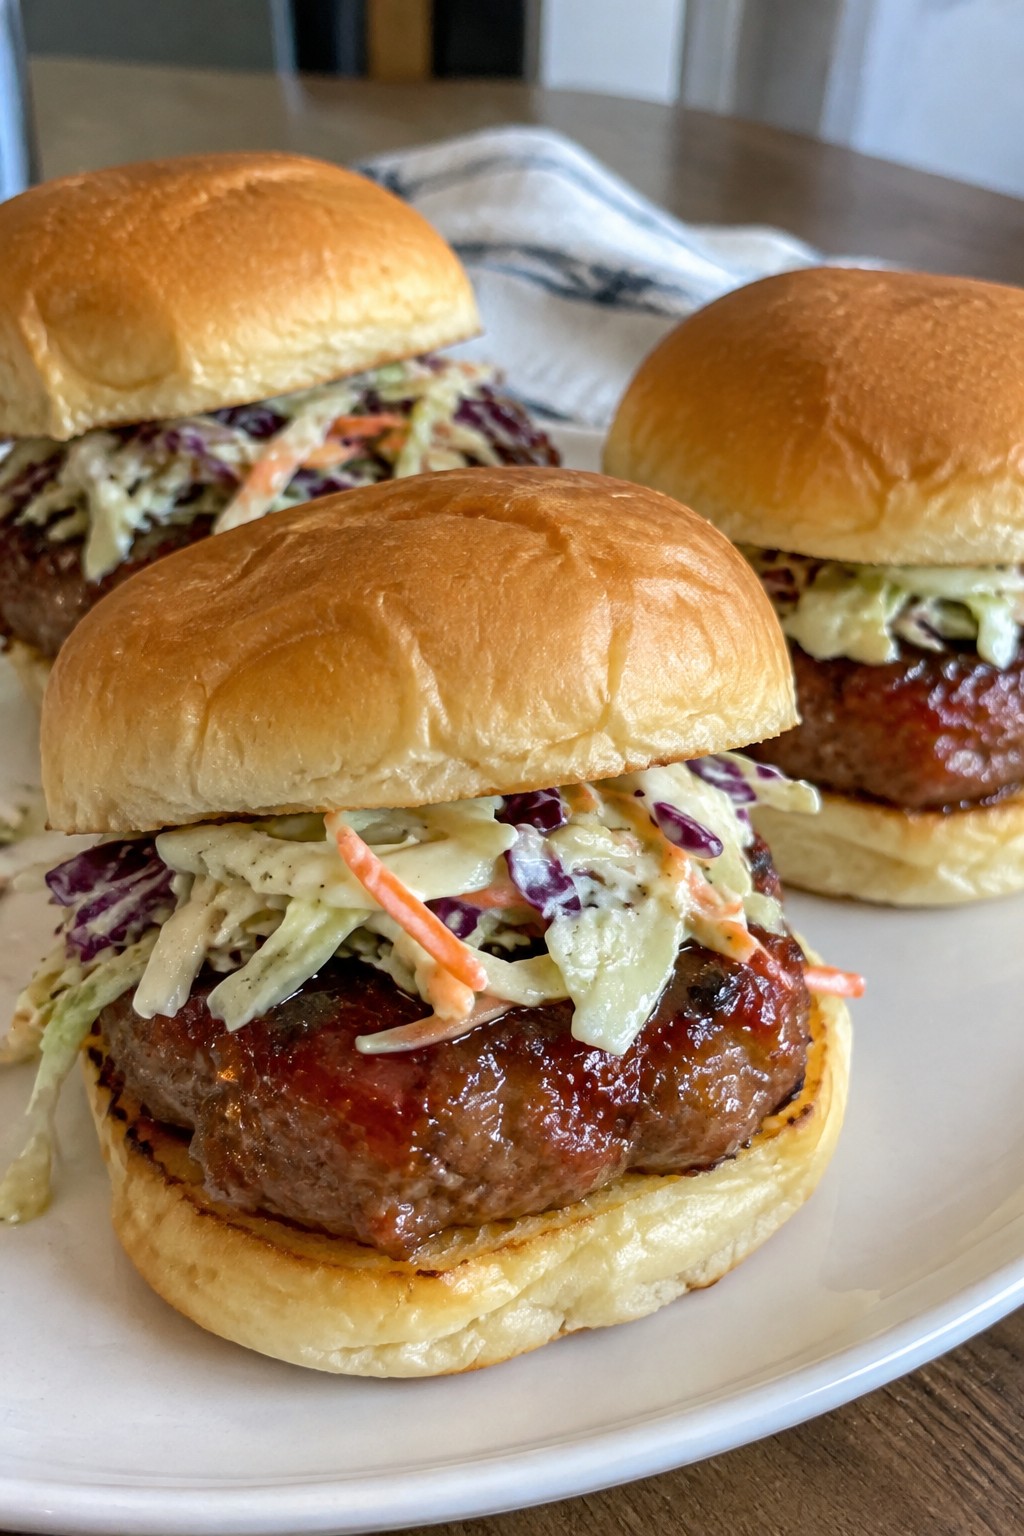
Poison Apple Pork Sliders with Slaw
These sliders bring a sweet and savory bite that fits right into a Halloween spread. The pork patties get a glossy red apple glaze while the slaw adds crunch and a light tang. They work well as a main bite for guests who want something hearty but still themed.
The flavor leans toward smoky pork balanced by tart apple and a touch of honey. The slaw stays crisp against the warm patties and soft buns.
Equipment
- Large skillet
- Mixing bowl
- Small saucepan
Ingredients
- 1 pound ground pork
- 2 red apples
- 3 cups shredded cabbage
- 1/4 cup mayonnaise
- 2 tablespoons apple cider vinegar
- 8 slider buns
- 1/2 cup apple cider
- 2 tablespoons honey
- 1 teaspoon cinnamon
- 1/2 teaspoon salt
- 1/4 teaspoon black pepper
- 1 tablespoon oil
Instructions
- Mix the ground pork with salt, pepper, and cinnamon in a bowl. Form the mixture into 8 small patties.
- Heat the oil in a large skillet over medium heat. Cook the patties for 4 minutes per side until browned and cooked through. Remove them to a plate.
- Core and thinly slice one apple. Add the slices to the same skillet along with the apple cider and honey. Simmer for 5 minutes until the liquid thickens into a glossy glaze. Return the patties to the skillet and coat them with the glaze.
- Core and thinly slice the second apple. Combine the shredded cabbage, sliced apple, mayonnaise, and apple cider vinegar in a bowl to make the slaw.
- Split the slider buns and place a patty on each bottom half. Top with a spoonful of slaw and the bun lid.
Notes
Cuisine: American
Equipment: Large skillet, Mixing bowl, Small saucepan
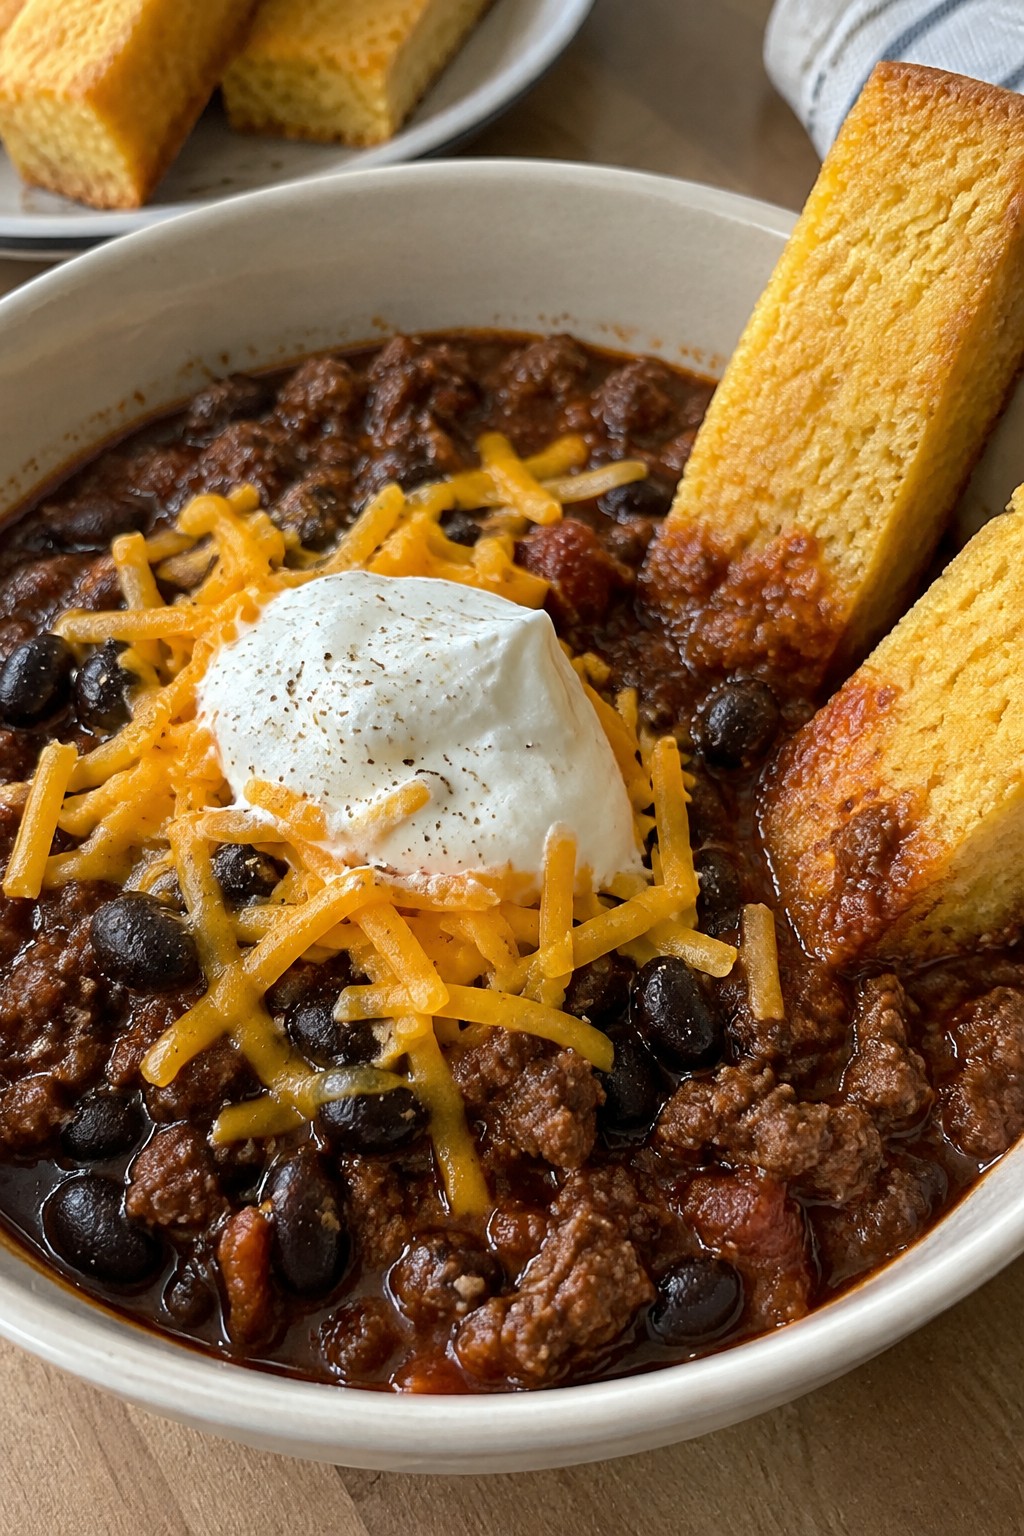
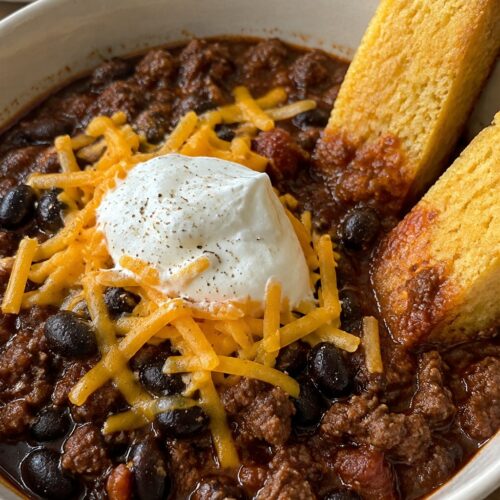
Haunted Cauldron Chili with Cornbread Dippers
This chili comes together in one pot and pairs with warm cornbread sticks that guests can dip right in. It works well for Halloween parties where everyone gathers around the table to serve themselves.
The dark beans and rich spices give it a hearty flavor with a bit of smokiness from the tomatoes. The cornbread adds a sweet contrast that balances the spice.
Equipment
- Large pot
- Mixing bowl
- 8×8 baking dish
Ingredients
- 1 pound ground beef
- 1 large onion, diced
- 3 cloves garlic, minced
- 1 can (15 oz) black beans, drained
- 1 can (14.5 oz) fire-roasted diced tomatoes
- 2 tablespoons chili powder
- 1 teaspoon ground cumin
- 2 cups beef broth
- 1 cup shredded cheddar cheese
- 1/2 cup sour cream
- 1 cup cornmeal
- 1 cup all-purpose flour
- 1 tablespoon baking powder
- 1 large egg
- 1 cup milk
- 3 tablespoons butter, melted
- 1/2 teaspoon salt
Instructions
- Heat a large pot over medium heat. Add the ground beef, diced onion, and minced garlic. Cook until the beef is browned and the onion softens.
- Stir in the chili powder and cumin. Cook for one minute to toast the spices.
- Add the black beans, fire-roasted diced tomatoes, and beef broth. Bring the mixture to a simmer and cook for 20 minutes, stirring occasionally.
- While the chili simmers, preheat the oven to 400°F. In a mixing bowl, combine the cornmeal, flour, baking powder, and salt.
- In a separate bowl, whisk together the egg, milk, and melted butter. Pour the wet mixture into the dry ingredients and stir until just combined.
- Spread the cornbread batter into a greased 8×8 baking dish. Bake for 15 to 18 minutes until the top is golden and a toothpick comes out clean.
- Let the cornbread cool for a few minutes, then cut it into strips. Ladle the chili into bowls and top each serving with shredded cheddar cheese and a spoonful of sour cream. Serve the cornbread strips on the side for dipping.
Notes
Cuisine: American
Equipment: Large pot, Mixing bowl, 8×8 baking dish
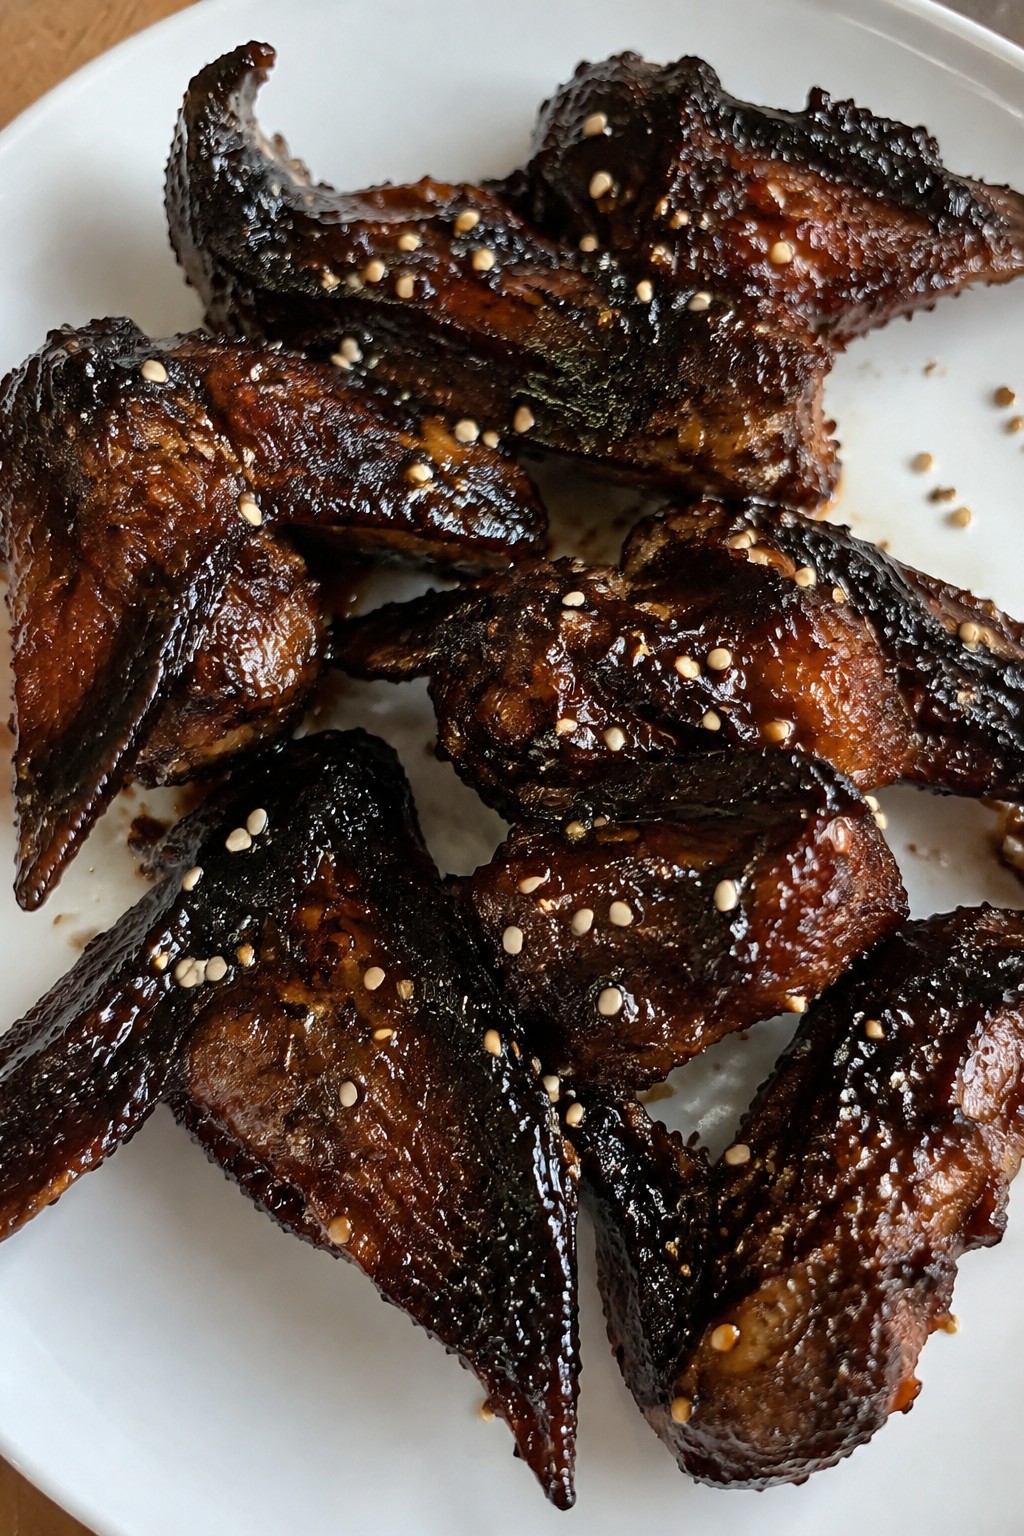
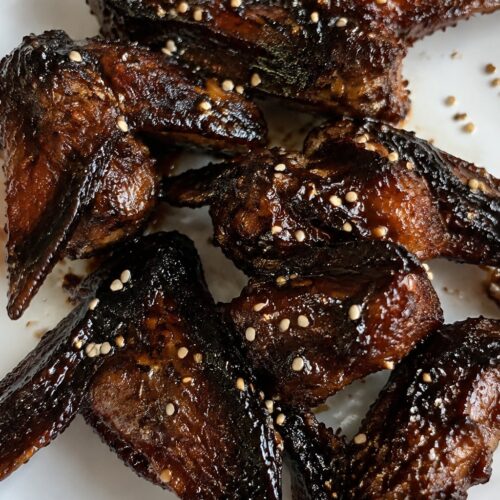
Bat Wing Chicken Wings with Spicy Black Glaze
These chicken wings earn their name from the way the flats spread out during baking and the deep black glaze that coats them. The look suits a Halloween spread while the wings stay simple to prepare for a group.
The finished wings turn out crisp on the outside with a sticky, spicy-sweet coating that clings to each piece. They hold up well on a platter and give guests something savory to reach for first.
Equipment
- Baking sheet
- Mixing bowl
- Small saucepan
- Pastry brush
Ingredients
- 2 pounds chicken wings
- 1/4 cup soy sauce
- 2 tablespoons honey
- 1 tablespoon sriracha
- 1 teaspoon black food coloring gel
- 2 cloves garlic, minced
- 1 tablespoon vegetable oil
- 1/2 teaspoon salt
- 1/4 teaspoon black pepper
- Sesame seeds for garnish
Instructions
- Heat the oven to 400 degrees F and line a baking sheet with parchment paper.
- Pat the chicken wings dry, then toss them in a bowl with the vegetable oil, salt, and black pepper until evenly coated.
- Spread the wings in a single layer on the baking sheet and bake for 25 minutes, turning once halfway through.
- While the wings bake, combine the soy sauce, honey, sriracha, minced garlic, and black food coloring gel in a small saucepan.
- Bring the glaze to a simmer over medium heat and cook for 3 to 4 minutes until it thickens slightly.
- Remove the wings from the oven, brush them generously with the glaze, and return them to the oven for another 10 minutes.
- Brush the wings with any remaining glaze, sprinkle with sesame seeds, and let them rest for 5 minutes before serving.
Notes
Cuisine: American
Equipment: Baking sheet, Mixing bowl, Small saucepan, Pastry brush
