

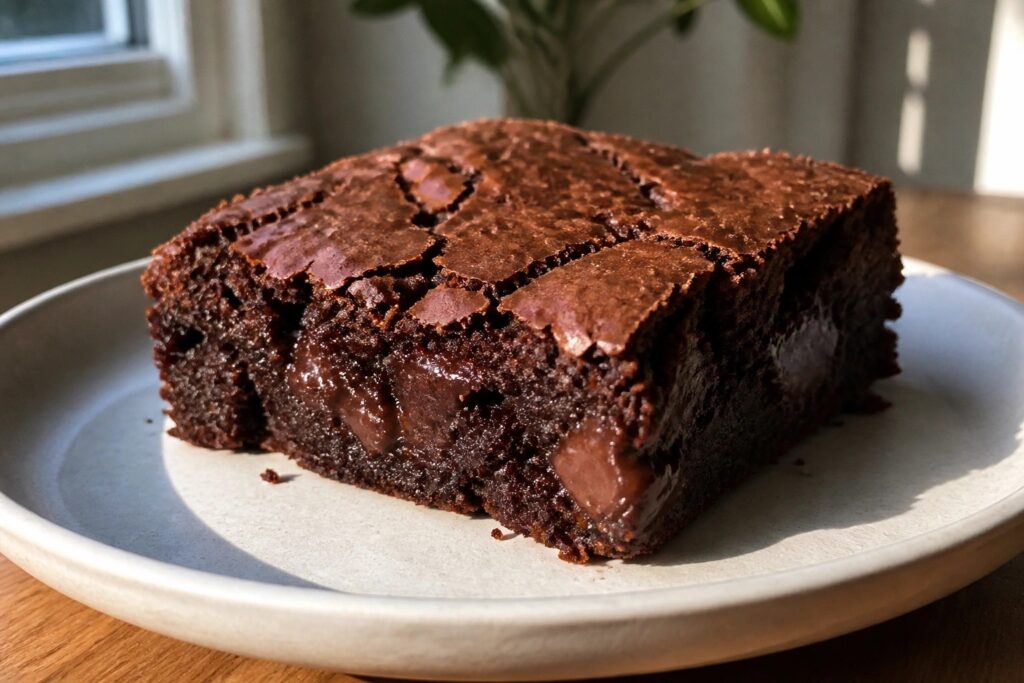
Potluck desserts work best when they travel well and feed a group without extra effort. I collected 13 rich options that stay fresh and slice or scoop easily at any gathering. These recipes focus on simple steps and common ingredients so you can prep them ahead. You will see a range of flavors from chocolate to fruit that suit different tastes. Pick a few to try for your next event and see which ones become regulars.
Helpful Tips Before You Start
These tips help your desserts travel well and serve a crowd without extra stress.
Pick Recipes That Travel Easily
Choose bars, brownies, or sheet cakes over delicate layered items. They hold up better in a car and need less fuss at the event.
Use the Right Containers
Pack desserts in sturdy, stackable containers with tight lids. Foil pans work well too since you can leave them behind.
Make Most Items Ahead
Bake the day before when possible. This keeps your kitchen clear and lets flavors settle before serving.
Cut Into Small Pieces
Slice everything into bite size portions. Guests can try several desserts without committing to a large serving.
Label Common Allergens
Add a small note with each dish that lists nuts, gluten, or dairy. It helps everyone pick safely at a shared table.
Salted Caramel Chocolate Brownie Bars
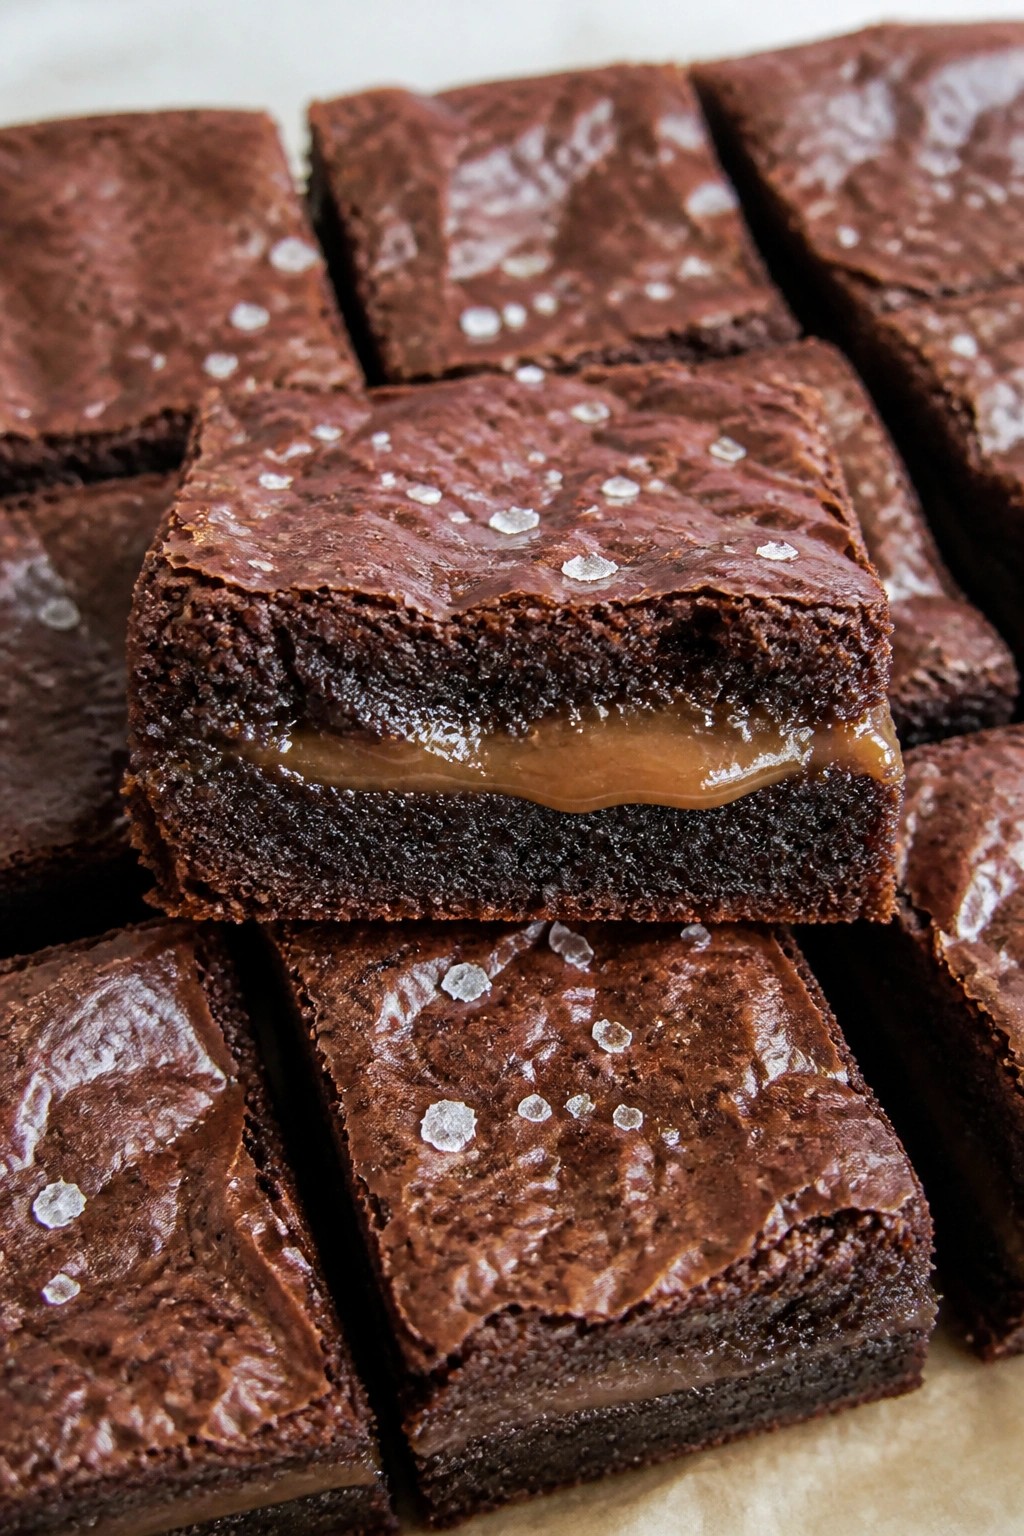
These bars layer fudgy chocolate brownie with a ribbon of caramel and a finishing sprinkle of salt. They hold their shape well after cooling, which makes them easy to pack up and bring to a potluck where guests can grab a square or two.
The chocolate stays rich while the caramel adds a chewy contrast and the salt keeps each bite from tasting too sweet. Cut them into larger pieces for sharing or smaller ones if the table is already full.

Equipment
- Mixing Bowl
- Baking Pan
- Saucepan
Ingredients
- 1/2 cup unsalted butter
- 1 cup granulated sugar
- 2 large eggs
- 1/3 cup unsweetened cocoa powder
- 1/2 cup all-purpose flour
- 1/4 teaspoon salt
- 1/2 cup semi-sweet chocolate chips
- 1/2 cup caramel sauce
- 1 teaspoon flaky sea salt
Instructions
- Preheat the oven to 350°F and line an 8×8-inch pan with parchment paper so the bars lift out easily after baking.
- Melt the butter in a medium saucepan over low heat. Remove from heat and stir in the sugar until combined.
- Add the eggs one at a time, stirring well after each addition. Mix in the cocoa powder, flour, and salt until no dry streaks remain.
- Fold in the chocolate chips. Spread half the batter into the prepared pan.
- Drizzle the caramel sauce evenly over the first layer of batter. Spread the remaining batter on top to cover the caramel.
- Bake for 25 to 28 minutes until the center is set. Remove from the oven and immediately sprinkle the flaky sea salt over the top.
- Let the bars cool completely in the pan before lifting them out and cutting into four large squares.
Notes
Cuisine: American
Equipment: Mixing Bowl, Baking Pan, Saucepan
No-Bake Oreo Peanut Butter Trifle
This trifle layers crushed Oreos with a creamy peanut butter filling and chocolate accents for a dessert that travels well to potlucks. The no-bake method keeps it simple, and the individual layers hold up nicely when scooped and shared.
It delivers a mix of crunchy cookie pieces, smooth peanut butter, and light whipped topping in every bite. The combination feels rich without needing an oven, which makes it easy to prepare ahead for gatherings.


Equipment
- Mixing Bowls
- Electric Mixer
- Trifle Dish
Ingredients
- 20 Oreo cookies, crushed
- 1 cup creamy peanut butter
- 8 ounces cream cheese, softened
- 1/2 cup powdered sugar
- 1/4 cup milk
- 2 cups whipped topping, divided
- 1/2 cup chocolate chips, melted
Instructions
- Place the crushed Oreos in a bowl and set aside. In a separate large bowl, beat the cream cheese until smooth.
- Add the peanut butter, powdered sugar, and milk to the cream cheese. Beat until the mixture is fully combined and creamy.
- Fold 1 cup of whipped topping into the peanut butter mixture until it becomes light and uniform.
- In a trifle dish or four individual glasses, begin layering by spooning a layer of crushed Oreos on the bottom.
- Add a layer of the peanut butter mixture over the Oreos, followed by a thin drizzle of melted chocolate chips.
- Repeat the layers once more, ending with a final layer of the remaining whipped topping.
- Sprinkle a few extra crushed Oreos on top and drizzle with any remaining melted chocolate chips before serving.
Notes
Cuisine: American
Equipment: Mixing Bowls, Electric Mixer, Trifle Dish
Raspberry Swirl White Chocolate Blondies
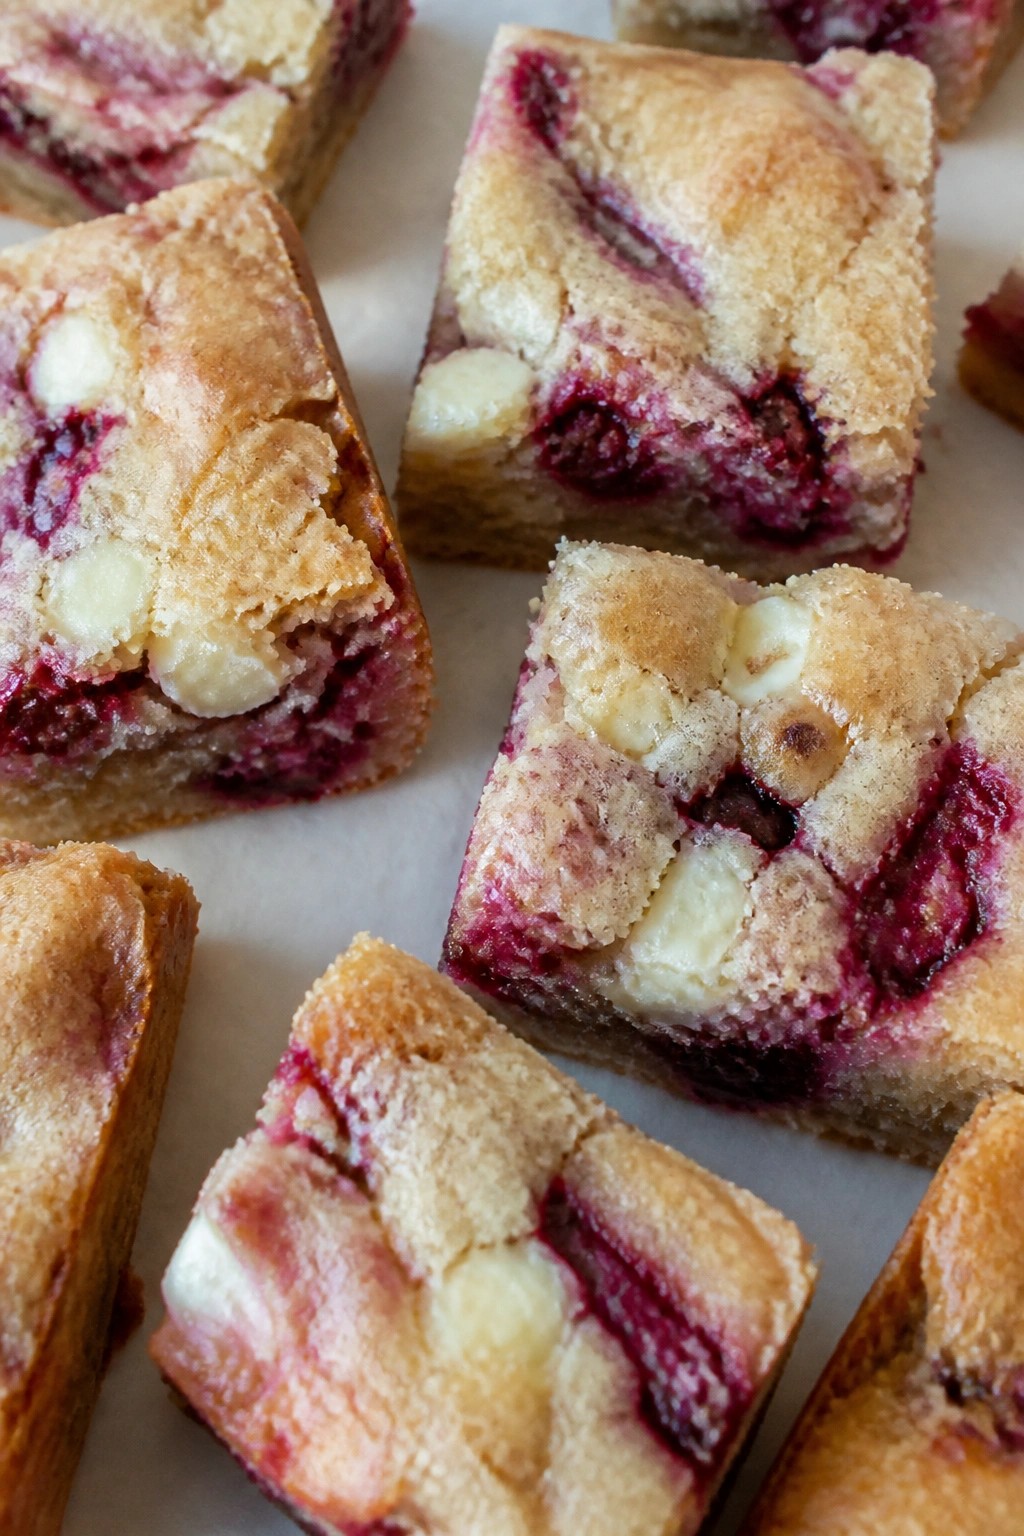
These blondies bring together chewy white chocolate bars and bright raspberry swirls in one easy pan. They travel well to potlucks and hold up nicely when cut into squares for sharing.
The texture stays soft in the center with slightly crisp edges, while the white chocolate melts into creamy pockets and the raspberry adds a tart contrast.

Equipment
- Mixing Bowls
- 8×8 Inch Baking Pan
- Whisk
Ingredients
- 1/2 cup unsalted butter
- 1 cup light brown sugar
- 1 large egg
- 1 teaspoon vanilla extract
- 1 cup all-purpose flour
- 1/2 teaspoon baking powder
- 1/4 teaspoon salt
- 1/2 cup white chocolate chips
- 1/3 cup raspberry jam
Instructions
- Preheat the oven to 350 degrees and line an 8×8 inch baking pan with parchment paper.
- Melt the butter in a medium bowl, then stir in the brown sugar until smooth.
- Add the egg and vanilla extract to the butter mixture and stir until fully combined.
- In a separate bowl, whisk together the flour, baking powder, and salt.
- Fold the dry ingredients into the wet mixture until no streaks remain.
- Stir in the white chocolate chips.
- Spread the batter evenly in the prepared pan.
- Drop spoonfuls of raspberry jam across the top and use a knife to swirl it gently through the batter.
- Bake for 25 to 28 minutes until the edges are golden and the center is set.
- Cool completely in the pan before slicing into squares.
Notes
Cuisine: American
Equipment: Mixing Bowls, 8×8 Inch Baking Pan, Whisk
Pecan Pie Cheesecake Squares
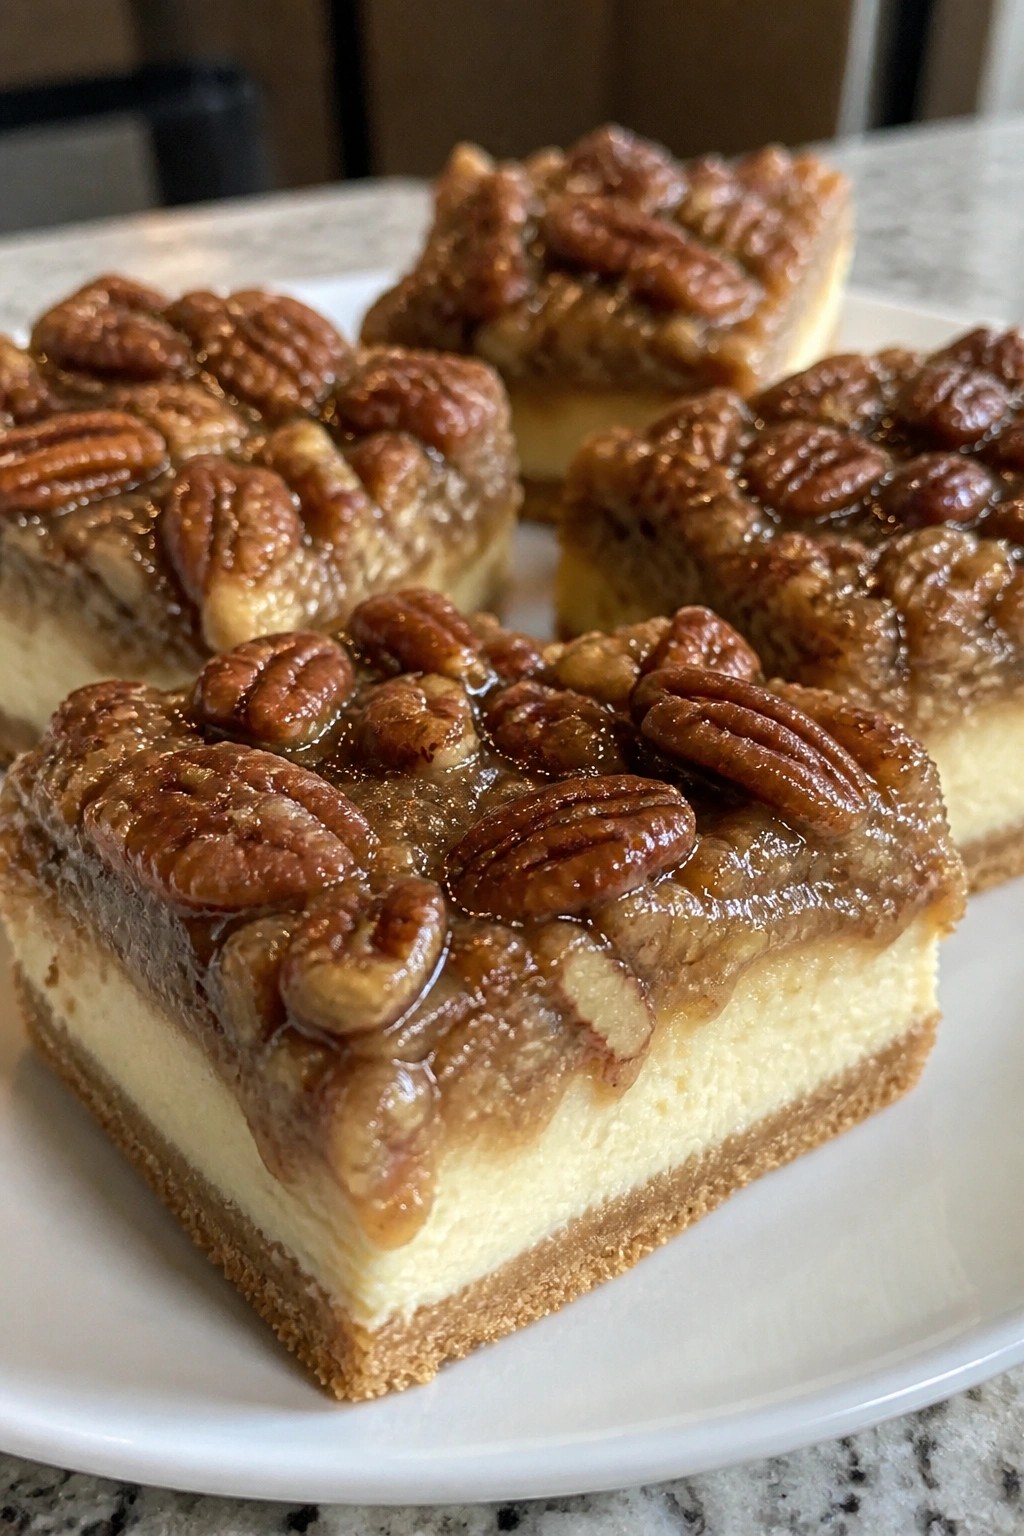
This combination brings together the creamy richness of cheesecake with the sticky sweetness of pecan pie. It travels well to gatherings and holds up nicely on a dessert table.
The texture contrasts a crisp crust with a smooth middle layer and a crunchy nut topping. Guests enjoy the familiar flavors in a new format that feels special yet comforting.

Equipment
- Mixing Bowl
- 8×8 Baking Pan
- Oven
Ingredients
- 1 cup graham cracker crumbs
- 4 tablespoons unsalted butter, melted
- 8 ounces cream cheese, softened
- 1/4 cup granulated sugar
- 1 large egg
- 1 teaspoon vanilla extract
- 3/4 cup pecan halves
- 1/3 cup light corn syrup
- 1/4 cup packed brown sugar
- 2 tablespoons unsalted butter
- 1 large egg
Instructions
- Preheat the oven to 350 degrees and line an 8×8 baking pan with parchment paper. Stir the graham cracker crumbs with the melted butter until evenly moistened, then press the mixture firmly into the bottom of the pan.
- Beat the cream cheese with the granulated sugar until smooth. Add the first egg and vanilla extract, then mix until fully combined. Spread this filling evenly over the crust.
- In a separate bowl, stir together the pecan halves, corn syrup, brown sugar, and the remaining 2 tablespoons of butter. Beat in the second egg until the mixture is uniform.
- Pour the pecan mixture over the cream cheese layer and spread it gently to cover the surface. Bake for 35 minutes, or until the top is set and lightly golden.
- Cool the pan completely on a wire rack, then refrigerate for at least two hours before cutting into four squares.
Notes
Cuisine: American
Equipment: Mixing Bowl, 8×8 Baking Pan, Oven
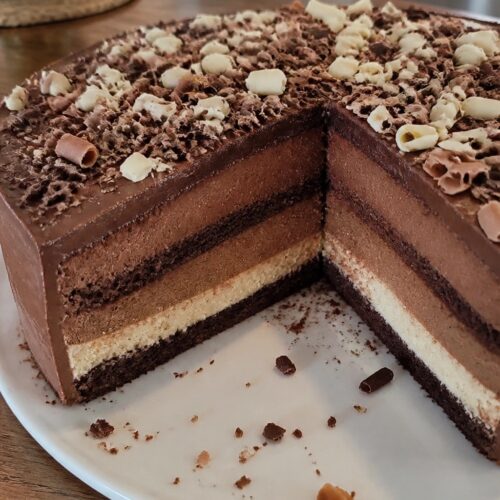
Triple Chocolate Mousse Layer Cake
This triple chocolate mousse layer cake stacks thin slices of chocolate cake with three distinct mousse layers made from dark, milk, and white chocolate. The result is a light yet intensely chocolate dessert that travels well and slices cleanly for a crowd. It suits potlucks because it can be assembled the day before and needs only a quick chill before serving.

Equipment
- Mixing bowls
- Electric mixer
- Heatproof bowl
- Saucepan
- Loaf pan
Ingredients
- 1 8-inch chocolate cake layer, sliced horizontally into three thin layers
- 4 ounces dark chocolate, chopped
- 4 ounces milk chocolate, chopped
- 4 ounces white chocolate, chopped
- 3 cups heavy cream, divided
- 3 tablespoons sugar
- 1 teaspoon vanilla extract
- Chocolate curls for garnish
Instructions
- Place the dark chocolate in a heatproof bowl set over simmering water and stir until melted. Remove from heat and let cool slightly.
- In a large bowl, whip 1 cup heavy cream with 1 tablespoon sugar and 1/3 teaspoon vanilla until stiff peaks form. Fold the whipped cream into the melted dark chocolate to create the dark mousse.
- Repeat the melting and whipping process with the milk chocolate using another 1 cup cream, 1 tablespoon sugar, and 1/3 teaspoon vanilla.
- Repeat once more with the white chocolate, the remaining 1 cup cream, 1 tablespoon sugar, and 1/3 teaspoon vanilla.
- Place the bottom cake layer in a loaf pan or small square pan lined with plastic wrap. Spread the dark mousse evenly over it.
- Add the middle cake layer and spread the milk chocolate mousse on top.
- Top with the final cake layer and spread the white chocolate mousse over the surface.
- Cover and refrigerate at least 4 hours until the mousses are firm.
- Lift the cake out using the plastic wrap, slice, and garnish with chocolate curls before serving.
Notes
Cuisine: American
Equipment: Mixing bowls, Electric mixer, Heatproof bowl, Saucepan, Loaf pan
Lemon Blueberry Pavlova with Mascarpone
This pavlova brings a light meringue shell with a soft center that pairs well with bright lemon and sweet blueberries. The mascarpone adds a smooth, rich layer that makes it easy to slice and share at gatherings. It works well for potlucks because the components hold up during travel, and you can assemble it on site.
The flavor stays balanced with citrus tang against the berries and cream. The texture offers a crisp top that gives way to a marshmallow-like middle.


Equipment
- Baking sheet
- Parchment paper
- Mixing bowls
- Electric mixer
Ingredients
- 2 large egg whites
- 1/2 cup granulated sugar
- 1 teaspoon cornstarch
- 1 teaspoon lemon juice
- Zest of 1 lemon, divided
- 8 ounces mascarpone cheese
- 2 tablespoons powdered sugar
- 1/2 teaspoon vanilla extract
- 1 cup fresh blueberries
Instructions
- Preheat the oven to 250 degrees and line a baking sheet with parchment paper.
- In a clean bowl, beat the egg whites until soft peaks form. Gradually add the granulated sugar and continue beating until stiff, glossy peaks form.
- Gently fold in the cornstarch, lemon juice, and half the lemon zest.
- Spoon the meringue into four small nests on the prepared sheet. Bake for 60 minutes, then turn off the oven and let the pavlovas cool inside with the door closed.
- In a separate bowl, stir the mascarpone with the powdered sugar, vanilla, and remaining lemon zest until smooth.
- Once the pavlovas are cool, spoon the mascarpone mixture into the center of each one and top with blueberries.
Notes
Cuisine: Australian
Equipment: Baking sheet, Parchment paper, Mixing bowls, Electric mixer
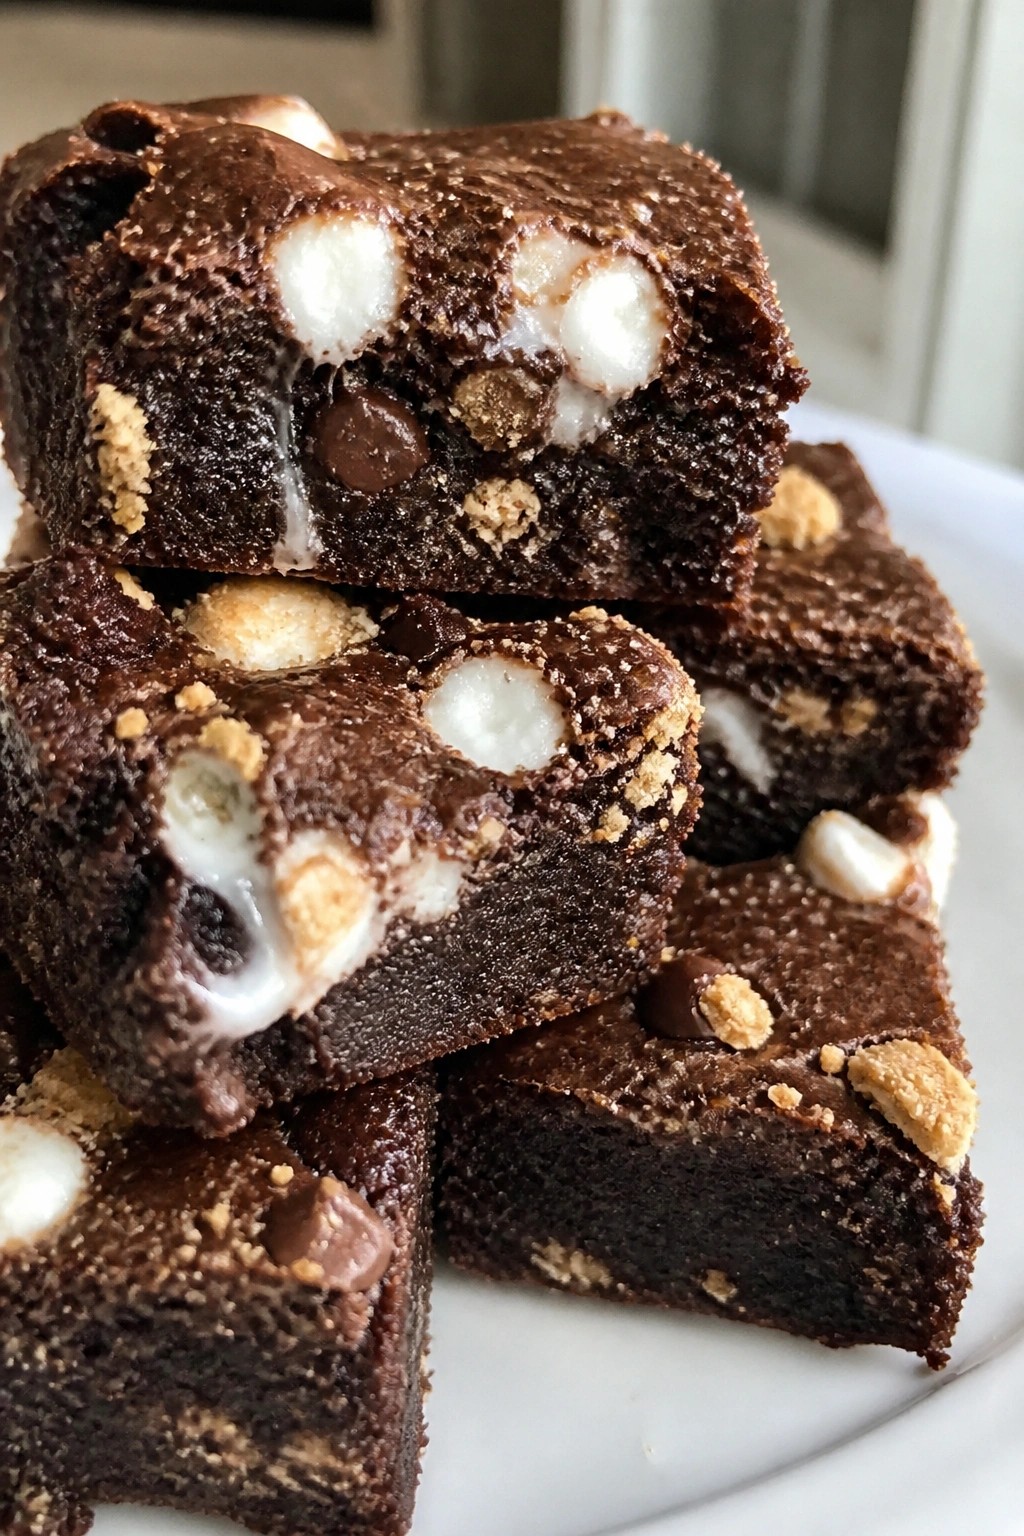
Gooey S’mores Fudge Brownie Bites
These brownie bites pack the campfire flavors of s’mores into a fudgy chocolate square. They travel well to potlucks and give guests an easy handheld treat that feels special without extra fuss.
The finished bites stay soft in the center from melted marshmallows while graham cracker pieces add light crunch. Chocolate chips throughout keep every bite rich and satisfying.

Equipment
- Medium Saucepan
- Mini Muffin Tin
- Mixing Bowl
- Whisk
Ingredients
- 1/2 cup unsalted butter
- 3/4 cup granulated sugar
- 2 large eggs
- 1 teaspoon vanilla extract
- 1/3 cup unsweetened cocoa powder
- 1/2 cup all-purpose flour
- 1/4 teaspoon salt
- 3/4 cup graham cracker crumbs
- 1 cup mini marshmallows
- 1/2 cup semisweet chocolate chips
Instructions
- Heat the oven to 350 degrees and line a mini muffin tin with paper liners.
- Melt the butter in a medium saucepan over low heat. Remove from heat and stir in the sugar until combined.
- Add the eggs one at a time, mixing well after each, then stir in the vanilla extract.
- Whisk in the cocoa powder, flour, and salt until the batter is smooth and no dry streaks remain.
- Fold in the graham cracker crumbs, mini marshmallows, and chocolate chips until evenly distributed.
- Spoon the batter into the prepared muffin cups, filling each about three-quarters full.
- Bake for 12 to 14 minutes until the tops look set but the centers still feel slightly soft.
- Cool the bites in the tin for 10 minutes before moving them to a rack.
Notes
Cuisine: American
Equipment: Medium Saucepan, Mini Muffin Tin, Mixing Bowl, Whisk
Coconut Macaroon Chocolate Ganache Tart
This tart brings together a chewy coconut macaroon crust and a smooth chocolate ganache layer in one easy pan. It holds up well on a potluck table and cuts into neat slices that travel without fuss.
The flavor balances sweet coconut with rich chocolate, while the texture mixes chew from the crust and creaminess from the filling. It feels special without needing complicated steps.


Equipment
- Mixing bowl
- Tart pan
- Saucepan
Ingredients
- 1 1/2 cups sweetened shredded coconut
- 2 large egg whites
- 1/4 cup granulated sugar
- 1 teaspoon vanilla extract
- 1/4 teaspoon salt
- 6 ounces semisweet chocolate chips
- 1/2 cup heavy cream
Instructions
- Preheat the oven to 325 degrees F and lightly grease a small tart pan. In a mixing bowl, whisk the egg whites, sugar, vanilla extract, and salt until the sugar dissolves.
- Stir the shredded coconut into the egg white mixture until evenly coated. Press the mixture firmly into the bottom and up the sides of the prepared tart pan to form a crust.
- Bake the crust for 20 to 25 minutes until the edges turn golden. Remove from the oven and let it cool completely in the pan.
- Place the chocolate chips in a heatproof bowl. Heat the heavy cream in a small saucepan over medium heat until it just begins to simmer, then pour it over the chocolate.
- Let the mixture sit for one minute, then stir until the chocolate melts and the ganache becomes smooth and glossy. Pour the ganache into the cooled crust and spread it evenly.
- Refrigerate the tart for at least two hours until the ganache sets. Slice and serve chilled.
Notes
Cuisine: American
Equipment: Mixing bowl, Tart pan, Saucepan
Spiced Apple Caramel Crumble Cake
This cake brings together tender apple pieces, warm spices, and a buttery crumble topping with ribbons of caramel throughout. It travels well to gatherings and slices neatly for a crowd. The contrast of soft fruit, gooey caramel, and crisp topping makes each bite satisfying without being overly heavy.
It works best when you want a dessert that feels comforting yet a little special. The flavors stay balanced so it pairs easily with coffee or tea at a potluck table.


Equipment
- Mixing Bowls
- 8×8 Baking Pan
- Whisk
Ingredients
- 2 medium apples, peeled and diced
- 1 teaspoon ground cinnamon
- 1/2 teaspoon ground nutmeg
- 1/2 cup caramel sauce, divided
- 3/4 cup all-purpose flour, divided
- 1/4 cup rolled oats
- 1/4 cup brown sugar
- 4 tablespoons unsalted butter, softened and divided
- 1/2 cup granulated sugar
- 1 large egg
- 1 teaspoon baking powder
- 1/3 cup milk
- 1/4 teaspoon salt
Instructions
- Preheat the oven to 350 degrees and grease an 8×8 baking pan.
- In a medium bowl, mix the diced apples with cinnamon and nutmeg. Set aside.
- In another bowl, combine 1/2 cup flour, the oats, brown sugar, and 2 tablespoons butter. Rub the mixture together until it forms coarse crumbs for the topping.
- In a large bowl, beat the remaining 2 tablespoons butter with the granulated sugar until light. Add the egg and mix well.
- Stir in the baking powder, salt, and remaining 1/4 cup flour. Alternate adding the milk until a smooth batter forms.
- Spread the batter into the prepared pan. Layer the spiced apples on top, then drizzle with half the caramel sauce.
- Sprinkle the crumble mixture evenly over the apples.
- Bake for 35 to 40 minutes until the topping is golden and a toothpick inserted in the center comes out clean.
- Cool slightly, then drizzle the remaining caramel sauce over the cake before serving.
Notes
Cuisine: American
Equipment: Mixing Bowls, 8×8 Baking Pan, Whisk
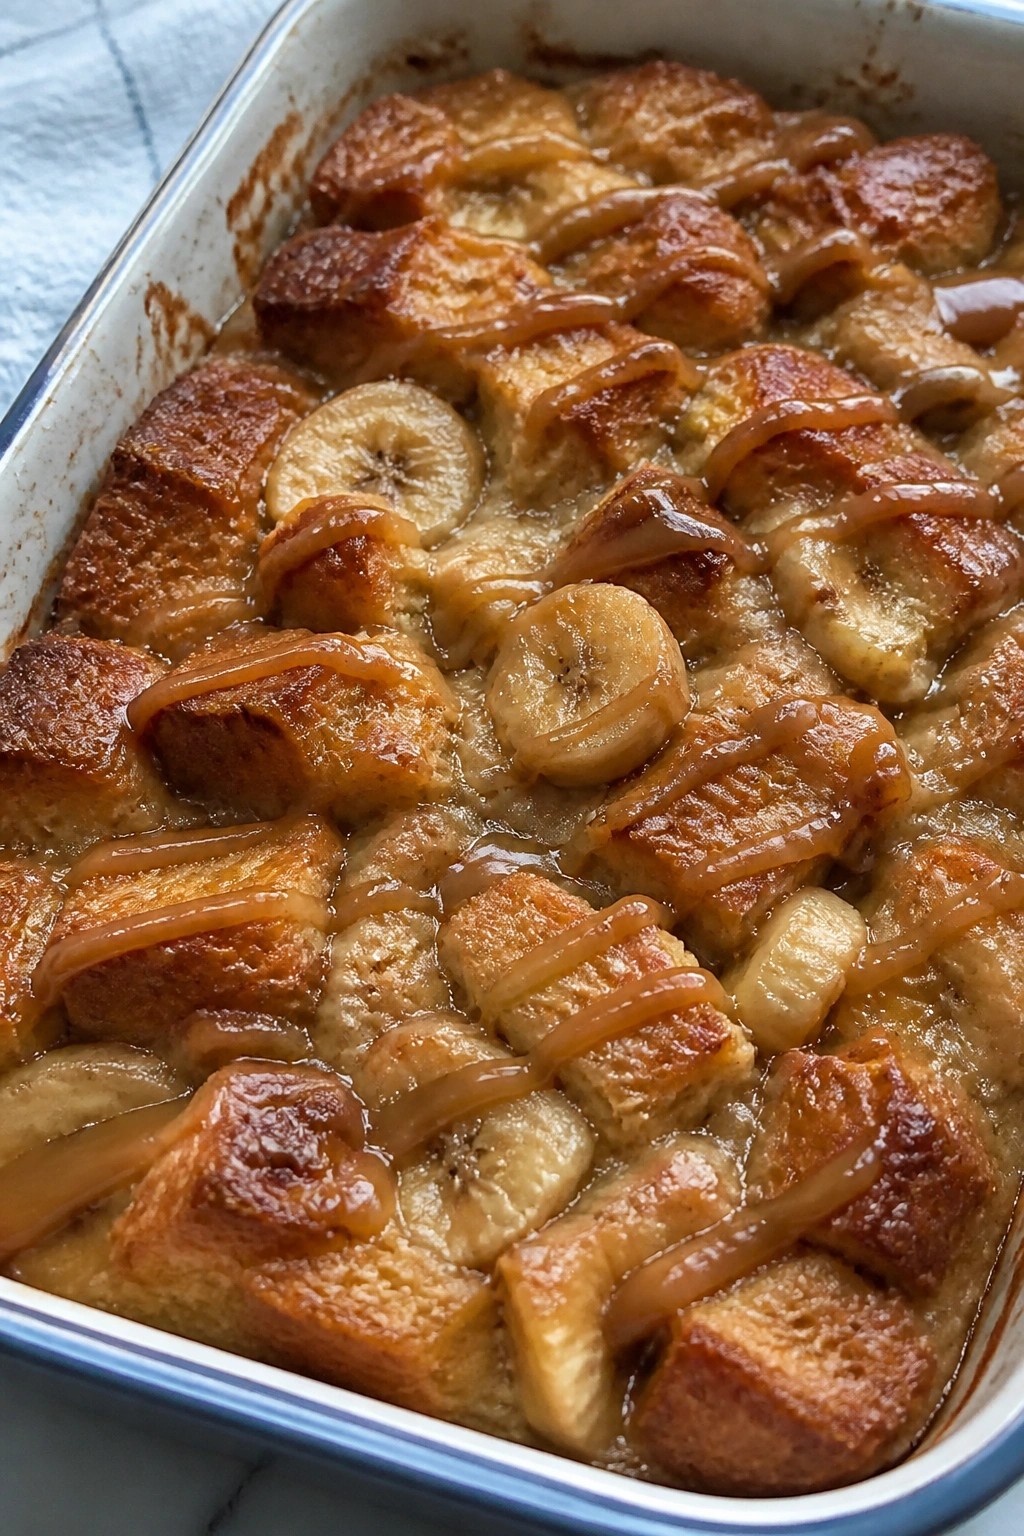
Dulce de Leche Banana Bread Pudding
This bread pudding turns ripe bananas and thick dulce de leche into a creamy, caramel-scented dessert that travels well to any gathering. The soft custard layers with tender bread and sweet banana slices make it easy to scoop and share at a potluck table.
It bakes into a golden top with gooey pockets of caramel throughout. Serve it warm so the extra dulce de leche melts into each portion.

Equipment
- Mixing Bowl
- Baking Dish
- Whisk
Ingredients
- 4 cups cubed day-old bread
- 2 ripe bananas, sliced
- 1/2 cup dulce de leche, plus 2 tablespoons for drizzling
- 1 cup whole milk
- 2 large eggs
- 1/4 cup granulated sugar
- 1 teaspoon vanilla extract
- 1/4 teaspoon ground cinnamon
- Pinch of salt
- 2 tablespoons unsalted butter, melted
Instructions
- Heat the oven to 350 degrees and lightly grease a small baking dish.
- In a mixing bowl, whisk together the milk, eggs, sugar, vanilla, cinnamon, and salt until smooth.
- Add the bread cubes and sliced bananas to the bowl. Pour in the 1/2 cup dulce de leche and the melted butter. Stir gently until the bread is coated.
- Transfer the mixture to the prepared dish and spread it evenly.
- Bake for 35 to 40 minutes, until the top is golden and the center is set.
- Remove from the oven and drizzle the remaining 2 tablespoons dulce de leche over the warm pudding before serving.
Notes
Cuisine: American
Equipment: Mixing Bowl, Baking Dish, Whisk
Cherry Almond Streusel Coffee Cake
This coffee cake combines tart cherries with a nutty almond flavor and a crisp streusel topping. It travels easily to gatherings and holds up well when sliced and passed around.
The sour cream keeps the crumb soft while the almonds add crunch in every bite. It works as a sweet finish to a shared meal or a morning treat at a brunch spread.


Equipment
- Mixing Bowls
- 8-Inch Baking Pan
- Oven
Ingredients
- 1 1/2 cups all-purpose flour
- 3/4 cup granulated sugar, divided
- 1/4 cup brown sugar
- 1/2 cup unsalted butter, softened and divided
- 2 large eggs
- 1/2 cup sour cream
- 1 teaspoon baking powder
- 1/2 teaspoon almond extract
- 1 cup fresh cherries, pitted and halved
- 1/2 cup sliced almonds
- 1 teaspoon ground cinnamon
Instructions
- Preheat the oven to 350 degrees and grease an 8-inch square baking pan.
- In a small bowl, mix 1/2 cup flour, 1/4 cup granulated sugar, the brown sugar, 1/4 cup butter, the cinnamon, and 1/4 cup sliced almonds until crumbly. Set the streusel aside.
- In a large bowl, beat the remaining 1/4 cup butter with the remaining 1/2 cup granulated sugar until light. Add the eggs one at a time, then stir in the sour cream and almond extract.
- Whisk together the remaining 1 cup flour and the baking powder. Fold the dry mixture into the wet ingredients until just combined.
- Spread the batter into the prepared pan. Scatter the cherries over the top, then sprinkle on the streusel mixture and the remaining 1/4 cup sliced almonds.
- Bake for 35 to 40 minutes until a toothpick inserted in the center comes out clean. Cool in the pan before slicing.
Notes
Cuisine: American
Equipment: Mixing Bowls, 8-Inch Baking Pan, Oven
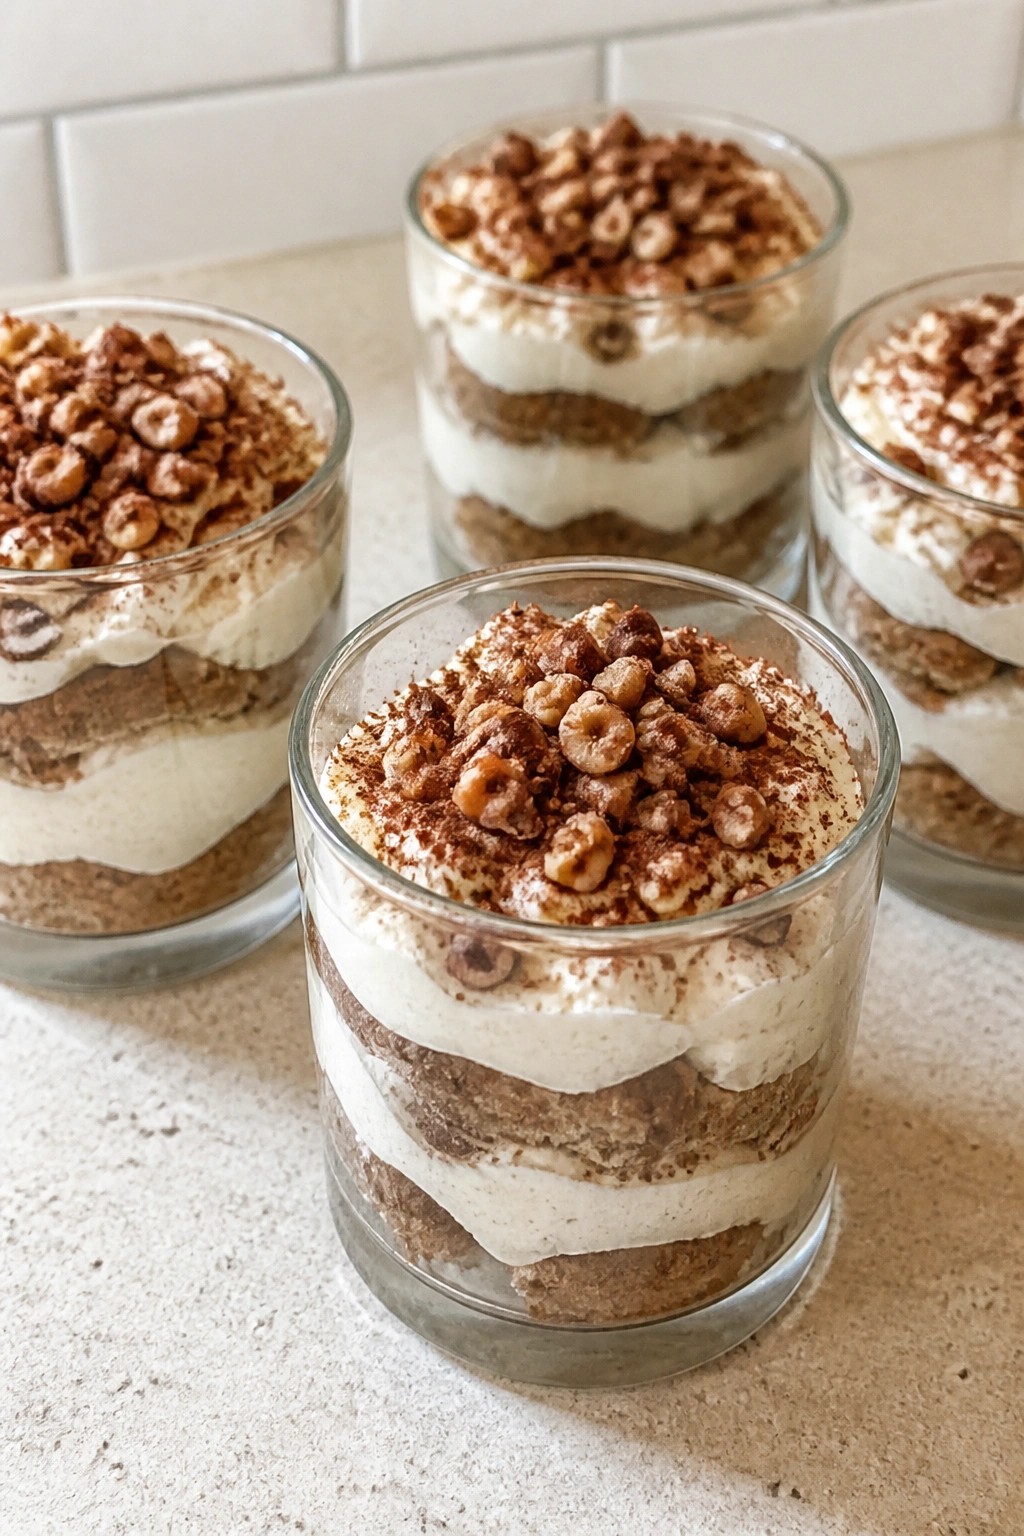
Espresso Hazelnut Tiramisu Cups
These individual tiramisu cups bring a nutty twist to a classic Italian dessert. The combination of bold espresso and toasted hazelnuts gives each serving a rich flavor with a bit of crunch on top. They travel well to potlucks and can be made ahead so you spend less time in the kitchen on the day of the event.
The texture stays light thanks to whipped mascarpone cream layered with coffee-soaked ladyfingers. Guests enjoy the balance of creamy filling and subtle hazelnut notes without needing to slice a large dish.

Equipment
- Mixing Bowl
- Electric Mixer
- Serving Cups
Ingredients
- 12 ladyfinger cookies
- ¾ cup cooled espresso
- 8 oz mascarpone cheese
- 1 cup heavy cream
- ¼ cup sugar
- 1 teaspoon vanilla extract
- 2 tablespoons hazelnut liqueur
- ¼ cup chopped toasted hazelnuts
- 2 tablespoons cocoa powder
Instructions
- Brew the espresso and set it aside to cool completely.
- In a mixing bowl, beat the heavy cream with the sugar and vanilla extract until stiff peaks form.
- In a second bowl, stir the mascarpone cheese with the hazelnut liqueur until smooth.
- Fold the whipped cream into the mascarpone mixture until evenly combined.
- Quickly dip each ladyfinger into the cooled espresso and place two dipped cookies in the bottom of each serving cup.
- Spoon a layer of the mascarpone cream over the ladyfingers.
- Sprinkle a portion of the chopped hazelnuts and a light dusting of cocoa powder on top of the cream.
- Repeat the layers once more, ending with a final dusting of cocoa powder and the remaining hazelnuts.
- Cover and chill the cups until ready to serve.
Notes
Cuisine: Italian
Equipment: Mixing Bowl, Electric Mixer, Serving Cups
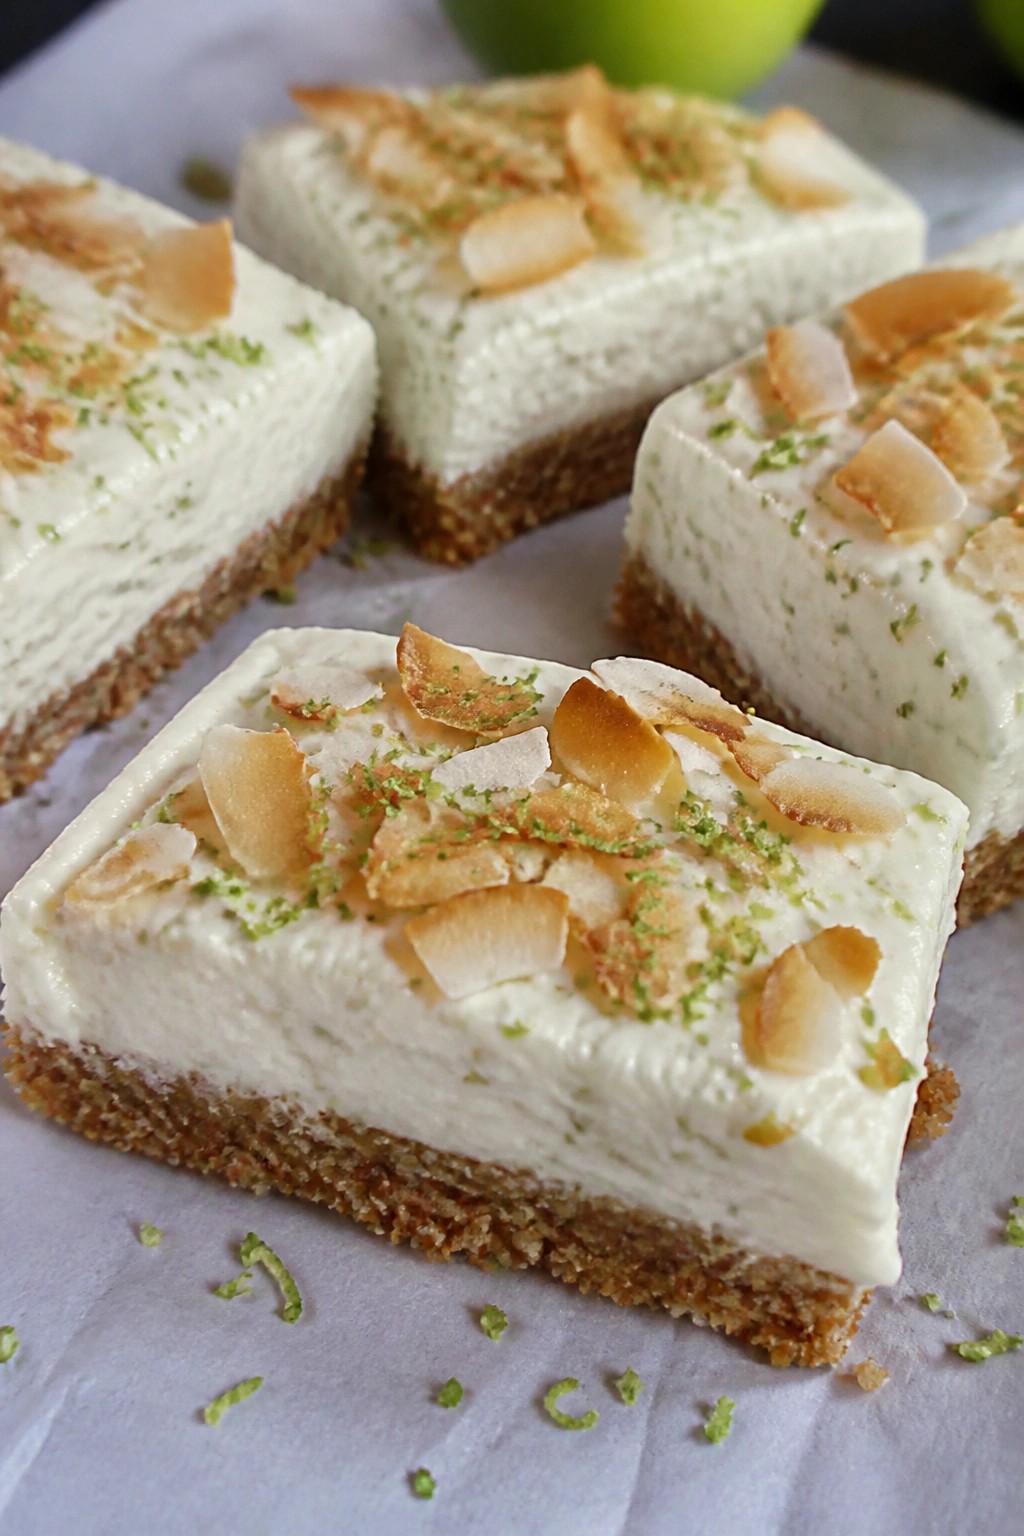
Key Lime Coconut Cream Pie Bars
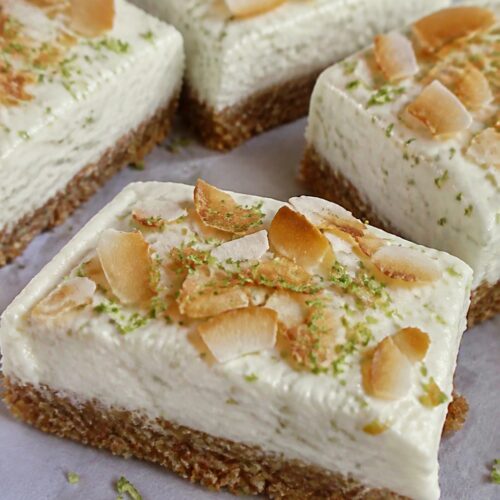
These bars bring a bright, tropical twist to classic cream pie flavors. The tangy key lime cuts through rich coconut cream, all layered over a coconut graham crust. They travel well to potlucks and hold up nicely at room temperature for a few hours.
The texture stays creamy on top with a crisp base. Each bite balances sweet coconut and sharp citrus without feeling heavy. They work best when made ahead so the filling sets firmly.
Equipment
- Mixing Bowl
- 8×8 Baking Pan
- Electric Mixer
Ingredients
- 3/4 cup graham cracker crumbs
- 1/4 cup unsweetened shredded coconut
- 3 tablespoons unsalted butter, melted
- 1/2 cup sweetened condensed milk
- 1/4 cup key lime juice
- 1/4 cup coconut cream
- 1/2 cup heavy cream
- 1 tablespoon powdered sugar
- 2 tablespoons toasted coconut flakes
- Zest of 2 key limes
Instructions
- Preheat the oven to 350 degrees. Stir together the graham cracker crumbs, shredded coconut, and melted butter until the mixture holds together when pressed.
- Press the crust mixture firmly into the bottom of an 8×8 baking pan. Bake for 10 minutes, then let it cool completely.
- Whisk the sweetened condensed milk, key lime juice, and coconut cream in a bowl until smooth. Pour this filling over the cooled crust.
- Chill the pan in the refrigerator for at least 4 hours until the filling is firm.
- Whip the heavy cream with the powdered sugar until soft peaks form. Spread the whipped cream over the chilled filling.
- Sprinkle the toasted coconut flakes and key lime zest evenly across the top before slicing into bars.
Notes
Cuisine: American
Equipment: Mixing Bowl, 8×8 Baking Pan, Electric Mixer
