


Thanksgiving potlucks work best when the dishes can feed a big group without much fuss. These recipes stick to classic flavors that travel well and hold up on a crowded table. You will find sides and mains that use basic ingredients and simple steps. Most of them can be made ahead so you are not rushed on the day. Choose a few that fit your family size and what you already have on hand.
Helpful Tips Before You Start
These tips will help your dishes travel well and feed a big group without extra stress.
Scale Up Early
Most Thanksgiving potluck recipes need to serve 12 or more. Check the yield and double the ingredients before shopping so you do not run short.
Prep Components Ahead
Chop vegetables and mix dry ingredients the day before. This keeps your kitchen calm on the morning of the event.
Use Sturdy Carriers
Pack hot casseroles in disposable foil pans with tight lids. They go straight from oven to table and make cleanup simple for the host.
Add Clear Labels
Write the dish name and any major allergens on a small card. Guests with restrictions can choose safely without asking questions.
Plan for Room Temperature Serving
Choose sides like salads or baked goods that hold well without constant reheating. This frees up oven space once the crowd arrives.
Turkey Cranberry Sliders with Gravy Dip
These sliders give leftover turkey a new role at the potluck table. Sweet-tart cranberry sauce cuts through the rich meat and cheese while the soft rolls hold everything together for easy serving.
The warm gravy on the side turns each bite into a familiar Thanksgiving combination that travels well and reheats without trouble.


Equipment
- Baking dish
- Small saucepan
- Pastry brush
Ingredients
- 8 slider buns
- 12 ounces sliced cooked turkey
- ¾ cup whole berry cranberry sauce
- 4 slices provolone cheese
- 2 tablespoons unsalted butter, melted
- 2 cups turkey gravy
Instructions
- Heat the oven to 350°F. Slice the slider buns in half horizontally and arrange the bottom halves in a baking dish.
- Layer the sliced turkey evenly across the buns. Spoon the cranberry sauce over the turkey in small dollops.
- Lay the provolone slices on top of the cranberry sauce, then replace the top halves of the buns.
- Brush the melted butter over the tops of the buns.
- Bake for 15 minutes until the cheese has melted and the tops turn lightly golden.
- While the sliders bake, warm the turkey gravy in a small saucepan over medium heat, stirring until it is hot and smooth.
- Remove the sliders from the oven, cut them apart, and serve with the warm gravy for dipping.
Notes
Cuisine: American
Equipment: Baking dish, Small saucepan, Pastry brush
Sweet Potato Casserole with Pecan Streusel
This sweet potato casserole brings a creamy base topped with a crunchy pecan streusel. It makes a reliable choice for Thanksgiving potlucks because it travels well and stays satisfying even after sitting on a buffet table.
The finished dish offers earthy sweetness from the potatoes against the buttery, nutty crunch of the topping. It pairs easily with roasted turkey and other savory sides at large family gatherings.


Equipment
- Large pot
- Baking dish
- Mixing bowl
- Potato masher
Ingredients
- 2 large sweet potatoes, peeled and cubed
- 1/4 cup milk
- 2 tablespoons butter, divided
- 2 tablespoons brown sugar
- 1 large egg
- 1/2 teaspoon vanilla extract
- 1/2 teaspoon ground cinnamon
- 1/2 cup chopped pecans
- 1/4 cup all-purpose flour
- 3 tablespoons brown sugar
- 3 tablespoons butter, softened
Instructions
- Place the sweet potatoes in a large pot and cover with water. Bring to a boil and cook until tender, about 15 minutes. Drain well.
- Return the potatoes to the pot. Add the milk, 2 tablespoons butter, 2 tablespoons brown sugar, egg, vanilla extract, and cinnamon. Mash until smooth.
- Transfer the mashed mixture to a greased baking dish and spread it evenly.
- In a small bowl, combine the pecans, flour, 3 tablespoons brown sugar, and 3 tablespoons softened butter. Mix with a fork until crumbly.
- Sprinkle the pecan mixture evenly over the sweet potato layer.
- Bake at 350°F for 25 minutes, or until the topping turns golden and the edges bubble slightly. Let it rest for 5 minutes before serving.
Notes
Cuisine: American
Equipment: Large pot, Baking dish, Mixing bowl, Potato masher
Green Bean Casserole with Crispy Onions
This green bean casserole delivers the creamy sauce and savory notes that fit right into a Thanksgiving spread. The crispy onions on top give a satisfying crunch that contrasts with the tender beans underneath.
It travels well for potlucks and holds up during a long meal with extended family. The simple flavors pair easily with roasted turkey and other classic sides without overpowering them.


Equipment
- Large Pot
- Mixing Bowl
- Baking Dish
Ingredients
- 1 pound fresh green beans, trimmed and cut into 2-inch pieces
- 1 (10.5-ounce) can cream of mushroom soup
- 1/2 cup milk
- 1 1/2 cups crispy fried onions, divided
- 1/4 teaspoon black pepper
Instructions
- Preheat the oven to 350°F. Bring a large pot of salted water to a boil. Add the green beans and cook for 5 minutes until they are tender yet still crisp. Drain them well and set aside.
- In a mixing bowl, combine the cream of mushroom soup, milk, and black pepper. Stir until smooth.
- Add the drained green beans and 1 cup of the crispy fried onions to the bowl. Mix gently until the beans are evenly coated.
- Spoon the mixture into a baking dish. Sprinkle the remaining 1/2 cup crispy fried onions evenly over the top.
- Bake for 25 minutes until the casserole is hot and bubbling around the edges and the onions have turned golden.
Notes
Cuisine: American
Equipment: Large Pot, Mixing Bowl, Baking Dish
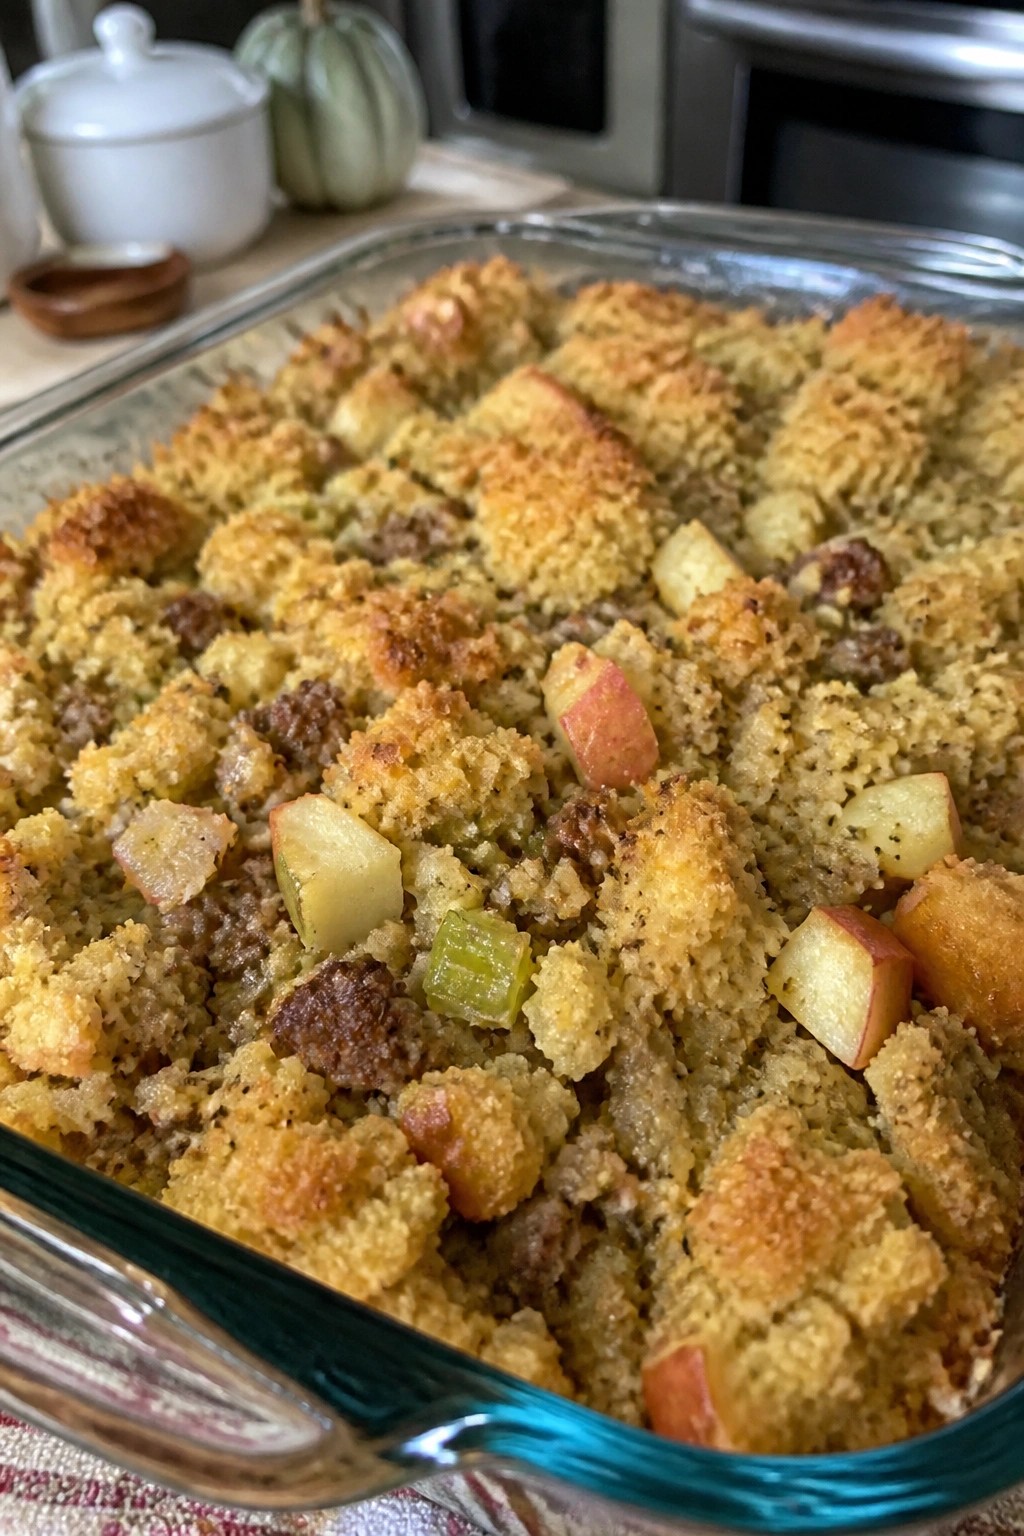
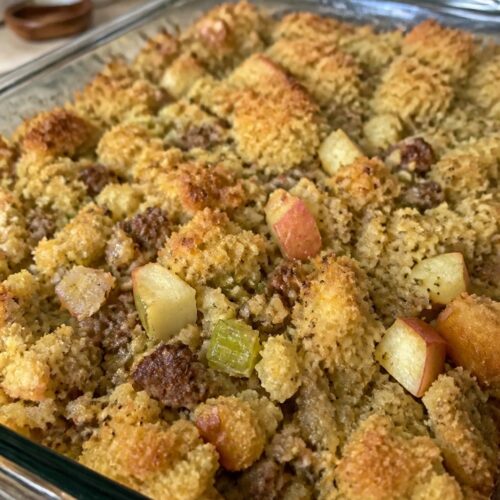
Sausage Apple Cornbread Stuffing Bake
This sausage apple cornbread stuffing bake brings together savory sausage, sweet apples, and crumbly cornbread in one dish that travels well to a potluck. It works especially well for large family gatherings because it holds its texture after reheating and pairs easily with turkey or ham. The finished bake has a crisp top layer over a moist, well-seasoned center with balanced sweet and savory notes.
Equipment
- Large skillet
- Mixing bowl
- 8×8 inch baking dish
Ingredients
- 12 oz ground pork sausage
- 2 medium apples, peeled and diced
- 4 cups crumbled cornbread
- 1 small onion, diced
- 2 celery ribs, diced
- 1/2 cup chicken broth
- 2 large eggs
- 1 tsp dried sage
- 1/2 tsp salt
- 1/4 tsp black pepper
- 2 tbsp butter, melted
Instructions
- Preheat the oven to 375°F and grease an 8×8 inch baking dish with a little of the melted butter.
- In a large skillet over medium heat, cook the sausage until browned and cooked through, breaking it into small pieces as it cooks. Remove the sausage to a large mixing bowl and leave the drippings in the skillet.
- Add the onion and celery to the skillet and cook for 4 minutes until softened. Add the diced apples and cook 2 minutes more until the apples begin to soften.
- Transfer the vegetable and apple mixture to the bowl with the sausage. Add the crumbled cornbread, sage, salt, and pepper.
- In a small bowl, whisk the eggs with the chicken broth. Pour this mixture over the cornbread blend and stir gently until everything is evenly moistened.
- Spread the mixture into the prepared baking dish and drizzle the remaining melted butter over the top.
- Bake for 30 minutes until the top is golden and the center is set. Let it rest 5 minutes before serving.
Notes
Cuisine: American
Equipment: Large skillet, Mixing bowl, 8×8 inch baking dish
Cheesy Scalloped Potatoes with Thyme
This cheesy scalloped potatoes dish brings comfort to any Thanksgiving table. Layers of tender potatoes sit in a creamy sauce with melted cheese and a touch of thyme for an earthy note. It travels well to potlucks and reheats nicely for large family meals.
The texture stays soft in the center with a lightly golden top. Thyme keeps the flavor balanced rather than heavy, so it pairs easily with roasted meats and other sides.


Equipment
- Baking dish
- Saucepan
- Mandoline slicer or sharp knife
Ingredients
- 4 large russet potatoes, thinly sliced
- 2 cups shredded cheddar cheese
- 2 tablespoons fresh thyme leaves
- 3 tablespoons butter
- 3 tablespoons all-purpose flour
- 2 cups milk
- 2 cloves garlic, minced
- 1 teaspoon salt
- 1/2 teaspoon black pepper
Instructions
- Preheat the oven to 375 degrees and lightly grease a baking dish.
- Melt the butter in a saucepan over medium heat. Add the garlic and cook for one minute until fragrant.
- Whisk in the flour and cook for two minutes to form a roux. Slowly pour in the milk while whisking to avoid lumps.
- Add the salt, black pepper, and one tablespoon of thyme leaves to the sauce. Stir and simmer until the sauce thickens slightly.
- Layer half the sliced potatoes in the baking dish. Sprinkle one cup of cheddar cheese over them and pour half the sauce on top.
- Repeat with the remaining potatoes, cheese, and sauce. Sprinkle the rest of the thyme leaves over the top layer.
- Cover with foil and bake for 45 minutes. Remove the foil and bake 15 more minutes until the top turns golden and the potatoes are tender.
Notes
Cuisine: American
Equipment: Baking dish, Saucepan, Mandoline slicer or sharp knife
Roasted Brussels Sprouts with Bacon and Maple
This side brings a good mix of sweet and savory flavors that pair well with other Thanksgiving dishes. The Brussels sprouts roast until the edges turn crisp, the bacon adds smoky bites, and the maple syrup provides a light glaze that ties everything together without overpowering the vegetables.
It travels well for potlucks and reheats without losing much texture, making it practical for large family gatherings where dishes need to hold up on a buffet table.


Equipment
- Baking Sheet
- Mixing Bowl
- Oven
Ingredients
- 1 pound Brussels sprouts, trimmed and halved
- 4 slices thick-cut bacon, chopped into 1-inch pieces
- 2 tablespoons olive oil
- 3 tablespoons pure maple syrup
- 1/2 teaspoon kosher salt
- 1/4 teaspoon black pepper
Instructions
- Preheat the oven to 400°F and line a large baking sheet with parchment paper or foil for easy cleanup.
- Place the halved Brussels sprouts in a mixing bowl and toss them with the olive oil, kosher salt, and black pepper until evenly coated.
- Spread the sprouts in a single layer on the prepared baking sheet and scatter the chopped bacon pieces over the top.
- Roast for 20 to 25 minutes, stirring once halfway through, until the sprouts are tender and the edges are browned.
- Remove the baking sheet from the oven and drizzle the maple syrup over the hot sprouts and bacon. Toss gently on the sheet to coat everything evenly before serving.
Notes
Cuisine: American
Equipment: Baking Sheet, Mixing Bowl, Oven
Butternut Squash Gratin with Sage Breadcrumbs
This butternut squash gratin offers layers of tender squash in a light cream sauce, finished with a crisp breadcrumb topping. The sage adds an earthy note that complements other holiday dishes without overpowering them.
It travels well for potlucks and holds its texture after baking, making it practical for large family gatherings. You can assemble it early and bake it once you arrive.


Equipment
- Baking Dish
- Saucepan
- Mixing Bowl
Ingredients
- 1 medium butternut squash (about 2 pounds), peeled and sliced 1/4-inch thick
- 2 tablespoons butter
- 2 cloves garlic, minced
- 1 cup heavy cream
- 1 teaspoon salt
- 1/2 teaspoon black pepper
- 1 cup grated Gruyere cheese
- 1 cup plain breadcrumbs
- 2 tablespoons fresh sage, finely chopped
- 2 tablespoons olive oil
Instructions
- Preheat the oven to 375°F and lightly butter a medium baking dish.
- Melt the butter in a saucepan over medium heat. Add the minced garlic and cook for 1 minute until fragrant.
- Stir in the heavy cream, salt, and black pepper. Heat until the mixture just begins to simmer, then remove from the heat.
- Arrange half the squash slices in the baking dish. Pour half the cream mixture over the top and sprinkle with half the Gruyere cheese. Repeat with the remaining squash, cream mixture, and cheese.
- In a mixing bowl, combine the breadcrumbs, chopped sage, and olive oil. Toss until the crumbs are evenly coated.
- Sprinkle the breadcrumb mixture evenly over the top of the gratin.
- Bake for 40 to 45 minutes until the squash is tender and the topping is golden brown.
Notes
Cuisine: American
Equipment: Baking Dish, Saucepan, Mixing Bowl
Creamy Corn Pudding Casserole
This creamy corn pudding casserole brings a sweet and savory side to any Thanksgiving potluck spread. It bakes into a soft, custardy texture that pairs well with roasted turkey and other holiday favorites. The dish travels easily and holds up well on a large family table.
It works best when made with pantry staples like canned corn, so you can pull it together without extra shopping. The flavor stays mild and comforting with a touch of sweetness from the sugar.


Equipment
- Mixing Bowl
- 8×8 Baking Dish
- Whisk
Ingredients
- 1 can (14.75 oz) cream-style corn
- 1 can (15.25 oz) whole kernel corn, drained
- 1 cup heavy cream
- 3 large eggs
- 1/4 cup granulated sugar
- 2 tablespoons all-purpose flour
- 1 teaspoon salt
- 1/4 teaspoon black pepper
- 4 tablespoons unsalted butter, melted
Instructions
- Preheat the oven to 350 degrees and grease an 8×8 baking dish.
- In a large mixing bowl, stir together the cream-style corn, drained whole kernel corn, heavy cream, eggs, sugar, flour, salt, and black pepper until smooth.
- Pour in the melted butter and mix until fully combined.
- Transfer the mixture to the prepared baking dish and spread it evenly.
- Bake for 45 to 50 minutes until the center sets and the top turns lightly golden.
- Remove from the oven and let it rest for 5 minutes before serving.
Notes
Cuisine: American
Equipment: Mixing Bowl, 8×8 Baking Dish, Whisk
Cranberry Apple Waldorf Salad
This salad adds a fresh, crunchy element to a Thanksgiving spread filled with heavier dishes. The mix of sweet apples and tart cranberries with crisp celery and nuts gives it a bright flavor that stands out on a potluck table. It travels well and holds up during a long meal.
The texture stays light with juicy fruit pieces and a bit of crunch from the walnuts. A simple creamy dressing ties it together without overpowering the produce.


Equipment
- Mixing Bowl
- Knife
Ingredients
- 2 medium apples, cored and diced
- 1/2 cup dried cranberries
- 2 celery stalks, thinly sliced
- 1/2 cup chopped walnuts
- 1/4 cup mayonnaise
- 1 tablespoon lemon juice
- 1/4 teaspoon salt
Instructions
- Place the diced apples, dried cranberries, sliced celery, and chopped walnuts in a large mixing bowl.
- Stir the mayonnaise, lemon juice, and salt together in a small bowl until the mixture is smooth.
- Pour the dressing over the ingredients in the large bowl.
- Toss everything gently until the fruit, celery, and nuts are evenly coated.
Notes
Cuisine: American
Equipment: Mixing Bowl, Knife
Pumpkin Cheesecake Bars with Gingersnap Crust
These bars combine the familiar flavors of pumpkin pie with a creamy cheesecake layer and a crisp spiced crust. They travel well to potlucks and hold up nicely on a crowded Thanksgiving table where guests serve themselves.
The texture starts with a crunchy gingersnap base that gives way to a smooth, lightly spiced pumpkin filling. The result feels festive without needing extra decoration or last-minute assembly.


Equipment
- Mixing Bowl
- 8×8 Baking Pan
- Oven
Ingredients
- 1 cup gingersnap cookie crumbs
- 3 tablespoons unsalted butter, melted
- 8 ounces cream cheese, softened
- 1/2 cup pumpkin puree
- 1/4 cup granulated sugar
- 1 large egg
- 1 teaspoon vanilla extract
- 1/2 teaspoon ground cinnamon
- 1/4 teaspoon ground nutmeg
Instructions
- Preheat the oven to 350 degrees and line an 8×8 baking pan with parchment paper.
- Stir the gingersnap crumbs with the melted butter until the mixture resembles wet sand. Press it firmly into the bottom of the prepared pan.
- In a mixing bowl, beat the cream cheese until smooth. Add the pumpkin puree, sugar, egg, vanilla, cinnamon, and nutmeg. Mix until fully combined and no streaks remain.
- Pour the filling over the crust and spread it evenly.
- Bake for 25 to 28 minutes, until the center looks set but still has a slight jiggle.
- Cool the pan at room temperature for 30 minutes, then refrigerate until the bars are fully chilled before slicing into four portions.
Notes
Cuisine: American
Equipment: Mixing Bowl, 8×8 Baking Pan, Oven
Classic Apple Crisp with Oat Topping
This apple crisp fits right into a Thanksgiving potluck because it travels easily and feeds a small group without much fuss. The warm spiced apples pair with a buttery oat topping that stays crisp after baking.
It works well as a make-ahead dessert that still tastes fresh when served later in the day. Expect soft fruit with a lightly sweet, crunchy oat layer that feels comforting on a holiday table.


Equipment
- Mixing Bowls
- Baking Dish
Ingredients
- 4 medium apples, peeled, cored, and sliced
- 2 tablespoons granulated sugar
- 1 teaspoon ground cinnamon
- 1 tablespoon lemon juice
- 1/2 cup rolled oats
- 1/2 cup all-purpose flour
- 1/3 cup brown sugar
- 1/4 cup unsalted butter, melted
- 1/4 teaspoon salt
Instructions
- Preheat the oven to 350 degrees F and lightly grease an 8-inch square baking dish.
- In a large bowl, toss the apple slices with granulated sugar, cinnamon, and lemon juice until evenly coated.
- Spread the apple mixture into the prepared baking dish in an even layer.
- In a medium bowl, stir together the rolled oats, flour, brown sugar, and salt.
- Pour the melted butter over the oat mixture and stir until the topping forms small clumps.
- Sprinkle the oat topping evenly over the apples.
- Bake for 35 to 40 minutes until the topping turns golden and the apples bubble around the edges.
- Remove from the oven and let it rest for 10 minutes before serving.
Notes
Cuisine: American
Equipment: Mixing Bowls, Baking Dish
Pecan Pie Squares with Bourbon Glaze
These pecan pie squares pack the familiar holiday flavors into easy-to-share bars that travel well to family gatherings. They fit right into a potluck spread because they stay firm at room temperature and do not require last-minute assembly. The buttery crust supports a rich pecan filling while the bourbon glaze adds a gentle warmth without overpowering the nuts.
The finished squares offer a crisp base, a chewy center, and a light sheen from the glaze that sets as they cool.


Equipment
- Baking Dish
- Mixing Bowls
- Wire Rack
Ingredients
- 1 cup all-purpose flour
- 1/4 cup granulated sugar
- 1/2 cup unsalted butter, cold and cubed
- 1/4 teaspoon salt
- 1 cup chopped pecans
- 1/2 cup light corn syrup
- 1/4 cup packed brown sugar
- 2 large eggs
- 1 teaspoon vanilla extract
- 1/2 cup powdered sugar
- 2 tablespoons bourbon
- 1 tablespoon heavy cream
Instructions
- Heat the oven to 350 degrees and line an 8-inch square baking dish with parchment paper.
- In a mixing bowl, stir together the flour, granulated sugar, and salt. Add the cold butter cubes and work them in with your fingers until the mixture forms coarse crumbs.
- Press the crumb mixture evenly into the bottom of the prepared dish. Bake for 15 minutes until the edges look lightly golden.
- While the crust bakes, whisk the eggs, corn syrup, brown sugar, and vanilla in a separate bowl until smooth. Stir in the chopped pecans.
- Pour the pecan mixture over the hot crust and return the dish to the oven. Bake for 20 minutes until the filling is set and no longer jiggles in the center.
- Remove the pan from the oven and let it cool completely on a wire rack.
- In a small bowl, whisk the powdered sugar, bourbon, and heavy cream until the glaze is smooth and pourable. Drizzle it over the cooled squares and let it set for 10 minutes before cutting.
Notes
Cuisine: American
Equipment: Baking Dish, Mixing Bowls, Wire Rack
