


Halloween parties are easier to plan when you have some reliable food ideas ready. I collected these recipes because they look nice without needing fancy skills or hours in the kitchen. You will find options that work for different group sizes and tastes. Each one uses common ingredients and clear steps so you can make them ahead if needed. They should give you practical choices to serve at your next get together.
Helpful Tips Before You Start
A little planning keeps your Halloween party food looking polished and keeps the kitchen stress low.
Choose Recipes You Can Make Ahead
Pick at least half the items that hold well in the fridge or freezer. This leaves time for final touches right before guests arrive.
Keep Decorations Simple but Themed
Use black plates, orange napkins, or quick additions like candy eyeballs and edible dust. These small details make ordinary snacks feel festive without extra work.
Test One New Idea First
Try any unfamiliar recipe on a smaller scale a few days early. You will know the timing and any adjustments before the full party batch.
Label Items with Dietary Notes
Set out small cards for nut free, vegetarian, or gluten free options. Guests can serve themselves quickly and safely.
Portion Food into Small Batches
Set out half the food at a time and refill from the kitchen. This keeps everything looking fresh throughout the evening.
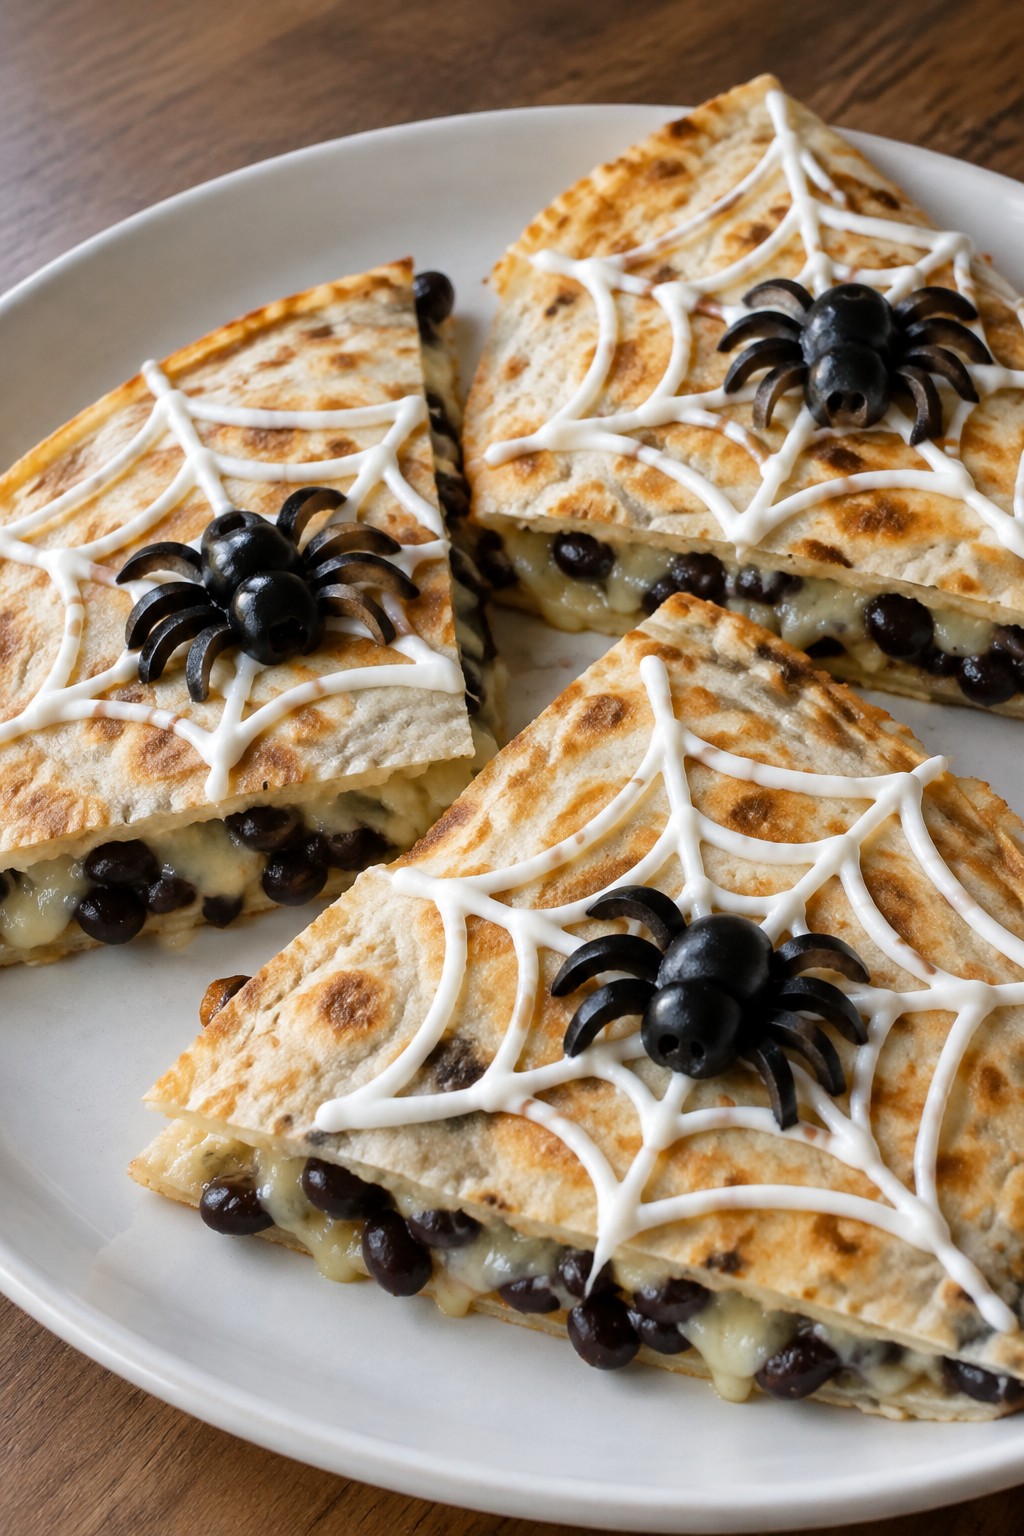
Spooky Spiderweb Black Bean Quesadillas
These quesadillas turn a simple black bean filling into a party-ready dish with a sour cream spiderweb on top. They work well for Halloween gatherings because they come together quickly and look striking on a platter without extra fuss. The result is crispy tortillas with a savory, lightly spiced bean layer and creamy topping.
This recipe serves 4 people. – 8 large flour tortillas – 1 can (15 oz) black beans, rinsed and drained – 1 1/2 cups shredded Monterey Jack cheese – 1 teaspoon ground cumin – 1/2 teaspoon chili powder – 1/4 teaspoon salt – 2 tablespoons olive oil – 1/2 cup sour cream – 4 black olives
### Instructions 1. Place the black beans in a bowl and mash them with a fork until mostly smooth. Stir in the cumin, chili powder, and salt. 2. Lay four tortillas on a work surface. Spread the bean mixture evenly over each one, then sprinkle the cheese on top. Cover with the remaining four tortillas. 3. Heat 1 tablespoon of olive oil in a large skillet over medium heat. Cook one quesadilla at a time for 2 to 3 minutes per side until the tortillas are golden and the cheese has melted. Add the remaining oil as needed for the rest. 4. Transfer the cooked quesadillas to a cutting board. Spoon the sour cream into a zip-top bag, snip off one corner, and pipe concentric circles on each quesadilla. Drag a toothpick from the center outward to form a web pattern. 5. Slice each olive into thin rings and place one or two on each quesadilla to form spider shapes. Cut the quesadillas into wedges and serve.
### Extra Tips Pipe the sour cream right before serving so the web stays sharp against the warm surface. If you make the quesadillas ahead, keep them warm in a low oven and add the sour cream design at the last minute. A light sprinkle of extra salt on the beans before assembly brings out the cumin without overpowering the cheese.
Course: Appetizer Cuisine: Mexican Equipment: Large skillet, Mixing bowl, Zip-top bag
Serves 4 people.
Instructions
- Place the black beans in a bowl and mash them with a fork until mostly smooth. Stir in the cumin, chili powder, and salt.
- Lay four tortillas on a work surface. Spread the bean mixture evenly over each one, then sprinkle the cheese on top. Cover with the remaining four tortillas.
- Heat 1 tablespoon of olive oil in a large skillet over medium heat. Cook one quesadilla at a time for 2 to 3 minutes per side until the tortillas are golden and the cheese has melted. Add the remaining oil as needed for the rest.
- Transfer the cooked quesadillas to a cutting board. Spoon the sour cream into a zip-top bag, snip off one corner, and pipe concentric circles on each quesadilla. Drag a toothpick from the center outward to form a web pattern.
- Slice each olive into thin rings and place one or two on each quesadilla to form spider shapes. Cut the quesadillas into wedges and serve.
Extra Tips
Pipe the sour cream right before serving so the web stays sharp against the warm surface. If you make the quesadillas ahead, keep them warm in a low oven and add the sour cream design at the last minute. A light sprinkle of extra salt on the beans before assembly brings out the cumin without overpowering the cheese.Course: Appetizer Cuisine: Mexican Equipment: Large skillet, Mixing bowl, Zip-top bag
Mummy-Wrapped Italian Sausage Rolls with Marinara
These sausage rolls give a simple Halloween twist to a classic Italian combination. They work well at parties as a handheld item that guests can grab without plates or utensils. The finished rolls have a flaky outside and savory filling that holds up during a long event.
The dough strips create a wrapped look while the sausage stays juicy inside. Warm marinara on the side adds a bright, tangy note that balances the richness of the meat and pastry.


Equipment
- Baking sheet
- Oven
- Pastry brush
- Small knife
Ingredients
- 4 Italian sausages
- 1 package crescent roll dough
- 1 cup marinara sauce
- 1 egg, beaten
- 8 black olive slices
Instructions
- Preheat the oven to 375°F and line a baking sheet with parchment paper.
- Unroll the crescent dough and cut it into thin strips.
- Wrap the strips around each Italian sausage, leaving small gaps to create a mummy effect.
- Place the wrapped sausages on the baking sheet and brush them lightly with the beaten egg.
- Press two black olive slices onto each sausage to form eyes.
- Bake for 20 to 25 minutes until the dough is golden and the sausages are cooked through.
- Warm the marinara sauce in a small pan or microwave and serve it alongside the rolls for dipping.
Notes
Cuisine: Italian
Equipment: Baking sheet, Oven, Pastry brush, Small knife
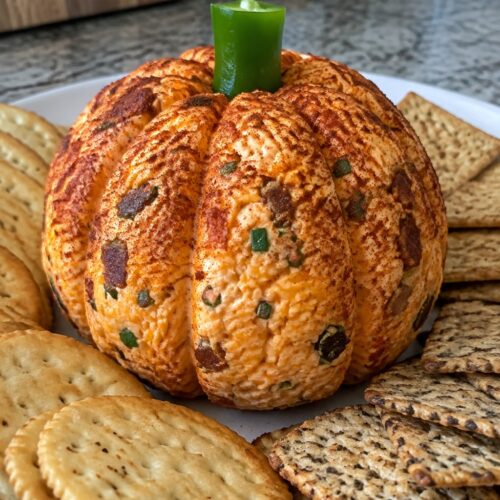
Pumpkin-Shaped Bacon Cheddar Cheese Ball with Crackers
This cheese ball turns a classic party appetizer into something festive for Halloween. The bacon and sharp cheddar create a smoky, savory bite that stands out on a snack table. It pairs naturally with crisp crackers and holds its shape well once chilled.
It works especially well for small gatherings where you want one dish that feels themed without extra fuss. The creamy inside stays soft while the outer layer picks up a light coating of paprika for color and subtle warmth.

Equipment
- Mixing Bowl
- Plastic Wrap
- Serving Plate
Ingredients
- 8 ounces cream cheese, softened
- 1 1/2 cups shredded cheddar cheese
- 1/2 cup cooked bacon bits
- 2 tablespoons chopped chives
- 1/2 teaspoon garlic powder
- 1/4 teaspoon paprika
- 1 small piece green bell pepper (for the stem)
- Assorted crackers, for serving
Instructions
- Place the softened cream cheese in a mixing bowl and mash it until smooth.
- Add the shredded cheddar cheese, bacon bits, chopped chives, and garlic powder. Stir until everything is evenly combined.
- Sprinkle in the paprika and mix again to distribute the color and flavor.
- Turn the mixture out onto a sheet of plastic wrap. Shape it into a round ball, then use your fingers or the edge of a spatula to press light vertical ridges around the sides so it resembles a pumpkin.
- Cut a small stem from the green bell pepper and press it gently into the top center of the cheese ball.
- Wrap the cheese ball in plastic wrap and chill for at least one hour to firm up.
- Unwrap and place on a serving plate with the crackers arranged around it.
Notes
Cuisine: American
Equipment: Mixing Bowl, Plastic Wrap, Serving Plate
Vampire Bite Mini Meatball Sliders on Brioche
These mini sliders bring a fun Halloween touch to any party spread. The name comes from the red marinara that seeps from the meatballs, giving the look of a bite mark on the soft brioche. They work well as a handheld main bite at a casual gathering and balance savory meat with a touch of sweetness from the buns.
The meatballs stay juicy inside a simple tomato sauce, while the toasted brioche adds a light crunch. Guests can grab one or two without needing plates or utensils.


Equipment
- Mixing bowl
- Skillet
- Baking sheet
Ingredients
- 1 pound ground beef
- 1/2 cup breadcrumbs
- 1 large egg
- 2 cloves garlic, minced
- 1 teaspoon Italian seasoning
- 1/2 teaspoon salt
- 1/4 teaspoon black pepper
- 1 tablespoon olive oil
- 1 cup marinara sauce
- 8 mini brioche buns
- 4 slices mozzarella cheese, cut in half
- 2 tablespoons chopped fresh parsley
Instructions
- Mix the ground beef, breadcrumbs, egg, minced garlic, Italian seasoning, salt, and black pepper in a bowl until just combined. Form the mixture into 8 small meatballs, each about 1.5 inches wide.
- Heat the olive oil in a skillet over medium heat. Add the meatballs and cook for 8 to 10 minutes, turning them every couple of minutes until browned on all sides and cooked through.
- Pour the marinara sauce into the skillet with the meatballs. Lower the heat and let everything simmer together for 5 minutes so the sauce coats the meatballs.
- Split the mini brioche buns and place them cut side up on a baking sheet. Toast them under the broiler for 1 to 2 minutes until the edges turn golden.
- Place one meatball on each bottom bun half. Add a half slice of mozzarella on top of each meatball so it begins to melt from the heat. Spoon a little extra sauce over the cheese, then sprinkle with chopped parsley. Add the top bun halves and serve right away.
Notes
Cuisine: American
Equipment: Mixing bowl, Skillet, Baking sheet
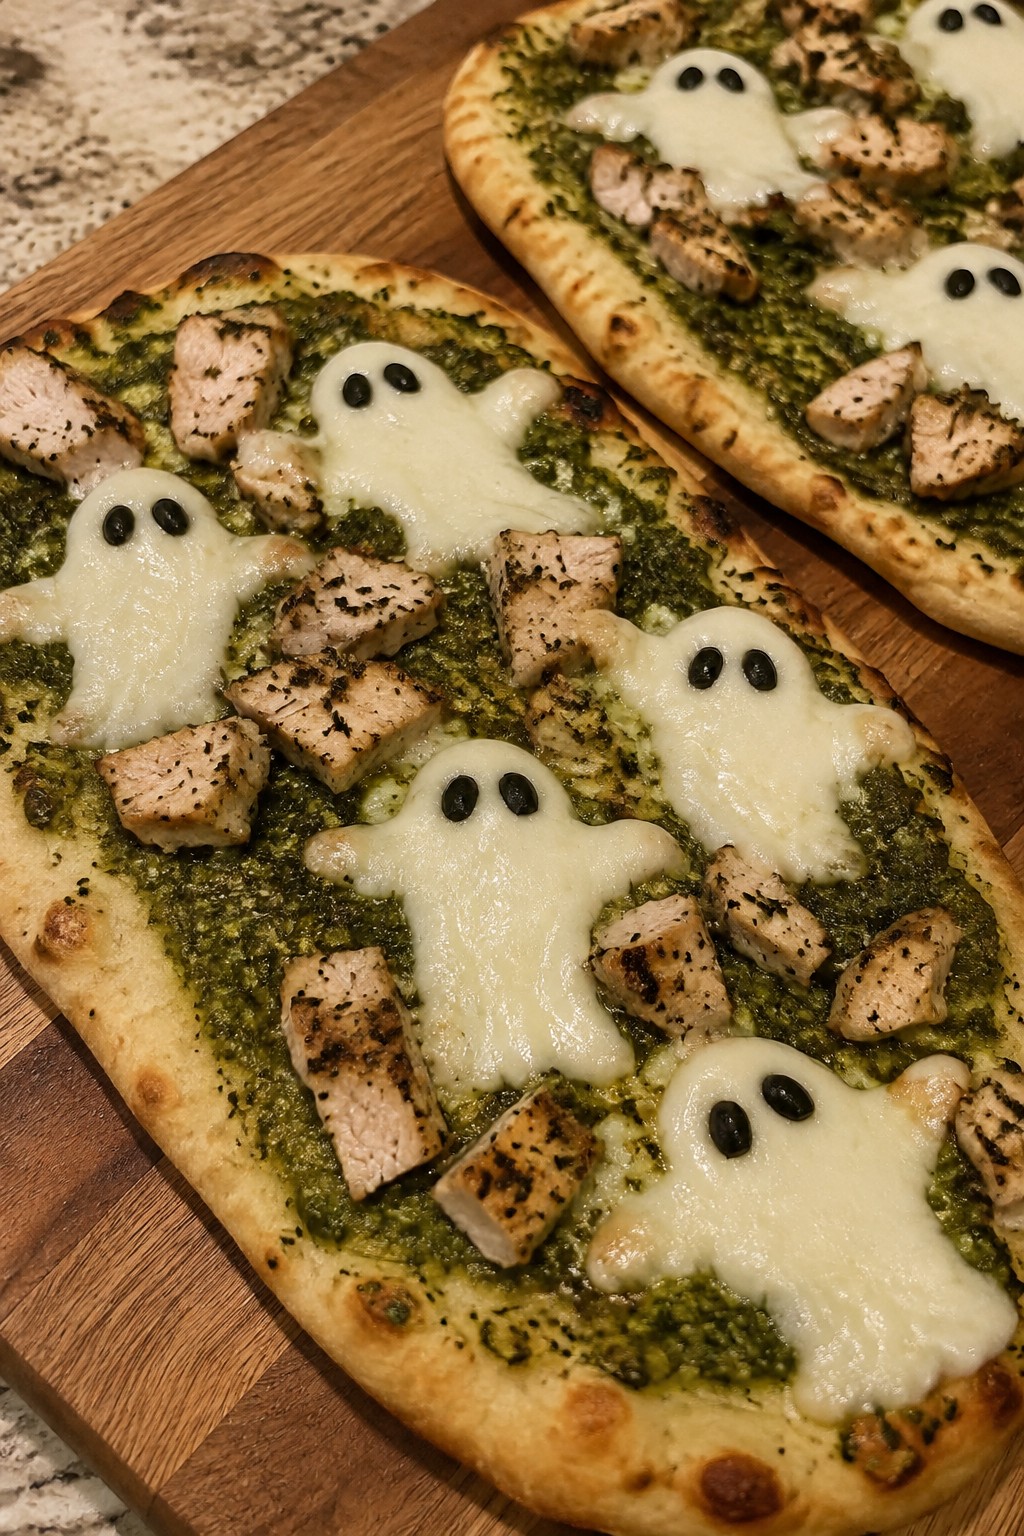
Ghostly Pesto Chicken Flatbreads
These flatbreads bring a simple Halloween touch to any party spread. The green pesto base contrasts with pale cheese ghosts, making them easy to spot on a table while still tasting like a solid meal. They work well for both kids and adults because the flavors stay familiar.
The chicken adds protein and substance, while the flatbread keeps everything quick to assemble. Each bite gives you herby pesto, tender meat, and soft melted cheese without much fuss.

Equipment
- Baking sheet
- Skillet
- Knife
Ingredients
- 4 flatbreads
- 1/2 cup basil pesto
- 1 lb boneless skinless chicken breasts
- 2 tablespoons olive oil
- 1/2 teaspoon salt
- 1/4 teaspoon black pepper
- 8 ounces fresh mozzarella
- 4 black olives
Instructions
- Preheat the oven to 400 degrees F. Line a baking sheet with parchment paper.
- Season the chicken breasts with salt and pepper. Heat the olive oil in a skillet over medium heat and cook the chicken for 6 to 7 minutes per side until fully cooked. Let it rest for 5 minutes, then slice it into thin strips.
- Place the flatbreads on the baking sheet. Spread 2 tablespoons of pesto evenly over each flatbread.
- Divide the sliced chicken among the flatbreads and arrange it in an even layer.
- Slice the mozzarella into four ghost shapes using a small knife or ghost cookie cutter. Place one ghost on each flatbread.
- Bake for 8 to 10 minutes until the cheese softens and the edges of the flatbreads turn golden.
- Slice each olive into small rounds and press two pieces onto each mozzarella ghost to form eyes. Serve warm.
Notes
Cuisine: Italian
Equipment: Baking sheet, Skillet, Knife
Caramel Apple Nachos with Toasted Pecans
This recipe turns fresh apple slices into a fun, shareable treat that feels festive without much effort. It works well at Halloween parties because guests can grab a few slices while mingling, and the mix of crisp fruit, warm caramel, and crunchy nuts keeps things light yet satisfying. The flavor leans sweet and nutty with a bright tart edge from the apples.


Equipment
- Skillet
- Serving platter
- Knife
Ingredients
- 4 medium apples, cored and thinly sliced
- 1/2 cup caramel sauce
- 1/2 cup pecans
- 1/4 teaspoon sea salt
Instructions
- Place the pecans in a dry skillet over medium heat. Stir them often for 3 to 4 minutes until they smell toasted and turn slightly darker. Remove them from the heat and let them cool.
- Arrange the apple slices in a single overlapping layer on a large serving platter.
- Warm the caramel sauce slightly if it is too thick, then drizzle it evenly over the apple slices.
- Sprinkle the toasted pecans across the top.
- Finish with a light dusting of sea salt right before serving.
Notes
Cuisine: American
Equipment: Skillet, Serving platter, Knife
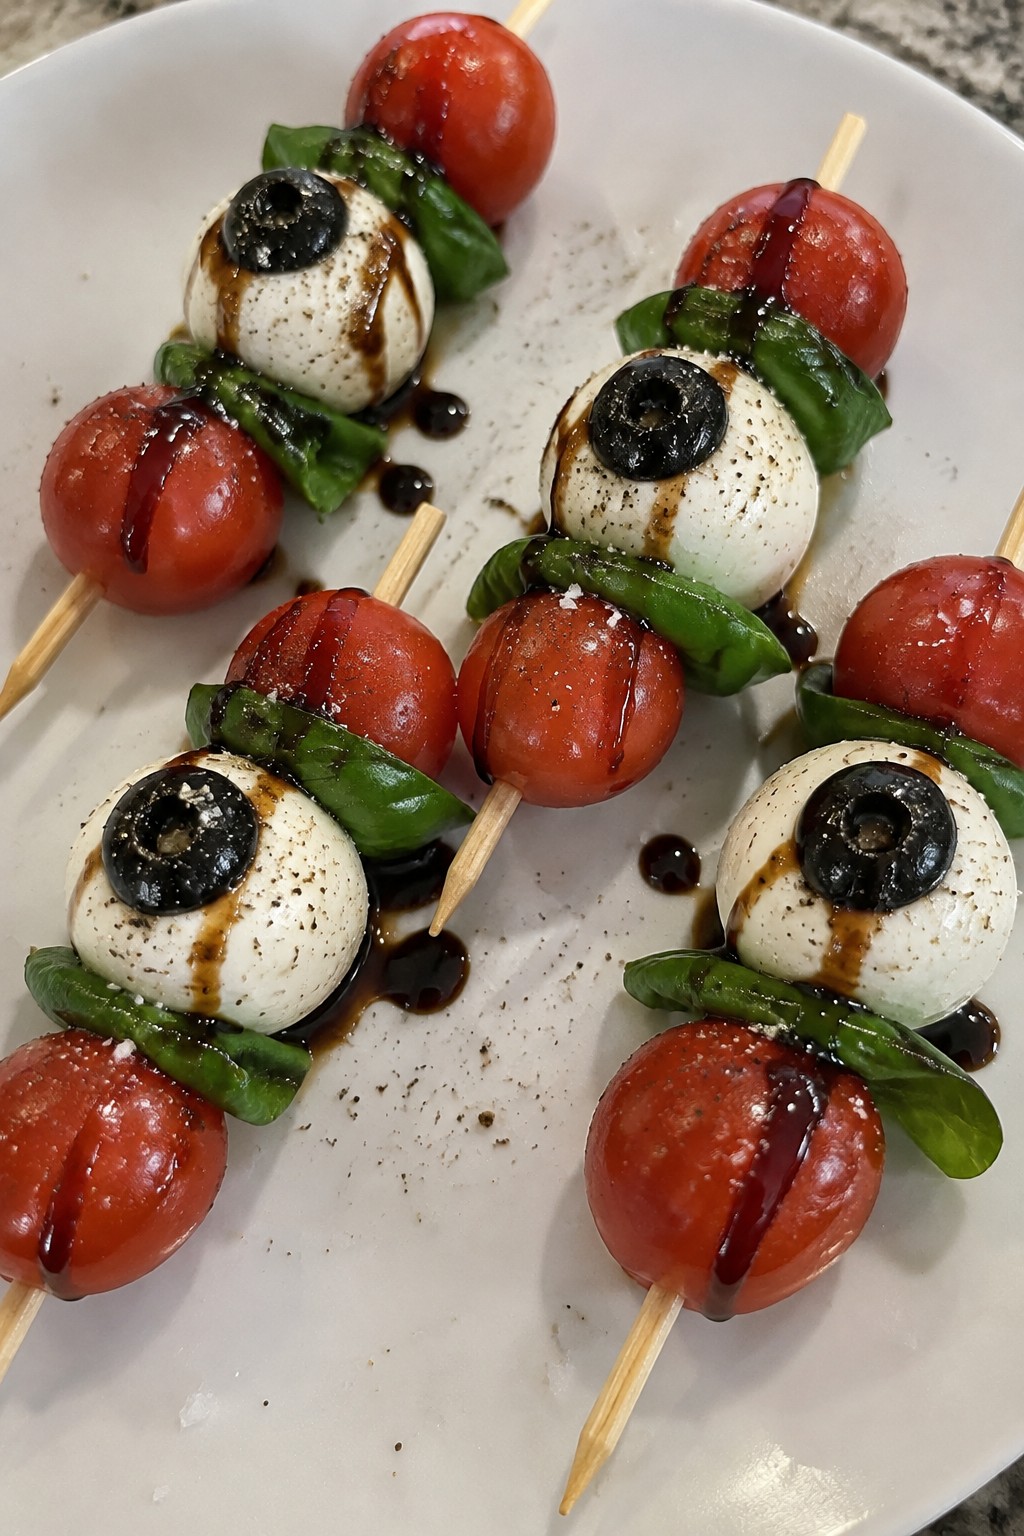
Monster Eyeball Caprese Skewers with Balsamic Glaze
These Monster Eyeball Caprese Skewers with Balsamic Glaze turn a classic Italian appetizer into a fun Halloween party bite. The skewers look spooky on the table but still deliver fresh, creamy, and tangy flavors that guests enjoy. They work well for casual gatherings or more dressed-up spreads since they come together quickly and need no cooking.
They offer a nice mix of soft mozzarella, juicy tomato, and fragrant basil, finished with a sweet-tart balsamic drizzle that ties everything together.

Equipment
- Wooden skewers
- Serving platter
Ingredients
- 12 bocconcini mozzarella balls
- 12 cherry tomatoes
- 12 fresh basil leaves
- 12 pitted black olives, halved
- 1/4 cup balsamic glaze
- 12 wooden skewers
- Salt and black pepper
Instructions
- Thread one bocconcini mozzarella ball onto each wooden skewer.
- Add one fresh basil leaf and one cherry tomato to each skewer, placing them right after the mozzarella.
- Press one halved black olive, cut side down, onto the front of each mozzarella ball to create the eyeball effect.
- Arrange the finished skewers on a serving platter.
- Drizzle the balsamic glaze evenly over the skewers.
- Sprinkle lightly with salt and black pepper before serving.
Notes
Cuisine: Italian
Equipment: Wooden skewers, Serving platter
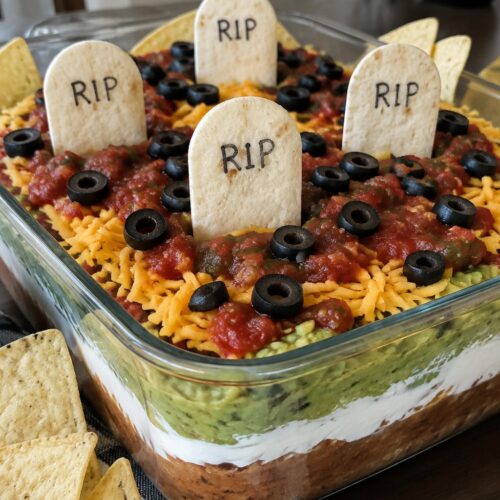
Graveyard Layered Taco Dip with Tortilla Chips
This layered taco dip turns a classic party appetizer into a Halloween graveyard scene. Creamy refried beans, cool sour cream, and fresh guacamole stack up in a dish while tortilla pieces stand upright like tombstones. The result is a shareable snack with bold taco flavors and plenty of crunch from the chips on the side.
It works well for casual gatherings where guests can scoop straight from the dish. The mix of smooth layers and crisp tortilla elements keeps every bite interesting without extra fuss.

Equipment
- Mixing bowl
- Shallow serving dish
- Knife
Ingredients
- 1 can (16 oz) refried beans
- 2 tablespoons taco seasoning
- 1 cup sour cream
- 1 cup guacamole
- 1 cup shredded cheddar cheese
- 1/2 cup salsa
- 1/4 cup sliced black olives
- 6 small flour tortillas
- Tortilla chips for serving
Instructions
- Stir the refried beans and taco seasoning together in a bowl until evenly mixed. Spread this mixture across the bottom of a shallow serving dish to form the first layer.
- Spread the sour cream evenly over the bean layer. Follow with the guacamole spread in an even layer on top of the sour cream.
- Sprinkle the shredded cheddar cheese over the guacamole. Spoon the salsa across the cheese layer and scatter the sliced black olives on top.
- Cut each flour tortilla into three or four rectangles roughly the size of small tombstones. Press the rectangles upright into the top of the dip so they stand like grave markers.
- Arrange tortilla chips around the edge of the dish or in a separate bowl for scooping.
Notes
Cuisine: Mexican
Equipment: Mixing bowl, Shallow serving dish, Knife
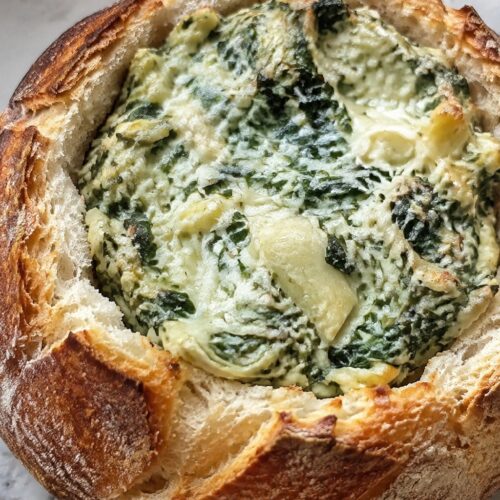
Witch’s Cauldron Spinach Artichoke Dip Bread Bowl
This bread bowl turns a classic creamy dip into a simple party centerpiece. The spinach and artichoke filling stays thick enough to scoop, while the hollowed loaf keeps its shape during baking. It suits Halloween gatherings where guests can pull pieces from the sides as they eat.

Equipment
- Baking sheet
- Mixing bowl
- Oven
Ingredients
- 1 large round sourdough bread loaf
- 10 oz frozen chopped spinach, thawed and squeezed dry
- 14 oz can artichoke hearts, drained and chopped
- 8 oz cream cheese, softened
- 1/2 cup sour cream
- 1/2 cup grated Parmesan cheese
- 1 cup shredded mozzarella cheese
- 2 garlic cloves, minced
- 1/2 teaspoon salt
- 1/4 teaspoon black pepper
Instructions
- Preheat the oven to 375 degrees. Cut a circle around the top of the sourdough loaf and remove the inner bread to create a bowl shape. Set the removed bread pieces aside for dipping.
- In a mixing bowl, combine the cream cheese, sour cream, Parmesan, mozzarella, minced garlic, salt, and black pepper. Stir until smooth.
- Add the drained spinach and chopped artichoke hearts to the cheese mixture. Mix until evenly distributed.
- Spoon the dip into the hollowed bread bowl. Place the filled loaf on a baking sheet.
- Bake for 20 to 25 minutes until the top is lightly golden and the dip is hot throughout. Serve with the reserved bread pieces.
Notes
Cuisine: American
Equipment: Baking sheet, Mixing bowl, Oven
Bloody Red Velvet Brownie Bites
These brownie bites bring a rich chocolate base with a bright red hue that fits right into a Halloween spread. They work well for parties because they are easy to grab and serve without plates. The texture stays fudgy inside with a slight chew on the edges.
The flavor leans toward classic red velvet with cocoa notes and a touch of vanilla. A simple cream cheese topping and strawberry drizzle add a creamy contrast and a red finish that reads as bloody without extra work.


Equipment
- Mixing Bowl
- Baking Pan
- Whisk
Ingredients
- ½ cup all-purpose flour
- ¼ cup unsweetened cocoa powder
- ½ cup granulated sugar
- ¼ cup unsalted butter, melted
- 1 large egg
- 1 tablespoon red food coloring
- 1 teaspoon vanilla extract
- ¼ teaspoon baking powder
- ¼ teaspoon salt
- 2 tablespoons cream cheese, softened
- 2 tablespoons powdered sugar
- ¼ cup strawberry preserves
Instructions
- Preheat the oven to 350 degrees and line a small baking pan with parchment paper.
- In a mixing bowl, stir together the flour, cocoa powder, sugar, baking powder, and salt.
- Add the melted butter, egg, red food coloring, and vanilla extract to the dry mix. Stir until a thick batter forms and no dry streaks remain.
- Spread the batter evenly into the prepared pan and smooth the top.
- Bake for 18 to 20 minutes until the center is set. Let the brownies cool completely in the pan.
- Mix the cream cheese and powdered sugar in a small bowl until smooth.
- Cut the cooled brownies into bite-size squares. Spread a small amount of the cream cheese mixture on each bite.
- Warm the strawberry preserves slightly and drizzle over the top of each bite before serving.
Notes
Cuisine: American
Equipment: Mixing Bowl, Baking Pan, Whisk
Skeleton Bone Parmesan Breadsticks with Marinara
These breadsticks bring a fun Halloween touch to any party spread. Shaped like bones and topped with Parmesan, they offer a crispy outside and soft center that pairs well with warm marinara for dipping. They work especially well as a starter for casual gatherings or themed dinners.
The flavor stays savory with garlic and herbs, while the cheese adds a light crunch. Kids and adults both enjoy the playful shape without any extra fuss.


Equipment
- Baking Sheet
- Oven
- Mixing Bowl
- Pastry Brush
Ingredients
- 1 (16-ounce) package refrigerated pizza dough
- 2 tablespoons unsalted butter, melted
- 1/4 cup grated Parmesan cheese
- 1 teaspoon garlic powder
- 1/2 teaspoon dried oregano
- 1 cup marinara sauce
Instructions
- Preheat the oven to 400 degrees Fahrenheit and line a baking sheet with parchment paper.
- Unroll the pizza dough on a lightly floured surface and divide it into 8 equal pieces.
- Roll each piece into a rope about 8 inches long, then twist the ends slightly to form a bone shape.
- Place the shaped dough on the prepared baking sheet and brush each piece evenly with the melted butter.
- Sprinkle the garlic powder, oregano, and Parmesan cheese over the top of each breadstick.
- Bake for 12 to 15 minutes until the breadsticks turn golden brown.
- Warm the marinara sauce in a small saucepan over low heat while the breadsticks bake, then transfer it to a serving bowl.
Notes
Cuisine: Italian
Equipment: Baking Sheet, Oven, Mixing Bowl, Pastry Brush
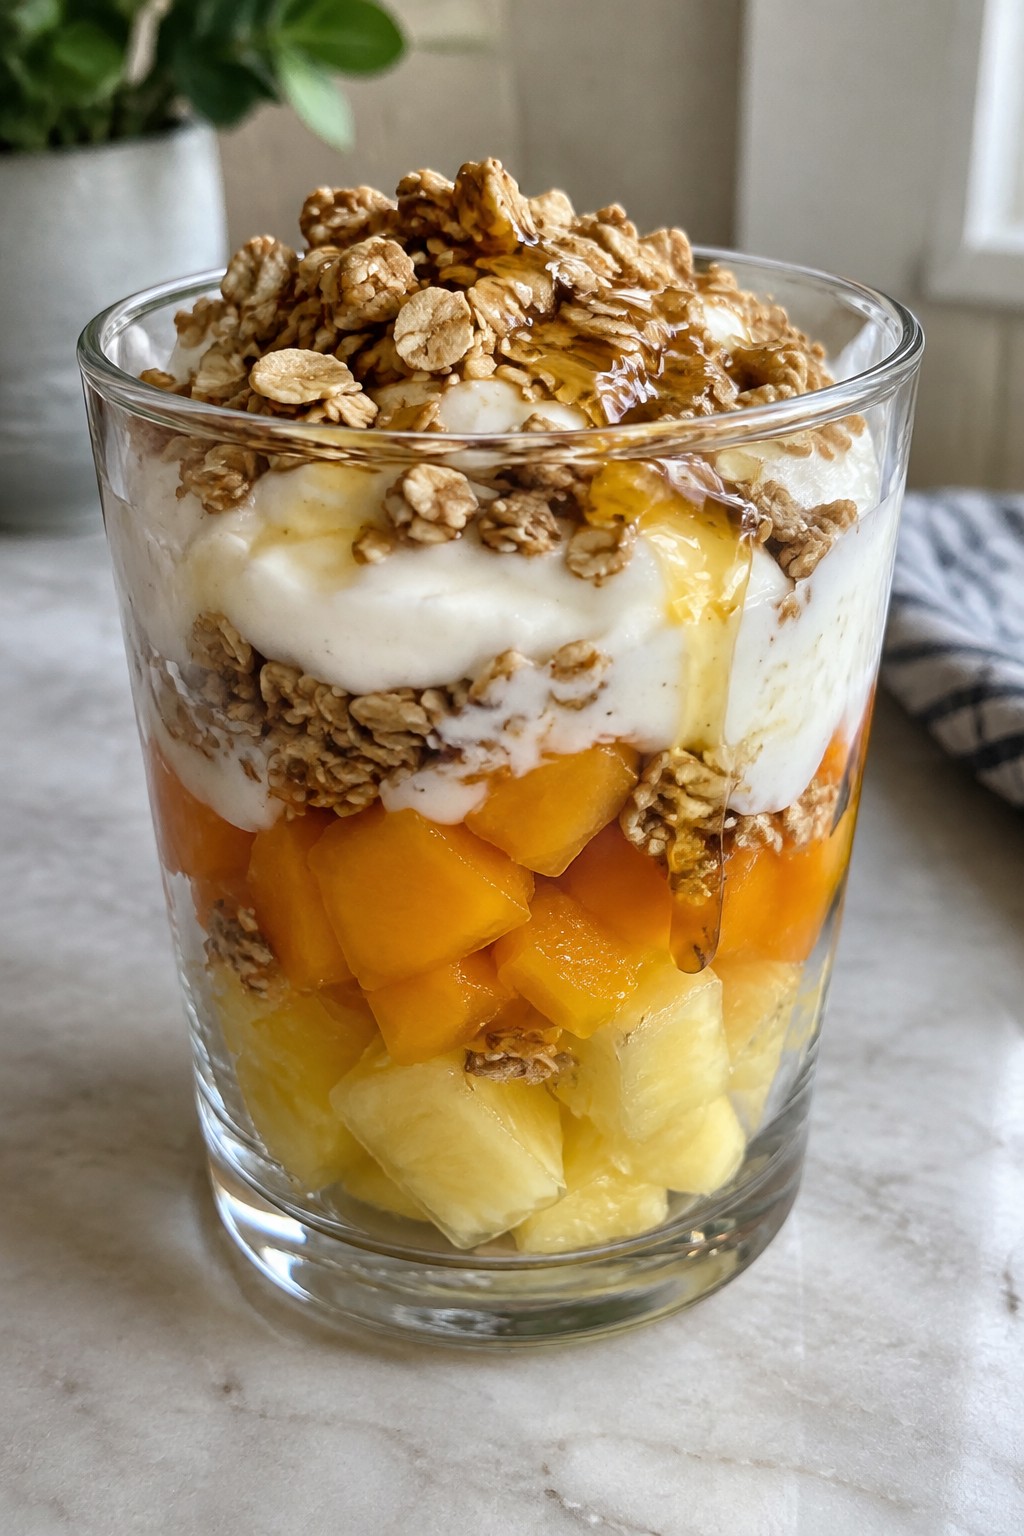
Candy Corn Yogurt Parfaits with Granola
These parfaits capture the classic candy corn look with simple fruit layers that create yellow and orange bands under a white yogurt top. The granola adds crunch that balances the creamy texture, making the dish feel like a lighter party option that still fits the Halloween theme.
They work well for gatherings because they can be put together in clear glasses ahead of time and served cold. The mix of tangy yogurt, sweet fruit, and toasted granola gives a pleasant contrast without being overly sweet.

Equipment
- Blender
- Mixing Bowl
- 4 Clear Glasses
Ingredients
- 2 cups vanilla Greek yogurt, divided
- 1 cup pineapple chunks
- 1 cup mango chunks
- 1 cup granola
- 2 tablespoons honey
Instructions
- Blend the pineapple chunks until smooth to create the yellow layer base. Stir 1/2 cup of the vanilla yogurt into the pineapple puree until evenly combined.
- Blend the mango chunks until smooth to create the orange layer base. Stir another 1/2 cup of the vanilla yogurt into the mango puree until evenly combined.
- Spoon the pineapple-yogurt mixture into the bottom of four clear glasses, dividing it evenly among them.
- Add the mango-yogurt mixture on top of the pineapple layer in each glass, again dividing evenly.
- Top each parfait with the remaining 1 cup of vanilla yogurt, spreading it gently to form the final white layer.
- Drizzle 1/2 tablespoon of honey over the yogurt in each glass, then sprinkle 1/4 cup of granola on top of each parfait before serving.
Notes
Cuisine: American
Equipment: Blender, Mixing Bowl, 4 Clear Glasses
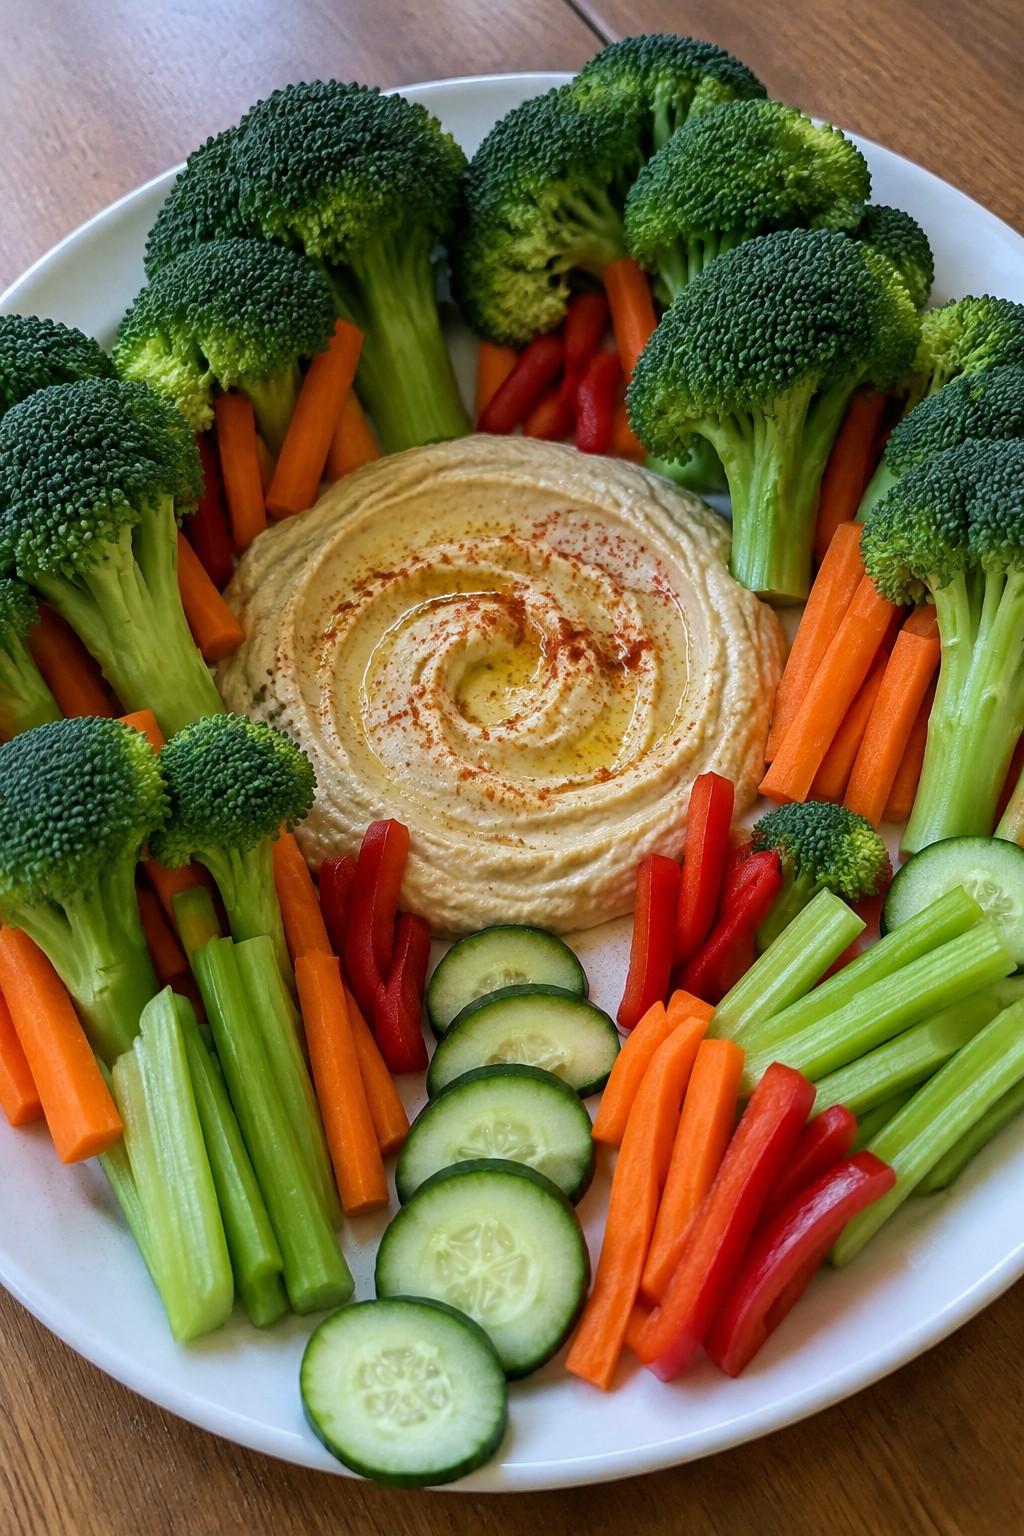
Haunted Forest Crudité Platter with Roasted Garlic Hummus
This platter turns simple vegetables into a forest scene that fits right into a Halloween party table. The roasted garlic hummus offers a creamy base with mellow savory notes that balance the fresh crunch of the vegetables around it.
It works well when you need an option that feels festive yet still appeals to guests looking for something lighter. The arrangement stays straightforward to put together and travels easily to a gathering.

Equipment
- Baking Sheet
- Food Processor
- Large Platter
Ingredients
- 1 can (15 oz) chickpeas, drained and rinsed
- 1 head garlic
- 1/4 cup tahini
- 2 tablespoons olive oil, plus more for drizzling
- Juice of 1 lemon
- 1/2 teaspoon salt
- 1/2 teaspoon cumin
- 2 cups broccoli florets
- 3 carrots, cut into sticks
- 2 celery stalks, cut into sticks
- 1 cucumber, sliced
- 1 red bell pepper, cut into strips
Instructions
- Preheat the oven to 400°F. Slice the top off the head of garlic, drizzle with a little olive oil, wrap in foil, and roast for 30 minutes until soft.
- Squeeze the roasted garlic cloves into a food processor. Add the chickpeas, tahini, 2 tablespoons olive oil, lemon juice, salt, and cumin. Blend until smooth, adding a splash of water if needed to reach a creamy consistency.
- Cut the broccoli, carrots, celery, cucumber, and red bell pepper as listed.
- Spread the hummus in the center of a large platter. Arrange the broccoli florets upright around the hummus to form tree shapes, then place the carrot sticks, celery sticks, cucumber slices, and red bell pepper strips in clusters to complete the forest layout. Drizzle extra olive oil over the hummus before serving.
Notes
Cuisine: Mediterranean
Equipment: Baking Sheet, Food Processor, Large Platter
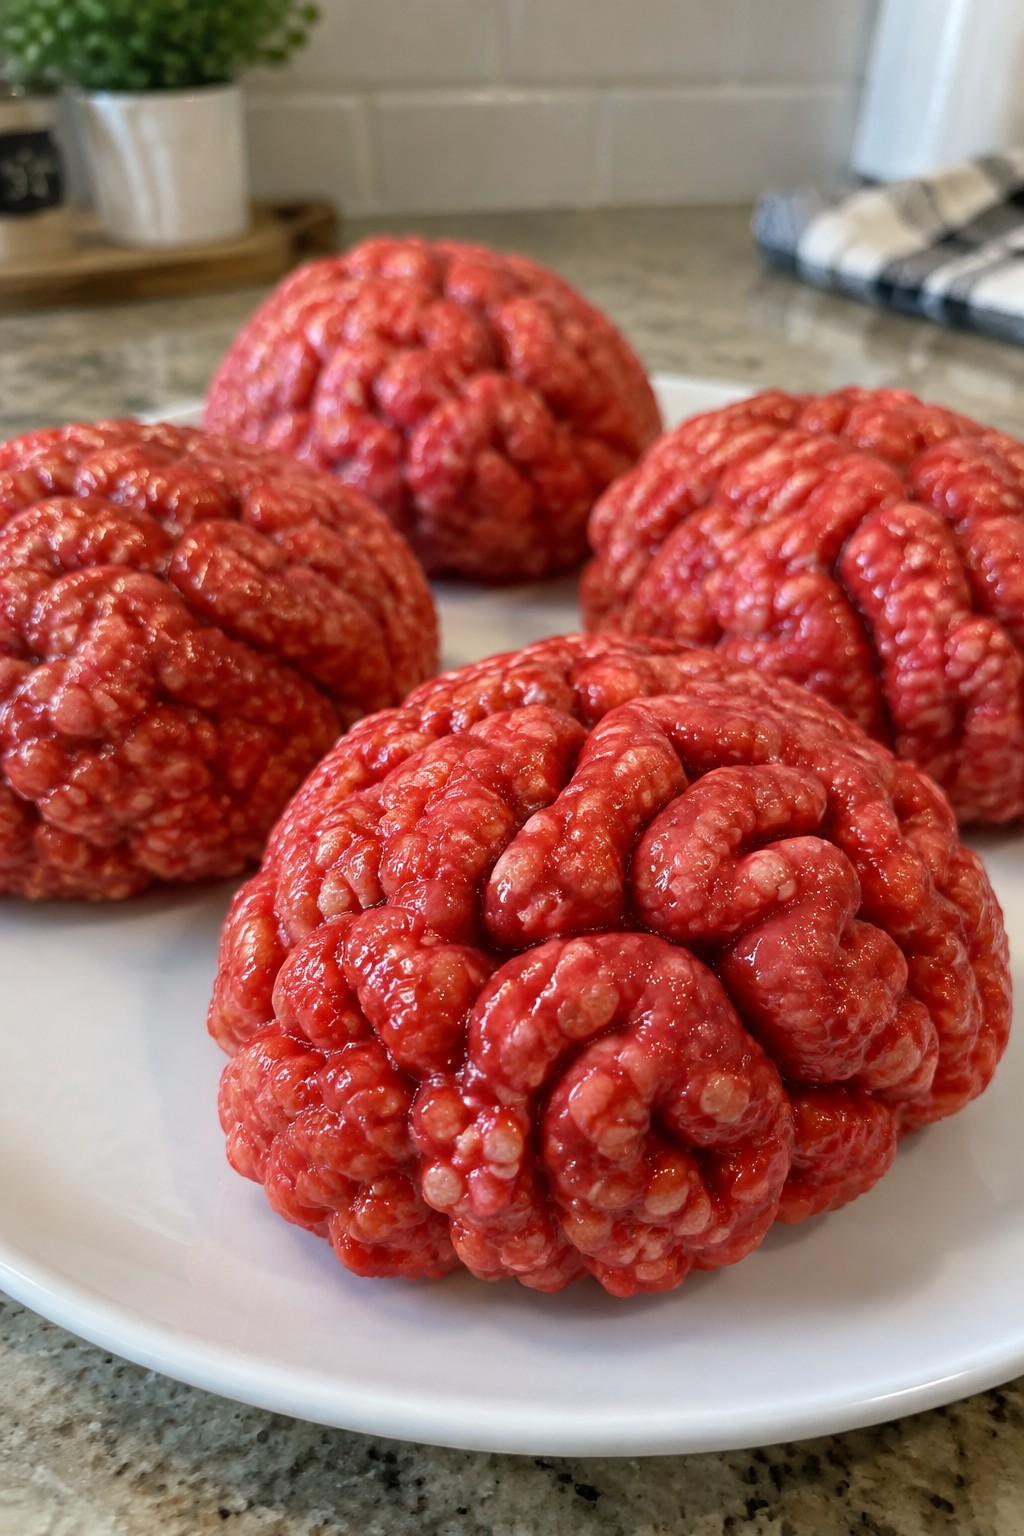
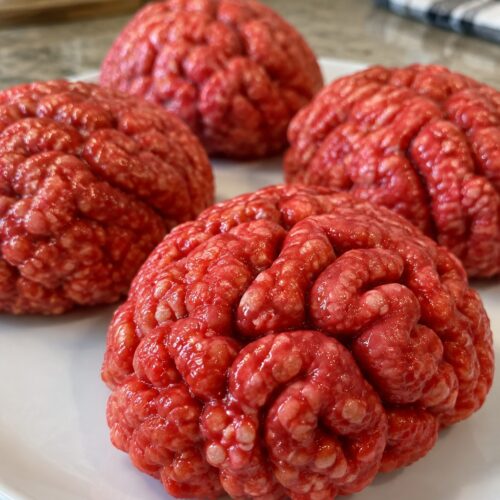
Zombie Brain Strawberry Rice Krispie Treats
These treats turn a simple cereal snack into a Halloween party hit. The strawberry flavor adds a bright fruity note while the red color and brain shape create a fun visual that draws attention on any dessert table.
The texture stays classic with gooey marshmallow binding the crispy cereal, making each bite satisfying without being overly sweet.
Equipment
- Large saucepan
- Silicone brain molds
- Wooden spoon
Ingredients
- 3 tablespoons butter
- 4 cups mini marshmallows
- 1 package (3 oz) strawberry gelatin
- 6 cups Rice Krispies cereal
- 4 drops red food coloring
Instructions
- Grease four individual brain-shaped silicone molds and set them aside.
- Melt the butter in a large saucepan over medium heat. Add the mini marshmallows and strawberry gelatin. Stir until the marshmallows are fully melted and the mixture is smooth.
- Remove the pan from heat and stir in the red food coloring until the color is even.
- Add the Rice Krispies cereal to the marshmallow mixture. Stir quickly until all the cereal is coated.
- Divide the mixture evenly among the four molds. Press it firmly into each mold to create the brain shape. Let the treats cool at room temperature for 30 minutes until firm.
Notes
Cuisine: American
Equipment: Large saucepan, Silicone brain molds, Wooden spoon
Pumpkin Spice Whoopie Pies with Cream Cheese Filling
These whoopie pies bring cozy pumpkin spice flavor to any Halloween spread. The soft, cake-like cookies sandwich a tangy cream cheese filling that balances the warm spices nicely. They work well for parties because they hold up on a platter and feel festive without extra decoration.
The texture stays tender thanks to the pumpkin puree, while the filling adds a slight richness that guests enjoy. Serve them as a sweet bite alongside other party snacks.


Equipment
- Mixing Bowls
- Baking Sheets
- Electric Mixer
Ingredients
- 1 cup all-purpose flour
- 1/2 teaspoon baking soda
- 1 1/2 teaspoons pumpkin pie spice
- 1/4 cup unsalted butter, softened
- 1/2 cup packed brown sugar
- 1/2 cup pumpkin puree
- 1 large egg
- 4 ounces cream cheese, softened
- 2 tablespoons unsalted butter, softened
- 1 cup powdered sugar
- 1/2 teaspoon vanilla extract
Instructions
- Preheat the oven to 350 degrees and line two baking sheets with parchment paper.
- Stir together the flour, baking soda, and pumpkin pie spice in a medium bowl.
- In a large bowl, beat the 1/4 cup softened butter with the brown sugar until light. Add the pumpkin puree and egg, then mix until smooth.
- Gradually add the dry ingredients to the wet mixture and stir until just combined.
- Drop rounded tablespoons of batter onto the prepared sheets, spacing them a few inches apart. Bake for 10 to 12 minutes until the edges look set. Cool completely on a wire rack.
- Beat the cream cheese, 2 tablespoons softened butter, powdered sugar, and vanilla extract until creamy.
- Spread filling on the flat side of half the cooled cookies and top with the remaining cookies to form sandwiches.
Notes
Cuisine: American
Equipment: Mixing Bowls, Baking Sheets, Electric Mixer
